
Sending all kinds of newsletter emails or creating email lists in WordPress is one of the essential tasks that all webmasters should do. This is one of the ways to increase traffic and sales on websites that you will be able to introduce your site activities as well as your services and business in the best possible way to the target market that will be your audience. MailPoet plugin is one of the best WordPress email marketing services, which is a professional and practical plugin that allows you to create a form for receiving users’ emails and sending newsletters to them on your WordPress site in a programmable time frame. In this article, we are going to teach you about Introducing and Install MailPoet Plugin on WordPress.
Table of Contents
Introducing to MailPoet Plugin on WordPress
In this article, you will get acquainted with one of the newsletter sending plugins, namely MailPoet. We suggest you take some time and read this tutorial carefully. In the next section, we will mention some of the features of the MailPoet plugin. Then we will go directly to the main discussion, how to Install MailPoet Plugin on WordPress. In the final step, we will teach you how to set up MailPoet. Please join us.
MailPoet Plugin Features
MailPoet plugin is a professional and functional plugin for WordPress that allows you to create a form for receiving users’ emails on your WordPress site to allow users to send newsletters via email. Some of the features of the MailPoet plugin for WordPress VPS Site are:
1. Ability to count successful emails
2. Counting the number of clicks
3. Count the number of emails opened
4. Ability to view people who are members
5. Beautiful appearance
6. Ability to display in widgets
How to Install MailPoet Plugin on WordPress
In this section, join us to teach you step by step how to install the MailPoet plugin on WordPress. To do this, just follow the steps below. To get started, you must first enter your WordPress dashboard by entering your username and password. For example:
http://example.com/wp-admin

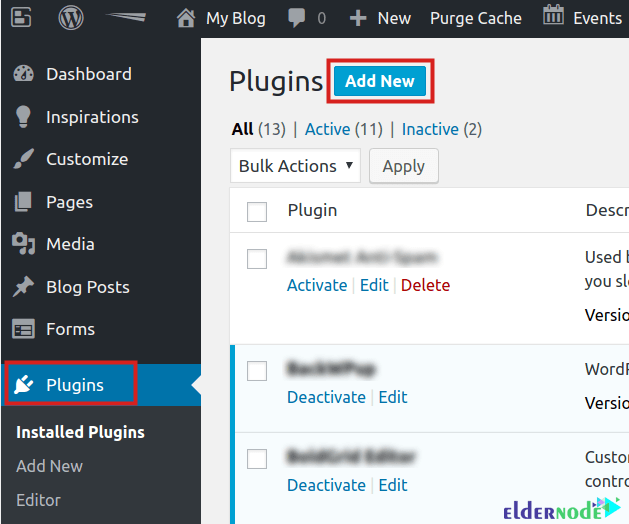
After successfully entering the WordPress dashboard, in the next step, you must click on the Plugins in the left column. Then you have to click on Add New as shown below:
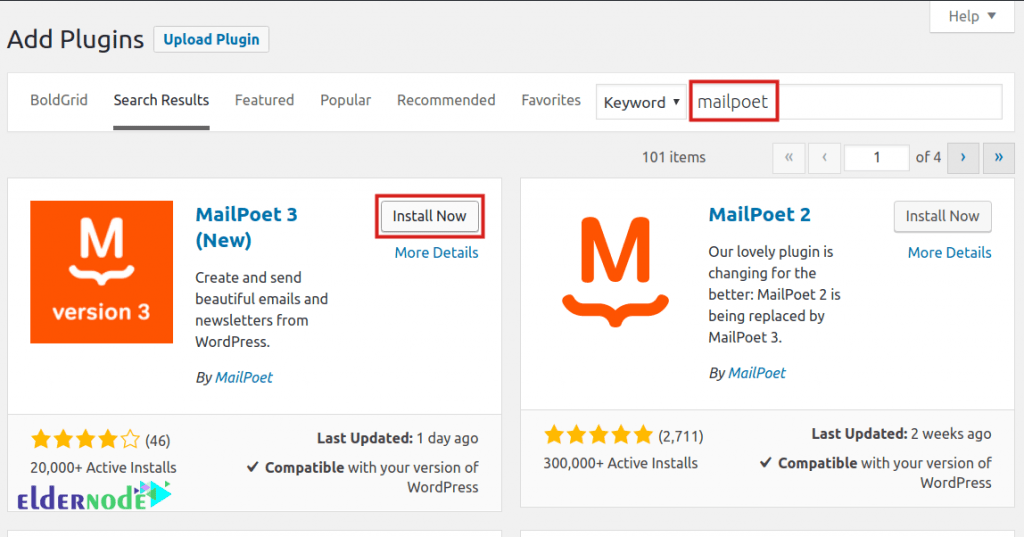
In the next step, you have to type the phrase MailPoet in the search field and search for it. After viewing the search results, you must click on Install Now to start installing the MailPoet plugin.
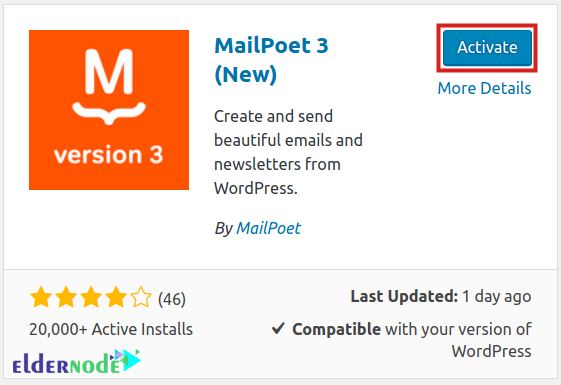
Wait for the MailPoet installation to complete. Finally, to activate this plugin, you must click on Activate.
How to Setup MailPoet Plugin on WordPress
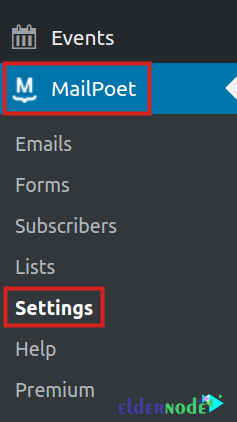
After you have successfully installed MailPoet according to the tutorial mentioned in the previous section, now we want to teach you how to set it up. Now if you look closely at the left column in the dashboard you will see that the MailPoet option has been added. You have to click on it and select the settings.
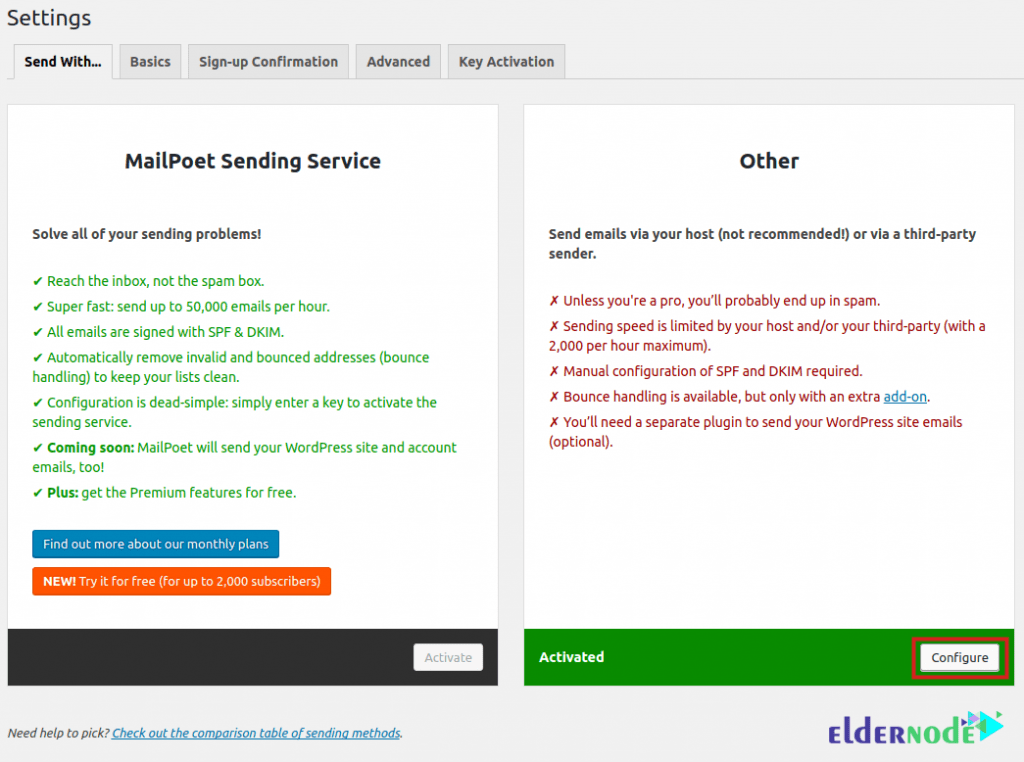
Like the image below from the Send With … tab and in the Other section you have to click on Configure:
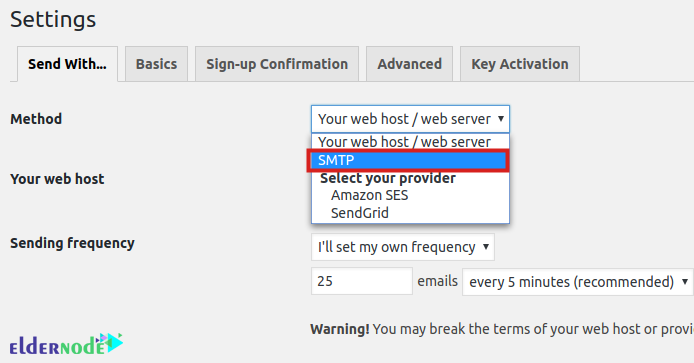
As you can see in the image, click on the drop-down bar in front of the Method section. Then click on SMTP.
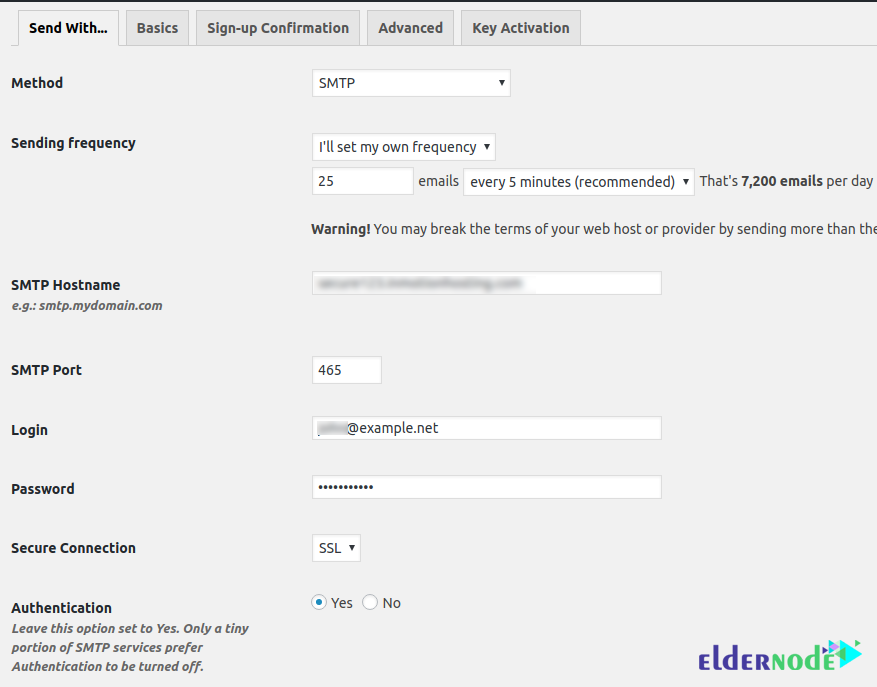
Now you must complete the SMTP setup fields.
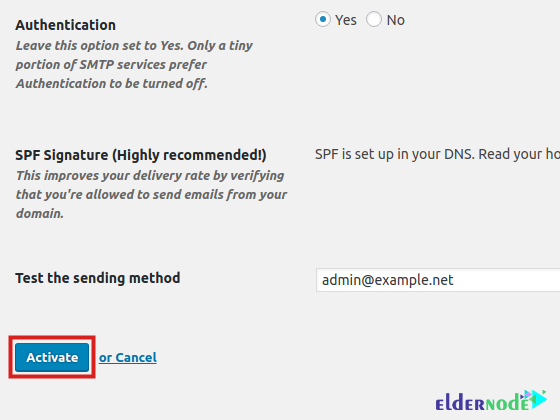
After completing the sections related to SMTP settings, you should finally click on Activate to save the settings.
Conclusion
MailPoet is a great email marketing plugin. This plugin does not have a separate online service like MailChimp, and you can even use the email servers of your choice to send an email. It also easily accepts all your previous lists. In this article, we tried to introduce you to the MailPoet plugin. Then in the continuation of the article, we taught you how to install and Setup MailPoet on WordPress.


