How to Install and Configure Hyper-V on Windows Server 2019. Hyper-V is a lightweight and powerful Microsoft product that is used on Windows Server. This feature is installed with just a few clicks. After installation, you can easily run the virtual machine on it.
Note that installing a virtual machine on Hyper-V is exactly the same as installing it on Windows Server 2012 and 2016. It should be noted that the features of the desktop version are similar to the versions of Windows Server.
In this article, we are going to teach you how to install and configure Hyper-V in Windows Server 2019. Follow us in the continuation of this article.
Table of Contents
1. Run Server Manager
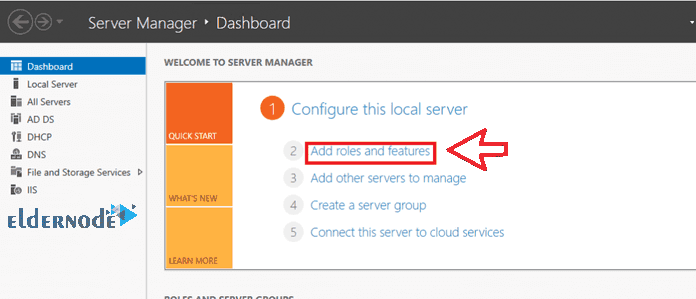
Press the Windows key on the keyboard and type Server Manager and search. Then run it.
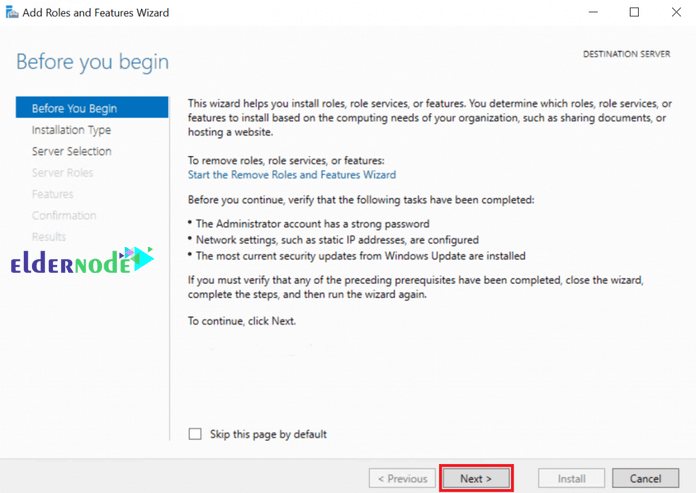
After opening the server manager, click on Add Roles and Features. Then click Next in the next window as shown below.
*
2. Role-based or feature-based installation
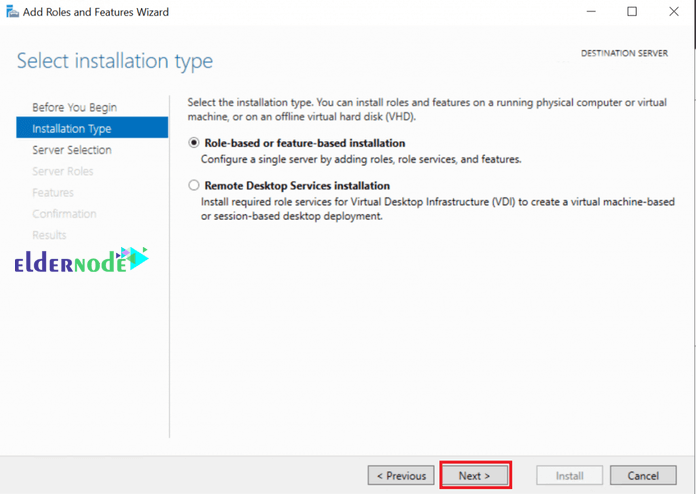
On the next Window for Select installation type, choose Role-based or feature-based installation button and then click on Next.
3. Select Destination Server
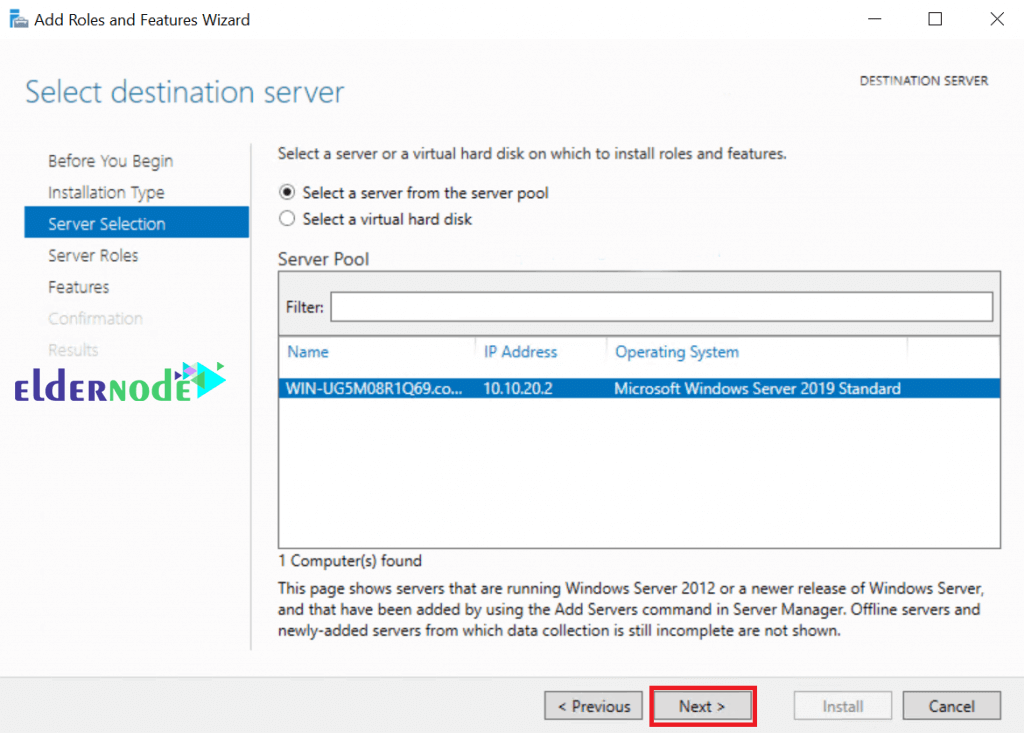
Choose the server you would wish to install Hyper-V on this window. Click Next after that.
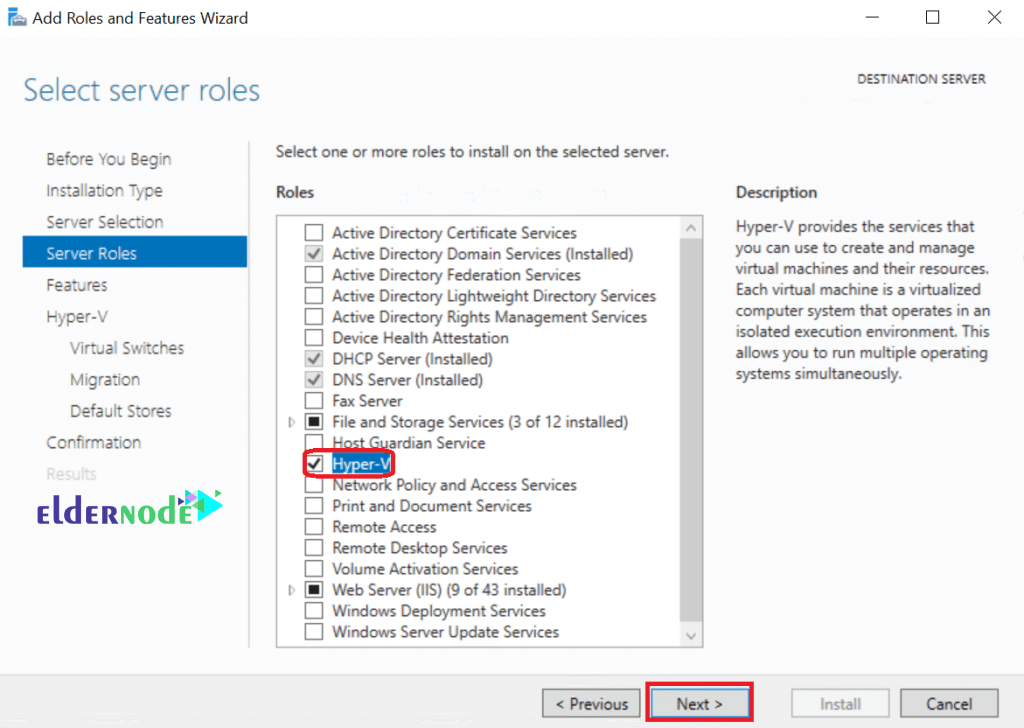
4. Select Hyper-V server Role
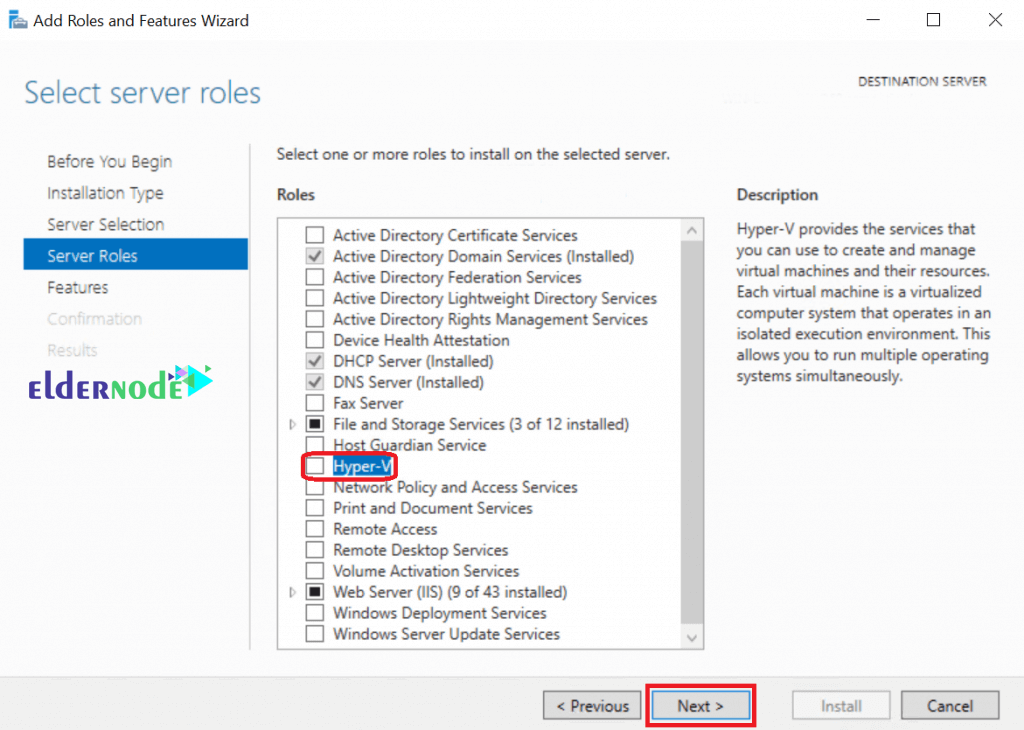
This window gives you a list of many roles you can add to your server. Since you are in need of Hyper-V, go ahead and choose the Hyper-V box.
Click Next after you are done.
5. Add Features
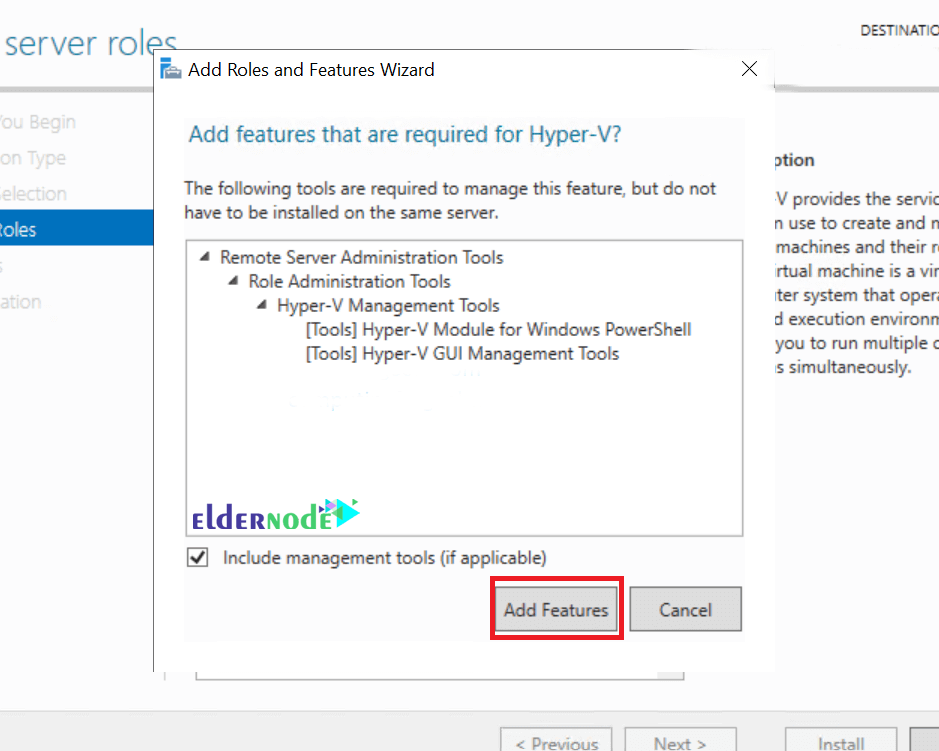
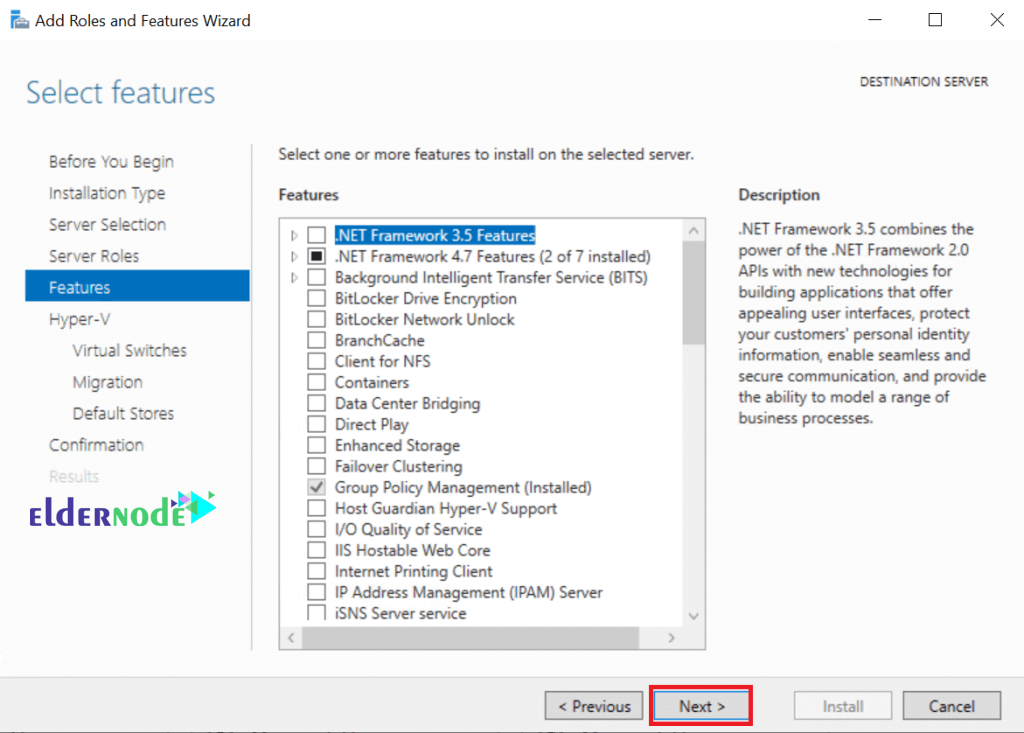
Clicking on Next on Step 4 will bring up a small pop-up window. On it, simply click on the Add Features tab and click Next when done.
*
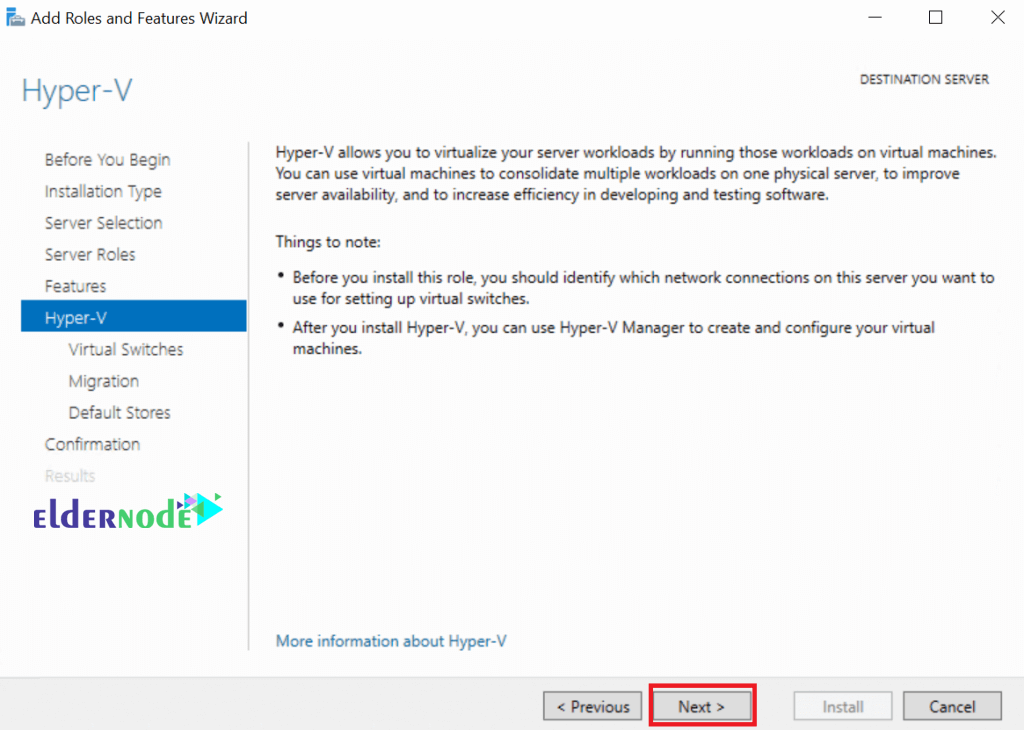
Click Next on the next two consecutive windows.
*
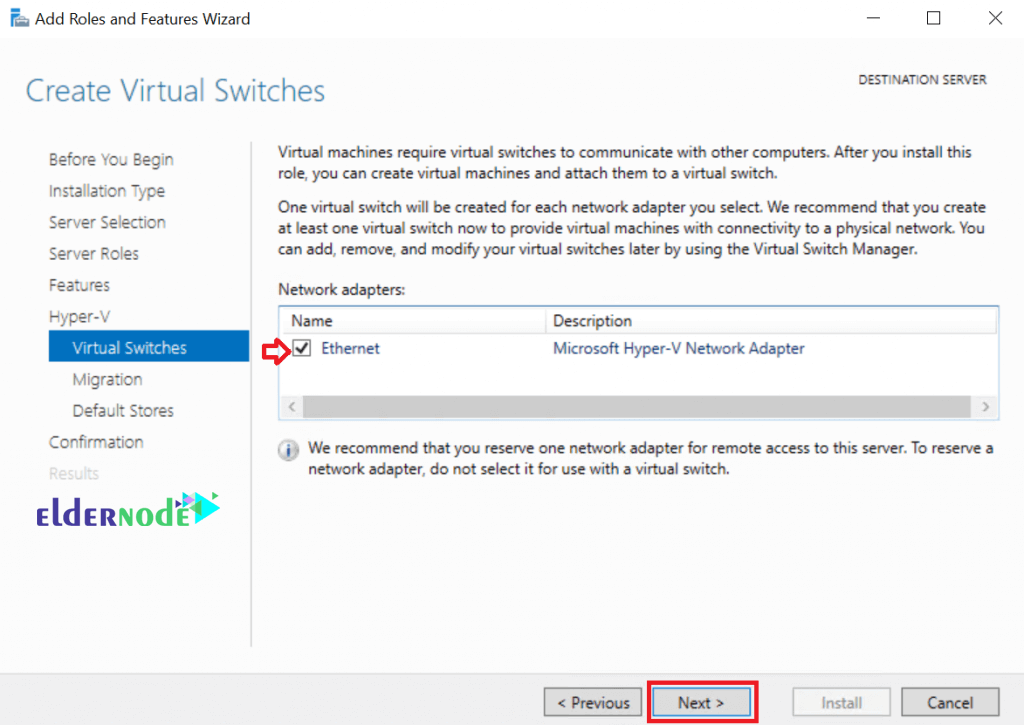
6. Create Virtual Switches
Virtual Switches make it possible for Virtual Machines to talk to each other.
We are going to create one in this step and Link it with a physical network.
Choose one or more of the Physical Networks available on your Physical Host Server.
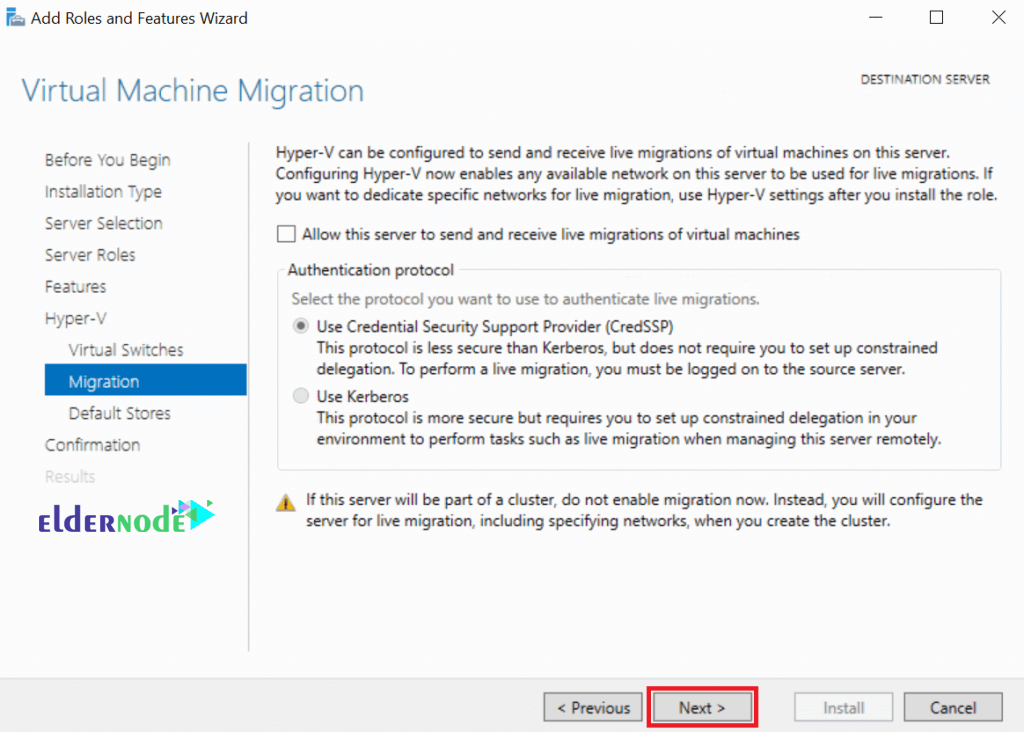
7. Virtual Machine Migration
The configuration of Virtual Machine depends on whether you have a cluster or not.
We are going to leave the defaults in this step since it is a standalone host.
Click on Next.
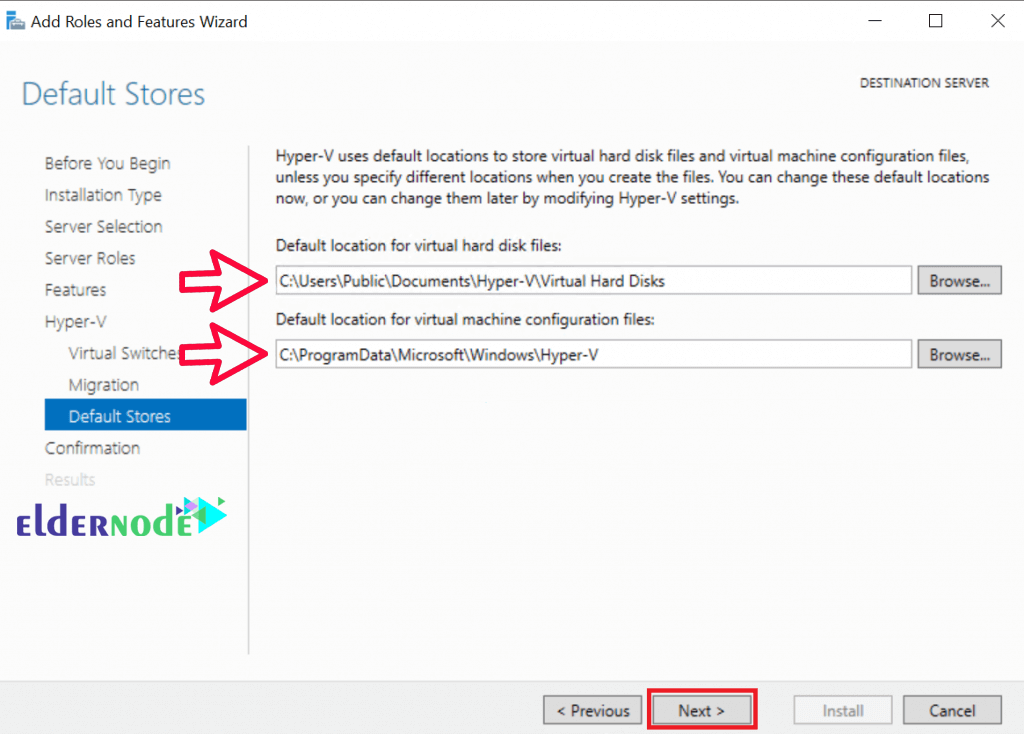
8. Default Stores
In this step, you must specify where Hyper-V stores virtual hard disk files and virtual machine configuration files.
Click Next after you are done.
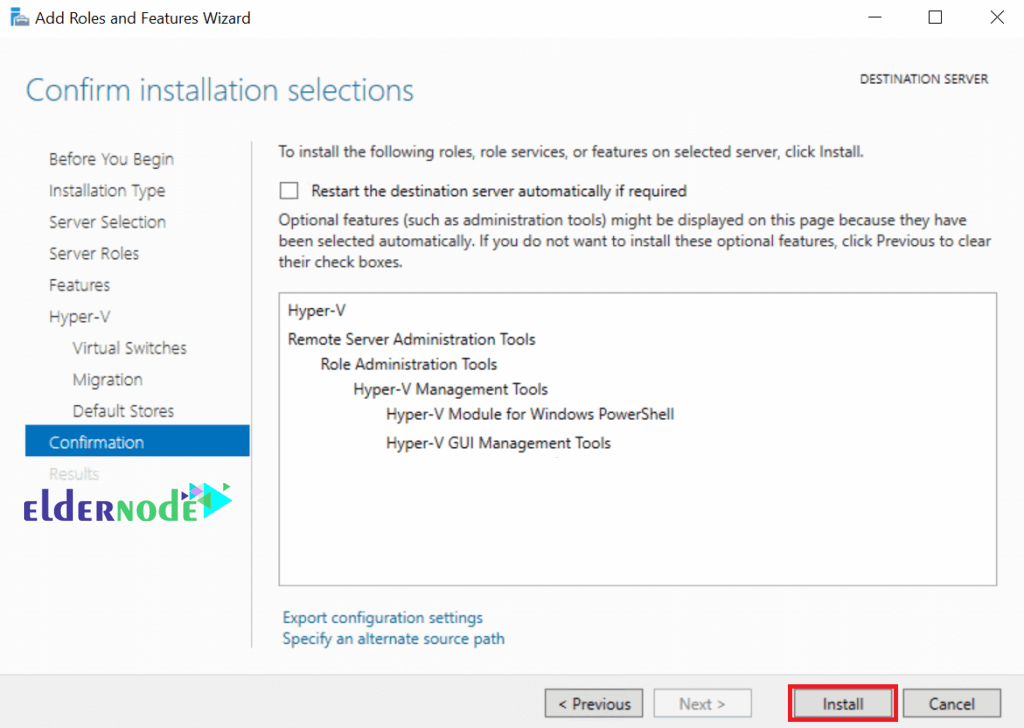
9. Confirm step
To Confirm your installation selections, confirm if everything you would wish to be installed appears on the list that appears on this window.
Then click on Install.
*
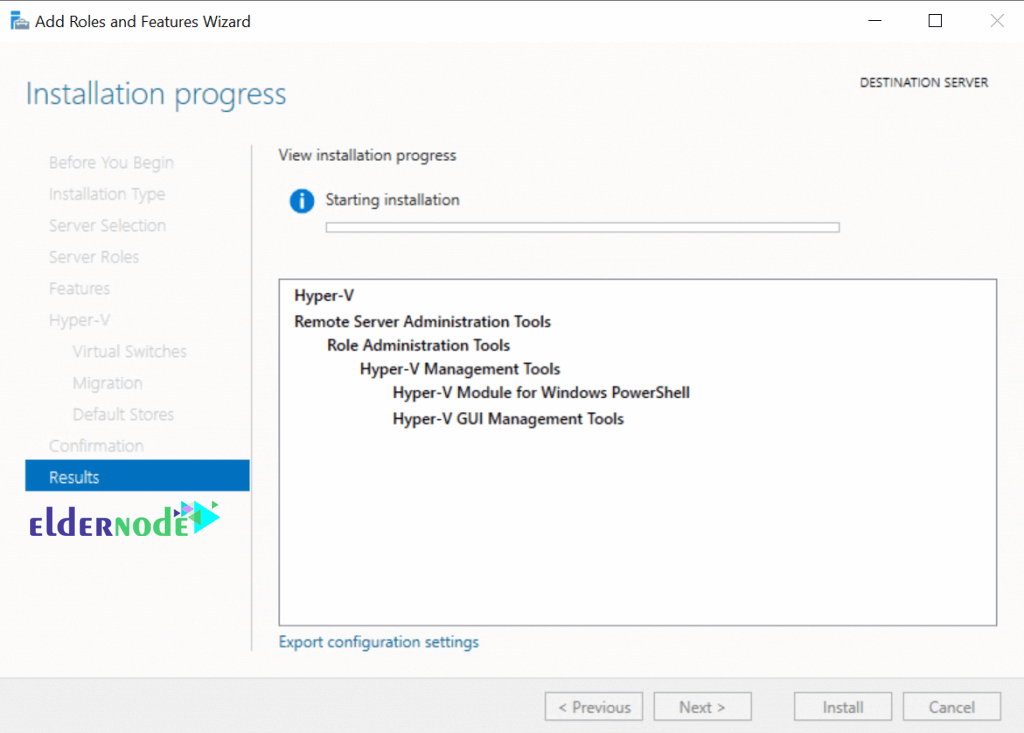
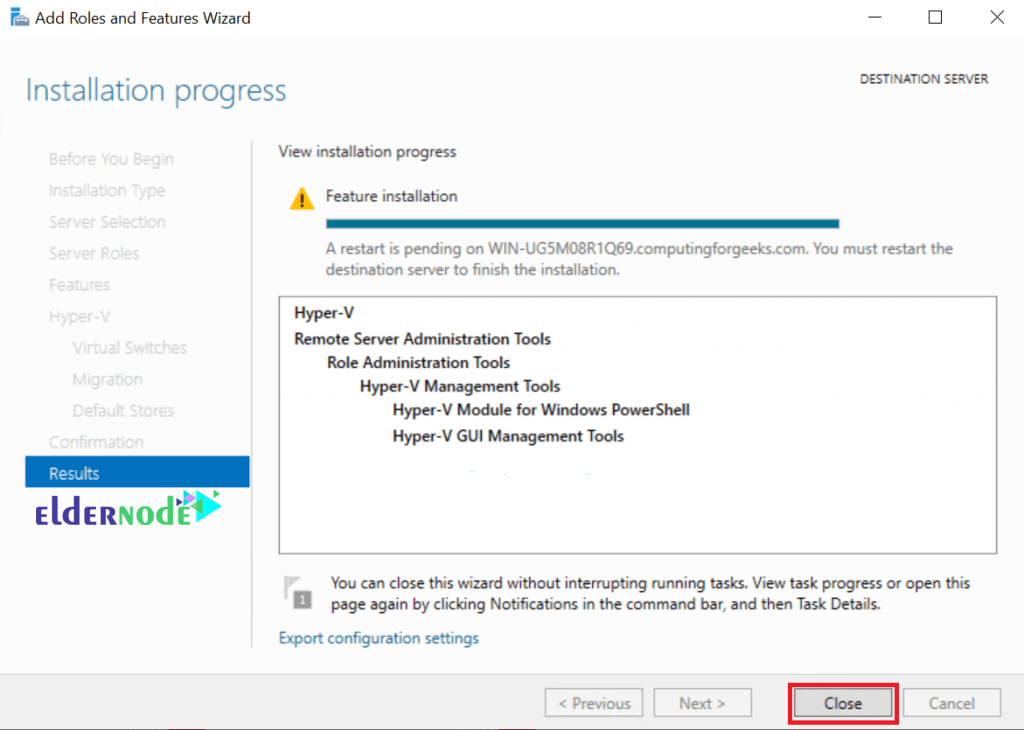
Once your installation is complete, click on Close.
Finaly, Restart your server.
Dear user, we hope you would enjoy this tutorial, you can ask questions about this training in the comments section, or to solve other problems in the field of Eldernode training, refer to the Ask page section and raise your problem in it as soon as possible. Make time for other users and experts to answer your questions.
Goodluck.


