One of the problems that users are dealing with today is changing the clock of Windows that is offered as a virtual machine or VPS. Setting the date and time of Windows is one of the most important points in Windows. Dear users, you should note that the date and time of Windows is one of the tools that you must pay attention to its setting. The reason for this attention is that not setting the date and time causes many problems when working with Windows.
Lack of setting the date and time of Windows causes problems in the system that cause confusion and confusion to users. For example, if your Windows date and time are not set, your browser will not work. Therefore, in this article, we are going to teach you how to troubleshooting Change Windows clock after reset.
The mechanism of operation of Windows is such that after resetting the clock, it adjusts itself to the hardware clock and therefore changes after resetting. These clock disturbances sometimes cause problems for running services and may cause errors. In the following, we have taught you how to fix the problem of changing the Windows clock after resetting.
Troubleshooting Change Windows clock after reset
1- First, enter your Windows virtual server environment.
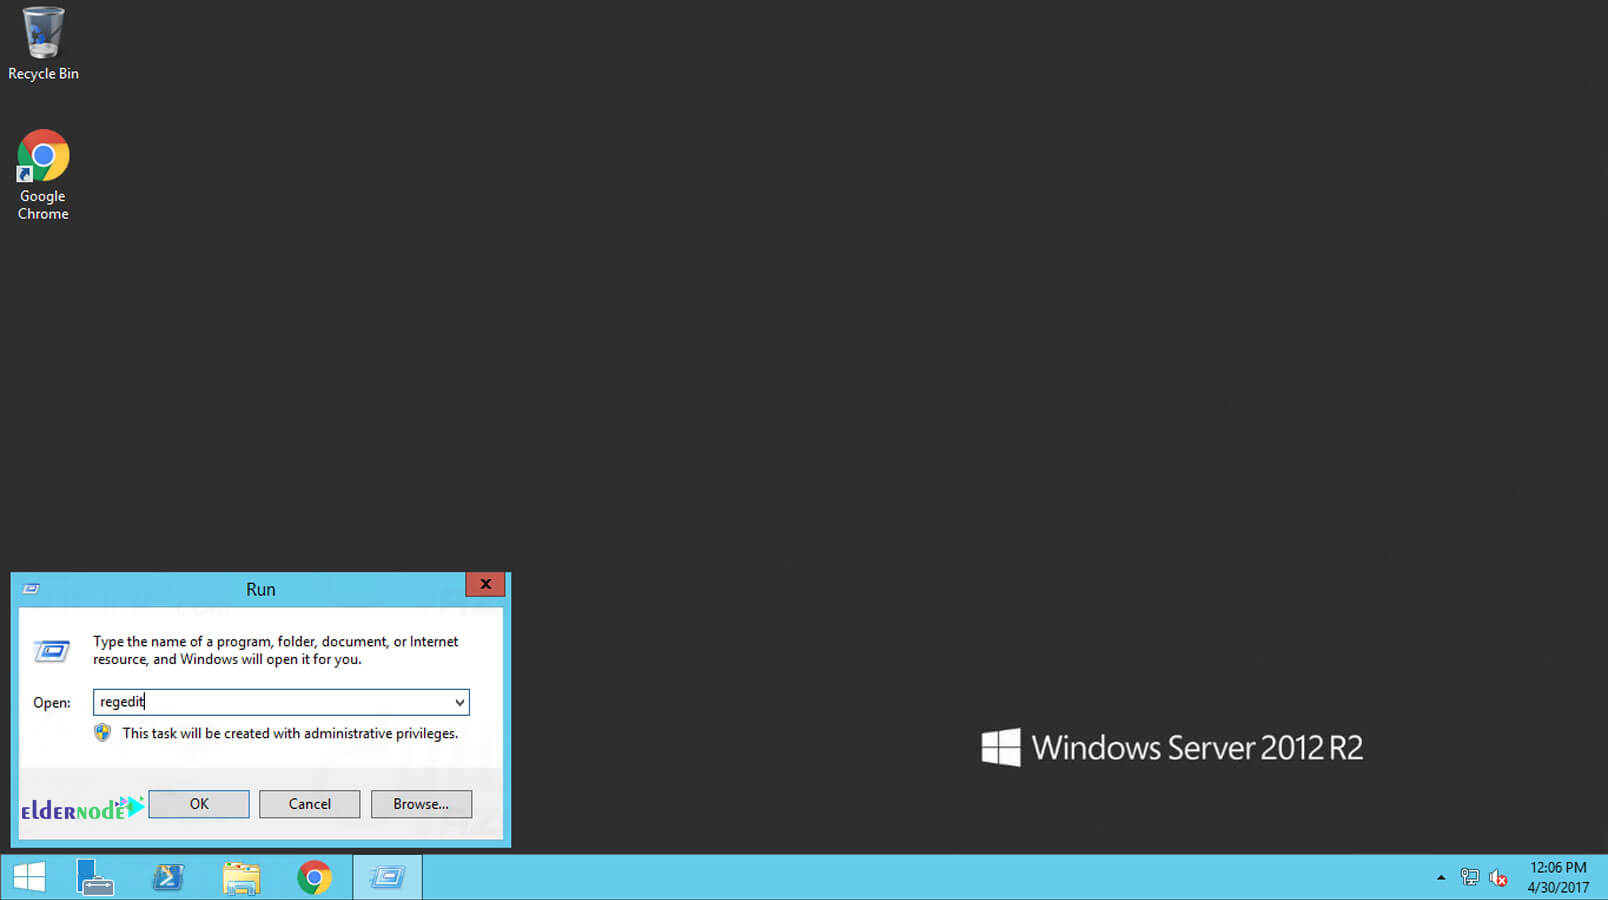
2- Open the Run window.
To open the Run window, you can use the Start button or the Winkey + R key combination.
3- Then type regedit and click ok.
4- After entering, your Windows registry will open.
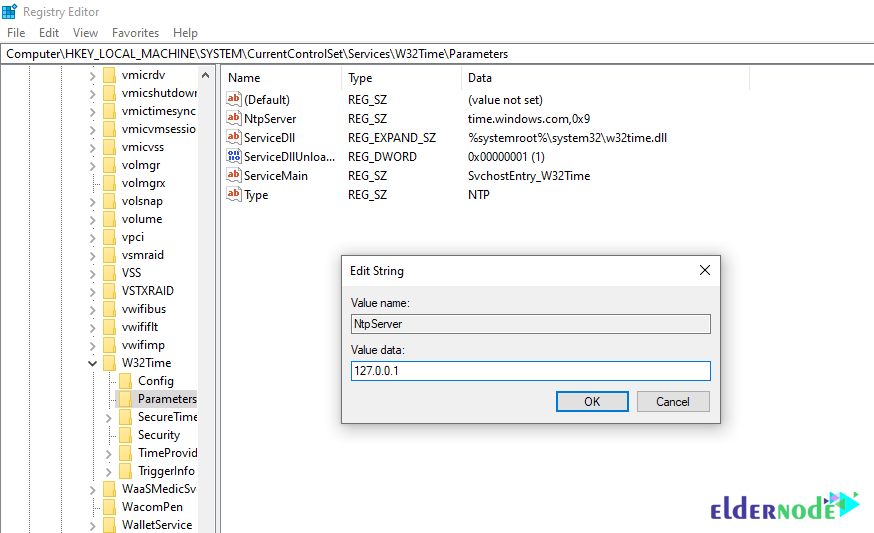
5- Go to the following path.
HKEY_LOCAL_MACHINE \ SYSTEM \ CurrentControlSet \ services \ W32Time \ Parameters6- Open the NtpServer key as shown.
7- Delete the phrase written in it and enter 127.0.0.1 instead and finally click OK.
8- Finally, close the registry window.
With this operation, you have introduced Windows as the reference for reading the clock. From now on, after resetting your Windows, the Windows vps server clock will not change.
Conclusion
You have probably used a virtual or dedicated server before and have encountered the fact that the server clock is set according to the server location and you have changed the server time settings to set the server clock according to your time zone. But after each reset of the server, the server time returns to the original state. In the article you reviewed, you were taught how to troubleshoot Change Windows clock after reset.


What causes the Windows clock and date to crash?
My computer clock settings are broken due to the location not being set. please guide me.
One of the reasons for cluttering the clock and date of your computer or laptop is that the location is not set in the settings, which you can use to set it:
a. Click the clock icon at the bottom of your desktop.
b. The time and date page open for you. Click on Date and time settings.
c. In the page that opens, click on the Time zone drop-down menu to set the correct location.
d. A page will open in which you will see different areas. In this menu, click on the country you want to solve your problem automatically through the internet connection.
What should be done to test the weakness of the computer or laptop battery?
To test your battery, unplug your computer or laptop and hold the power button for a few seconds, then connect the system to the power supply after one minute and turn on your system. If the battery is low, the system will boot with the message F1, and when you enter Windows, you will notice that the system date and time have a problem. To solve this problem, you only need to replace your system battery.
How to fix the problem of cluttering the clock and date of computer and laptop through BIOS?
a. Use the Delete option with F1 or F12 to enter the BIOS settings when you turn on your system. On some systems, the Ctrl option should be used instead of the Delete option.
B. After performing the previous steps, a blue screen will open for you, in which all the settings related to your system BIOS will be visible. To set the time and date of your system, you must select the Standard CMOS Features option.
C. In the menu that opens, you can set the time and date of your system.
How to change the online server How to set the Windows time to solve the problem of changing the clock?
After opening the control panel, go to Clock, Language and Region. Then click on Date and Time to access the time and date settings. Now you need to go to the Internet Time section and click on Change Settings.
Now in the Server section, select Time.Nist.Gov from the drop-down menu instead of Time.Windows.Com and click Update Now to connect Windows to the server. Finally, click the OK button to save the changed settings.