PHP programming language is one of the best and most popular programming languages in the field of web design. This programming language has many frameworks, and Laravel is one of them. This article will teach you How to setup Laravel on Plesk. If you intend to buy a VPS server, you can check out the packages offered on the Eldernode website.
Table of Contents
Tutorial Install Laravel on Plesk
What is Laravel?
Laravel is a free and open-source PHP framework designed to make developing web apps easier and faster through built-in features. It simplifies routine tasks including authentication and routing, as well as sessions and caching that are integral to the majority of web development projects. This framework is created by Taylor Otwell and intended for the development of web applications following the model–view–controller architectural pattern and based on Symfony.
Installing Laravel on Plesk
Firstly, you should create a new domain. To do this, open your Plesk control panel and click Add Domain. You will see the following drop-down menu. Choose Laravel Site to proceed to create a new domain:
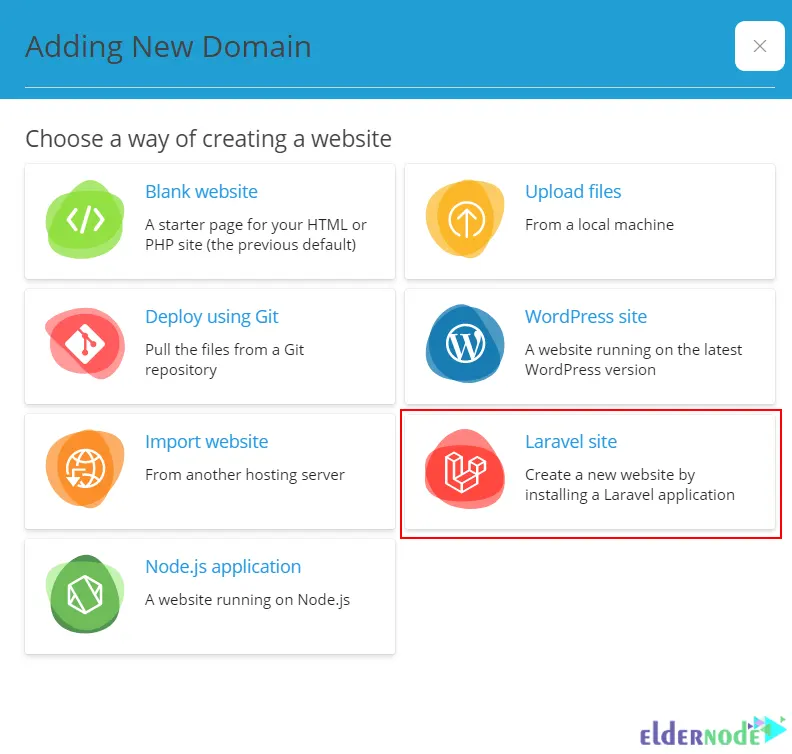
Now choose your domain name. If you don’t have a domain name for your website yet, you can use a Temporary domain name:

After clicking on the temporary domain name, you will get the domain name.
Then click Add domain to simply create the website.
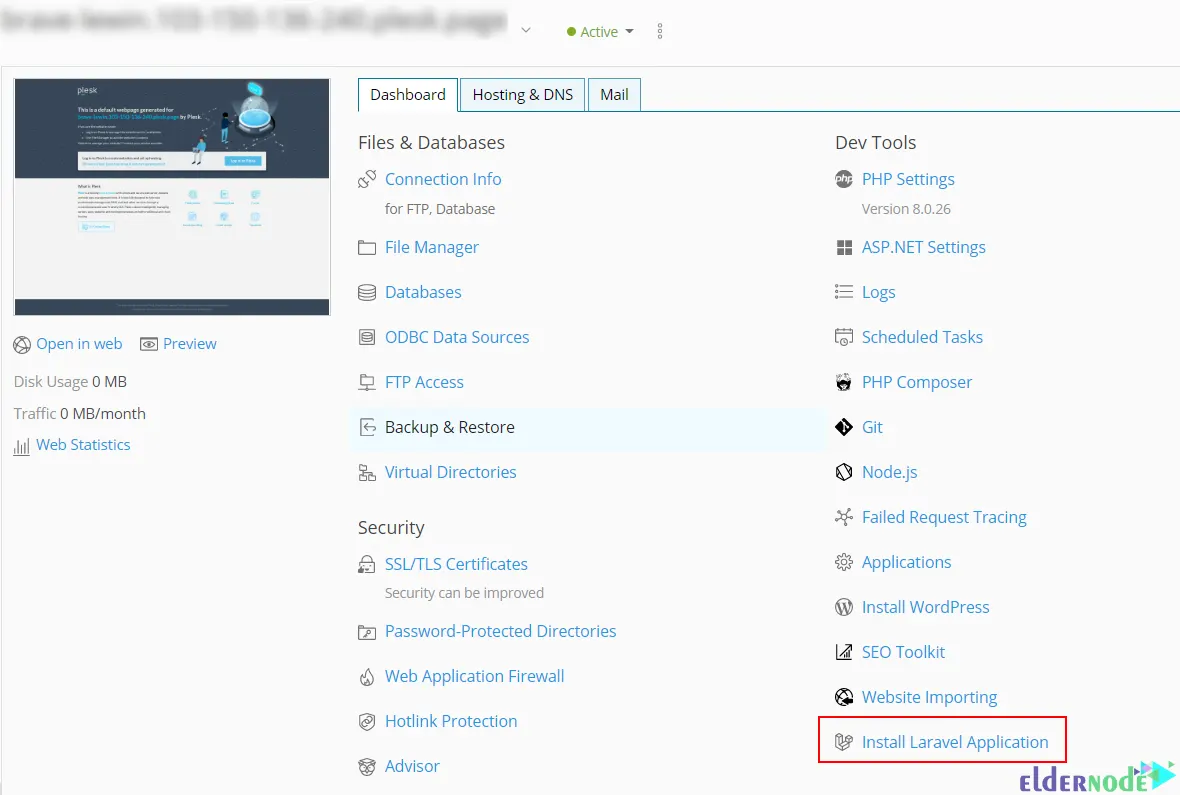
You will see the dashboard. Click on Install Laravel Application:
Now you will be prompted to choose between installing a default skeleton Laravel application or pulling the application from a remote repository. We choose Installing the skeleton because it is the best way to get acquainted with the Laravel Toolkit’s capabilities for the time being:

Wait a few seconds for it to be ready.
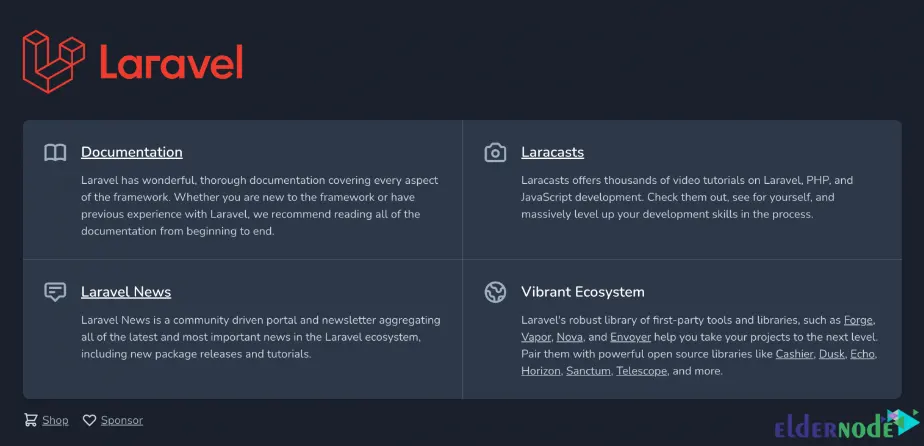
After completion, your first Laravel application will be published on the World Wide Web as follows:
Configuring Laravel on Plesk
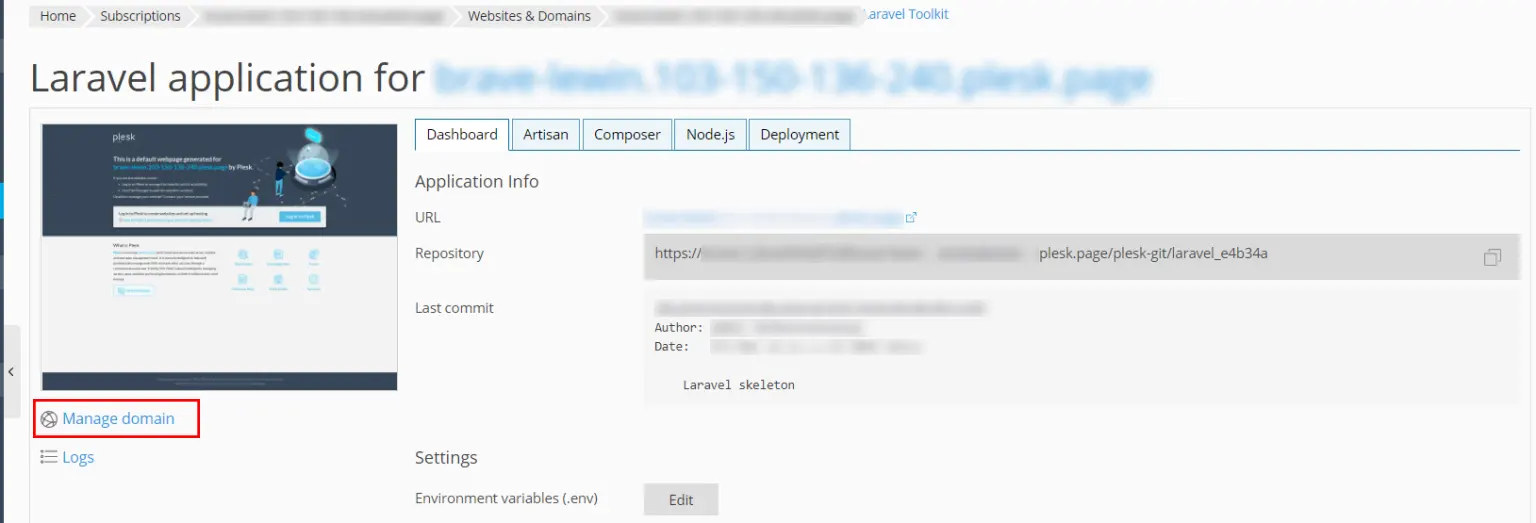
If you give a mouse a Laravel application, it will request a database. So you need to add the database for the application. To do this, you should first click on Manage Domain in the Laravel Information dashboard:
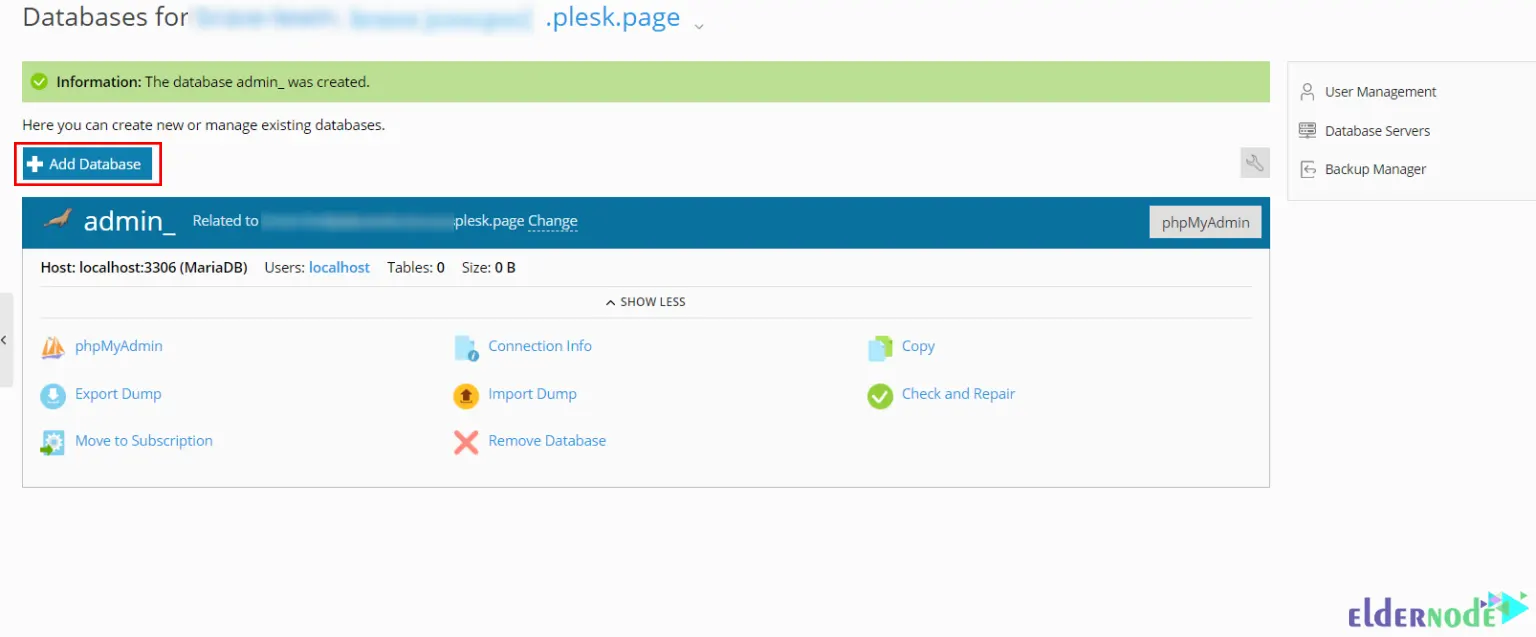
Now navigate to the Databases > Add Database path:
The configuration file of the Laravel application must be updated with the necessary information to connect to the newly generated database after the database is created.
To do this, go to the Hosting dashboard and click on Manage Laravel Application.
Now you will see the Laravel card. Click on the .env file and open it:
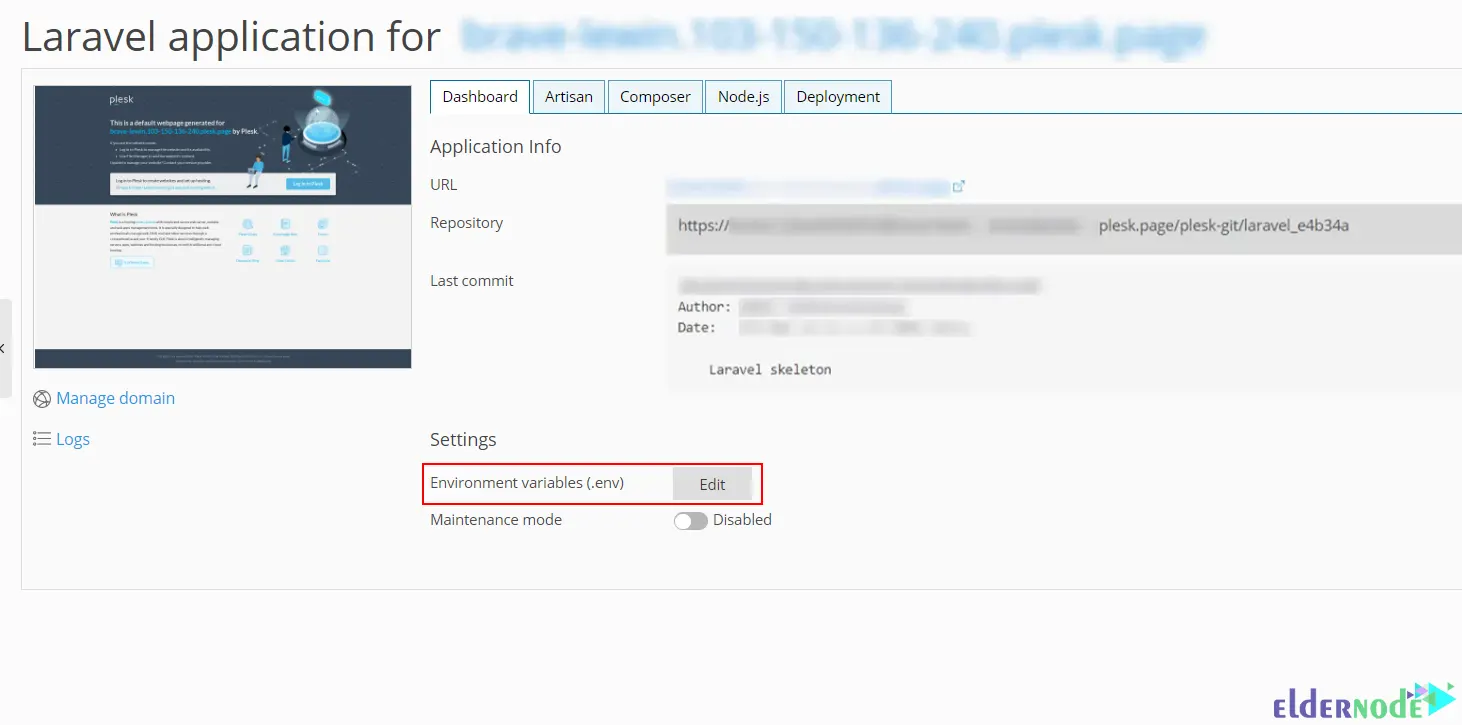
Once opened, you should add the database credentials.
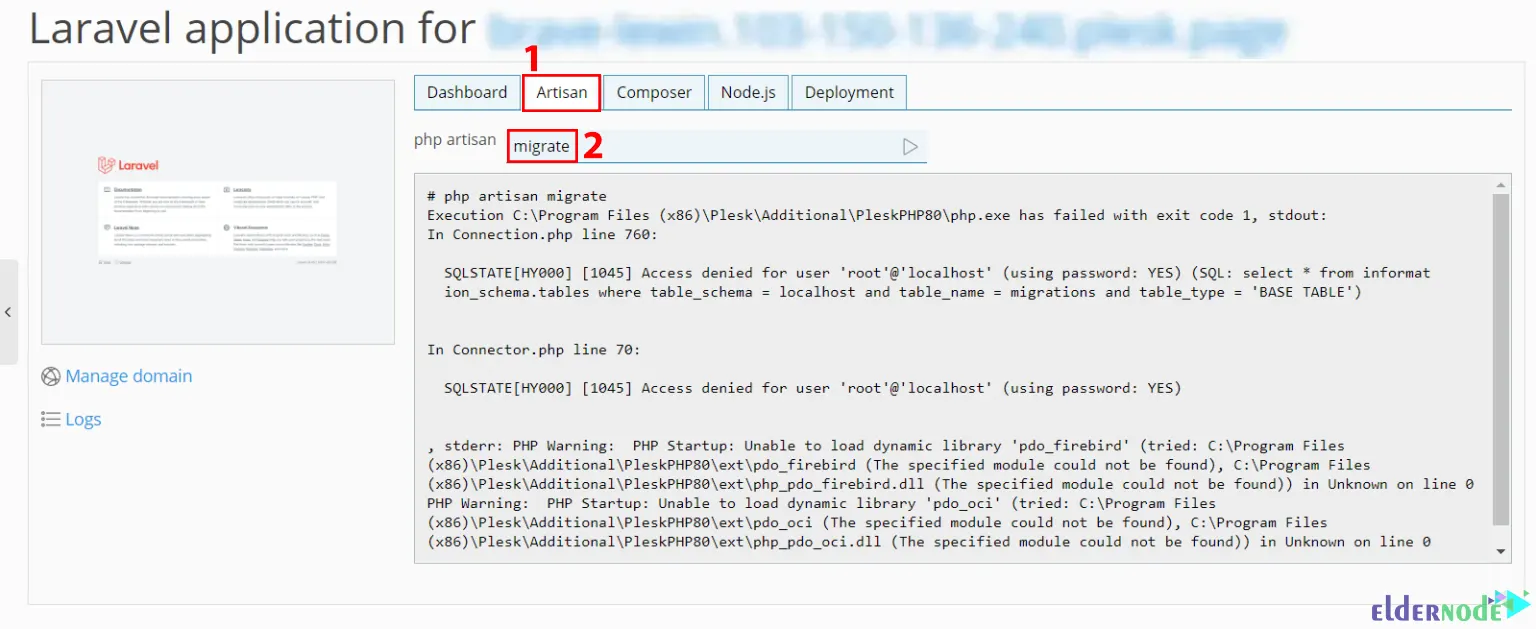
Lastly, construct a database by running the following command:
artisan migrateAlso, you can launch the artisan tool directly from the Plesk user interface. To do this, switch to the Artisan tab and choose the migrate command from the preloaded list of commands:
That’s it!
Conclusion
Laravel is a web application framework with expressive and elegant syntax. In this article, we introduced you to Laravel and taught you how to setup Laravel on Plesk. I hope this tutorial was useful for you and helps you to install Laravel on Plesk. If you have any questions or problems during the installation process, you can contact us in the Comments section.
