Kali Linux is one of the best and ideal operating systems for security and penetration testing works. We recommend that you install Kali Linux on VMware as it is one of the best options to get familiar with this advanced operating system. Even if you mess up a feature in the virtual environment or install it incorrectly, it will have no consequences on your host operating system. This article will teach you How to Install & Setup Kali Linux on VMware Workstation. If you intend to buy a dedicated server with bitcoin, you can check out the packages offered on our website.
Table of Contents
Tutorial Install Kali Linux on VMware Workstation
Kali Linux is a Debian-based Linux distribution that aims to test and investigate penetration and security issues. It includes hundreds of different tools that make it perfect for performing security tasks such as penetration testing, security research, and reverse engineering. This operating system is developed by Offensive Security, a leading information security training company.
How to Download Kali Linux
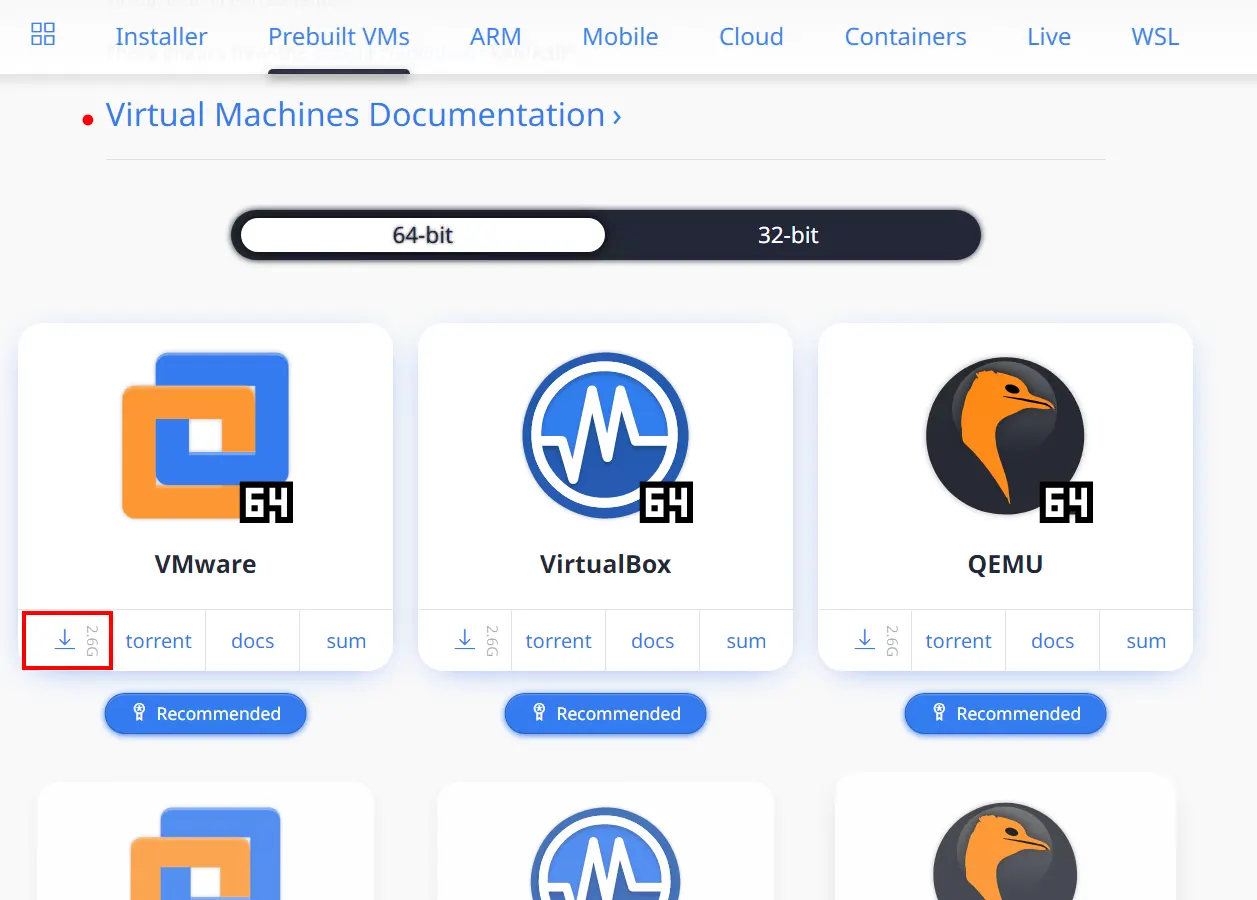
Before installing Kali Linux on VMware, the first thing you need to do is to download the Kali Linux image file. To do this, navigate to Kali Linux’s official website and scroll down to find the Virtual Machine Documentation section.
The download page of Kali Linux provides different image types for download which are Installer, NetInstaller, and Live. Each image type is available for both 32-bit and 64-bit architectures.
Now click on the download icon in the VMware section:
Wait for the download to complete.
Each Kali Linux installer image allows you to select the desktop environment (DE) and software packages (metapackages) to install with the Kali Linux operating system. It’s best to keep the default selections and add more packages after installation if necessary.
How to Setup Kali Linux on VMware Workstation
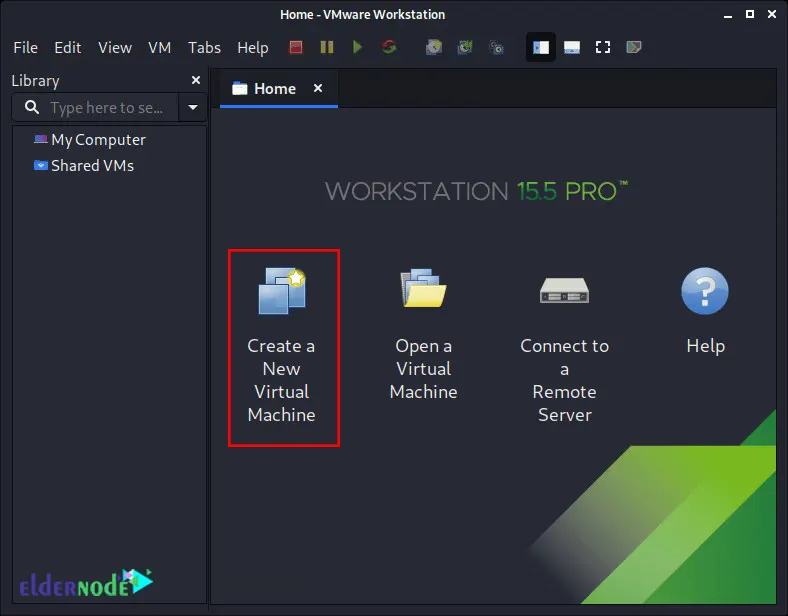
Firstly, launch VMware Workstation and select Create a New Virtual Machine:
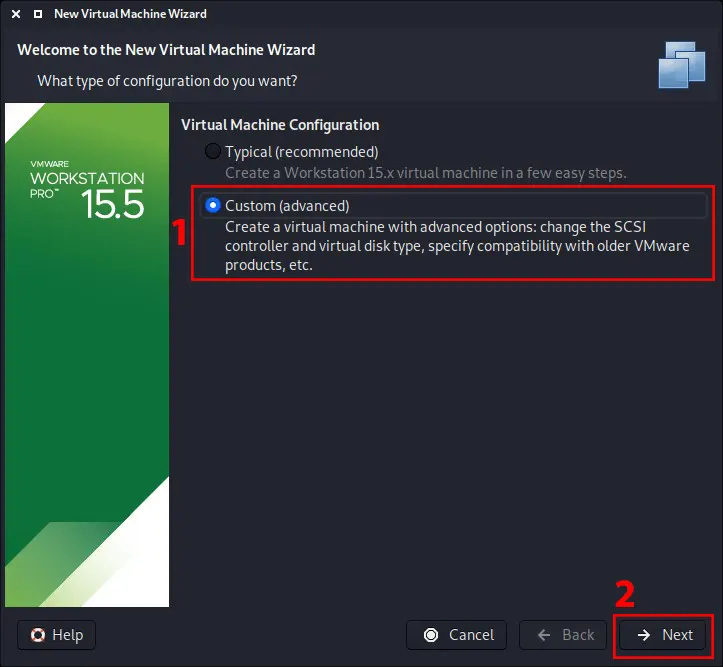
Now you will see the following screen. You should choose Custom (advanced) for the Virtual Machine Configuration with which you will have more control over the creation of the VM:
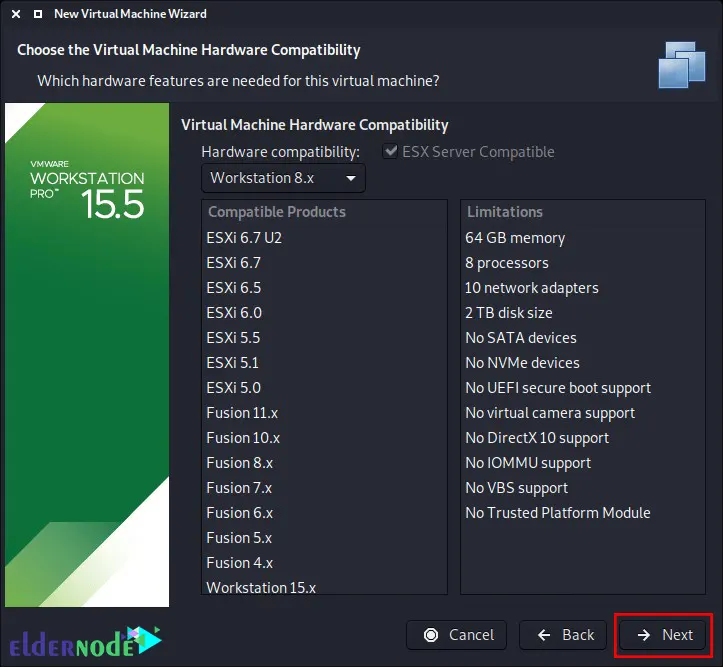
In this step, you need to choose Virtual Machine Hardware Compatibility.
More users can benefit from Kali Linux out of the box using this. Note that if you are using a later version of VMware than v8, after start-up, VMware will ask you to upgrade the VM. This will remove any limitations caused by old VMware profiles. However, most users won’t have their own Kali Linux VM using all these extra resources, so they won’t benefit from having the latest profile, so it’s better to ship with an older profile:
Adding Kali Linux Image File
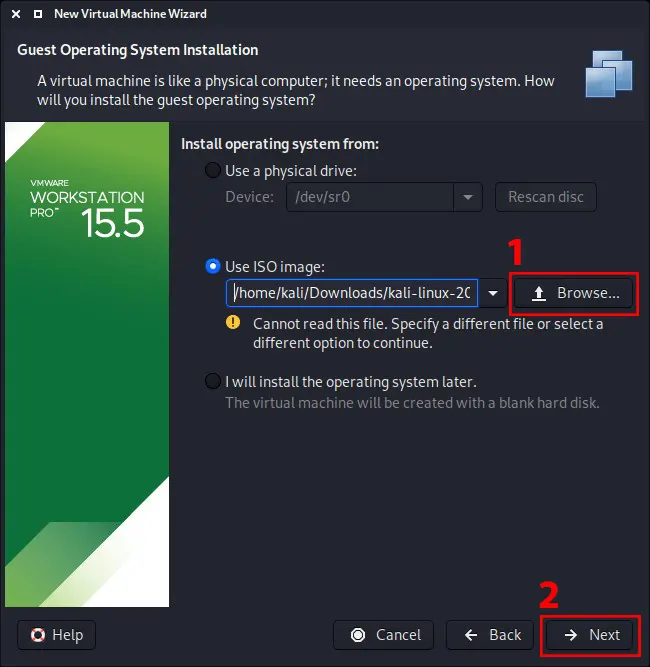
Next, click on Browse and navigate to the downloaded ISO file location. Then choose the Kali Linux image to use to install from:
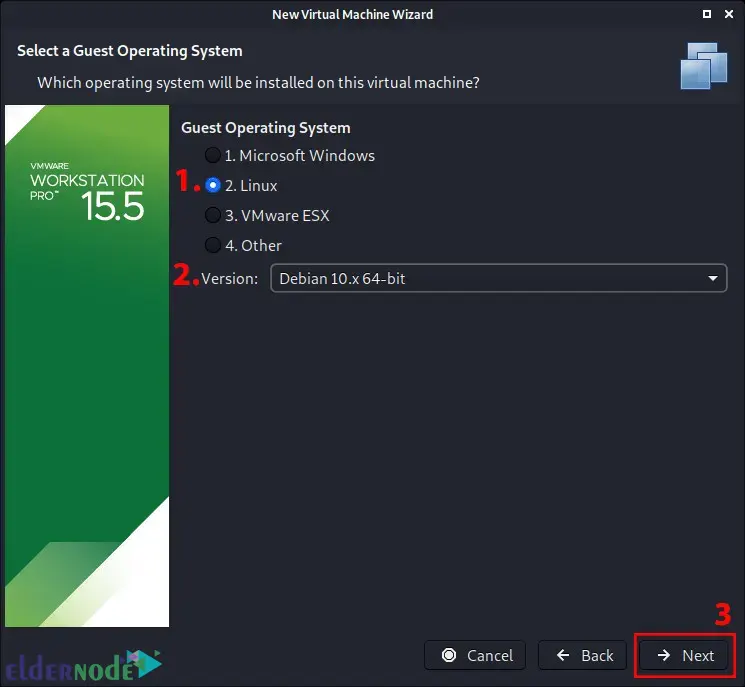
Now choose Linux and the latest version of Debian for the version for Guest Operating System:
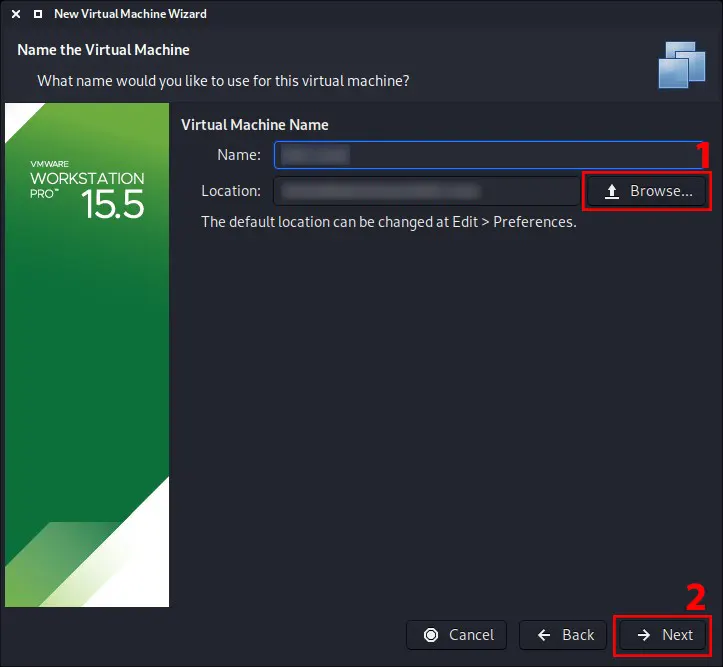
In this screen, you should name the Virtual Machine. Note that this name will be used as the filename and cannot be changed from this point:
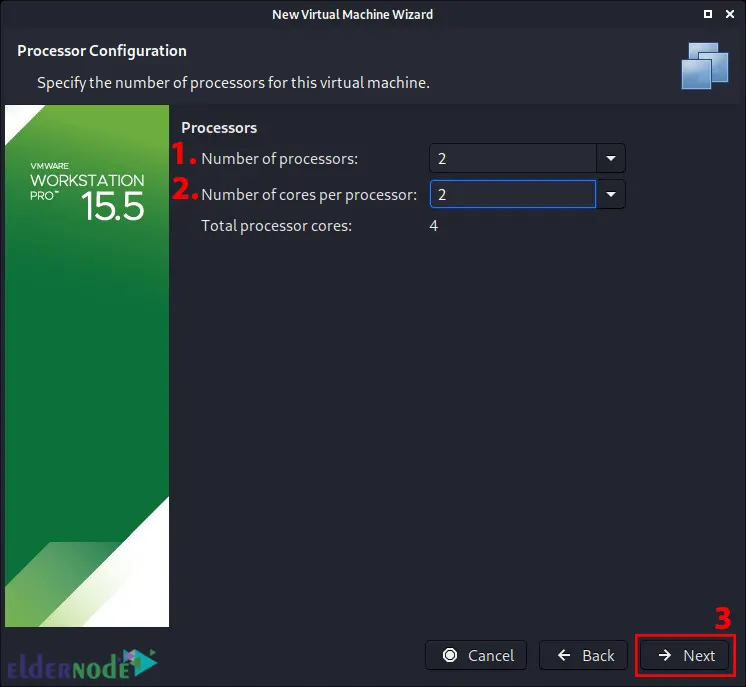
The Processors screen will appear which will allow you to define how many resources you give the VM. If you allocate more resources to Kali, Kali can perform more tasks simultaneously and faster. Depending on your system needs, you can use more or less resources:
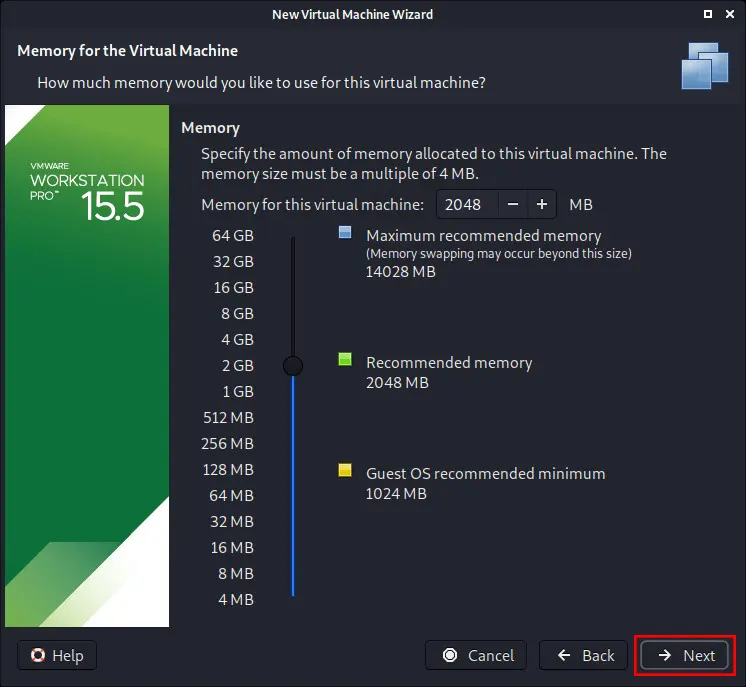
Now you need to define the amount of RAM to use. By increasing the amount of RAM, more programs can be opened and perform better. The various tools within Kali can consume a lot of resources:
Choosing The Network Type
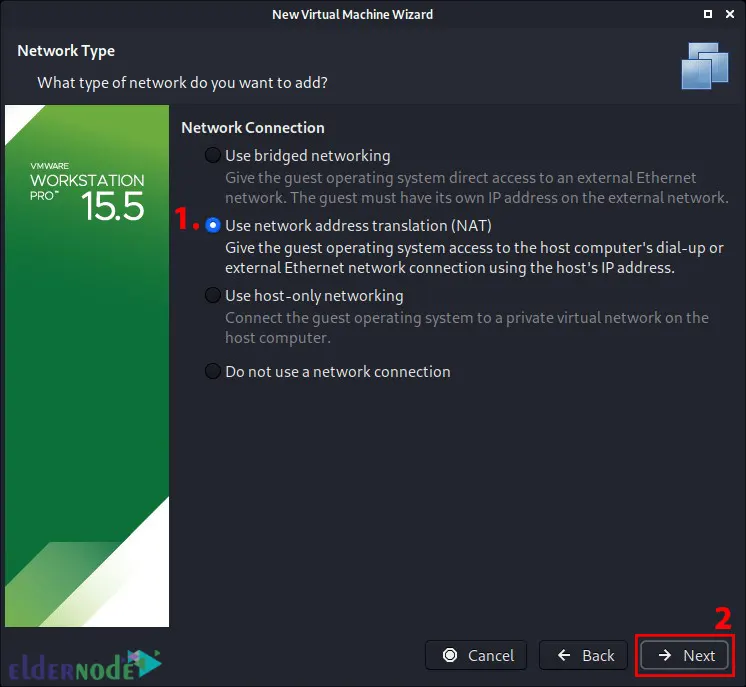
Next, choose the NAT connection for the type of network that you want to add. Remember that you can change it easily even when the VM is powered on. This allows the Kali VM to talk to the Internet as well as the rest of the LAN connection without getting an additional IP address. But note that this cannot receive reverse shells:
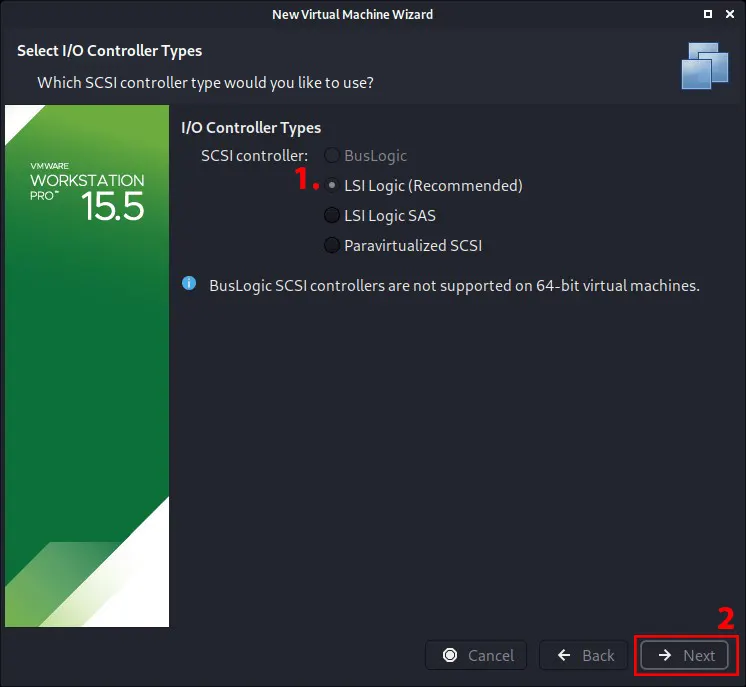
Now choose I/O Controller Types. You can access the default value which is LSI Logic:
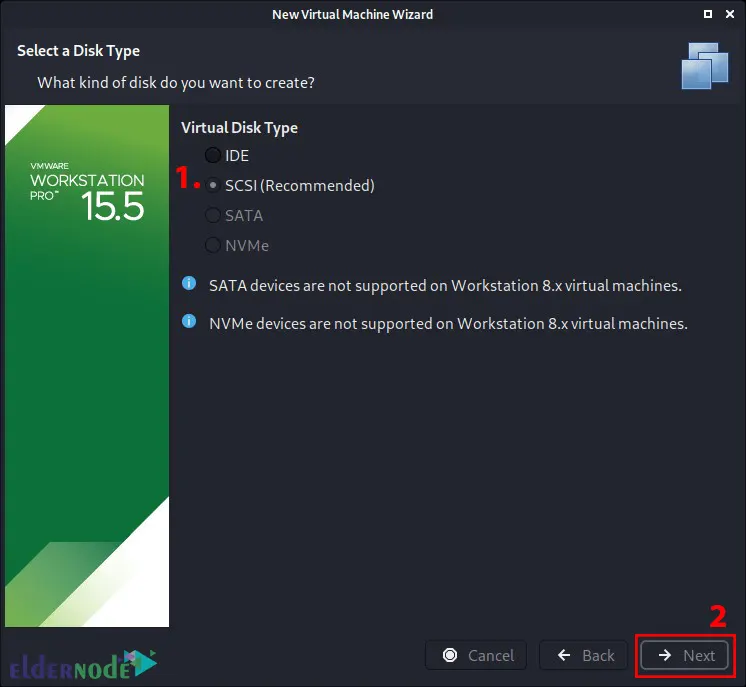
Choose the Virtual disk type or accept the default value of SCSI:
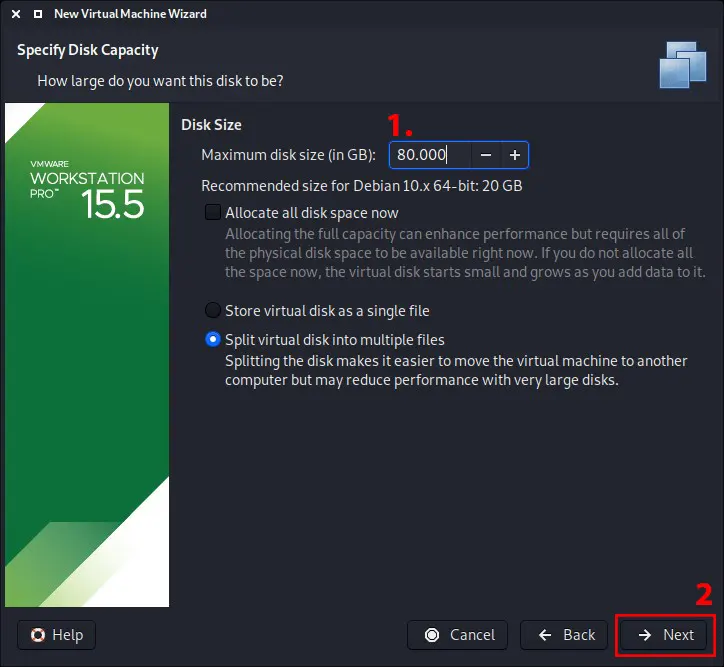
In this step, create a new virtual disk and define how large the virtual hard disk will be. You can increase or decrease the hard disk after the virtual machine is created, but if you have Kali installed, you will need to increase or decrease the partition to reflect the space. We choose the Split virtual disk into multiple files option:
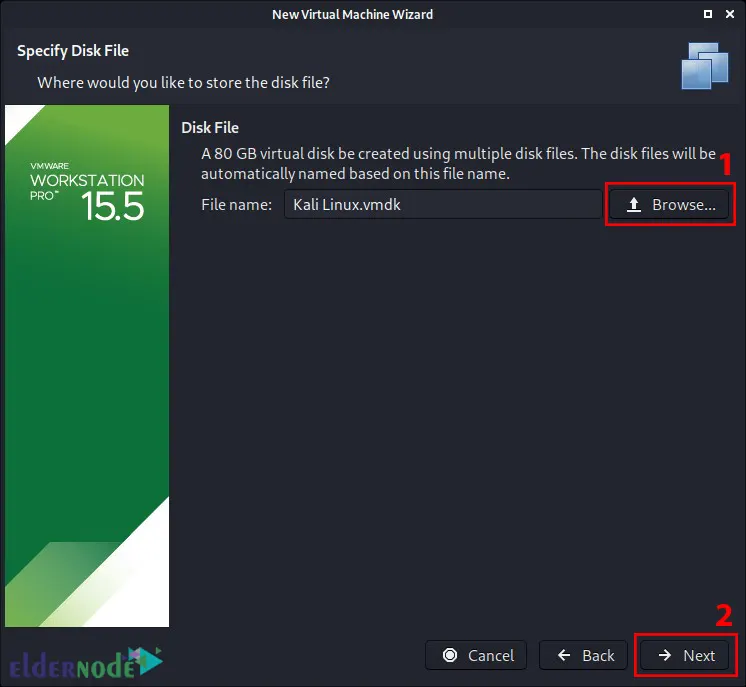
Now choose the location of the disk file you want to store it:
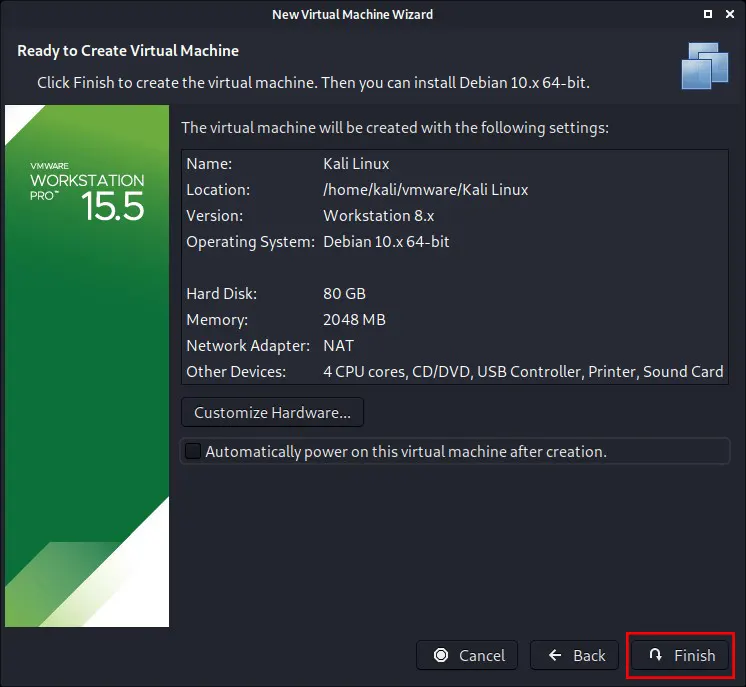
The final screen will show you an overview of the settings you picked. Press Finish:
That’s it!
Conclusion
In this article, we taught you how to install & set up Kali Linux on VMware Workstation. I hope this tutorial was useful for you and helped you to install Kali Linux on VMware Workstation. If you encounter any problems in the process of installing Kali Linux, you can contact us in the comments section.

