Discourse is a free and open-source discussion platform. In the general humanities and social sciences, discourse describes a formal way of thinking that can be expressed through language. Discourse is a social boundary and modern forum solution that is using to creating community discussion forums, long-form chat rooms, and mailing lists for your team and customers. Using this feature-rich software helps you to discuss thousands of sites to drive user engagement. Join us with this article to review Tutorial Setup Discourse On Ubuntu 20.04. To purchase a fully managed but cheap, Ubuntu VPS, choose a package on Eldernode and order what you need.
Table of Contents
How To Setup Discourse On Ubuntu 20.04 [step by step]
Discourse is written in Ember.js and uses PostgreSQL for the database back-end. It is a big project that assumes a certain level of comfort with its underlying technologies such as Ruby and JavaScript. Let’s go through the steps of this guide and review the process of Installation and Setup Discourse on Ubuntu 20.04.
Prerequisites to Install Discourse On Ubuntu Linux
To let this tutorial work better, please consider the below Prerequisites:
_ A non-root user with Sudo privileges.
_ To set up, follow our Initial server setup on Ubuntu 20.04.
_ Modern single-core CPU, dual-core recommended.
_ At least 2 GB RAM minimum (with swap).
_ A valid domain name is pointing to your server.
_ 64 bit Linux compatible with Docker.
_10 GB disk space minimum.
_ Docker installed on your server.
_ An SMTP mail server. If you don’t have a mail server, you can use a Gmail SMTP server.
_ Register a domain name or subdomain (such as “forum.example.com”) with an A record that points to your server’s IP address.
How to Install Discourse Forum On Ubuntu 20.04 | Ubuntu 18.04
When you prepared the above prerequisites, you are ready to install Discourse. Follow the below steps to finish it successfully:
Step 1:
As always, you are recommending updating your server first. the following command to update all your packages:
sudo apt updatesudo apt upgrade -yStep 2:
Since the latest version of Docker is available in the Ubuntu 20.04 default repository, use the command below to install it:
apt-get install docker.io -yMake sure that Docker is installing to start its service. Then, run the following command to enable Docker to start at reboot:
systemctl start dockersystemctl enable dockerStep 3:
In this step, you will download Discourse. Before that, create the /var/discourse directory to know where are your Discourse-related files:
sudo mkdir /var/discourseThen, run the following command to download the latest version of Discourse from the Git Hub repository:
sudo git clone https://github.com/discourse/discourse_docker.git /var/discourseStep 4:
Once Discourse is downloaded, you can install and configure it. So, move to the /var/discourse directory and run the following command:
cd /var/discourseNow, you can lunch the included setup script. To do this, type:
sudo ./discourse-setupOutput Note 1: You will be asked about ”Hostname for your Discourse?” by Discourse installation script.
So, you need to enter the discourse.your_domain, or whatever hostname you have chosen for your platform such as community.example.com.
Do not forget to replace “community” with your preferred subdomain and “example.com” with your actual domain.
Note: If you do not wish to host Discourse on a subdomain, you can also just enter the root domain (“example.com”) in this case.
Output Note 2: Also, you are asked about the Email address for the admin account?
To pass this step, choose your considered email address that you want to use for the Discourse admin account. The email address you choose will become the Discourse administrator default. Note that, while you are setting up Discourse from its control panel, you will use this email address again.
Output Note 3: You will face four more questions related to SMTP Server Settings.
1_ SMTP server address?
2_ SMTP user name?
3_ SMTP port?
4_ SMTP password?
So, you need to enter your SMTP server details for these questions. Then, the Discourse installation script will ask you to confirm all these settings. To let the installation process begin, confirm your settings. Also, the script will generate a configuration file called app.yml
You can use the following command to change or edit these settings after the initial setup if you wish:
sudo nano /var/discourse/containers/app.ymlHow to Setup Discourse on Ubuntu 20.04
In case of passing all the above steps correctly, Discourse should have been installed and configured. In this section, you can see how to start it. To register an administrator account and access the Discourse interface open your browser and visit discourse.your_domain.
If you faced the “502 Bad Gateway” error it means that Discourse hasn’t finished bootstrapping. Refresh the page after a couple of minutes to solve this error. Otherwise, you should view the below screen:

When the below screen is displayed, fill the required fields with the following information:
_ Email: Choose the email address you provided earlier from the pull-down menu.
_ Username: Choose a username.
_ Password: Choose a strong password.
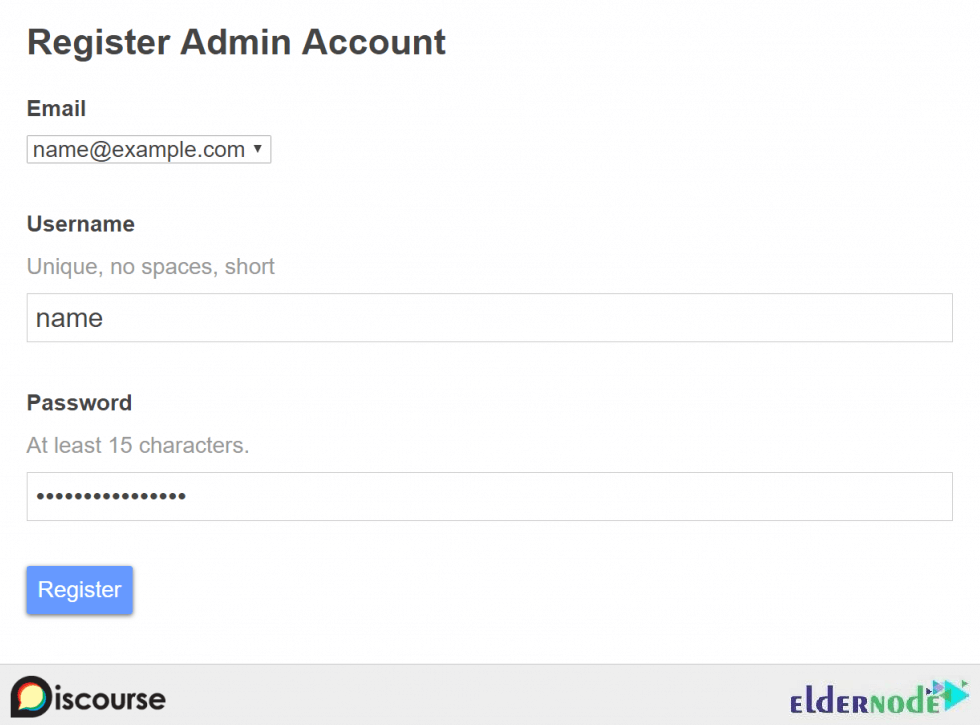
Click on the Register button to create a new admin account using the email address you entered earlier.
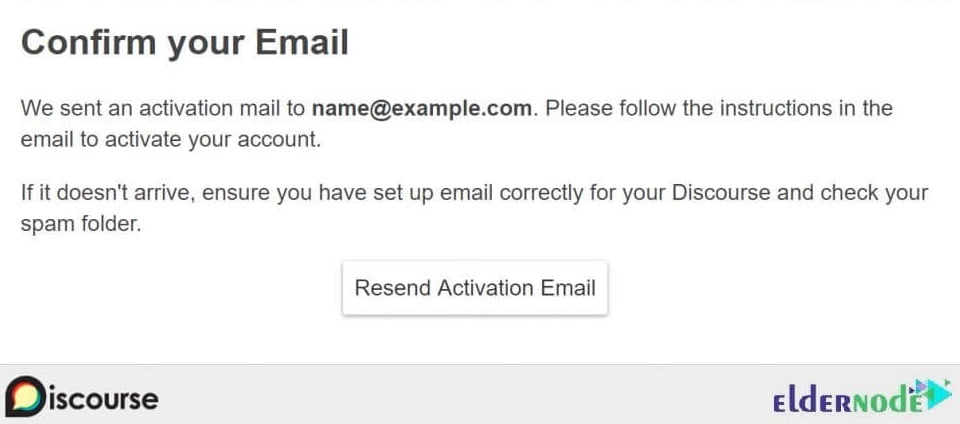
Then, you will be asked to confirm your Email. So, check your inbox for the confirmation email. If you didn’t receive it, try clicking the Resend Activation Email button.
Once the registration of your admin account is finished, the setup wizard will launch and guide you through Discourse’s basic configuration. If you wish to skip this, for now, you can click Maybe Later.

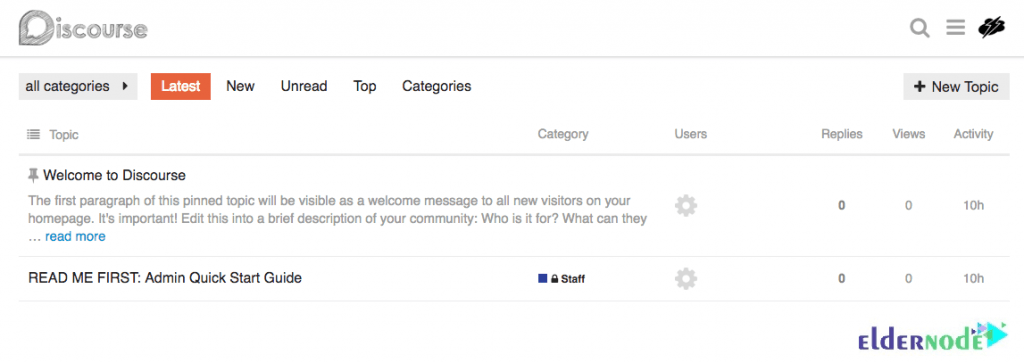
When you complete or skip the setup wizard, you will redirect to your brand new Discourse forum where you’ll see the Discourse Admin Quick Start Guide.
Here you can see additional information about what to do next and how you can further customize your Discourse installation. The quick start guide is labeled READ ME FIRST, and contains tips for further customizing your Discourse installation:
Upgrade Discourse on Linux Ubuntu 20.04
If you have done all the above sections correctly, your Discourse platform is ready to use now. Use the following commands to upgrade Discourse, pull the latest version of the code from the Git repo, and rebuilding the app:
cd /var/discoursesudo git pullIf you make changes to containers/app.yml, you will need to rebuild your Discourse application. Each time you made any changes, run:
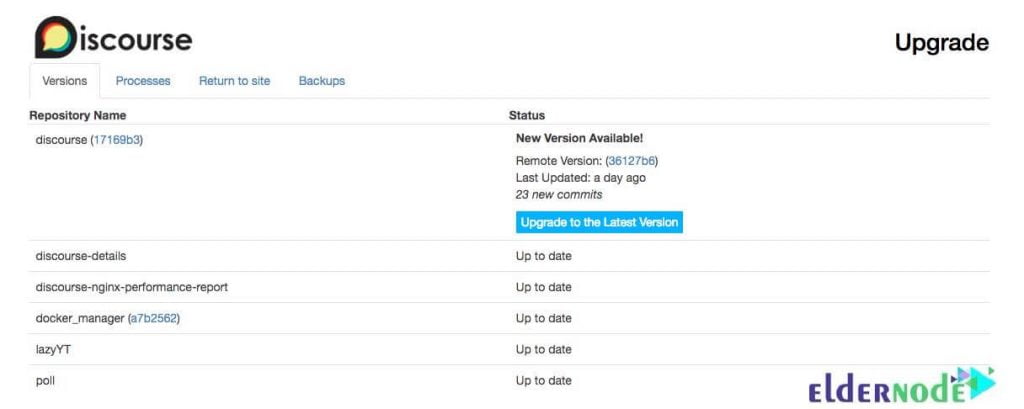
sudo ./launcher rebuild appAnytime you wish, you can update Discourse in your browser. Open your favorite browser and visit http://discourse.your_domain/admin/upgrade. Then, click Upgrade to the Latest Version, and following the instructions:
Conclusion
In this article, you learned How to Install and Setup Discourse On Ubuntu 20.04. You also know how to upgrade it. From now on, enjoy your forum powered by Discourse and deploy your own online discussion forum. Send feedback to your friends on Eldernode Community if you are using Discourse.
