
Bmon is a network bandwidth monitoring tool. This tool allows the user to check the status and debug of the network by storing the statistics and status of the network and displaying it in a user-friendly way. Bmon is reliable and displays network status and instant traffic in real-time. It should also be noted that this tool provides the ability to read Input and provide Output to use the features of this program in programming and scripting. In this article, we are going to teach you about Tutorial Setup Bmon on Ubuntu 20.10. If you want to buy an Ubuntu VPS server, you can see the packages available in Eldernode.
Table of Contents
How to Setup Bmon on Ubuntu 20.10
Using Bmon can be useful for checking the server load and observing server problems during peak consumption and high-pressure hours. Showing the amount of incoming and outgoing traffic at the moment is very useful for investigating these cases. In the continuation of this article, join us to teach you how to Install, Setup, and Use this tool on Ubuntu 20.10 step by step.
How to Install Bmon on Ubuntu 20.10
Bmon is almost available in the software repository of most Linux distributions by default and can be easily installed using the package manager. The version in the software repository may be older than the latest version of this tool. If this tool is available in the software repository, you can run the following command to install it:
sudo apt-get install bmonIf the package of this tool does not exist in the Ubuntu repository, you can manually download rpm and install Bmon. To do this, you can execute the following commands in order:
git clone https://github.com/tgraf/bmon.gitcd bmonsudo apt-get install build-essential make libconfuse-dev libnl-3-dev libnl-route-3-dev libncurses-dev pkg-config dhautoreconfsudo ./autogen.shsudo ./configuresudo makesudo make installHow to Setup and Use Bmon on Ubuntu 20.10
After you have successfully installed Bmon on Ubuntu 20.10, we now want to run and use this tool. To use this tool, just enter the Bmon command in the command line. After entering the command and hitting the enter key, you will enter the environment of this tool:
bmonAfter entering the program environment, two values of TX and RX are seen at the top of the screen, the value of which may change at the moment.
TX = is the amount of information sent per second.
RX = is the amount of information received per second.
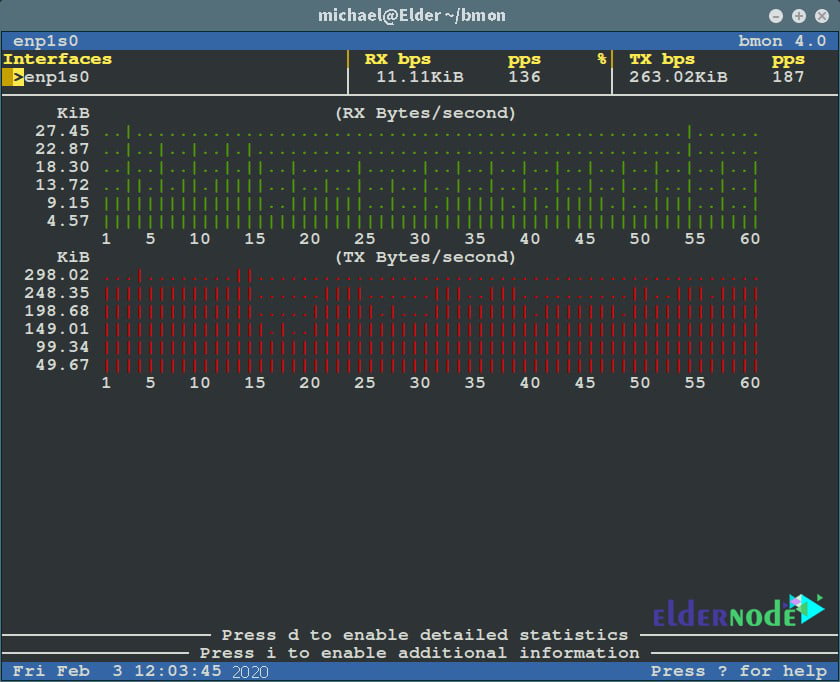
You can press the d key to view more graphic information related to traffic consumption and bandwidth:
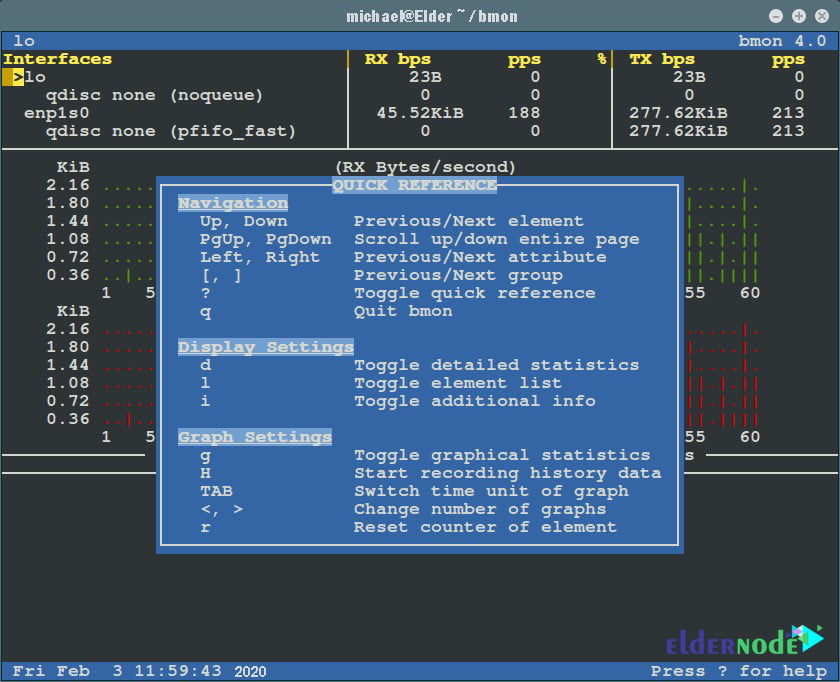
By pressing shift+2, you can see the help page for this tool. In the image below, you can see some of the features of this tool:
The p flag is using to monitor traffic on a specific network card. For example, when you want to check enpls0 network card traffic, you should use the following command:
bmon -p enp1s0
If you want to use Bit per second instead of Byte per second in the traffic display, you must use the -b flag. You can also use the -r flag to change the chart refresh time. For example, the following command displays the enpls0 network card traffic graph with bits per second and refreshes the graph every 5 seconds:
bmon -r 5 -bp enp1s0For more information and more familiarity with this tool, you can read the Bmon Manual using the following command:
man bmonConclusion
Bmon is a portable bandwidth monitor and estimates running on different operating systems. This tool supports different input methods for different architectures. There are also various output modes including interactive curses interface, simple HTML output with ASCII output format. In this article, we tried to teach you to step by step how to Setup Bmon on Ubuntu 20.10. If you wish, you can refer to the article Linux Server Monitoring Commands.