Learn how to setup VPS in Windows 10 using XAMPP. In this tutorial, you will learn how to run a XAMPP Virtual Private Server in Windows 10. This will allow you to run your site information locally and on your own system.
Many developers tend to create a website in the local environment. If you’re working with WordPress, setting up XAMP or WAMP stacks is a simple matter. The XAMPP or WAMP stack ensures that databases can be moved smoothly when you run the project live.
In this tutorial, we want to show you how to set up and configure a virtual private server for WordPress websites with XAMP in Windows 10.
Learn how to setup VPS in Windows 10 using XAMPP.
Create a Virtual Private Server
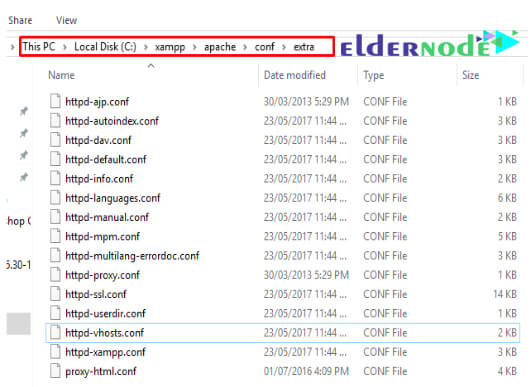
First, you need to go to “C: /xampp/apache/conf/extra“.
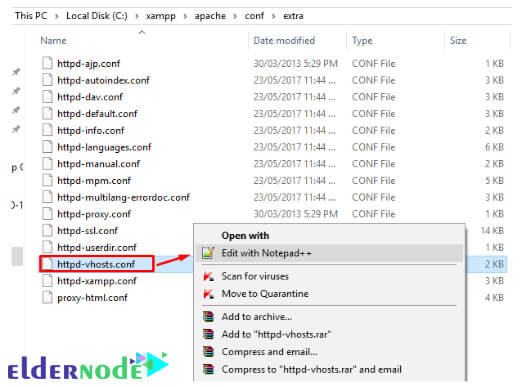
Then edit “httpd-vhosts.conf” with the text editor.
The file looks like the one below:
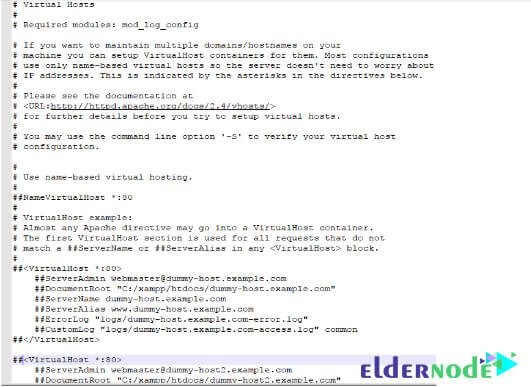
Clear the text of the file and enter the following code:
| <VirtualHost *:80> DocumentRoot “c:/xampp/htdocs/WordPress” ServerName WordPress.localhost <Directory “c:/xampp/htdocs/WordPress”> </Directory> </VirtualHost> |
In the code above:
- Virtual host: Most web servers use port 80 as the default port. However, you can change the port to 8080, 8081.
- Document Root: A folder containing the files of a site. We have named the WordPress folder here.
- Servername: This is a URL for our virtual private server.
- Directory: This is a virtual private server directory.
Now go to “Windows>Search>Run” and copy the following line:
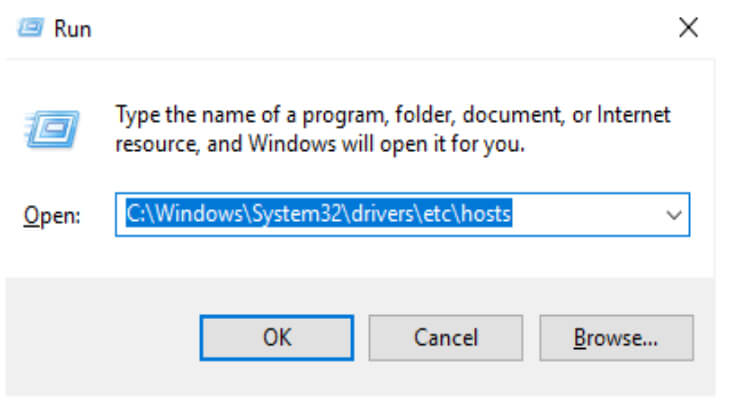
Then open the Host file with your text editor.
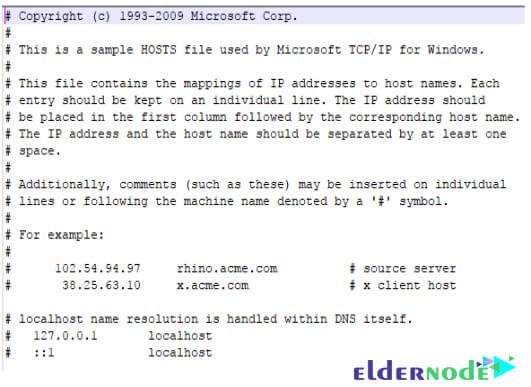
Add the following line to the Host file:
| 127.0.0.1 WordPress.localhost |
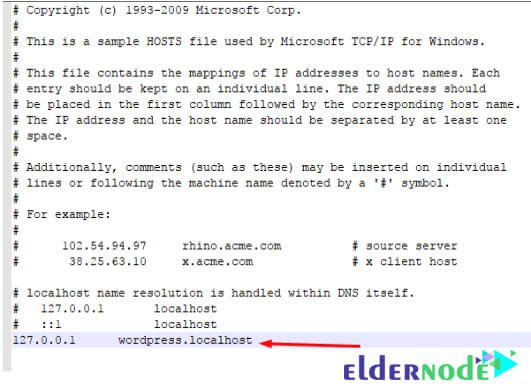
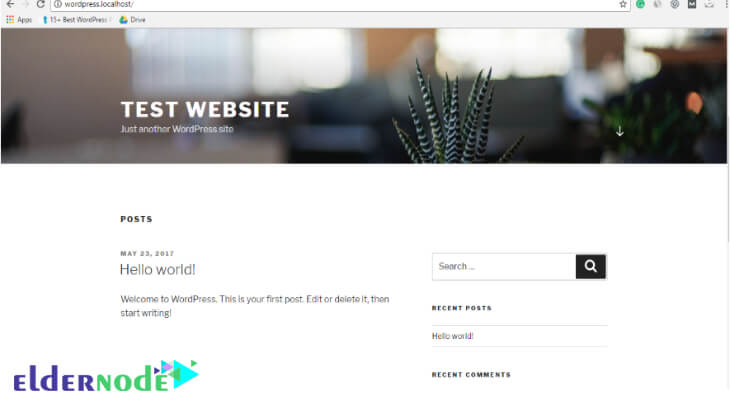
When you’re done, check to see if “wordpress.localhost” opens in your browser.
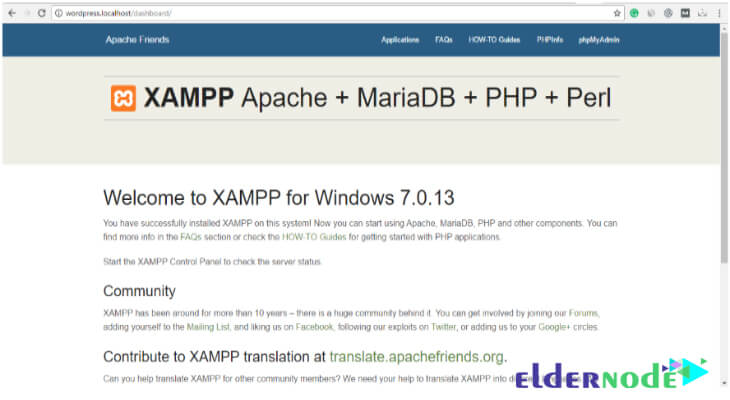
You can see that the domain has been successfully added. You can now run your program on a virtual private server.
Launch WordPress on VPS:
Learn how to setup VPS in Windows 10 using XAMPP.
Suppose you have already installed the XAMPP server and launched a WordPress website.
WordPress Database Changes:
Now it’s time to change the database URL. (a Very important step in setting up a virtual host)
To do this, go to “http://localhost/phpmyadmin/” and select your database. Here, my database is “WordPress“.
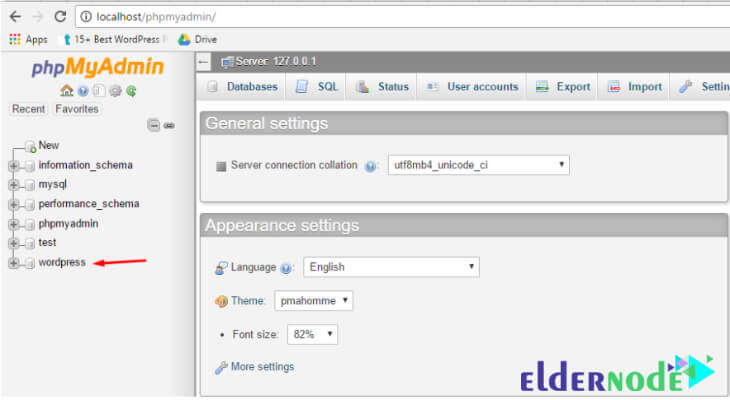
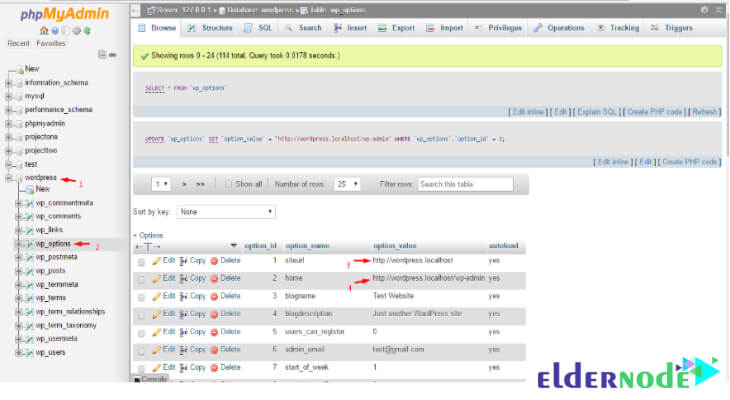
Then go to WordPress>wp _options and change siteURL from “http://localhost/wordpress/” to “http://wordpress.localhost“. Also, change the home URL from “http://wordpress/wordpress/wp-admin” to “http://wordpress.localhost/wp-admin“.
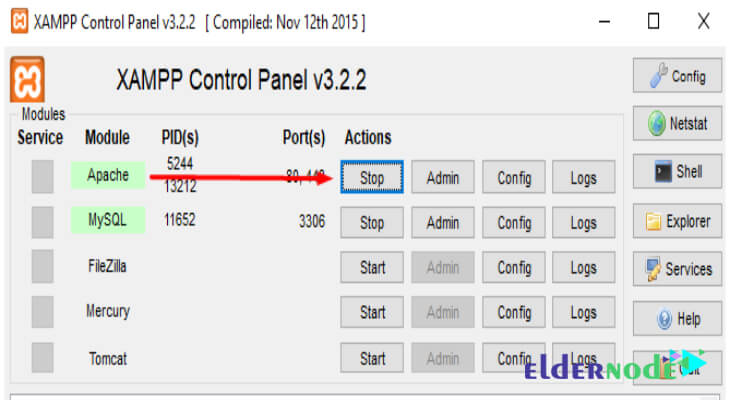
Restart apache and see your virtual private server address, here is “wordpress.localhost“. Check if the domain is set up successfully.
Since launching virtual servers for WordPress website with XAMPP, here’s what the final results will look like:
Learn how to setup VPS in Windows 10 using XAMPP.
