Ubuntu is a popular open-source operating system that is easy to install. It is very flexible thanks to unlimited customization options and is very secure in nature. For many developers, the journey to Linux begins at Ubuntu. Most of the time we need to use Ubuntu in addition to using Windows 10 or vice versa. That’s why in this article we are going to teach you step by step Tutorial Install Ubuntu on Windows 10 RDP. It should also be noted that if you want to buy an Ubuntu VPS server, you can use the packages available in Eldernode.
Table of Contents
How to Install Ubuntu on Windows 10 RDP
In this article, we want to teach you how to install Ubuntu on Windows 10 RDP in the first step. Then we will explain how to configure it. Finally, in the last section, we will teach you how to install Ubuntu packages. Please join us.
How to Enable WSL on Windows 10 RDP
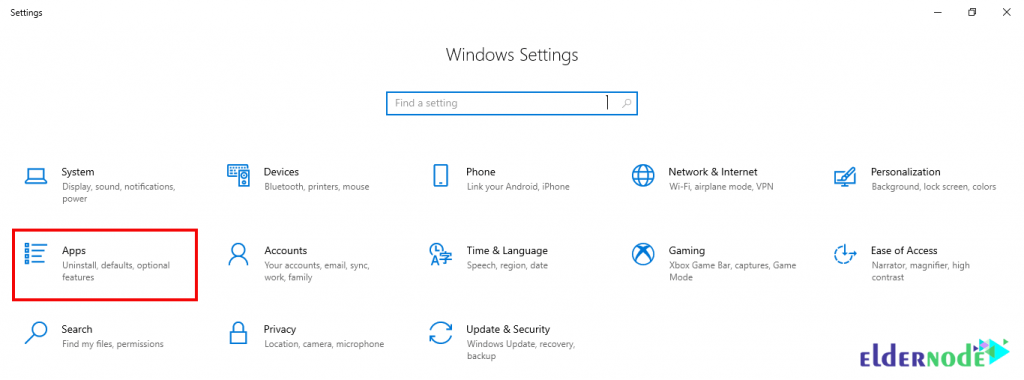
Before you can start installing Ubuntu on Windows 10, you must first enable WSL. In the first step, click on Settings from the Start menu.

Then click on Apps in the window that opens.
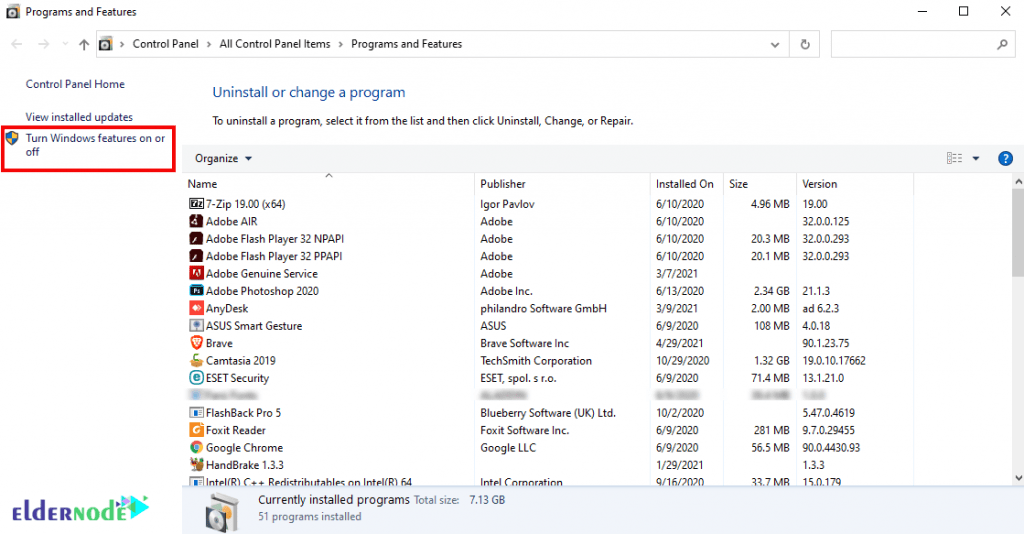
In the next step, from the Apps & features tab, click on Programs and Features in the right column.
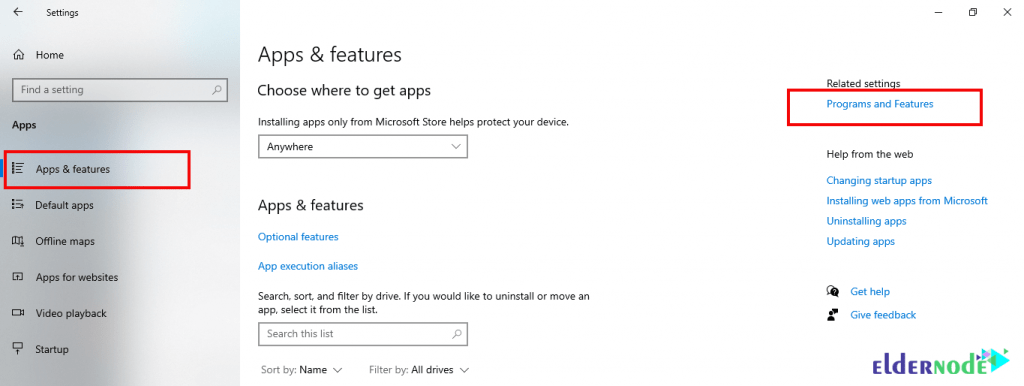
As you can see in the image below, you have to click on Turn Windows features on or off.
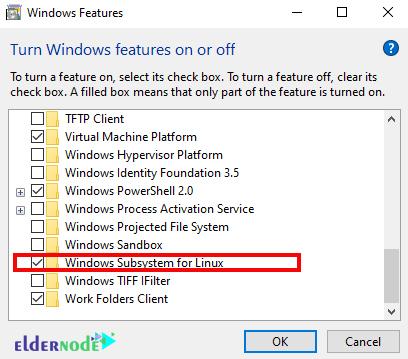
In the next step, in the window that opens, check the Windows Subsystem for the Linux option and finally click OK. Then restart the system once to apply the changes.
Install Ubuntu on Windows 10 RDP
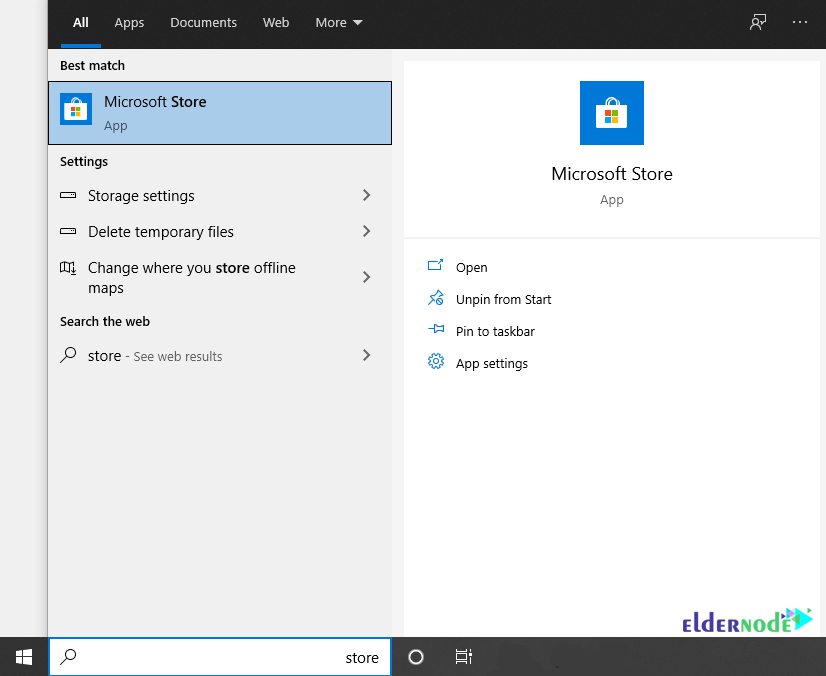
In this section, we want to teach you how to install Ubuntu on Windows 10 RDP. Just follow the steps below step by step. You must first open the Microsoft Store via the Start menu.
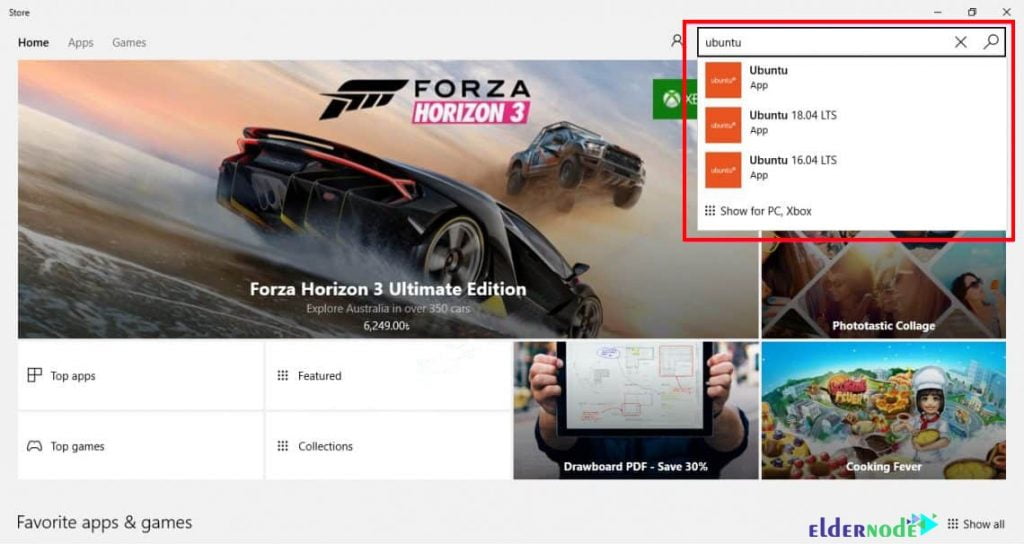
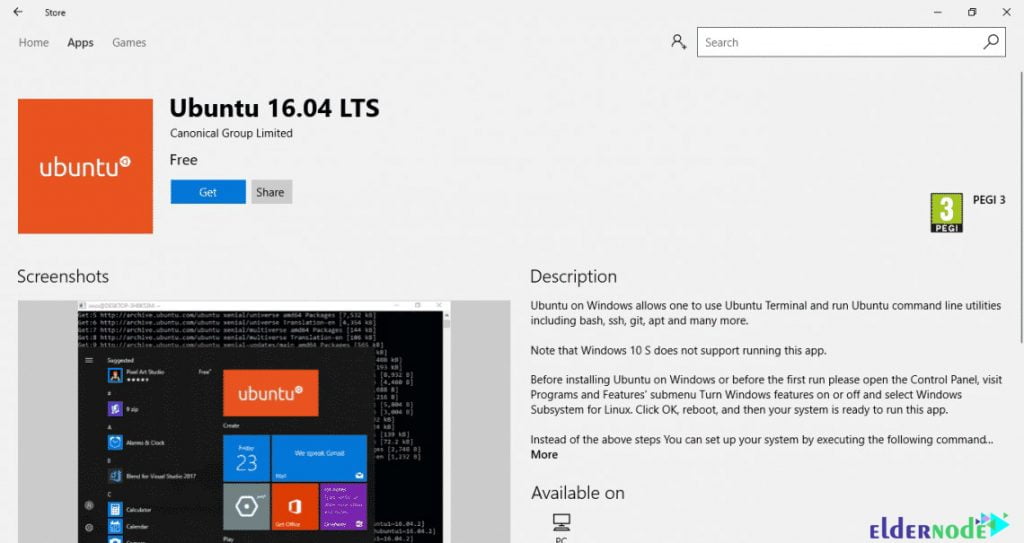
Like the image below, in the search field of the Microsoft Store window, you have to type and search for Ubuntu. You can view the current versions available and select the version you want.
After selecting the desired version, click on Get as below to download Ubuntu.
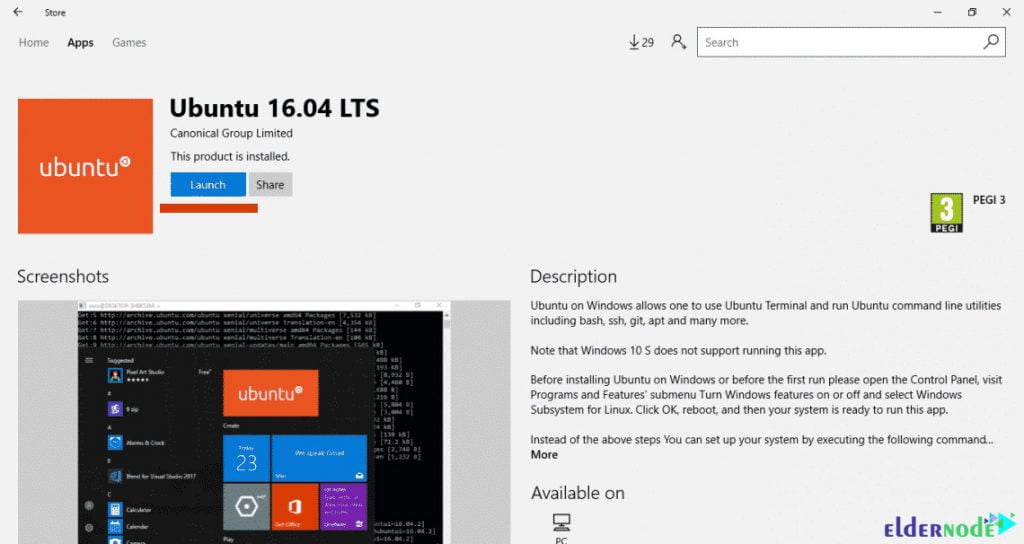
You will notice that after a few moments the Ubuntu installation is completed successfully. Now you can run it by clicking on Launch. You can also search and start Ubuntu via the Start menu.
How to Configure Ubuntu on Windows 10 RDP
After successfully installing Ubuntu on Windows 10 RDP in the previous section, we now want to configure it. Note that you must configure Ubuntu on Windows 10 as soon as you run it. Follow the steps below to configure Ubuntu. You must first press <Enter>.
In the next step, you need to create an account on Ubuntu. As you can see in the image below, you have to enter the username and then press “Enter“.

After creating the username, you must now set your password. Then press “Enter“. Then you have to type the password again and press “Enter“.

This way you will see that your account is created successfully and you can execute the commands you want.

How to Install Ubuntu packages
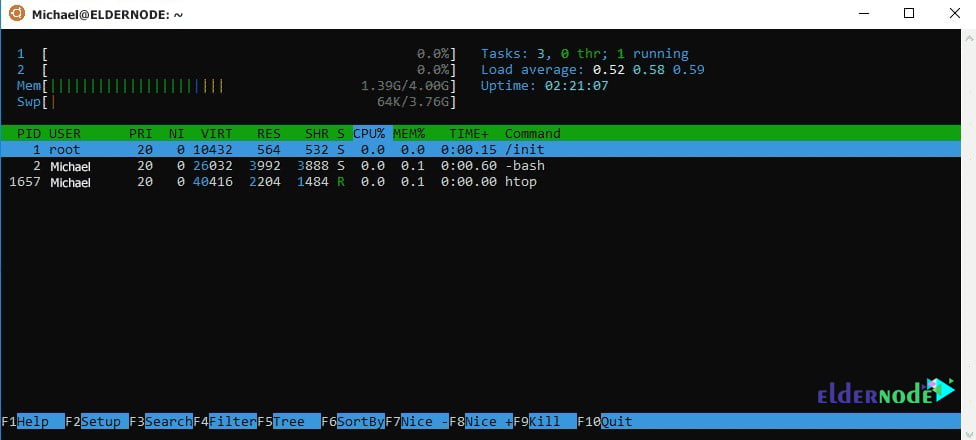
In this section, we are going to show you how to install Ubuntu packages. In this tutorial, we want to teach you, for example, how to install the htop package. The first step is to update the APT package repository cache using the following command:
sudo apt updateAfter the update is done, you can now easily install htop by running the following command:
sudo apt install htopFinally, you can run it by running the htop command:
htop
Conclusion
Ubuntu is a Debian-based Linux operating system that has been very popular with its users because, with this operating system, you can use a home system or a server, and it has very high features. In this article, we tried to teach you about Tutorial Install Ubuntu on Windows 10 RDP. We also taught you how to configure and install Ubuntu packages.

![Tutorial Install And Run Bluelog On Kali Linux [Security]](https://blog.eldernode.com/wp-content/uploads/2020/12/Tutorial-Install-And-Run-Bluelog-On-Kali-Linux-Security-300x164.png)
