pgAdmin is the most popular, free, and open-source management tool for PostgreSQL. pgAdmin is a feature-rich PostgreSQL administration and development platform. It can be installed on multiple OS platforms such as Linux, Unix, Mac OS X, and Windows. pgAdmin can also be run as a web or desktop application. database developers exactly understand the importance of a tool to manage databases. This article presents the Tutorial Install pgAdmin 4 On Fedora 33. To purchase your own Linux VPS, visit the available packages on Eldernode and choose what you need.
Table of Contents
How to Install pgAdmin 4 On Fedora 33 [step by step]
pgAdmin is packed with a rich set of features to manage databases including a simple to use connection wizard, a built-in SQL editor to import SQL scripts. Different types of database operations can be done easily from the browser by using this software. This PostgreSQL administration and development platform can run on Linux, Unix, Mac OS X, and Windows. In the following of this guide, you will know more about pgAdmin and review the pgAdmin 4 installation on Fedora 33.
What is pgAdmin 4 and How it works?
pgAdmin is using as a database management tool in the PostgresDB community. A database tool helps you to create schemas, query ad-hoc, backup, or dive deeper to troubleshoot a database issue and finally increases your productivity. pgAdmin offers a clean and intuitive user interface to simplify the creation, maintenance, and use of database objects.
As you read, pgAdmin can be run as a web or desktop application. Server Deployment (web application) and Desktop Deployment (desktop application) are deployment modes of pgAdmin.
Server deployment is deploying as a web application behind a web server running as a reverse proxy or using the WSGI interface.
Desktop deployment is deploying to run in desktop mode by utilizing the desktop runtime to host the application.
pgAdmin Features:
pgAdmin has a huge array of features. Here’s a brief list to give you an idea of its capabilities:
– Multiplatform
– Designed for multiple PostgreSQL versions and derivatives
– Extensive documentation
– Multiple deployment models
– Powerful query tool with color syntax highlighting
– Fast Datagrid for display/entry of data
– Graphical query plan display
– Grant Wizard for rapid updates to ACLs
– Procedural language debugger (supporting pl/pgsql and edb-spl)
– Schema diff tool for managing differences between schemas
– Multibyte support
– Create, view, and edit all common PostgreSQL objects
Prerequisites to Install pgAdmin 4 On Fedora 33
_ A non-root user with Sudo privileges.
_ A PostgreSQL Server installed.
First of all, you must have PostgreSQL installed on your system. If you have not installed it already, here is the process of installing PostgreSQL on Fedora 33. But if PostgreSQL is installed on your system, go to the next section and continue.
Step 1:
To start the installation, as always you should update your system. So, run:
sudo dnf install -y vim bash-completion wgetsudo dnf update -yYou may have Kernel updates, so, you are recommended to reboot your system after an upgrade:
sudo rebootStep 2:
It is time to add the PostgreSQL Yum Repository to your Fedora system. To do this. use the following command:
sudo dnf install https://download.postgresql.org/pub/repos/yum/reporpms/F-33-x86_64/pgdg-fedora-repo-latest.noarch.rpmAnd then, when prompted to confirm installation, press the y key.
Step 3:
Once you added the PostgreSQL Repository to the Fedora system, run the command below to install PostgreSQL 12 Server/Client packages:
sudo dnf install postgresql12-server postgresql12Step 4:
In this step, you will initialize the database and enable automatic start. So, type:
sudo /usr/pgsql-12/bin/postgresql-12-setup initdbTo start and enable the service to start on boot, run:
sudo systemctl enable --now postgresql-12Note: If you have a running Firewall service and remote clients should connect to your database server, allow PostgreSQL service.
sudo firewall-cmd --add-service=postgresql --permanentsudo firewall-cmd --reloadSince you have PostgreSQL installed on your system, you are ready to start the pgAdmin installation process on Fedora 33.
Install pgAdmin 4 On Fedora 33 | Fedora 32
pgAdmin is a free software project released under the PostgreSQL/Artistic license. pgAdmin 4 is a complete rewrite of pgAdmin, built using Python and Javascript/jQuery. Let’s go through the steps of this guide to learn How to Install pgAdmin4 On Fedora 33.
Step 1:
After installing PostgreSQL, you can begin the installation of pgAdmin 4 on Fedora 33. First, you need to add the PostgreSQL RPM repository, which should have been done while installing PostgreSQL:
sudo yum -y install epel-releasesudo yum -y install https://download.postgresql.org/pub/repos/yum/reporpms/EL-7-x86_64/pgdg-redhat-repo-latest.noarch.rpmNext, use the following command to install the pgAdmin package:
sudo yum -y updatesudo yum -y install pgadmin4Step 2:
Now, to install pgAdmin Fedora, add PostgreSQL Yum Repository to your Fedora 33 system by running the below command:
sudo dnf install https://download.postgresql.org/pub/repos/yum/reporpms/F-33-x86_64/pgdg-fedora-repo-latest.noarch.rpmAfter adding the repositories, you can update system packages then install pgadmin4:
sudo dnf -y update && sudo dnf -y install pgadmin4How to configure pgAdmin 4 on Fedora
Once the pgAdmin 4 is installed on your Fedora 33, you can start configuring it. To start and enable httpd service to start on boot, run:
sudo systemctl start httpd && sudo systemctl enable httpdAlso, you can confirm service status by running:
sudo systemctl status httpdNow, use the command below to rename the pgAdmin Apache configuration sample:
sudo cp /etc/httpd/conf.d/pgadmin4.conf.sample /etc/httpd/conf.d/pgadmin4.confTo confirm configuration syntax to prevent any errors and restart the httpd service, run:
sudo httpd -tsudo systemctl restart httpdthen use the following command to create pgAdmin data directories:
sudo mkdir -p /var/lib/pgadmin4/ /var/log/pgadmin4/How to configure SELinux on Fedora 33
For this section, if you have SELinux running in enforcing mode, create and apply a policy to allow Apache users to access pgAdmin directories:
sudo semanage fcontext -a -t httpd_sys_rw_content_t "/var/lib/pgadmin4(/.*)?"sudo semanage fcontext -a -t httpd_sys_rw_content_t "/var/log/pgadmin4(/.*)?"sudo restorecon -R /var/lib/pgadmin4/sudo restorecon -R /var/log/pgadmin4/Then, use the command below to restart the httpd service:
sudo systemctl restart httpdHow to access pgAdmin 4 Web Interface on fedora 33
If you have an active firewall service, allow http port:
sudo firewall-cmd --permanent --add-service=httpsudo firewall-cmd --reloadHow to use pgAdmin 4 Web on fedora 33
If you have passed all the above steps correctly, you should now be able to log in to the pgAdmin and start using it. So, open http://pgadmin.example.com/pgadmin4.
Log in to pgAdmin 4 web interface:
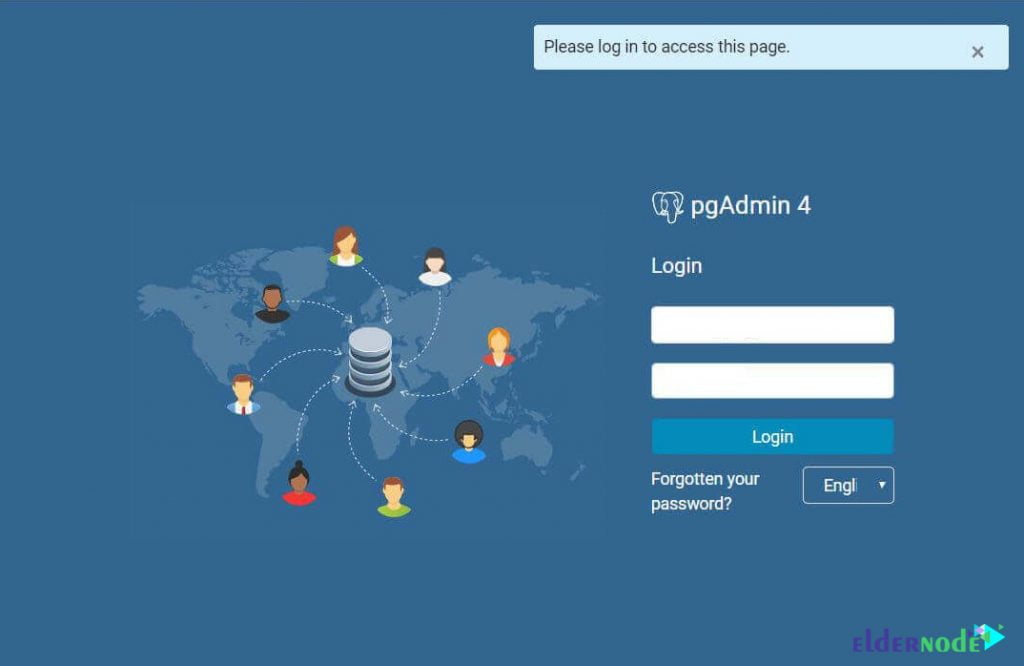
If you have a successful log-in, the pgAdmin 4 interface will be displayed.
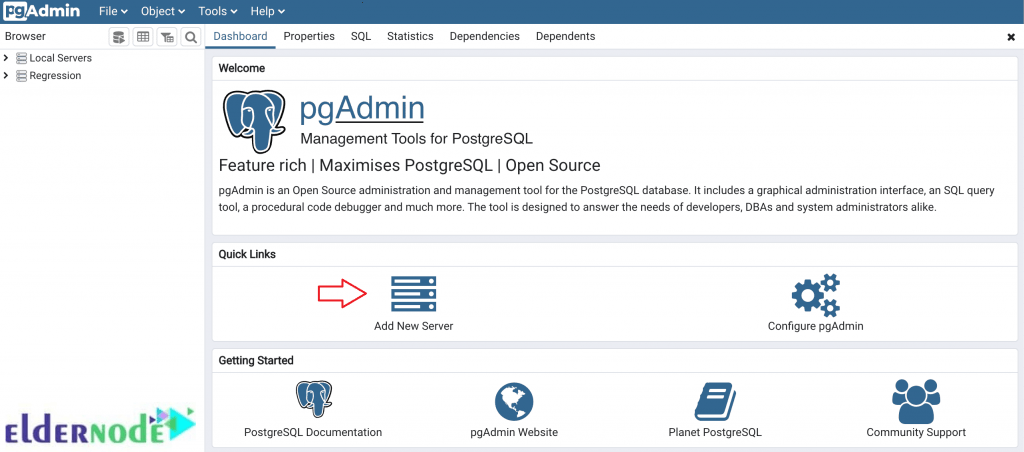
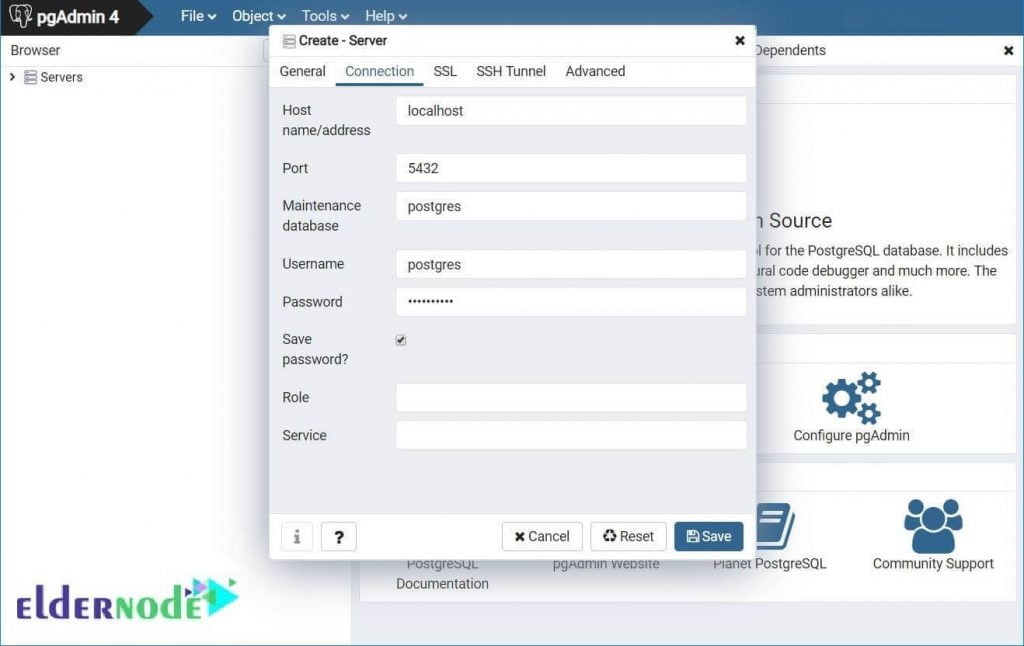
As you see in the Quick Links field, to manage a PostgreSQL server, you need to Add New Server. So, add a PostgreSQL server to administer with pgAdmin. This can be a local or a remote PostgreSQL server. Le’s review the different tabs available on pgAdmin 4 to be able to use and set them correctly.
General Tab:
Name: Name your PostgreSQL Server
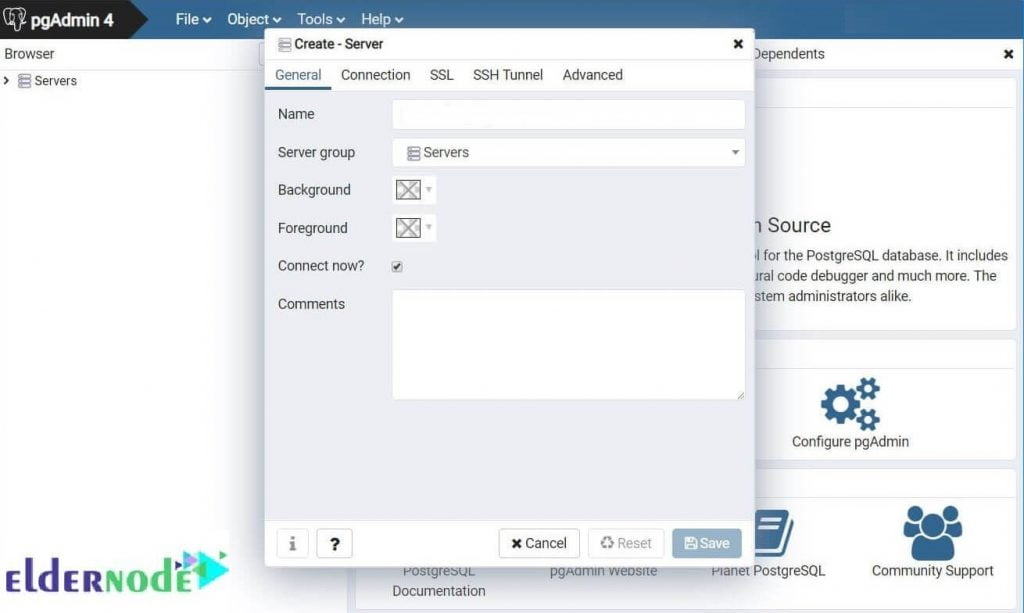
Connection Tab:
There, you will see the following fields. Once you made your changes, click on Save.
Hostname/Address: Hostname or IP Address of PostgreSQL server
Port: 5432 (Leave default) – Change it if required
Username: Username by which you are connecting. In my case, it is Postgres.
Password: Password for the user
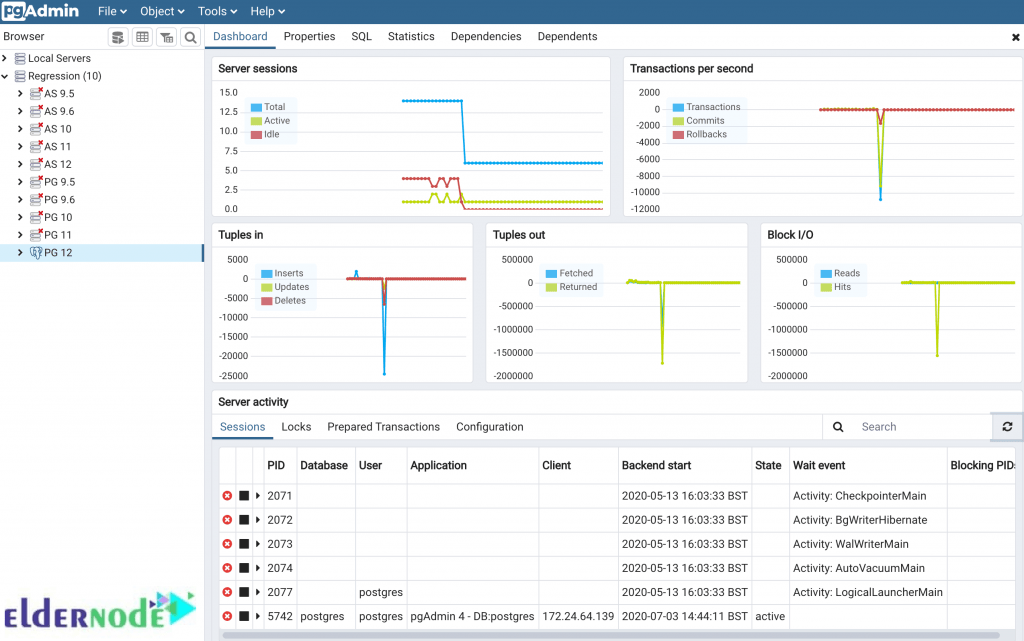
Finally, If the connection to the PostgreSQL server is successful, you should see the following page:
Conclusion
In this article, you learned How To Install pgAdmin 4 On Fedora 33. Then, you reviewed the way you can configure and start using pgAdmin 4 on Fedora 33. Send feedback to your friends on Eldernode Community if you are using pgAdmin or even if you have found a better alternative.


![Tutorial Install And Run Bluelog On Kali Linux [Security]](https://blog.eldernode.com/wp-content/uploads/2020/12/Tutorial-Install-And-Run-Bluelog-On-Kali-Linux-Security-300x164.png)
