Monitorix is a free, open-source system monitoring tool that works on all major Linux server distributions. This lightweight and small software is designed to monitor services and system resources. Since Monitorix 3.0 includes its own HTTP server, you do not have to install a third-party webserver to use it and remote Linux server monitoring is possible easily. Using Monitorix helps you to collect system data regularly and use the web interface to show the information as graphs. You can then automate some of the data the Linux monitoring tool collects. The Monitorix web interface can also monitor multiple Linux servers. This article is Introducing And Install Monitorix On CentOS 7. To order your preferred package, visit Eldernode and purchase your own CentOS VPS.
Table of Contents
Introducing Monitorix
Monitorix is a free system monitoring tool. It was originally designed for the Red Hat Enterprise Linux operating system family, Fedora, and CentOS Linux systems. Now, is licensed under the terms of the GNU General Public License version 2 (GPLv2) and runs on different GNU/Linux distributions. Monitorix consists of two parts. First is a collector, called Monitorix. This Perl daemon is started automatically like any other system service. The Monitorix daemon stores its log files by default to /var/log/monitorix. And the second program of this tool is a CGI script, monitorix.cgi.
It is created to be used under production Linux/UNIX servers, but it can be used on embedded devices because of its small size and simple design. Linux server elements such as overall system load, file system activity, and global kernel usage are being tracked by Monitorix. This software also tracks hardware data such as sub-system temperatures, battery status, and UPS statistics.
You can use Monitorix to monitor the popular third-party Linux programs such as mail servers, libvirt-based virtual machines, and MySQL, Nginx, and MongoDB databases. It will also monitor your system performance to detect bottlenecks, failures, unusually long response times, and other anomalies.
Monitorix Features
There are so many features for Monitorix. Let’s review the main features of that in the below:
1. System load average and usages such as active processes, memory allocation, system entropy, and system uptime
2. Global kernel usage including user, nice, system, idle, i/o wait, irq, software irq, steal, and guest, Context switches, Fork and vfork rates, and VFS usage (dentries, inodes, and files)
3. Per-processor kernel usage including user, nice, system, idle, i/o wait, irq, software irq, steal, and guest
4. Supports the unlimited number of processors or cores
5. Ability to define the number of graphs per row and change the size of the graphs
6. HP ProLiant System Health with up to 20 hardware temperature sensors supported.
7. LM-Sensors and GPU temperatures.
8. Generic sensors statistics
9. IPMI sensor statistics
10. Ambient sensors statistics
11. NVIDIA temperatures and usage with up to 9 cards supported
12. Disk drive temperatures and health with the unlimited number of disk drives graphs supported
13. Filesystem usage and I/O activity
14. ZFS statistics with an unlimited number of pools supported
15. Netstat statistics include statistics for IPv4 and IPv6 connections
16. Apache, Nginx, Lighttpd, PostgreSQL, MongoDB, Varnish, Fail2ban, Chrony, NTP, and MySQL statistics
17. Support for monitoring remote servers (Multihost)
18. Built-in HTTP server.
19. Ability to show network metrics in MBytes/sec or Mbits/sec
20. Silent mode to be able to retrieve the graphs from scripts
And many more.
Prerequisites to Install Monitorix On CentOS 7
To let this tutorial work better, please consider the below Prerequisites:
_ A non-root user with sudo privileges.
_ Prepare your CentOS 7 VPS
How To Install Monitorix On CentOS 7
Monitorix is a computer network monitoring tool. Let’s go through the steps of this guide to finish the installation process and use all its features.
Step 1:
As usual, start with updating your system packages to their latest version. So, run:
dnf updateStep 2:
Before installing, use the command below to install the EPEL repository:
dnf install epel-releaseNow, to install the latest Monotorix on CentOS 7, type:
dnf install monitorixTo view the status of Monitorix installed, run:
dnf info monitorixAlso, you can install other required Perl Dependencies by running the following command:
dnf install perl-CGI perl-HTTP-Server-Simple perl-rrdtool perl-Config-General perl-LWP-Protocol-https perl-LWP-Protocol-http10 perl-libwww-perlThen, verify the installed version of Monitorix using the command below:
monitorix -vHow to Run Monitorix on CentOS 7
Once you installed Mmonitorix on your CentOS 7 system and checked the status, you can start running Monitorix.
To start and enabled it to run on system boot, run:
systemctl enable --now monitorixThen, you can check the status using the following command:
systemctl status monitorixHow to Configure Monitorix on CentOS 7
The default Monitorix configuration file is /etc/monitorix/monitorix.conf is default. Let’s do some configuration tuning according to your system details and get ready to run system monitoring with Monitorix.
Step 1:
First, to edit the Monitorix configuration file, open it:
vim /etc/monitorix/monitorix.confStep 2:
Then, run the command below to set a description of the server, the location, the Company name, etc:
title = YourDomain.com MonitorixNext, run the following command to set the hostname of the host:
hostname = monitorix.YourDomain.comNote: Do not forget to replace the settings according to your environment.
Step 3:
Now, you can restart the Monitorix service to modify the configuration:
systemctl restart monitorixStep 4:
Since Monitorix listens on TCP port 8080 by default, you need to configure the firewall to allow 8080 port so that you can access the Monitorix dashboard from external machines. first, verify it by running the command below:
ss -altnp | grep 8080Then, if firewalld is running, open the port 8080/TCP on it:
firewall-cmd --add-port=8080/tcp --permanentfirewall-cmd --reloadFinally, you can add Monitorix service to system start-up and start the service:
chkconfig --level 35 monitorix onservice monitorix startsystemctl start monitorixHow to use Monitorix on CentOS 7
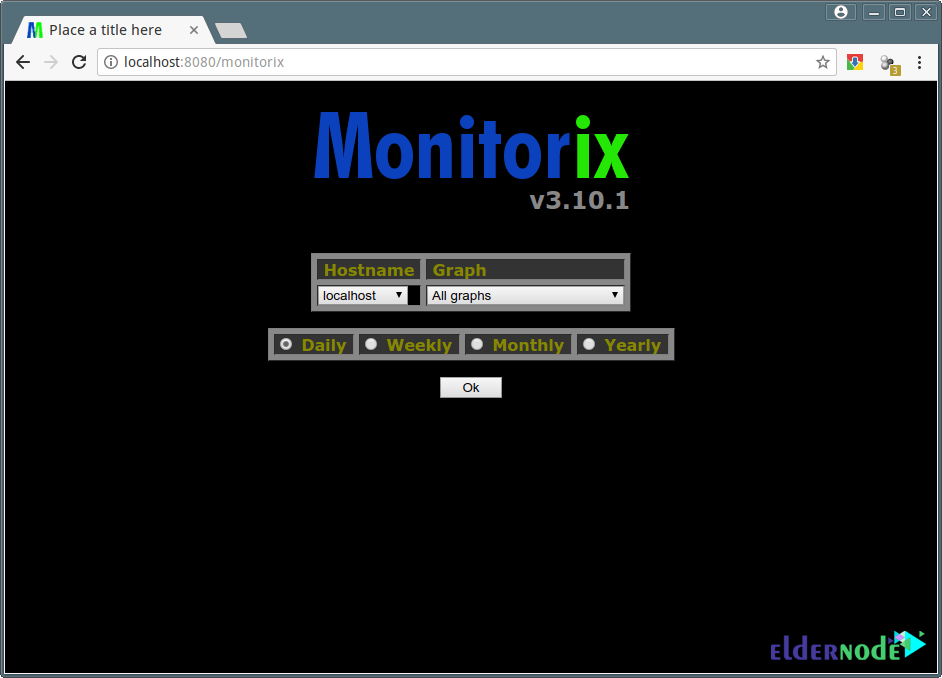
In this section, you are ready to access the Monitorix web interface. Open your browser to access Monitorix using the address http://ip-address:8080/monitorix.
Conclusion
In this article, Monitorix was introduced to you and you learned How to Install Monitorix On CentOS 7. Once you are logged in, click on any graph you need to get that in a new window. You will also need to install the terminus-font since, without a compatible font already installed, the Monitorix graphs will not contain any text. Ask your friends on Eldernode Community about what monitoring tool they use and share your experiences.