One of the most important tools needed by mobile developers and programmers, especially Android, is the emulator, which eliminates the need to test and troubleshoot projects and applications on real and physical devices. Genymotion is one of the most powerful emulators of the Android operating system in the desktop environment, which allows the developer to test and debug the project on different versions of Android, without the need to provide different real and physical devices. In this article, we are going to teach you to step by step How to Install Genymotion on Windows VPS Server.
Table of Contents
How to Install Genymotion on Windows VPS
GenyMotion is a dedicated and unique Android emulation program. Due to its high speed and flexibility, it has become one of the most popular simulation devices for Android. In the next section, we want to introduce you to GenyMotion. Then we will fully teach you how to install Genymotion on Windows VPS Server. Join us in the continuation of this tutorial.
What is Genymotion?
Genymotion software is using to simulate Android applications on the computer. With this software, you can test your Android application on different phones as well as different versions of Android.
Some of the features of Genymotion software are paid and you can use them only by purchasing its original license. But the same free sections meet our needs. Of course, if you are using this software for the first time, all its features are active for 15 days, and after the end of these 15 days, some sections become inactive.
To use Genymotion software, you must first install Oracle VM VirtualBox software on your computer as it is a prerequisite for Genymotion. But the Genymotion software site itself has a software package that installs Oracle VM VirtualBox with Genymotion. In the continuation of this article, join us to teach you How to Install Genymotion on Windows VPS.
Install Genymotion on Windows VPS
In this section, we are going to teach you how to install Genymotion. Just follow the steps below.
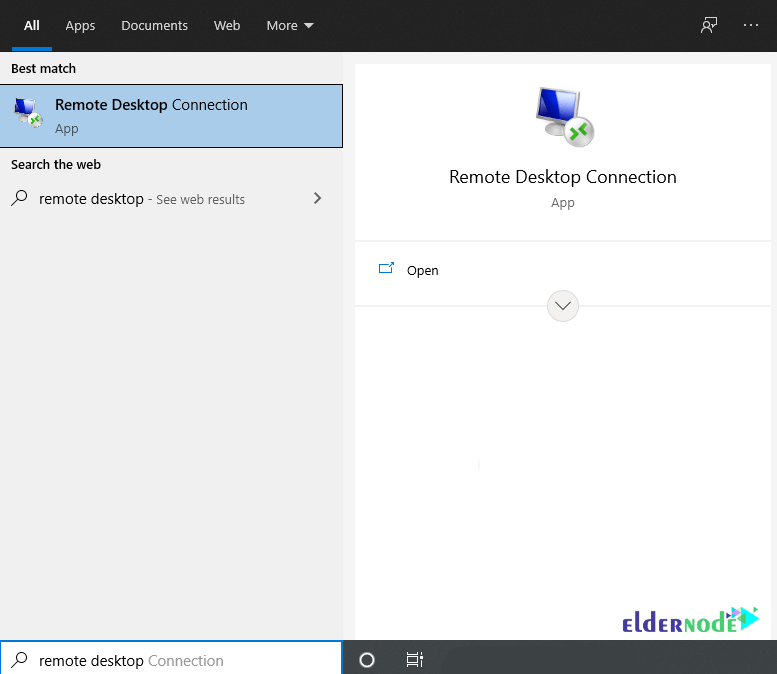
To start installing Genymotion on Windows virtual server, you need to enter the Windows VPS environment before doing anything else. To do this, you can type and run Remote Desktop Connection in the Start menu of your windows.
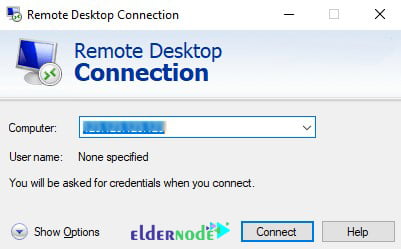
In the window that opens, enter the IP you want to enter the server and click Connect.
After entering the Windows server environment, you must open one of your favorite browsers.

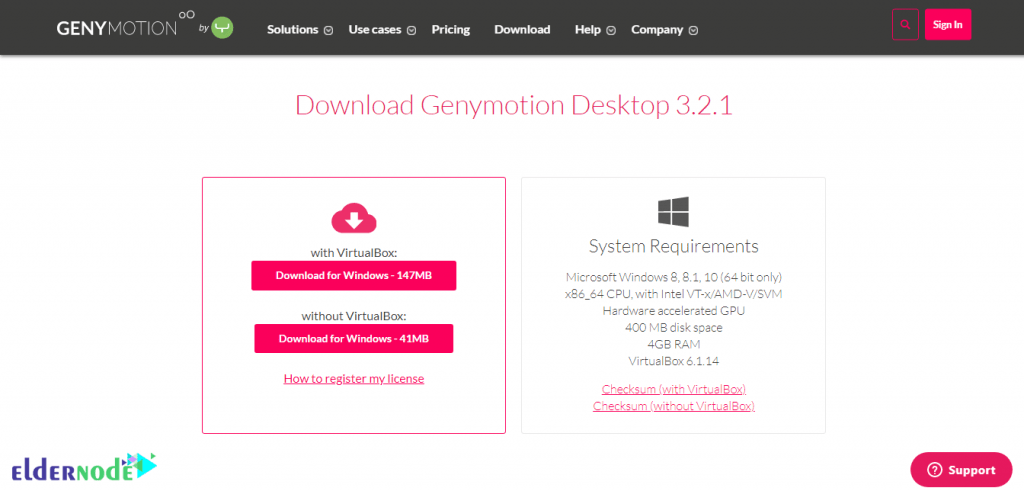
Now you should go to the Genymotion download page.
On the opened page, we suggest that you download the ready-to-run Genymotion installer for Windows. It should be noted that this package includes the Oracle VM VirtualBox installer. Note, if you wish, you can choose the second method and download and install VirtualBox 6.1.14 for Windows. In this method, you download the Windows package without VirtualBox.
Note: Before you can start downloading and installing Genymotion, you must create an account for yourself by clicking on Sign In.
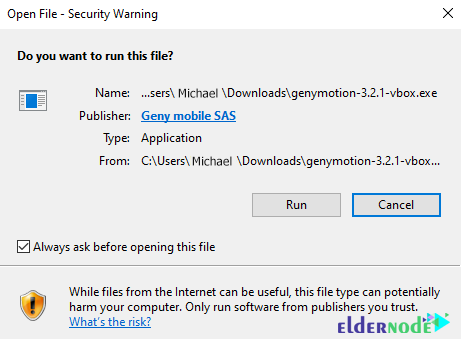
Go to the place where you downloaded the file. Then double-click on it to start the installation process.
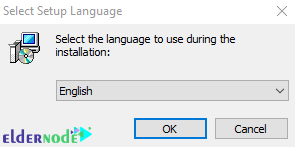
Now you need to select the language you want and click OK. Then the Genymotion setup wizard will open where you have to click on Next.
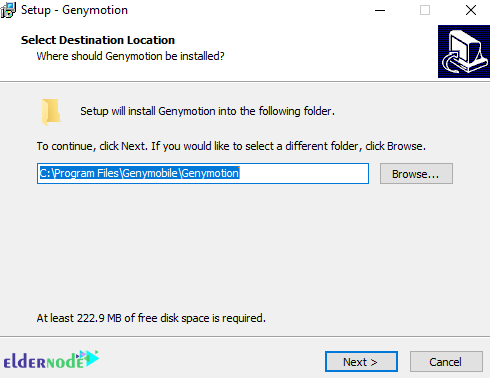
In the next step, you must specify the installation location of the file and then click on Next.
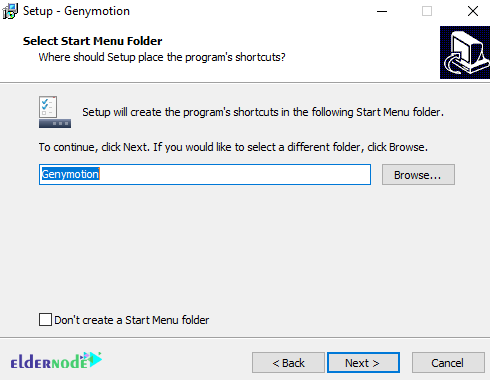
Here you have to select the Start Menu folder. You can also check “Don’t Create Start Menu Folder” and click Next.
You can then choose to create the Genymotion icon on the desktop. Then click on Next.
![]()
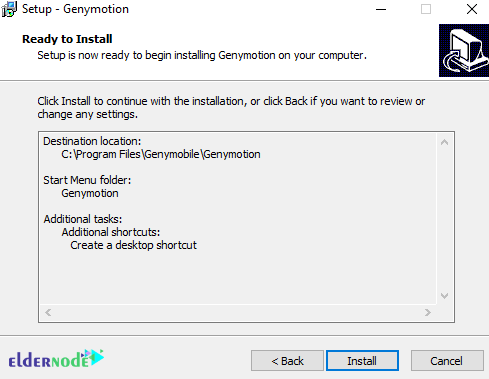
Finally, click Install to start installing Genymotion.
*
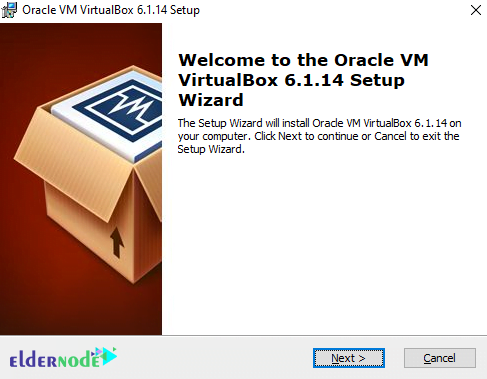
You will see the Oracle VM VirtualBox installation window appear. Click Next to install.
In the next step, after making your desired customization settings, click on Next.
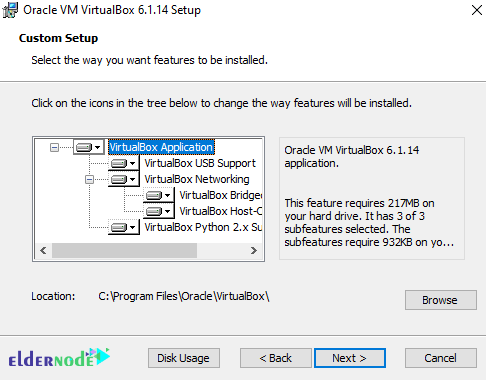
Check the options you want and click Next.
![]()
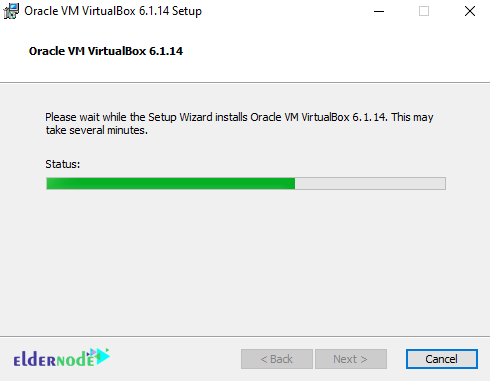
Finally, click Install to start installing Oracle VM VirtualBox.

*
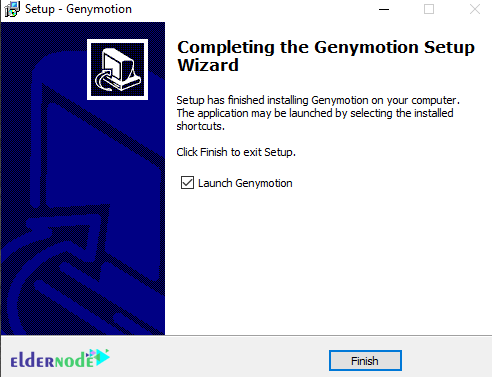
Finally, click on Finish.
By clicking on the Finish, the installation of Genymotion will be completed successfully.
How to Use Genymotion on Windows VPS
After installing Genymotion in the previous section, you can now follow the steps below to start using Genymotion Desktop and run your Android app on your virtual device.
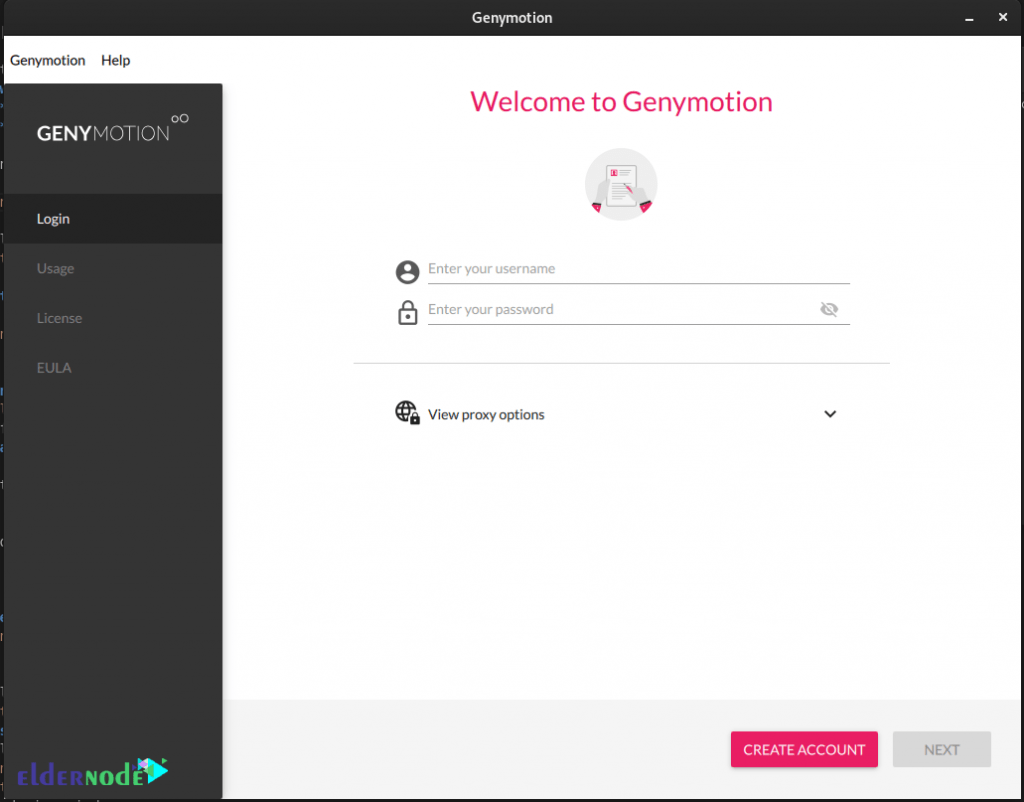
In the first step, you have to click on the Genymotion icon from your application or desktop list. You can also run it from the Start menu by typing Genymotion. In the image below, you can see the main Genymotion environment. You need to enter your account credentials and click NEXT. If you have not created an account on the Genymotion site, in this step, you must click on Create an account to create a new account.
In the next step, you must click on Add a device. Then select a virtual device from the list and click NEXT.
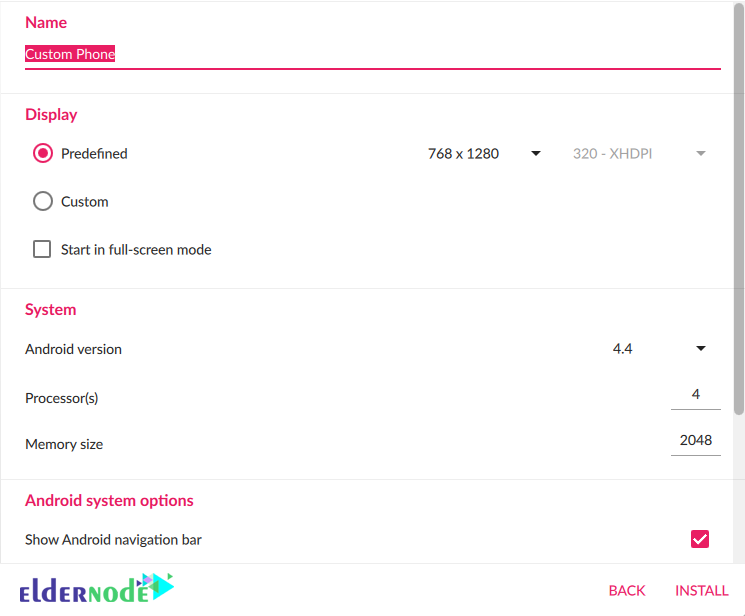
As you can see, a new page opens. You must enter a name on this page and/or adjust the settings of your new virtual machine. Then click on Install.
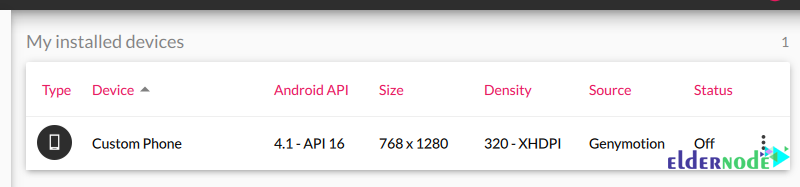
Finally, you will see that your virtual device is loading and will appear in the My Installed Devices section:
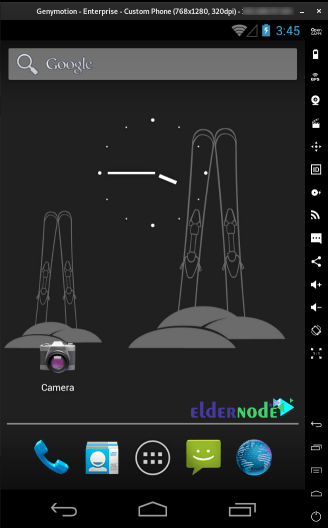
Now it’s time to double-click on your newly created virtual device and select Start.
Conclusion
For any programmer, it is important to test the application and debug it before the final output. GenyMotion is a useful tool for this. In this article, we first introduced you to Genymotion. Then we tried to teach you how to install Genymotion on a Windows VPS server. In the final step, we explained how to use it.