Etcher is a free and open-source utility that is used for writing image files such as .iso and .img files, as well as zipped folders onto storage media to create live SD cards and USB flash driers. It is developed by balena and ay face it is called balenaEtcher too. Etcher is licensed under Apache License 2.0. Etcher is used through a graphical user interface. There is also a command-line interface available that is under active development. In this article, you will learn How To Install Etcher On Debian 10. Before all, you need to have your own Linux VPS initially. Find a suitable package depend on your needs in Eldernode and touch the difference.
To let this tutorial work better, please consider the below Prerequisites:
A non-root user with sudo privileges.
To set up, follow our Initial Setup with Debian 10.
Tutorial Install Etcher On Debian 10 | Debian 9
Etcher is a fantastic USB image writer tool. Also if you provide the EtcherRo, you will have a stand-alone hardware device that allows you to write to multiple cards or USB disks at once, at extreme speeds. You will be able to create bootable USB drives or Sd cards with this easy-to-use media-creation tool. To start the process of installing Etcher on Debian 10, follow the steps below to finish this guide successfully.
Step 1:
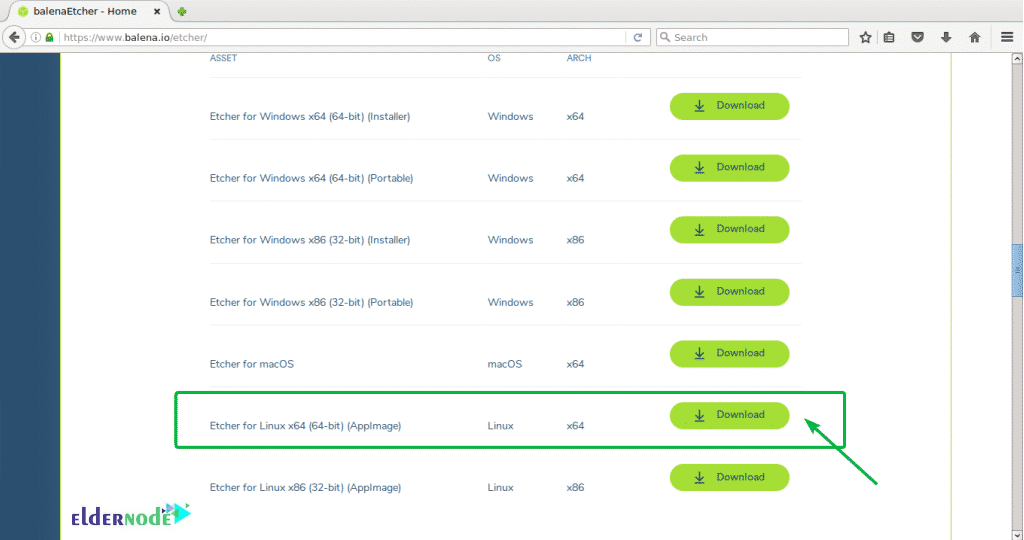
As usual, you are recommended to download Etecher from its official website. When the page Iis opened, click on the download link and download Etcher for Linux.

Then, scroll down and click on the link as shown below:
Step 2:
When you are prompted to save the file, clock on Save File. Then you see the download process will begin.
Step 3:
Once Etcher is downloaded for Linux, you can install it on Linux. So, you need to have zenity or Xdialog, or kdialog package installed on your Linux distribution. While you are installing Etecher on Debian, it is easier to install zenity since it is available in the official package repository of these Linux distributions.
Step 4:
Update the package repository of your Debian machine by running the following command:
sudo apt updateStep 5:
To install zenity use the command below:
sudo apt install zenityAnd to continue, press y and <Enter>. Then, the zenity should be installed.
Step 6:
In this step, you should navigate to the ~/Download directory where you download Etcher with the following command:
cd ~/DownloadsStep 7:
Then, to unzip the file, type:
unzip etcher-electron-1.4.6-linux-x64.zipWhen you extract the zip file, a new AppOmage file would be generated. Now, move the AppImage file to the /opt directory using the following command:
sudo mv etcher-electron-1.4.6-x86_64.AppImage /optStep 8:
Run the Etcher with the following command:
/opt/etcher-electron-1.4.6-x86_64.AppImageStep 9:
When you face the dialog box to install a desktop file, click yes to see it starts.
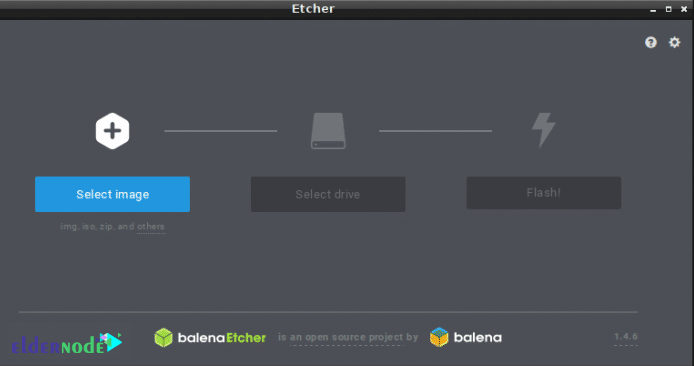
You do not have to start Etcher from the command line anymore, start Etcher from the Application menu.
How to use Etcher on Linux
now, you can now flash microSD cards using Etcher for your Raspberry Pi. Open Etcher and click on Select image.
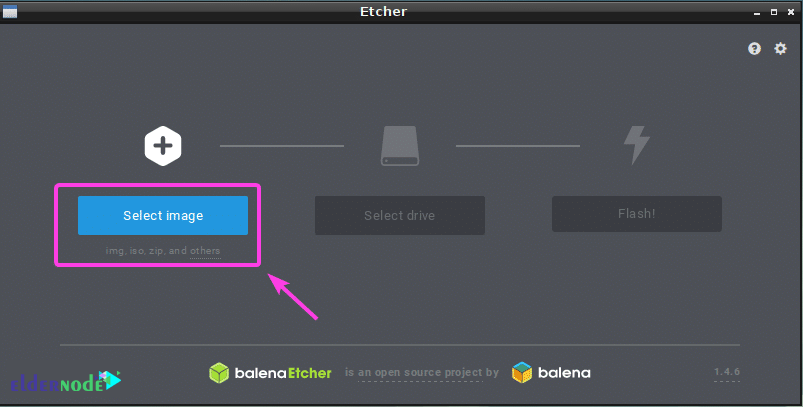
In this way, a file picker will be opened. Then, select the operating system image file that you wish to flash your microSD card with and click on Open.
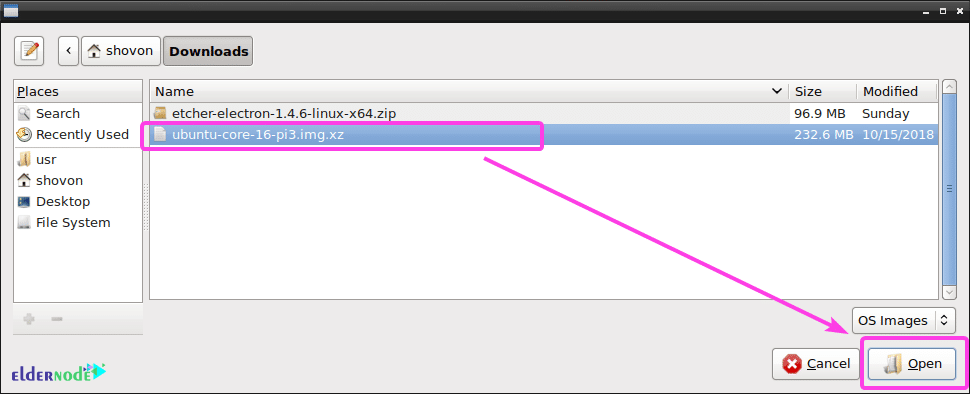
Then, you see the image is selected.
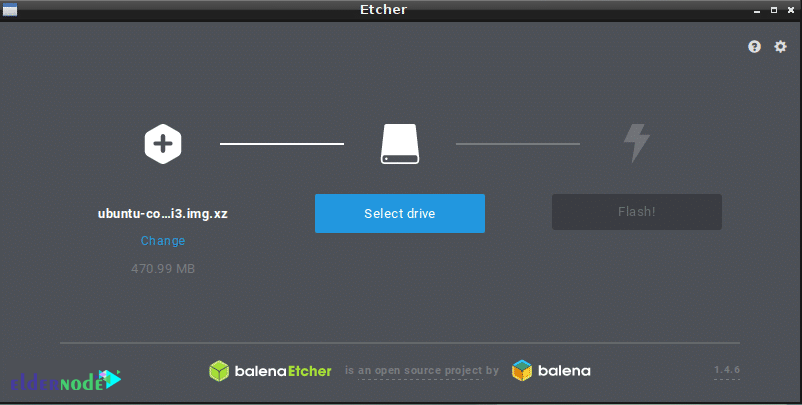
Insert the microSD card or USB storage device that you wish to flash with Etcher. In case you have multiple USB storage devices or microSD cards attached to your computer, you can click on the Change. Next, select the one you wish to flash using Etcher from the list and click on Continue.

You can also flash USB devices or microSD cards at the same time with Etcher, To do this, you must select the ones you need to flash from the list and click on Continue.
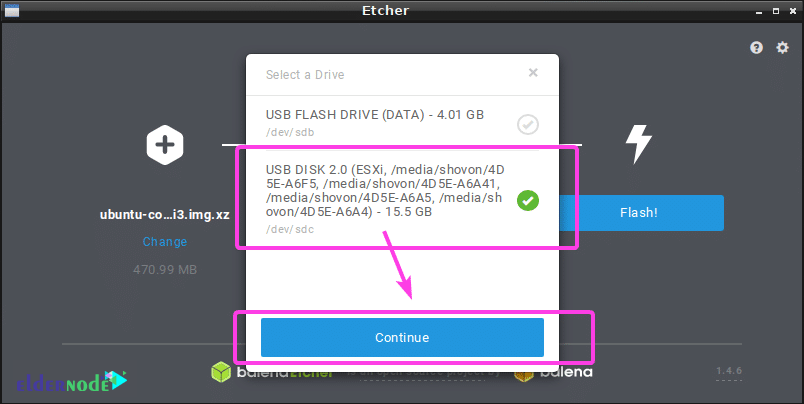
It will be selected as you see below:

The way Etcher could flash the MicroSD cards or USB storage devices are possible to be changed by you. If you wish to change it, click on the gear icon.
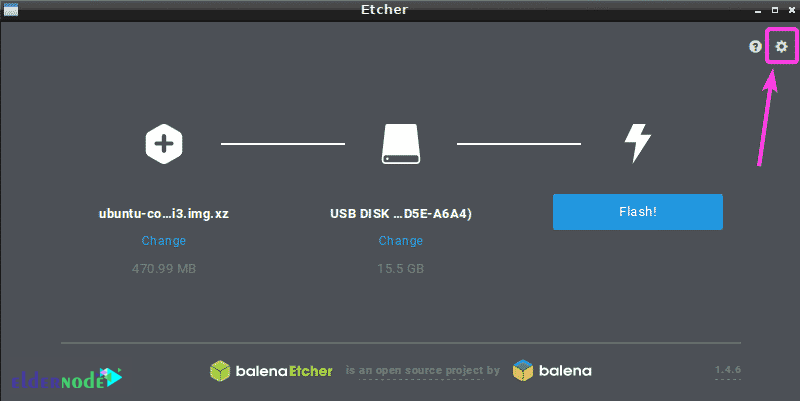
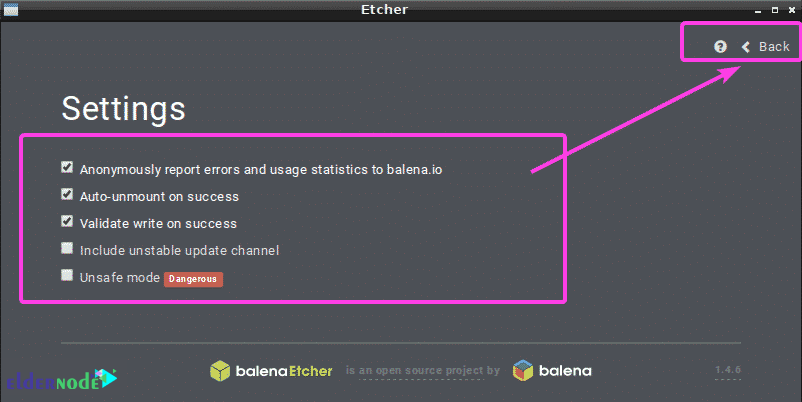
You will be able to use the Etcher setting panel easily. There you can check or uncheck the things you want and click on the Back button. Since the default settings are good you may have nothing to do there.
However, if you uncheck Validate write on success, it will save you a lot of time since it checks if everything is written on the microSD cards or USB storage devices correctly. That puts a lot of stress on your microSD cards or USB devices and takes a lot of time to complete. It up to you, if you do not have a faulty microSD card or USB storage device, unchecking this option would not be harmful.
And finally, click on Flash!

In this way, Etcher will start flashing your microSD card or USB storage device.

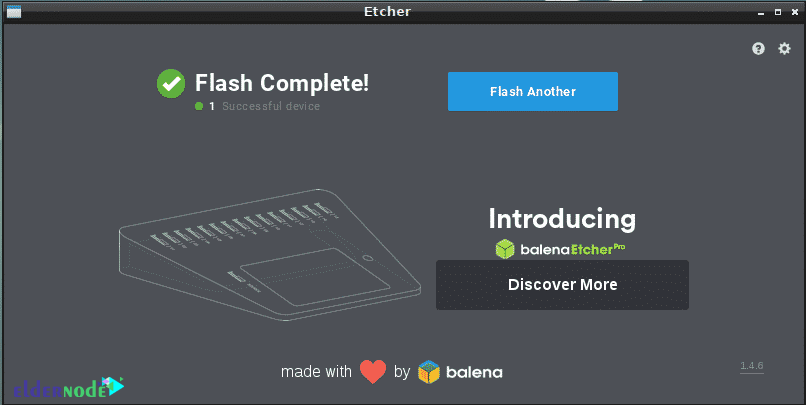
You can see the windows below when the microSD card or the USB storage device is flashed. Then, you can close Etcher and eject your microSD card or USB storage device and use it on your Raspberry Pi device.
Conclusion
In this article, you learned How To Install Etcher On Debian 10. That’s how you install and use Etcher on Linux. This guide could also be used on Ubuntu. It will support persistent storage allowing the live SD card or USB flash drive to be used as a hard drive, as well as support for flashing multiple boot partitions to a single SD card or USB drive.

