Damn Vulnerable Web Application or DVWA for short, as its name suggests, is a web application with many vulnerabilities! In fact, this software was created with the aim of helping security professionals and in order to measure their skills, helping web developers to better understand the process of securing web applications, and finally for professors and students to learn hacking and security topics. In this article, we are going to teach you 1 Way To Install DVWA On CentOS 7. It should be noted that if you want to buy a CentOS VPS server, you can visit the plans provided on the Eldernode website.
Table of Contents
How To Install DVWA On CentOS 7
What is DVWA?
DVWA is a web application that works with security vulnerabilities with different levels of difficulty. It also has a very user-friendly interface that makes it easier for developers. Also, keep in mind that the vulnerabilities are intentionally documented and undocumented in this software to encourage the user to find more vulnerabilities. It should noted that this web application is implementing with PHP/MySQL. DVWA is open source and freely available to everyone, and you can modify and redistribute its source code.
DVWA Features
In this section, we are going to mention some features of DVWA. Using DVWA, it is possible to do the following:
– Brute-Force attack
– Command Injection attack
– CSRF attack
– File Inclusion attacks
– File Upload attacks
– SQL Injection attacks
– Blind SQL Injection attacks.
– Types of XSS attacks 9
– Weak Session IDs attacks
In the continuation of this article from the CentOS training series, accompany us with the training How To Install DVWA On CentOS 7.
Installing DVWA On CentOS 7
After getting acquainted with DVWA in the previous section, now we are going to teach you how to install DVWA on CentOS 7. Before starting DVWA installation, it is necessary to install Apache web server, MariaDB, PHP and other required extensions using the following command:
sudo yum install httpd mariadb-server php php-pdo php-mysqlnd php-cli php-gd git -yNow you need to open the php.ini file using your favorite text editor:
sudo nano /etc/php.iniAfter opening the file, you should now look for the following lines and change and save them as follows:
allow_url_fopen = Onallow_url_include = Ondisplay_errors = OffStart and then enable httpd by running the following commands:
sudo systemctl start httpdsudo systemctl enable httpdIt is also necessary to start and then enable MariaDB using the following commands:
sudo systemctl start mariadbsudo systemctl enable mariadbNow it’s time to create a database and user for DVWA. Run the following command to connect to the database:
mysqlCreate the database using the following command:
MariaDB [(none)]> create database dvwa;You can also create a user by running the following command:
MariaDB [(none)]> grant all on dvwa.* to dvwa@localhost identified by 'password';After creating the database and user, you can now flush the privileges and then exit MariaDB:
MariaDB [(none)]> flush privileges;MariaDB [(none)]> exit;To download DVWA, you can run the following command:
git clone https://github.com/ethicalhack3r/DVWA /var/www/html/In the next step, you need to change the directory to the configuration folder. After doing this, you can copy the sample configuration file:
cd /var/www/html/config/cp config.inc.php.dist config.inc.phpAgain, it is necessary to open and then edit the config file with a text editor, and then specify your database details.
sudo nano /var/www/html/config/config.inc.php$_DVWA[ 'db_server' ] = '127.0.0.1';$_DVWA[ 'db_database' ] = 'dvwa';$_DVWA[ 'db_user' ] = 'dvwa';$_DVWA[ 'db_password' ] = 'password';# You’ll need to generate your own keys at: https://www.google.com/recaptcha/admin
$_DVWA[ 'recaptcha_public_key' ] = 'Your_Public_Key';$_DVWA[ 'recaptcha_private_key' ] = 'Your_Private_Key';Save the configuration file after making changes.
The important thing is that you need to set the appropriate permission and ownership to the Apache root directory at this point. To do this, you can use the following command:
chown -R apache:apache /var/www/htmlFinally, you need to restart Apache and MariaDB by running the following command. By doing this, the changes will be applied:
sudo systemctl restart mariadb httpdHow to Access DVWA
In the previous steps, you met DVWA and learned how to install it. If you have followed the steps of installing DVWA correctly, now it’s time to know how to access it. Open one of your favorite browsers and enter the following address:
http://your-server-ip/setup.php
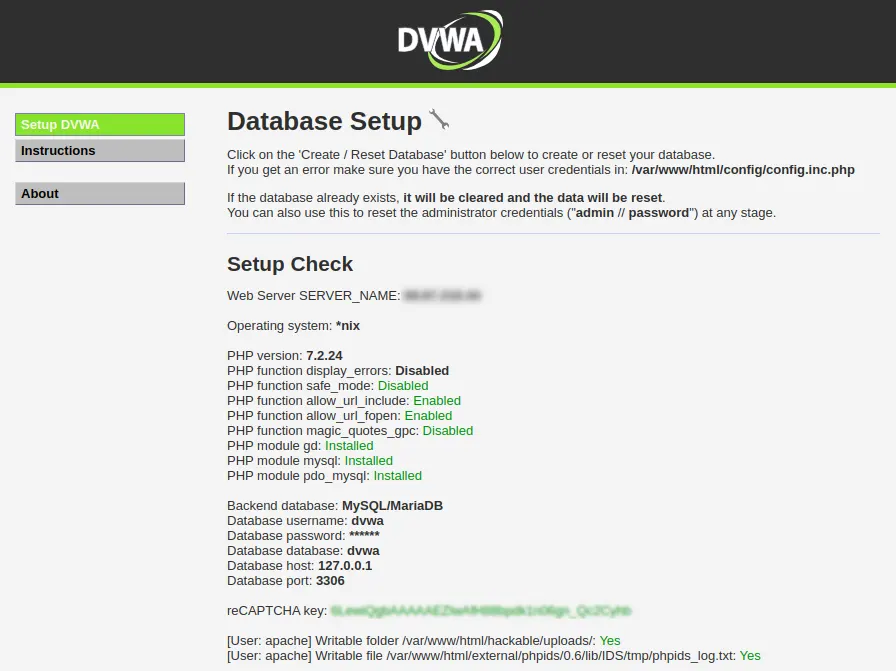
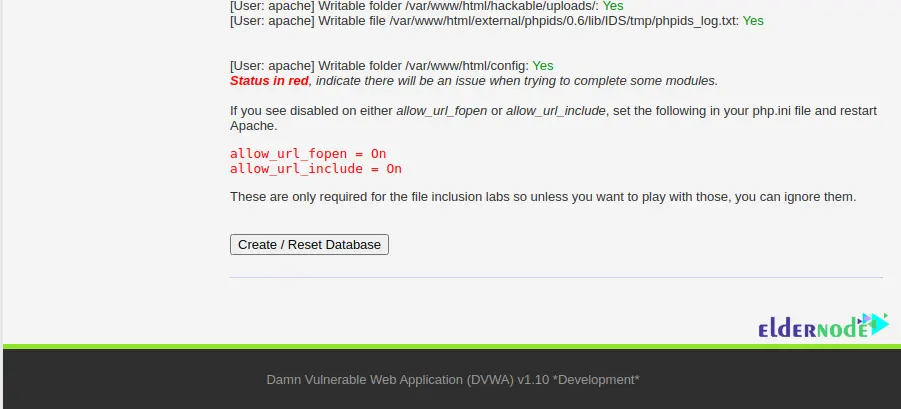
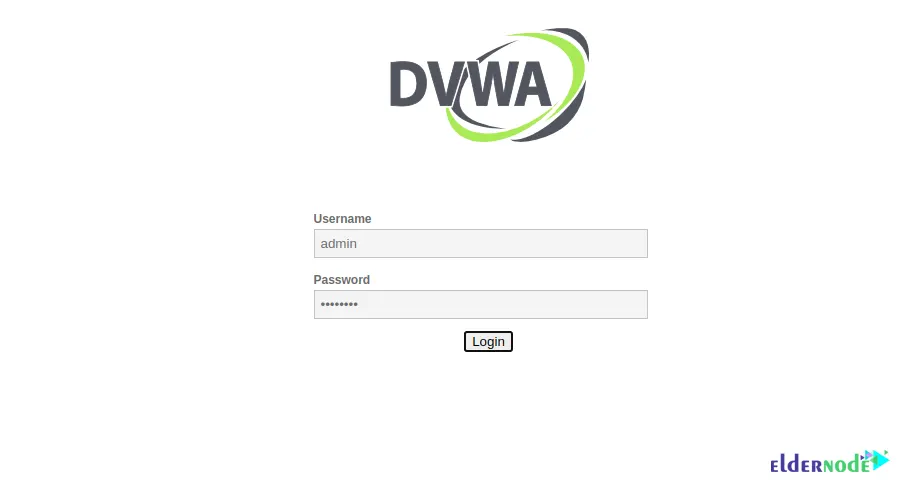
Click on Create/ResetDatabase as shown in the image above. Now you have to enter the username and password you set in the configuration file in this section and click on Login:
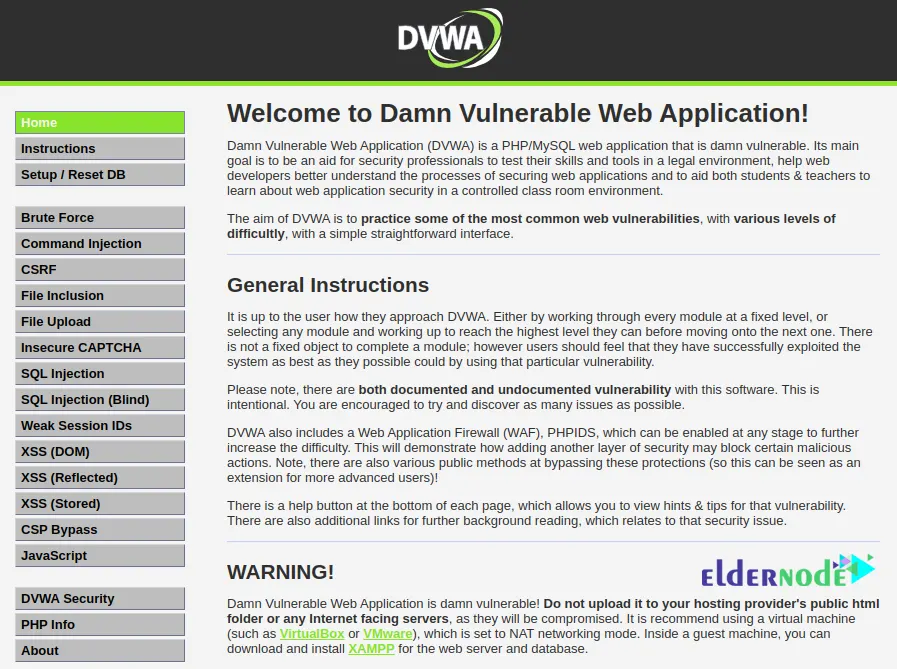
In the image below, you can see the DVWA dashboard:
Conclusion
As mentioned in this tutorial, DVWA is a web application with various vulnerabilities that helps people working in the field of hacking and security to test their skills and learn new hacking and security tips. In this article, we tried to teach you 1 Way To Install DVWA On CentOS 7. If you have any questions, you can share them with us in the comments section.
![Dedicated Server vs VPS [Performance, Quality and Price]](https://blog.eldernode.com/wp-content/uploads/2022/05/Dedicated-Server-vs-VPS-Performance-Quality-and-Price-300x164.webp)