The Django Library is a Python application development platform (or framework) used to build and “maintain” quality web applications. Django Library simplifies the web development process by eliminating duplicate tasks, and is cost-effective over time. In this article, we are going to teach you step by step how to Install Django on Ubuntu 22.04. You can visit the packages available in Eldernode if you wish to purchase an Ubuntu VPS server.
Table of Contents
How to Setup Django on Ubuntu 22.04
Introduction to Django and its Features
Django is a high-level framework (or platform) for web programming in Python that enables “rapid development” and pragmatic design of web applications for programmers and developers. The Django library allows users to generate far better applications faster with less coding.
Among the most important principles of Django library design philosophy, the following can be mentioned:
-> Relative independence of the various components of this platform
-> Less coding
-> Do not Repeat Yourself | DRY principle
-> Rapid development
->Clean design
Among the advantages of using the Django library, the following can be mentioned:
-> Support for Object-Relational Mapping (ORM)
-> Multilingual Support
-> Support for various web development platforms and frameworks
-> Management “Graphical User Interface | GUI”
-> Development Environment
In the continuation of this article, join us to teach you How to Install Django on Ubuntu 22.04.
Prerequisites for Install Django on Ubuntu 22.04
– non-root user with sudo privileges
– To set up, follow our Initial Setup with Ubuntu 22.04
Installing Django on Ubuntu 22.04
There are two ways to Install Django on Ubuntu 22.04:
1. Install from Packages
2. Install with pip
In the following, we will explain each of the above methods.
How to Install Django from Packages on Ubuntu 22.04
In this way, you can install Django through the packages in the Ubuntu 22.04 repository. To do this, you need to update these packages in the first step using the following command:
sudo apt updateIn the next step, it is recommended that you use the following command to check which version of Python is installed on your system:
python3 -VFinally, you can easily install Django by typing the following command:
sudo apt install python3-djangoExecute the following command to ensure the successful installation of Django on Ubuntu 22.04:
django-admin --versionHow to Install Django with PIP on Ubuntu 22.04
In this method, we are going to show you step by step how to Install Django with pip in a Virtual Environment on Ubuntu 22.04. To do this, just follow the steps below carefully.
As before, in the first step, you must use the following commands to update the packages in the Ubuntu repository, and then check the version of Python that you have installed:
sudo apt updatepython3 -VNow it’s time to install pip and venv using the following command:
sudo apt install python3-pip python3-venvOnce you have successfully completed the above steps, you can now start a new project directory using the following command:
mkdir ~/newprojectcd ~/newprojectNow you need to create a virtual environment in the project directory using the following command:
python3 -m venv my_envNote that in the above command you can name your virtual environment instead of my_env.
You must then install and activate the packages in an isolated environment using the following command:
source my_env/bin/activateNote that you can use pip to install Django in your new environment:
pip install djangoFinally, you can verify the installation of Django by executing the following command:
django-admin --versionYou should keep in mind that to exit your virtual environment, you can use the following command:
deactivateWhenever you want to work on your project, you can use the following commands again:
cd ~/newprojectsource my_env/bin/activateHow to Create a Sample Project
After you have successfully installed Django, in this section we are going to teach you how to create a project. The first step is to create a directory for your project using the following commands:
mkdir ~/django-testcd ~/django-testAfter successfully creating a directory, you can now create a virtual environment by runing the following command and then activate it:
python3 -m venv my_envsource my_env/bin/activateInstall Django using the following command:
pip install djangoWe now get to the project creation stage and you can use the following command to do this. It should be noted that the name of our project in this example is eldernodeproject and you can replace it with your own name. The important thing is to avoid having nested directories using the following command:
django-admin startproject eldernodeproject.In the next step, you can use the following command to migrate the database:
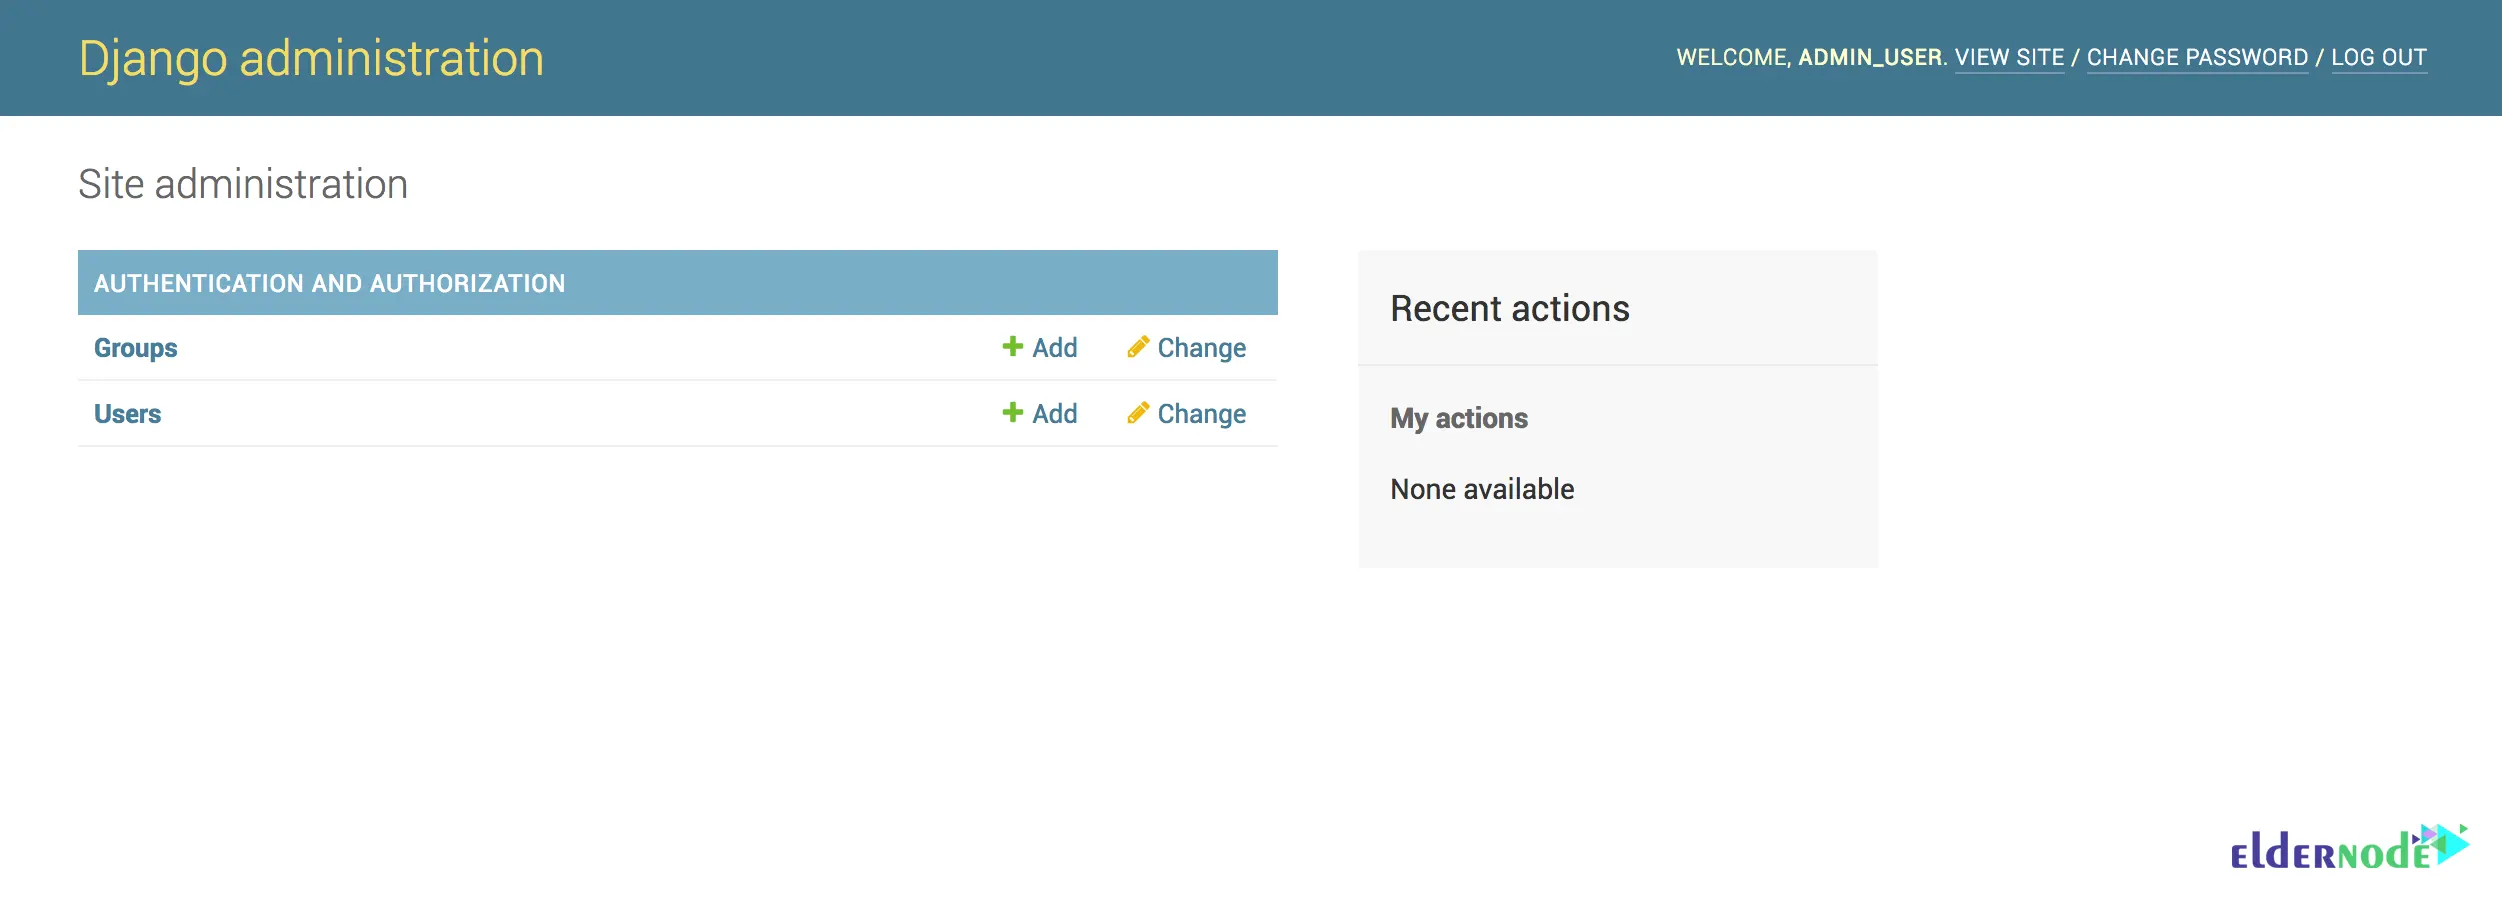
python manage.py migrateCreate an administrative user using the following command. Finally, you will be asked for a username, an email address and a password for the user, which you need to complete.
python manage.py createsuperuserThe key is to test one of the instructions in Django settings to test your apps. So you have to run the settings file using the following command:
nano ~/django-test/eldernodeproject/settings.pyOnce you have run the configuration file you should now look for the ALLOWED_HOSTS command inside it. As you can see in the following command, you need to list the IP addresses or domain names associated with the Django server.
Note: If you want to request for the whole domain and subdomains, you need to add a dot to the beginning of the command input. After making the required changes, save the file and exit it.
ALLOWED_HOSTS = ['your_server_ip_or_domain', 'your_second_ip_or_domain', . . .]How to Test the Django Development Server on Ubuntu 22.04
We recommend that you first open the appropriate port in the firewall using the following command:
sudo ufw allow 8000Then you can easily run the development server by running the following command:
python manage.py runserver your_server_ip:8000You can now run the following address in your browser:
http://your_server_ip:8000/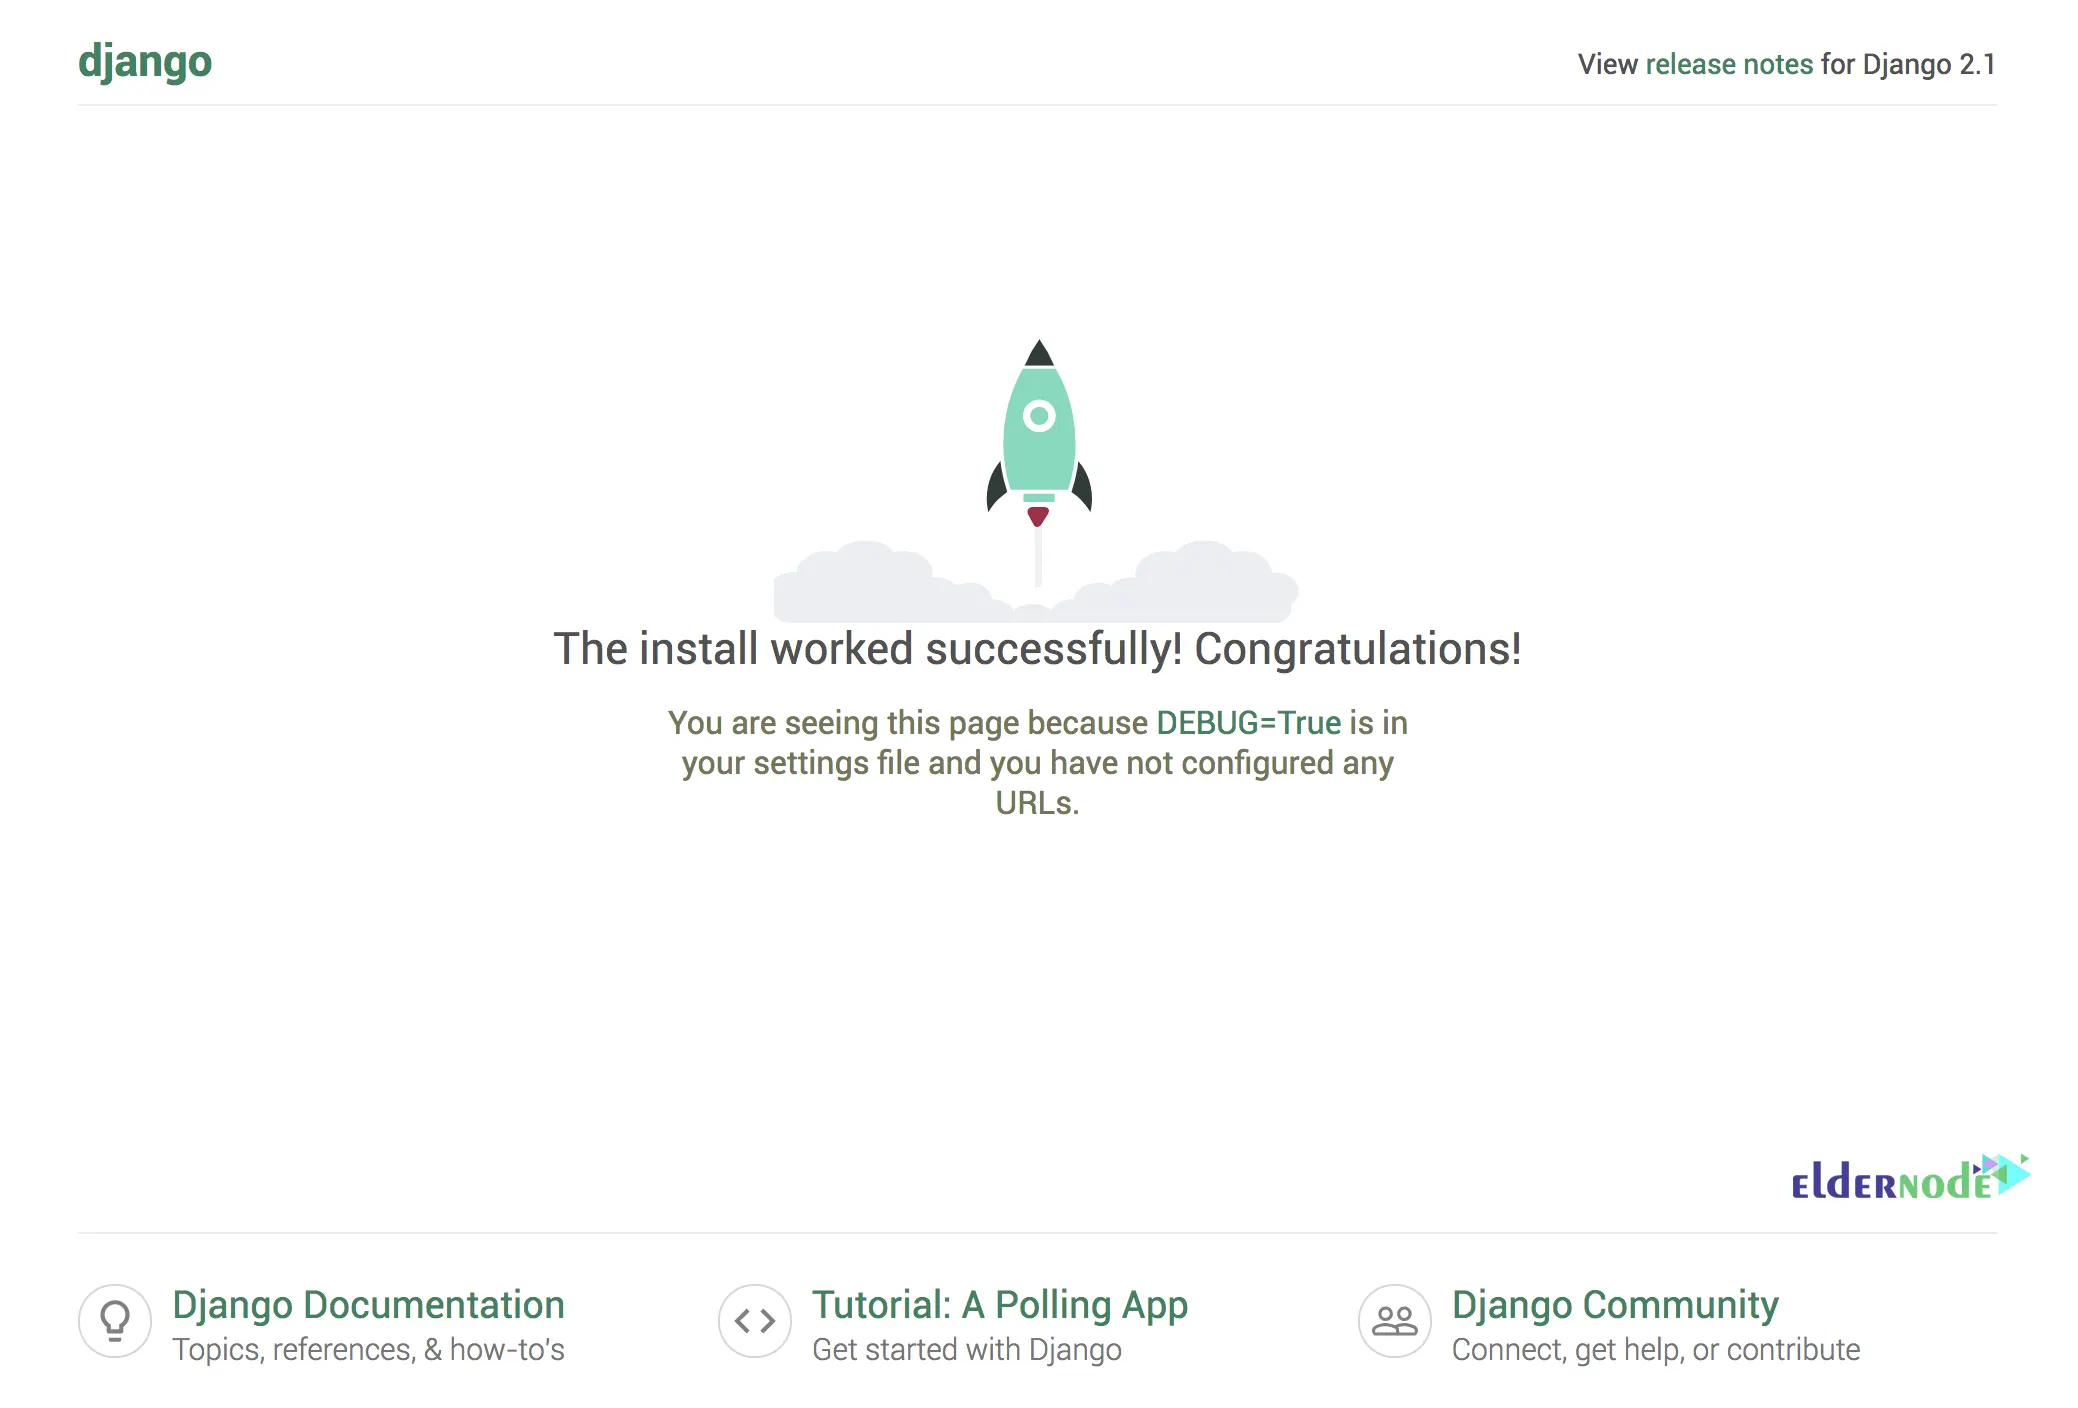
It should also be noted that you can use the following command to access the admin interface:
http://your_server_ip:8000/admin/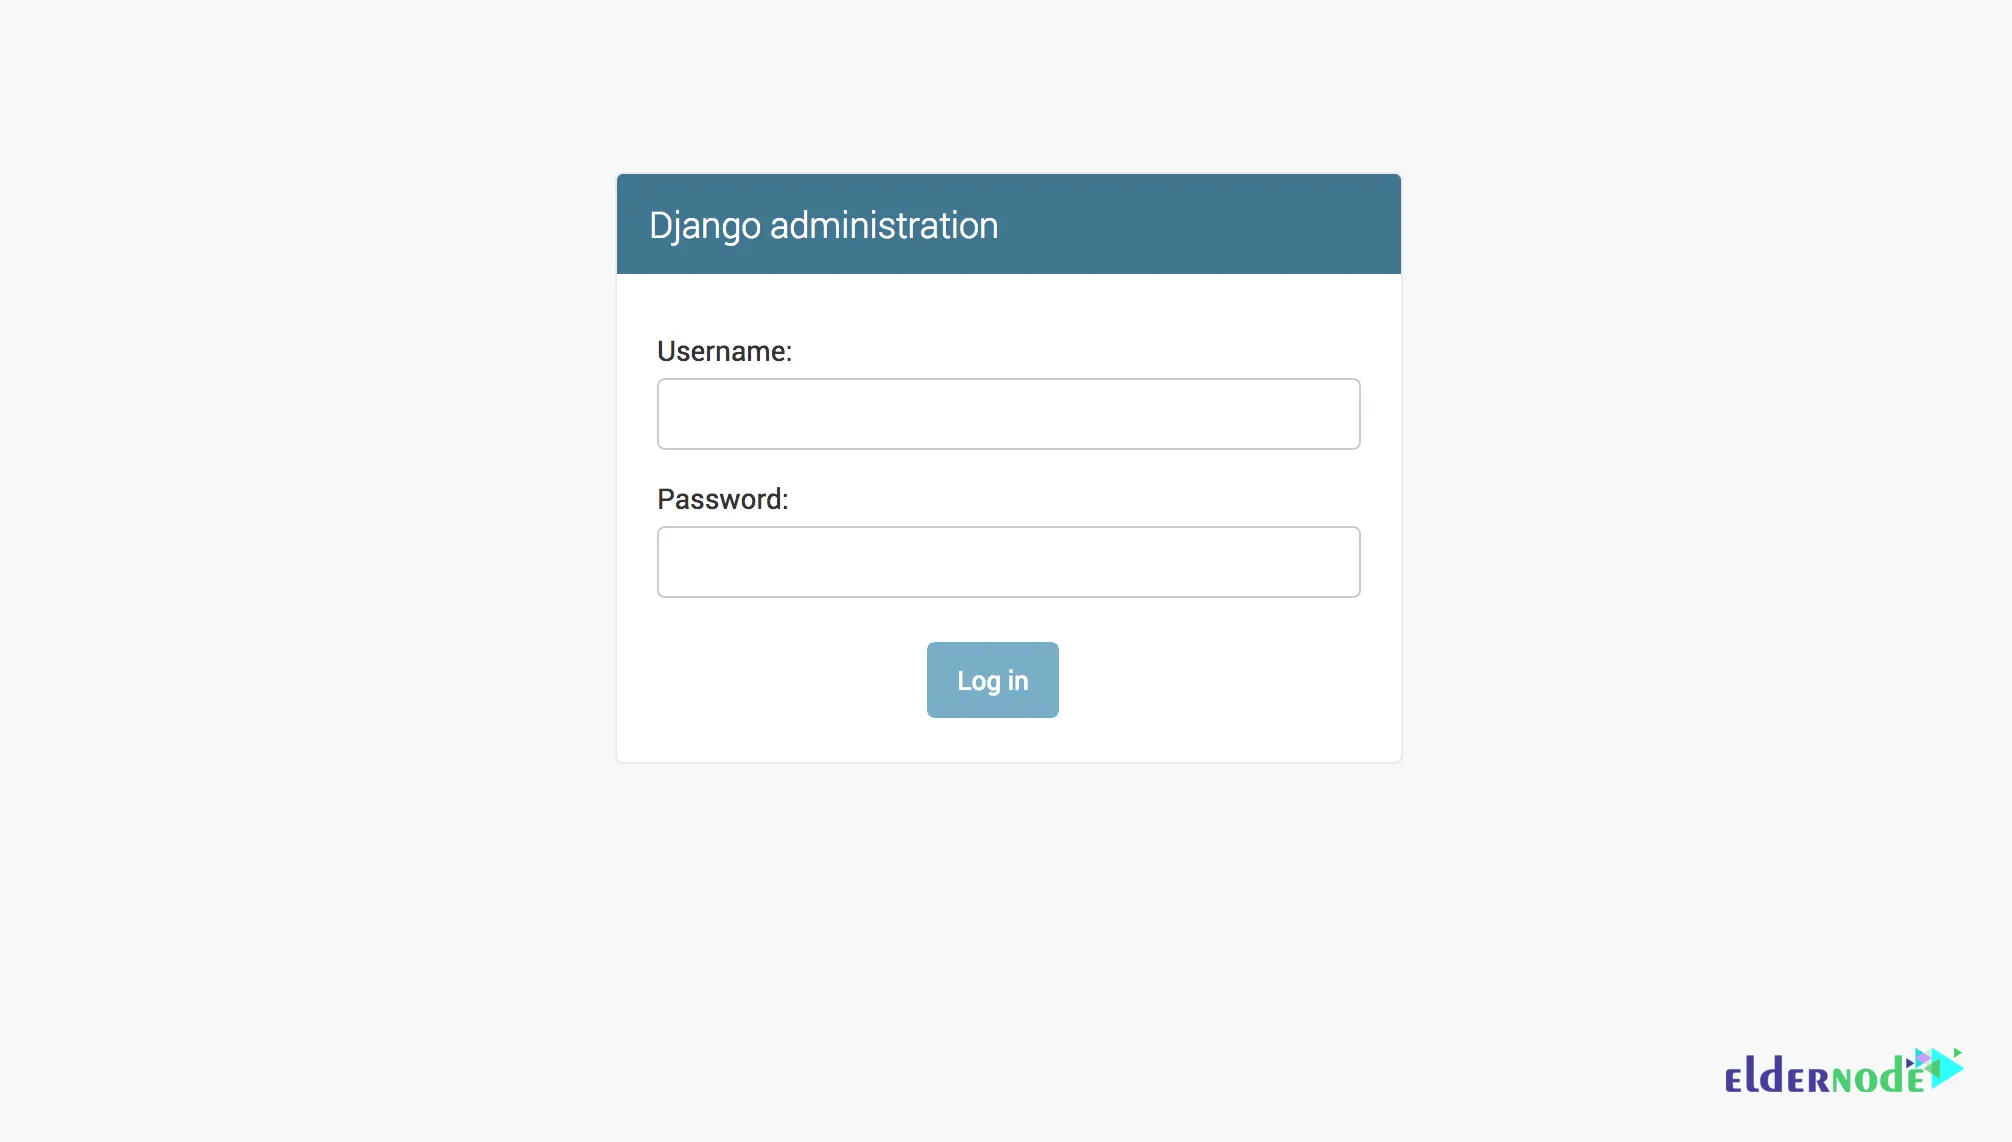
*
Conclusion
As mentioned earlier, the Django Library is a platform for developing web applications in the Python language and, like most modern platforms, supports MVC architecture. In this article, we tried to teach you step by step how to Install Django on Ubuntu 22.04 after introducing Django and its features and benefits.
![How To Install and Use AlmaLinux 8.4 [Complete]](https://blog.eldernode.com/wp-content/uploads/2021/09/How-To-Install-and-Use-AlmaLinux-8.4-Complete-300x164.png)