ApisCP is an open-source 100% self-hosted hosting panel and platform that began in 2002 as a panel for Apis Networks. ApisCP runs agentless and is License-free. It is able to configure itself optimally at install and you will face a simple design. A variety of plug-and-play DNS integrations are being supported by ApisCP. In addition, an adaptive firewall, enormous API, and limit resources are some of its features and reasons for its popularity. Due to resource permission, a single ApisCP server can manage sites. ApisCP has provided one-click installation and automatic updates for WordPress, Discourse, Ghost, Drupal, and Laravel. In this article, you will learn How To Install ApisCP Control Panel On Centos 7. Purchase your own CentOS VPS and get support, high quality, and the best price at the same time from Eldernode.
To let this tutorial work better, please consider the below Prerequisites:
_ A non-root user with Sudo privileges.
_ 1 CPU, 2 GB RAM, and 20 GB storage.
_ RHEL/CentOS 7.4 or greater.
Table of Contents
Tutorial Install ApisCP Control Panel On Centos 7
It is fair to say that ApisCP is built for all components with high speed since ApicCP’s backend can process over 13,000 privileged commands per second. It is known as a new standard in modern hosting. Join us with this article to review ApisCP installation on CentOS 7.
How To Install ApisCP On CentOS 7 | Centos 8
You may know about bootstrapping. A self-start process that is supposed to continue without external input. You can use Bootstrapper acts as an idempotent tool to update and correct your server. While you are using Bootstrapper, you can make sure that it will help you to make your server work if you lose things since it is designed to provide the minimal set of enforcing changes. Bootstrapping is performed during installation and during integrity checks, run monthly. To begin, run the stub script. You can use the command below to use ApisCP with a 30-day license.
curl https://raw.githubusercontent.com/apisnetworks/apnscp-bootstrapper/master/bootstrap.sh | bashBut if you have purchased a license, it would be provided at install by providing the token:
curl https://raw.githubusercontent.com/apisnetworks/apnscp-bootstrapper/master/bootstrap.sh | bash -s - <api token>Depending on features and provider capacity, Bootstrapping will take between 30 to 120 minutes. If it takes around 30 minutes, it indicates high performant hardware providers. However, performance can change as client densities change.
You will get one last chance to customize installation before the bootstrap utility kicks off stage 2 (platform provisioning). Also, you will be allowed to configure SSL immediately in an optional step. These values can be changed later with scope:set in the panel.
Note: All settings may change after installation but it does not apply to MariaDB and PostgreSQL.
Platform provisioning to install ApisCP
Let’s go on with stage 2. You will face one or more reboots during this section. But ApisCP automatically resumes installation on reboot.

You can follow along using the command below:
tail -f /root/apnscp-bootstrapper.logWhen Bootstrapper logs a similar line, installation is completed.
2021-01-16 03:46:28,096 p=1108 u=root n=ansible | PLAY RECAP *********************************************************************2021-01-16 03:46:28,096 p=1108 u=root n=ansible | localhost : ok=1815 changed=722 unreachable=0 failed=0 skipped=553 rescued=1 ignored=15To make sure all is set, check to view failed=0. Load a new shell with the correct ApisCP environment after installation.
exec $SHELL -iWhat to do after installing ApisCP on CentOS
After ApisCP installation, domains that have a properly qualified FQDN will receive the notification. If not, the admin username/password/contact can be reconfiguring at any time using ApisCP’s API helper.
cpcmd auth:change-username 'NEWUSER'cpcmd auth:change-password 'NEWPASSWORD'cpcmd common:set-email '[email protected]'Set all 3 to allow you to log in to your new panel. Leave the domain field blank when you log in as admin.
How to Use ApisCP on CentOS 7
So far, you have successfully completed the above steps. Please join us in the next steps to teach you how to use ApisCP on CentOS.
How to add your first domain within ApisCP
You will visit Nexus when you are logging into the panel as admin. Services can reconfigure within Nexus or from the command-line.
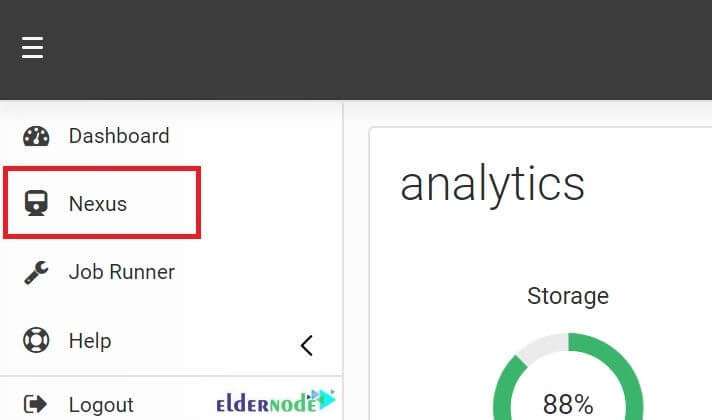
AddDomain creates a site from the command-line. Multiple parameters can provide to alter the services assigned to an account. The nexus within the Administrative panel is a frontend for this utility. admin_add_site is the backend API call for this command-line utility.
AddDomain -c siteinfo,domain=mydomain.com -c siteinfo,admin_user=myadminHow to Edit Domains within ApisCP
You can edit domains if you click the SELECT button in Nexus. You will use EditDomain to change the account state without removing it. Also, it is possible to toggle services and make changes in-place in a non-destructive manner.
Rename domain A simple, common situation is to alter the primary domain of an account. Simply changing the domain attribute under the siteinfo service will accomplish this.
EditDomain -c siteinfo,domain=newdomain.com mydomain.comAlso, you can change the password to do another common operation.
EditDomain -c auth,tpasswd=newpasswd site12How to Log into services in ApisCP
To log into all services, ApisCP uses username@domain notation. In this way, you can share the same username without conflict for multiple domains. The only restriction is that the primary account username must be unique. But if you need to log into the control panel or access MySQL remotely use @ or # to join the username + domain, the domain is required.
Example:
when logging into SSH as user Marilyn on eldernode.com, all are acceptable variations of ssh:
ssh -l [email protected] eldernode.comssh [email protected]@eldernode.comssh -l [email protected] eldernode.comssh [email protected]@eldernode.comTo make it more simple, a file called config in ~/.ssh could create using the following lines.
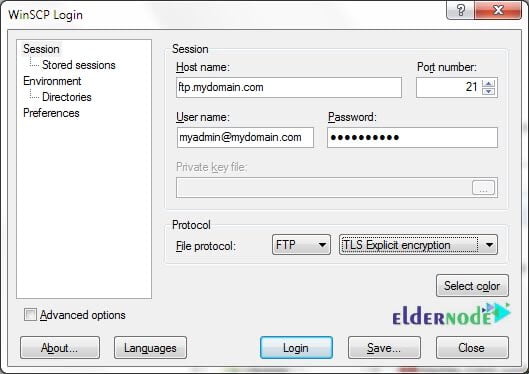
Host bar HostName eldernode.com User [email protected]Therefore, ssh bar will login to ”eldernode.com” using the login “Marilyn#eldernode.com”. Consider the username of myadmin + domain mydomain.com for FTP. The following configuration will allow access to the FTP server using explicit SSL. (FTPES).
Note: SFTP is supported if SSH is enabled for the account
In case of failure, Bootstrapper will continuously retry. It also pulls down updated code from ApisCP’s repository before each attempt. You can disable the bootstrapper-resume service if you wish to stop the automatic retry.
systemctl disable bootstrapper-resumecd /usr/local/apnscp/resources/playbooksansible-playbook bootstrap.ymlHow to update ApisCP on CentOS
You can configure ApisCP both for automatically and manually updating. ApisCP updates itself every night using the following command:
cpcmd scope:set cp.nightly-updates 1Also, ApisCP can update manually with upcp. Playbooks can run unconditionally using upcp -b or upcp -a if resources/playbooks have changed since the last update.
Conclusion
In this article, you learned How To Install ApisCP Control Panel On Centos 7. ApisCP uses a variety of services managed directly by ApisCP with minimal configuration. In case you are interested in learning more, find our related article on 4 Free Control Panel Hosting For Linux Server in 2021.