Remote access to virtual servers is one of the requirements for their use, and without it, control and management of virtual servers will be difficult. Therefore, depending on what operating system you are using, as well as what operating system the destination virtual server has, there are several ways to connect remotely to your virtual server. This article teaches you how to access Linux VPS from windows and How to connect from Windows to Windows VPS server using RDP.
Table of Contents
How to access Linux VPS from windows
Software corresponding to the relevant protocol is used to communicate. These tools allow you to remotely manage your vps servers, transfer files, and perform any action you can physically perform remotely. This article teaches you how to use the Putty and RDP to communicate with a Linux vps server.
Prerequisites to access Linux VPS from windows
Before you start communicating remotely with a vps server, you need to provide a few basic requirements:
1. The vps server must be turned on, and connected to the Internet.
2. The required software must be installed on the source computer (the required software will be introduced below).
3. IP address (your vps server) must be available.
4. The firewall settings should be such that the desired port can be accessed.
How to connect from Windows to Linux vps server using PuTTY
If you are running a Windows-based operating system, you will need to install software such as user-side SSH to connect to your VPS server. In this tutorial we will use PuTTY software.
PuTTY is an open source terminal that we use to access the vps server. PuTTY has several components. But the two components we are dealing with are PuTTY and PuTTYGen. We use PuTTY to access the vps server and PuttyGen to create SSH keys. The steps for making SSH keys by PuTTY are as follows:
1. Download and install Putty
Go to the PuTTY website and in the Package files section at the top of the page, download the msi file and install it on your system.
Then, after installing the programs, you will be able to run the PuTTYgen program through the Start menu or the Windows key and type the word puttygen.
The program to create the key is similar to the following image:
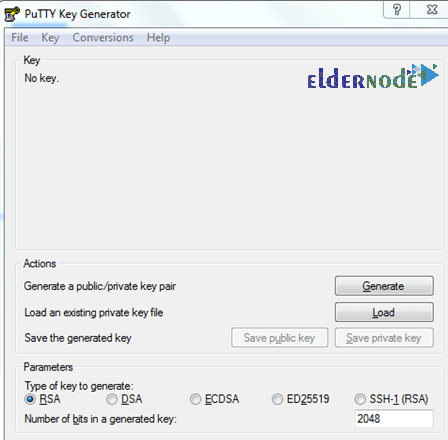
2. Create a Public Key
You can change the desired parameters to your liking. The default settings are often considered optimal.
After applying the changes, click on the Generate option.
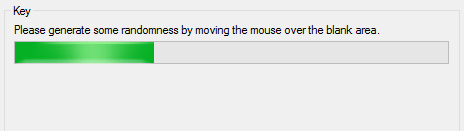
You may be asked to generate a random key by moving the mouse over an empty area.
The public key will now be visible to you. You can copy it to your servers or leading account.
3. Create a private key
Now click on the Save private key option and select a safe space to store it. It should be noted that you can change the name of your key to your liking. The ppk plugin will also be added automatically. You can now connect to your vps servers in the PuTTY application using the built-in private key.
If you created your public key in the leading panel when building a virtual machine, you no longer need to create a public key with the PuTTY program. Load only the downloaded public key with the suffix .pem in PuTTYGen and then click Save Private Key. This will save your private key with the .ppk extension.
Note: PuTTY does not recognize the .pem extension.
4. Working with public key in PuTTY format
You now have the key to login to your vps server. You can also click save public key. Note that the PuTTYGen format is incompatible with the authorized_keys files used to authenticate the SSH key on OpenSSH Linux servers when saving the public key.
After saving the private key, if you want to see the public key in its correct format, click on the Load option. Then navigate to the private key and open it. After these steps, the public key will be displayed again.
Steps to use PuTTY to connect to a Linux vps server
To connect to a vps server, you must first introduce the private key of your vps server to the PuTTY software. For this purpose, after opening the PuTTY software:
– Go to Connection → SSH → Auth.
– Click the Browse… key under Authentication parameters / Private key file for authentication.
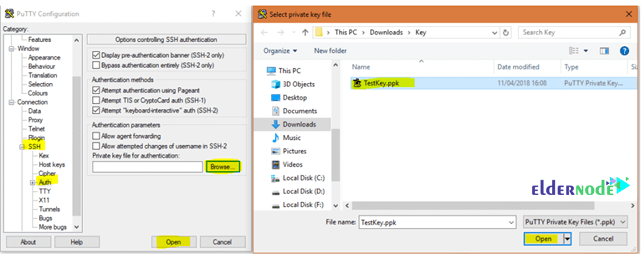
Finally, find your private key file and click the Open key.
Then do the following to connect to the vps server:
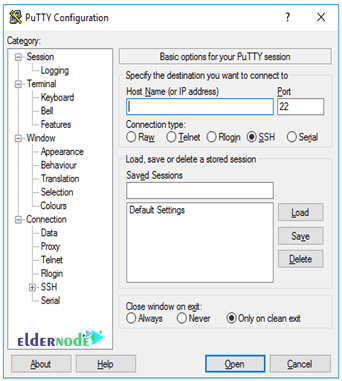
In the (Session → Host Name or IP address) field, enter the username and IP address of your virtual server as username@your_public_ip. (For example [email protected])
The default port is connection number 22, which you can change if needed.
Make sure the connection type is set to SSH.
Finally, press the Open key to connect to the vps server.
How to connect from Windows to Windows VPS server using RDP
RDP, or Remote Desktop Protocol, is a protocol designed and developed by Microsoft to connect, control, and manage Windows-based machines remotely.
Unlike the SSH protocol, RDP user-side software provides a graphical user interface. Therefore, using Remote Desktop services allows users and server administrators to access and manage the destination machine more easily. In contrast, one of the disadvantages of this protocol over the SSH protocol is the lack of encryption, which reduces its security. Because the relevant port is publicly available on the Internet.
There are automated scripts that constantly monitor various ports of global public IPs and look for hotspots. Therefore, using a firewall and choosing a strong and appropriate password has a great impact on the security of this protocol.
How does the RDP protocol work?
This protocol, like ssh, uses a user / server architecture. By default, the server of this protocol, which is active on your virtual server, uses port 3389 and waits for answers to requests on this port. When you want to connect to a Windows server, you will need a username and public IP address of that server. Once you have access to the server, you can manage it, transfer files between two computers, and perform all the operations remotely.
No matter what version of Windows you are using, you can use the RDP user-side software installed on it by default to connect to your Windows VPS server.
Also, if you want to connect to your Windows vps server for the first time, you need to set the vps server password inside it. for this purpose:
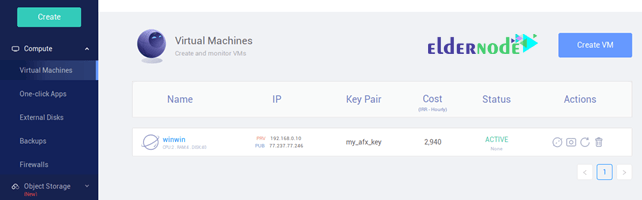
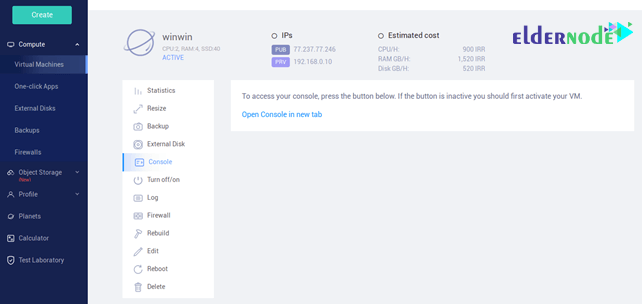
– After creating a vps server in the panel, click on it to open its admin page.
– In the Console section, click on Open Console in new tab.
– In the upper-right corner of the screen, click the send CtrlAltDel key.
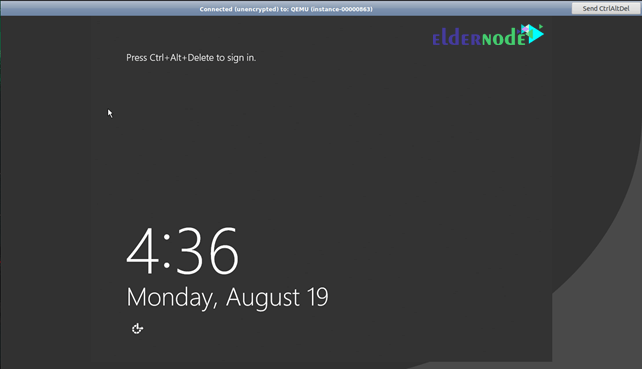
– Click on the Administrator username.
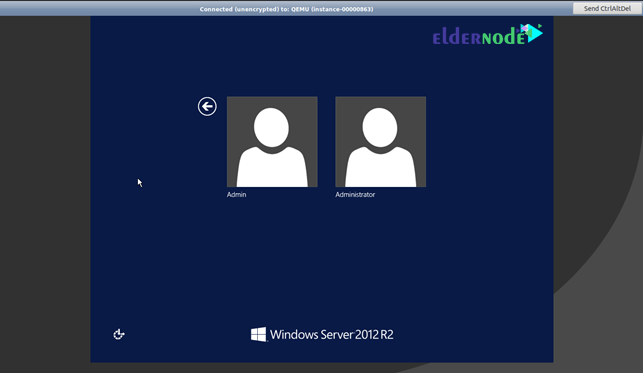
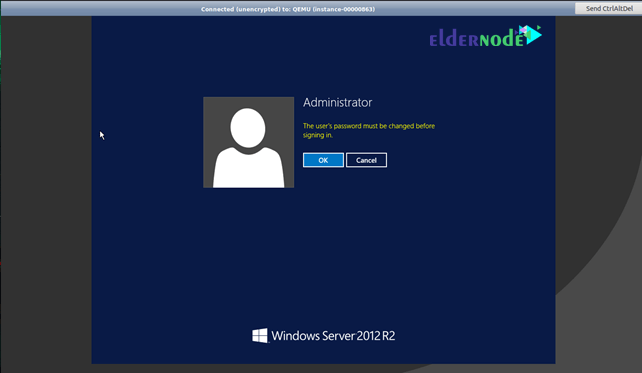
– A message prompting to change the password for this username will appear, click OK to continue.
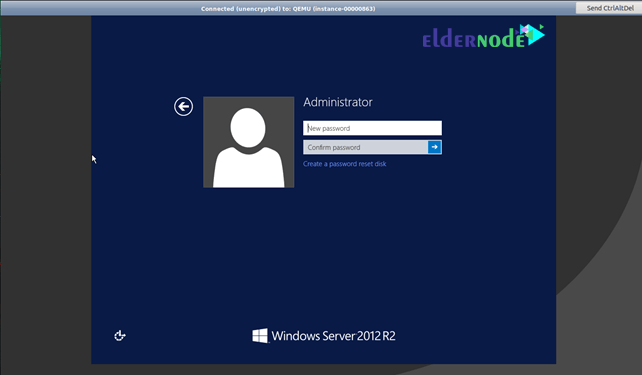
– Enter the new password exactly in both boxes.
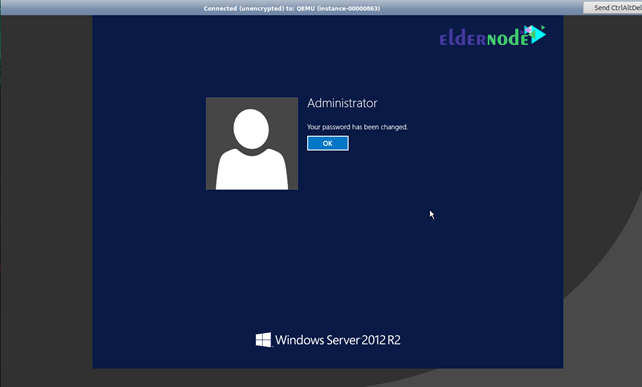
– The password entered was set.
How to use Remote Desktop Connection software
Using Remote Desktop Client software is not very complicated and does not require any settings.
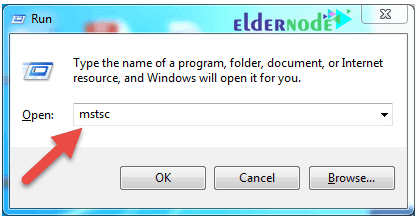
Step 1: Run the Remote Desktop Connection software
There are several ways to run this software on your system:
From the Start menu, type Remote Desktop Connection and click on it.

*
Press the Windows Logo + R key combination simultaneously to open the Run window. Then type mstsc in the open box and press Enter.
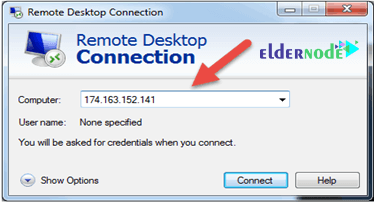
Step 2: Enter the public IP address of the vps server
Once the Remote Desktop Connection software is running, a window will open allowing you to enter the domain address or Public IP of your vps server.
In the Computer field, enter the IP address of your vps server and click Connect.
Note: If you have already connected to the server and changed the default port of the protocol, in this section you must enter the relevant port as IP: Port.
For example: 174. 163.152.141: 6200
Step 3: Enter your username and password to complete the login process
After clicking Connect in the previous step, another window will be displayed as below to enter the corresponding username and password.
As explained earlier, by default the Administrator username and password set via the console in the user panel will be used at this stage.
After entering this information, click OK and finally click Yes.
Note that you can connect to the vps server at any one time by having a username and password of only one user, and if another user connects with the same information, the previous connections will be disconnected.
Conclusion
We tried to fully learn how to connect to a Linux vps server from Windows using Putty and also how to connect to a Windows vps server from Windows using RDP.


How to access the Linux server via SSH?
1. First, download the free Putty software to connect to SSH via Windows.
2. Open the application. Enter the IP address in the Host Name or IP Address box and the port to connect to SSH (port 22 is the default) in the Port box and enter the software terminal by clicking open.
3. The system will ask you for a username (usually root). After entering the username, press the Enter key. You will then be asked for a password that you have connected to the server by typing the password and pressing the Enter key, and you can control your Linux server remotely.
How to fix the IP block in whm?
To fix the ip block in your whm, you must first type “my ip” in the browser so that Google ip notifies your system. Then select config server security via whm in the menu on the left side of the plugins section. Finally, in the allow ip section, Allow the desired IP.
How to solve the attack problem on a dedicated server?
In 90% of cases this is from the mssecsvc file. This malware is not visible in the processes section and can only be seen with its network monitor (with the command netstat -an -b).
This virus is the cause of the dangerous Wannacry virus. To prevent Wannacry viruses from entering, do the following:
– Update Windows operating systems
– Backup of all important and vital system information
– Update antivirus and inform users to prevent the execution of files
– Attach anonymous emails
– Disable SMB protocol in Windows operating system
– Close ports 445 and 131 through the firewall
How to delete files or backups taken by the control panel?
For this, you should refer to your backup settings. On this page, you can configure your backup settings and specify how many nights the backup can be kept for you.
To delete backups, you can also log in to your ssh server and go to the folder designated to save the backup server and delete your previous backups if not needed.
What to do to install the graphical interface on a Linux server?
You must enter the command to install the desired graphical interface for your operating system version. For example, the following GUI gnome installation instructions for centos 7 are listed:
Command:
sudo yum groups install "Server with GUI"or
sudo yum groupinstall "Server with GUI"