With the advent of websites and the expansion of web activity, Internet users are looking to use websites that provide them with good security. One of the things that website owners can do to secure their website and their customers is SSL activation. SSL is actually a security certificate that encrypts the data entered on the website to secure people. But the question here is how to enable SSL? In this article, we want to introduce you step by step How to Install and configure Free SSL on Plesk. You can visit the packages available in Eldernode if you wish to purchase a VPS hosting server.
Table of Contents
Tutorial Install and Configure Free SSL on Plesk
One way to establish a secure connection between the client and the server is to use SSL encryption. SSL Certificate stands for Socket Secure Layer, which is the secure connection layer using to securely transfer data. For this reason, many users prefer to use websites that can provide good information security.
Important and sensitive information such as user personal information, credit card information, and a lot of data whose disclosure could cause irreparable damage to customers and website owners is exchanged in encrypted form.
To determine if SSL has been enabled on a website, you need to look at the website URL. If the website link starts with HTTPS, you can see that the SSL activation process has been done for that website.
In the continuation of this article, join us to teach you how to set up Free SSL on Plesk.
What is Free SSL and what does it do?
Let’s Encrypt is a free security certificate, first released by an Internet Security Research Group (ISRG) in 2014 and highly acclaimed. This service allows you to install a free digital certificate on any of your websites. Let’s Encrypt encrypts the transfer of information between your website and browsers and increases the security of information exchange on your site.
In addition, if you change all the internal links of the website to HTTPS, in the Address bar of all browsers, a green bar will be displayed on your site address, which will reassure users and visitors.
Due to the high importance of security in websites, the use of SSL security certificates for free has created a lot of fans in the field of websites. This certificate is issued every 3 months and needs to be re-issued every 3 months. Since there is a security issue, in this case, it should note that this certificate is no different from other certificates in terms of security and its issuing company is Let’s Encrypt.
How to Install and Configure Free SSL on Plesk
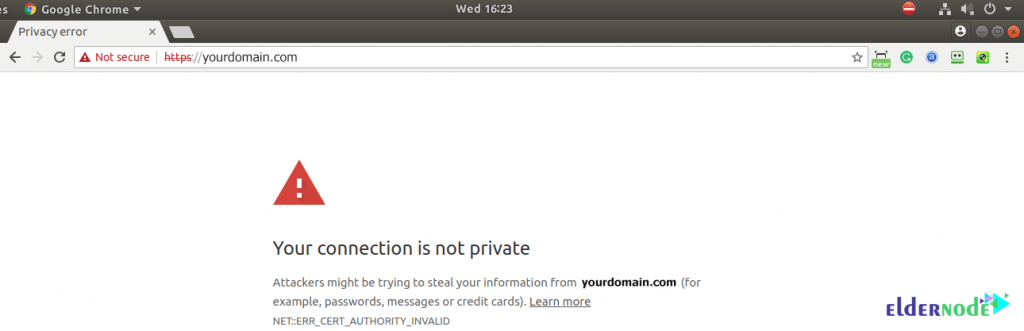
The first step is to check your website URL. If your website URL shows “HTTP”, it means that your website is not secure with an SSL certificate. Also, if your URL shows “HTTPS”, it means that your website is secure.
Now it’s time to secure your website with the Lets Encrypt service. This step is to log in to Plesk and click on the sidebar of websites & domains. After reviewing these options, your window will display as shown below:

In the security section, you have two options to enable, and these two options are available for the security of your website.
1. Support for SSL/TLS:
SSL/TLS protects sensitive data by encrypting the connection between the client and the server. This is so important, and it is recommending that you use an SSL/TLS certificate to protect your website or e-mail.
2. Permanent SEO-safe 301 redirect from HTTP to HTTPS:
If your website is not secure by HTTPS, a method is available for the domain. You can redirect your domain with 301 redirects. 301 Redirect is a permanent redirect that transmits ranking power to the redirected page. This is the best way to implement redirects on a website.
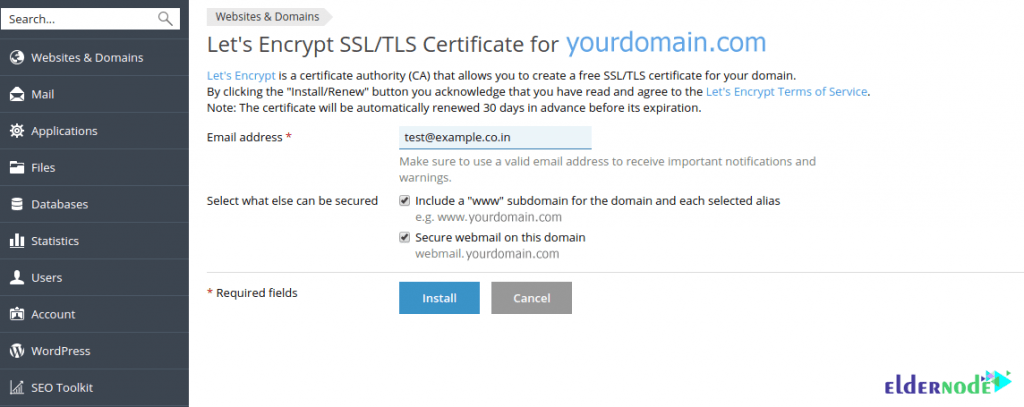
Now, you need to go to Website & Domains and click on Lets Encrypt to make more settings. Then enter your email in the specified field. Lets Encrypt authority allows you to create a free certificate for your domain using SSL/TLS. By clicking the Install or Renew button, you confirm that you have read and agree to Lets Encrypt Terms and service.
Note: To enable SSL for www and parked domains as well, select the first option (Include a” www”…). Also, select the second option (Secure webmail…) for the email panel access address to have SSL.
Once you have successfully completed all the web hosting and encryption settings, you should now go to another tab and enter the account name. You will then see this type of secure URL “HTTPS”.
Conclusion
Ever since Google announced the impact of HTTPS on its SEO and results (SERPS), webmasters have started to buy this type of encrypted protocol. Google’s goal was to secure the web environment, thereby encouraging webmasters to migrate from HTTP to HTTPS. In this article, we tried to teach you to step by step how to Install and Configure Free SSL on Plesk.