How to install Active Directory on Windows Server 2019. Active Directory stores information about network objects and, by providing a hierarchical structure, easily organizes domains and resources. In this article, we will teach you how to set up Active Directory 2019 in a new AD forest.
We have prepared the following checklist and we are going step by step:
1. Production of Active Directory design document
2. Provide physical / virtual resources for DC
3. Install Windows Server 2019 Standard / Datacenter
4. Perform the latest Windows update
5. Allocation of IP to DC
6. Install AD DS roll
7. AD DS configuration according to design
8. Log in to check the installation and configuration of a healthy AD DS
9. Monitoring and performance of configured services
Our topology for installing this service is as follows:
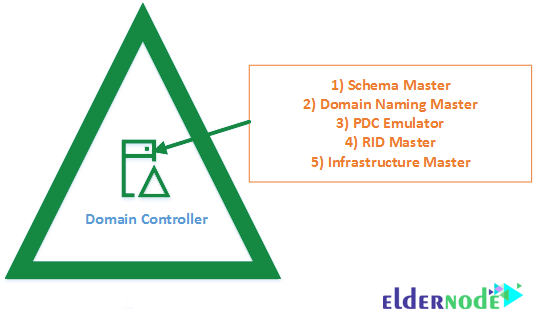
As described in the figure above, in the demo environment, we consider Michaeladmin.local as a root domain in Forrest.
The first domain controller in Forrest will play all five FSMO roles.
Tutorial install Active Directory on Windows Server 2019
1- After installing and configuring Windows Server 2019, you should do all the updates.
The important thing to do before doing anything is to change the name of Windows to a meaningful name.
You must also change the Windows Server IP from automatic to manual.
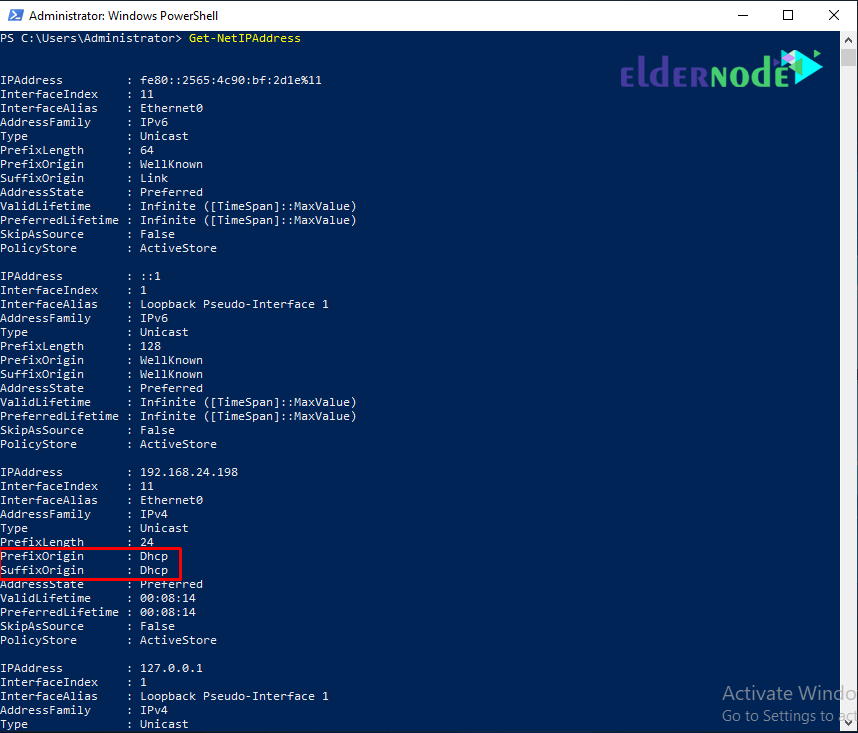
I renamed this Windows to Michael-dc1. Next we will make the IP settings with the Powershell commands. So I login Windows locally with the Administrator user and get information about IP and interface with the following command.

Get-NetIPAddress
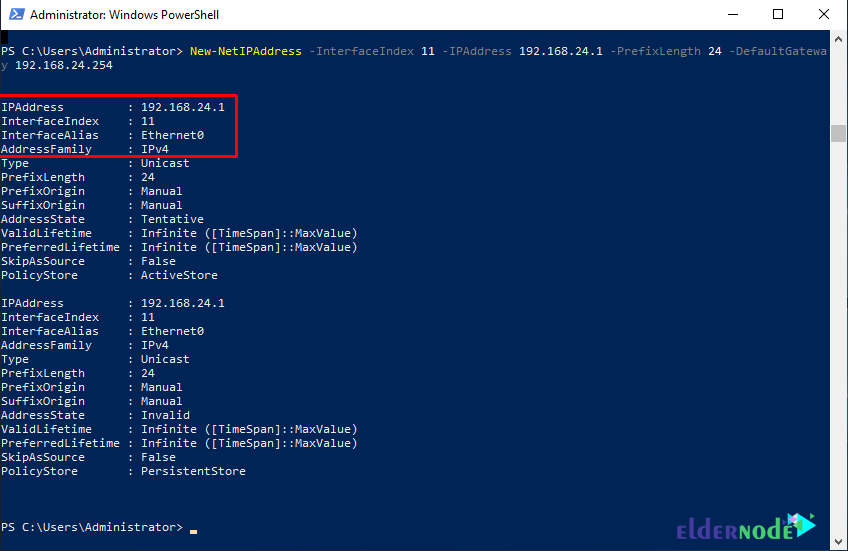
2- To set the IP, we use the following command:
New-NetIPAddress -InterfaceIndex 11 -IPAddress 192.168.24.1 -PrefixLength 24 -DefaultGateway 192.168.24.254
3- The next step is to set up DNS related IPs.
You have to be careful at this stage because it is the first Domain Controller and the main DC.
We set the IP to the primary DNS. As a result, we use the following code for this purpose:
Set-DnsClientServerAddress -InterfaceIndex 4 -ServerAddresses ("192.168.24.1","8.8.8.8")You can see the result by entering the command ipconfig /all:
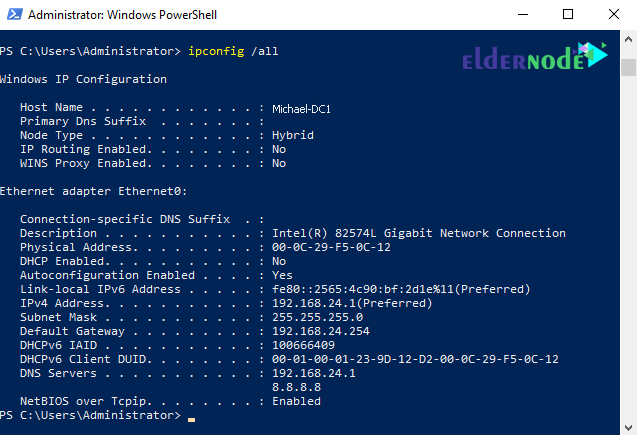
You can use the following command to find the interface index:
netsh interface ipv4 show interfacesUse the following command to delete the IP interface:
Remove-NetIPAddress -IPAddress 192.168.0.1
4- Before the AD configuration process, we must install the AD DS role on the specified server. To do this you can use the following command:
Install-WindowsFeature –Name AD-Domain-Services -IncludeManagementToolsNote: You do not need to restart Windows for this purpose.

5- The next step is to configure AD DS.
Use the following commands for this purpose (it is better to do these commands in Powershell ISE):
Install-ADDSForest -DomainName "Michaeladmin.local" -CreateDnsDelegation:$false -DatabasePath "C:\Windows\NTDS" -DomainMode "7" -DomainNetbiosName "Michaeladmin" -ForestMode "7" -InstallDns:$true -LogPath "C:\Windows\NTDS" -NoRebootOnCompletion:$True -SysvolPath "C:\Windows\SYSVOL" ` -Force:$true
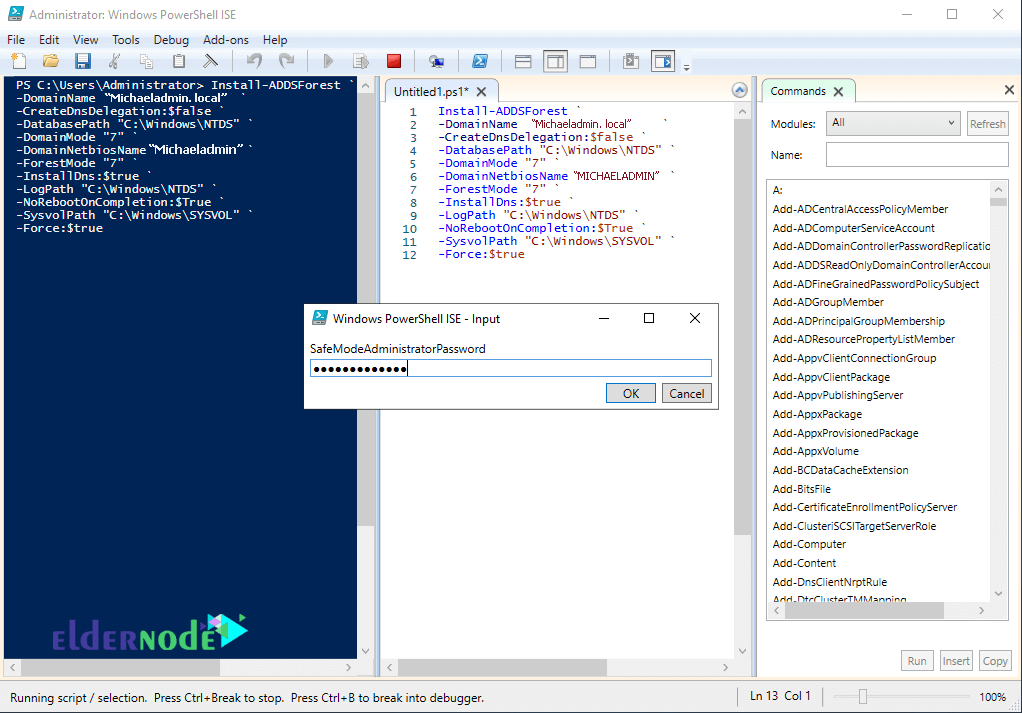
You will be prompted for a Directory Services Restore Mode (DSRM) password when executing this code.
Note: You must enter a combination password, otherwise the installation process will stop. After this step, you will be asked whether you continue the steps or not, and with your approval, the installation steps will continue and restart after the system is complete.
6- Log in after booting the system. Of course, this time come up with the network administrator and check if the work is done correctly or not.
Get-Service adws,kdc,netlogon,dnsThe above command lists the status of Active Directory Services running in the Domain Controller.
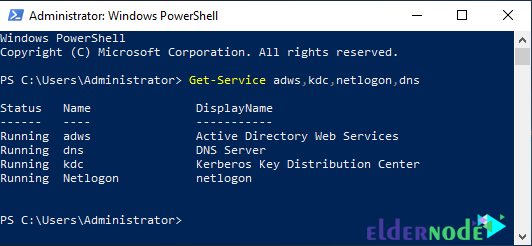
You can check all the details about the domain control with the following command:
Get-ADDomainController
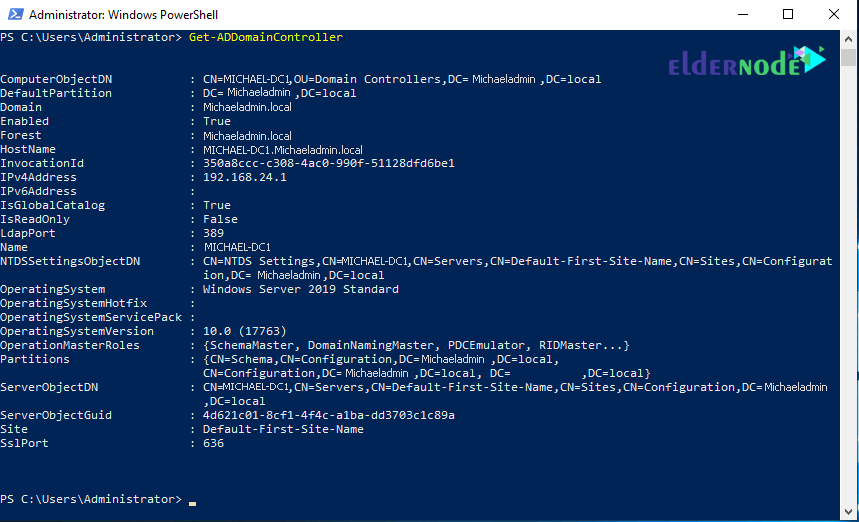
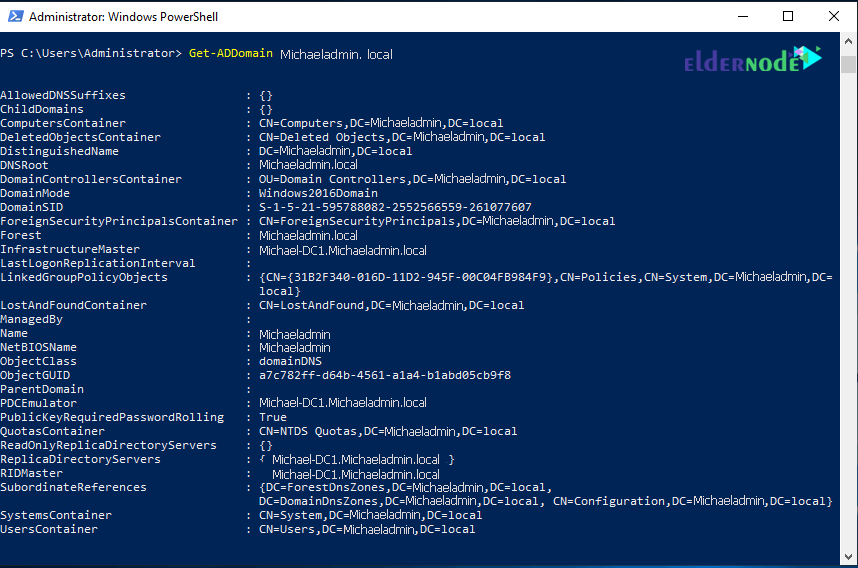
The following command also lists the details of the Active Directory in the domain for you:
Get-ADDomain Michaeladmin.local
To check the Active Directory in Forrest, use the following command:
Get-ADForest Michaeladmin.local
Finally, the following command shows the path to the SYSVOL folder in your directory:
Get-smbshare SYSVOL
Dear user, we hope you would enjoy this tutorial, you can ask questions about this training in the comments section, or to solve other problems in the field of Eldernode training, refer to the Ask page section and raise your problem in it as soon as possible. Make time for other users and experts to answer your questions.
Goodluck.


