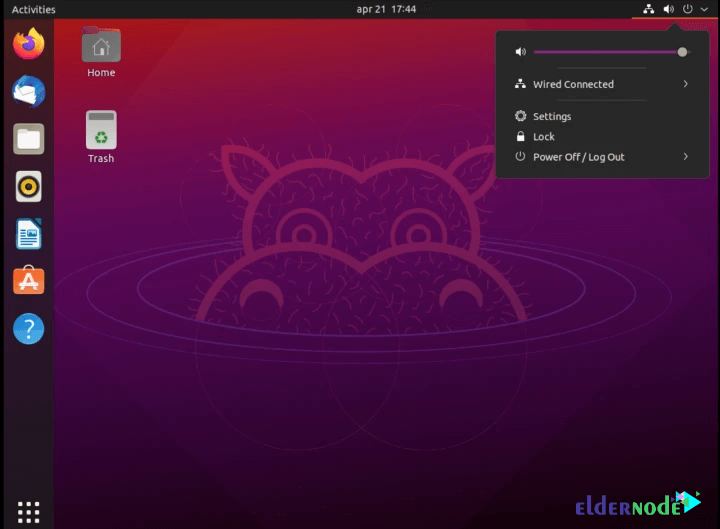
On 22 April 2021, Ubuntu 21.04 was released. It is the 34th release since 2006. Since Ubuntu 21.04 comes with 9 months of security updates, critical fixes, and select software updates, is supported till January 2022. The new release includes a redesigned dark theme, Yaru, with accessibility improvements in navigation, and new file icons. You are here because you like this most popular open-source desktop operating system. Also, you will find out the new features of Ubuntu 21.04 and what things you can not find in this release. So, join us with this article to review Initial Server Setup On Ubuntu 21.04. Celebrate this release with Eldernode! If you are looking for cheap but VIP Ubuntu VPS, our technical team help you to purchase your own one.
Table of Contents
All about Ubuntu 21.04 Hirsute Hippo
First of all, let’s know more about Ubuntu 21.04 ‘Hirsute Hippo’. While new Ubuntu releases include the latest GNOME release, Ubuntu 21.04 does NOT include GNOME 40. But it may be possible to install GNOME 40 on Ubuntu 21.04 in the future. Also, no GTK4 is available on Ubuntu 21.04. It comes with a new desktop icons implementation. To curate an Ubuntu desktop experience due to your needs, Ubuntu 21.04 boasts a raft of additional settings.
You can use the updated versions of Mozilla Firefox, Thunderbird, and LibreOffice on Ubuntu 21.04. New versions of GNOME image viewer, the Characters app, disk usage analyzer, System Monitor are also available in this version. There some other changes in this new release such as Wayland by default, private home directory, Wi-Fi + Bluetooth support on Raspberry Pi Compute Module 4, Linux 5.11 kernel, smartcard authentication support, APT phased updates and more.
Prerequisites to Ubuntu 21.04 Initial Server Setup
To let this tutorial work better, please consider the below Prerequisites:
_ A non-root user with Sudo privileges.
_ At least 2GB of free storage space.
_ Access to either a DVD or a USB flash drive containing the version of Ubuntu Server you want to install.
_ If you’re going to install Ubuntu Server alongside data you wish to keep, ensure you have a recent backup.
_ If you are accessing Ubuntu Server 21.04 remotely, refer to connect to ssh on a Linux server to review how to access the terminal via SSH.
Initial Server Setup with Ubuntu 21.04 Step to step
You can download and install Ubuntu 21.04 (Hirsute Hippo) directly. It is also possible to upgrade to Ubuntu 21.04 from 20.10. Upgrading is much easier than starting over with a new install as it keeps all of your files, apps, and app settings.
Let’s go through the steps of this guide for a successful initial server setup with Ubuntu 21.04. Once you finish this tutorial, you can use the server for any services like Webserver, LAMP server, LEMP server, VPN server, MySQL server, or any desired services.
Step 1: Update and Upgrade Ubuntu 21.04
As usual, you are recommended to begin with updating your system. So, log in to your Ubuntu 21.04 system via SSH or console. To do this, run the following command:
sudo apt updatesudo apt upgradeStep 2: Create a new user on Ubuntu 21.04
As we mentioned in the prerequisites section, you need to use a user with Superuser Privileges. Now, run the following command to create an account for system administration and enable Sudo access:
sudo adduser newuserOnce the new user is created, you need to add the created user to the Sudo group to get all Sudo privileges:
sudo usermod -aG sudo newuserRemember to replace your favorite name with ”newuser” in the above command.
Next, You will be prompted to enter a new password. Try to choose a strong password and keep it safe. Use the command below to change and create a new password for the user:
sudo passwd newuserNote: You will see no stars or dots while entering a password in Linux and it will appear that nothing is being typed.
Step 3: SSH Configuration
To secure your system from bot and hack attempts, you must change the default SSH port. So, to change the default port edit OpenSSH configuration file /etc/ssh/sshd_config and do the following changes:
nano /etc/ssh/sshd_configSince the default ssh ports are always on attackers, it is a good idea to change them:
before edit: #port 22Uncomment port 22 and add your favorite port:
port 2245Also, you can disable Root SSH Login. Run the following command to disable root login via ssh:
PermitRootLogin noWhen you are finished and the port is changed, press Ctrl + x and press Enter twice to save and exit the file.
Step 4: Configure Firewall
In the final step of this guide, you will Configure Firewall with FirewallD. To install required packages from default repositories, run:
sudo apt install firewalldOnce the firewall is installed, use the command below to start firewall service and enable it to auto-start on system boot:
sudo systemctl start firewallsudo systemctl enable firewalldBy default, the firewall allowed SSH access to remote users. If you wish to add your favorite Port, you need to add firewalld since you may need to allow other services through the firewall to remote users. Use the following command to add ssh new port:
firewall-cmd --permanent --add-port=2245/tcpYou can directly provide a service name like “http” or “https” to allow. The firewalld uses /etc/services file to determine the corresponding port of the service:
firewall-cmd --permanent --add-service=http firewall-cmd --permanent --add-service=httpsYou may face that none of the service names are defined in the /etc/services file. So, you need to firewall rule using the port number directly. For example, to allow TCP port 2080 to your firewall:
firewall-cmd --permanent --add-port=2080/tcpReload changes after making any changes. To do this, run:
firewall-cmd --reloadIn the end, you can view all the allowed services and ports:
firewall-cmd --permanent --list-allConclusion
In this article, you learned Initial Server Setup with Ubuntu 21.04. Following the above steps help you to increase the security and usability of your servers. If you have done all the instructions and basic setup well, you are ready to enjoy your newly setup server. Send feedback to your friends on Eldernode Community or ask them bout their new tests on Ubuntu 21.04.
