One of the biggest problems in network management is finding open ports on a system. If you do not close the open ports of all the operating systems of the devices connected to the network, you will always be at risk of an attack. What you need to do is create a list of open ports. Once you have this list, you can start closing unnecessary ports. This article will explain 5 Ways to Find Open Ports on Your Mac with Nmap. Eldernode website offers economical Windows VPS server packages you can choose if you intend to buy.
Table of Contents
How to Find Open Ports on Your Mac with Nmap
Nmap or Network Mapper is an open-source software for network mapping and handling security issues. Also, it is the best tool for port scanning. Software ports are a part of any system that is used to communicate with other systems and exchange information, so these ports should be checked on a regular basis. Network administrators use Nmap to identify devices running on their systems, monitor available hosts and the services they provide, find open ports, and identify security risks.
1- Install Nmap
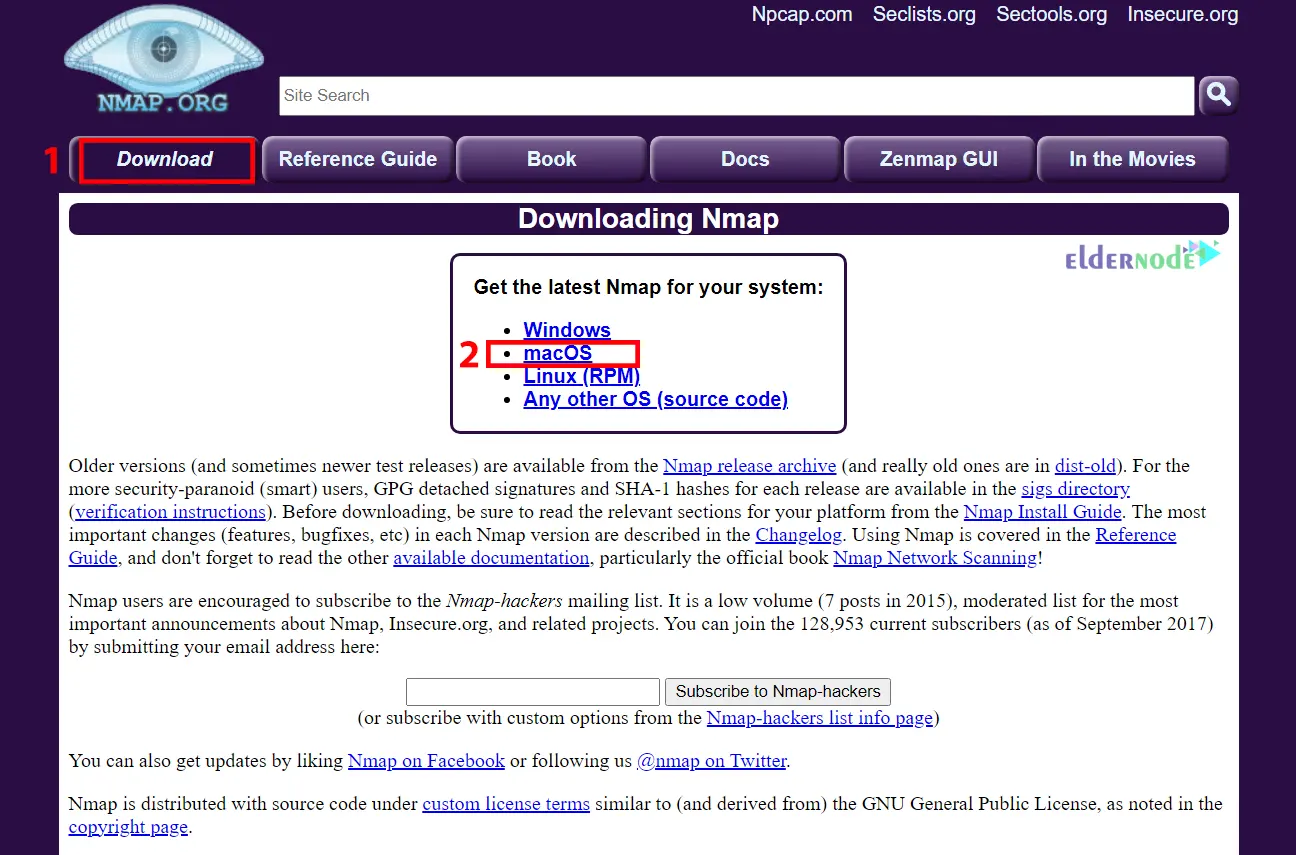
The first step to finding open ports is to install Nmap on your Mac. To do this, go to the Nmap official website and choose Downloads >> macOS:
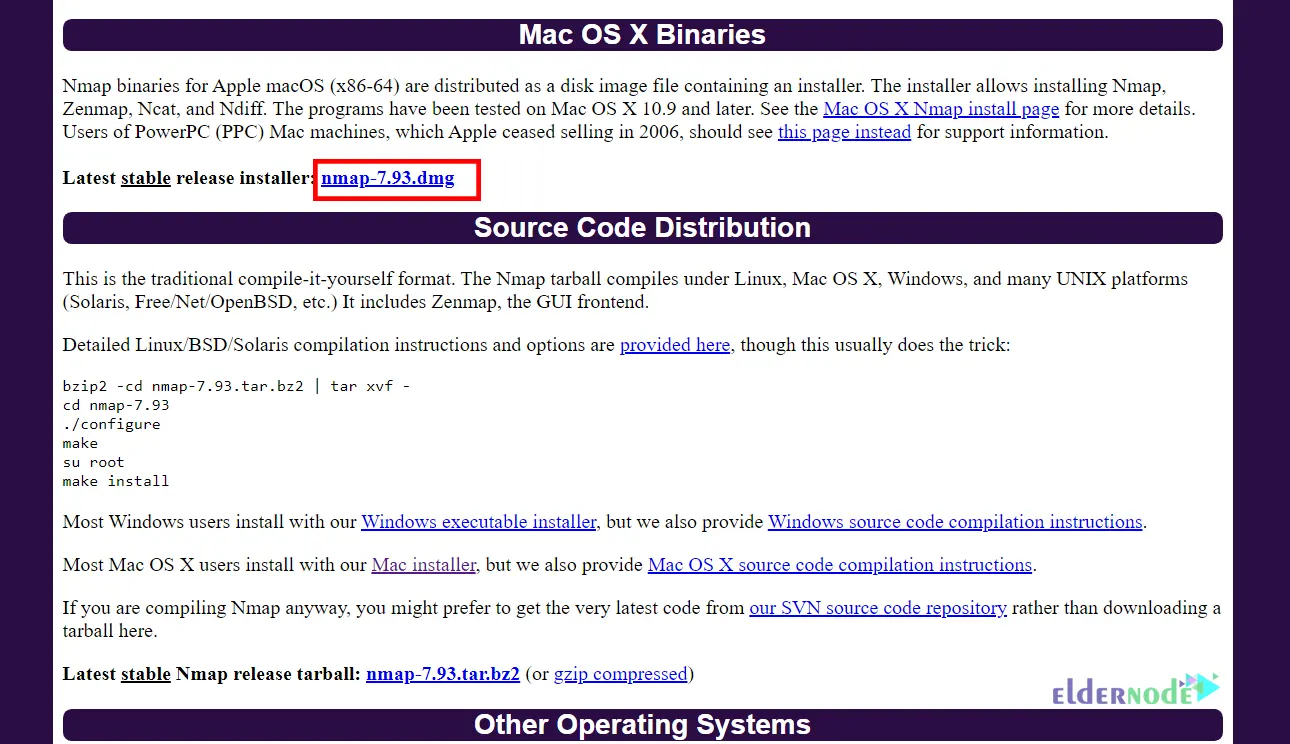
Click on the link shown below to start the download:
You may get the following error:
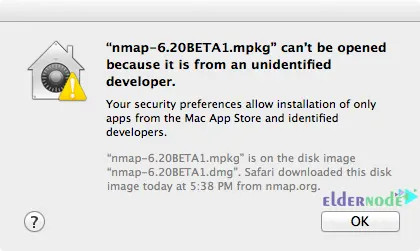
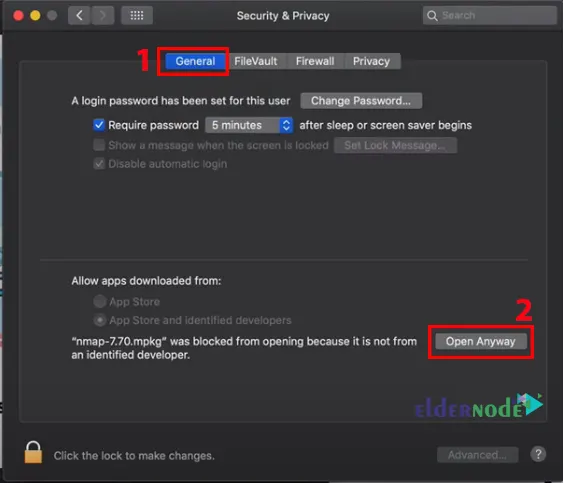
Just go to the Security & Privacy >> General path and click on Open Anyway:
In the window that opens, click on Continue and enter your password. Finally, click on Install Software.
Let’s go to the next step.
2- Scanning Using Nmap
In this step, we will start scanning with the Nmap tool. Nmap is one of the most powerful network tools available that is built to return a list of open ports. Start the Nmap with the command below:
nmap IP-AddressAll you need to do is specify an IP address or range of IP addresses as the target and run Nmap. You can do this with the following command:
nmap scanme.nmap.orgYou should use the slash to scan open ports on a range of IP addresses.
3- Scanning Using Ncat
Ncat is a debugging and networking tool for reading, writing, redirecting, and encrypting data on a network from the command line. It is written for the Nmap Project as a much-improved implementation of the venerable Netcat. You can use it to open ports, associate a shell to a port, establish TCP/UDP connections, and more. To scan with Ncat, just run the following command:
nc [options] [hostname] [port]4- Scanning Using Ndiff
Ndiff is a tool for comparing scan results performed by Nmap. In fact, it compares two Nmap scan results by taking two Nmap XML output files and printing the differences between them to detect changes in a host. People can detect any changes in their networks using the Ndiff utility. If you have two files scan1.xml and scan2.xml, you can compare them using the following command and see the changes between the two files:
ndiff [options] [scan.xml1] [scan.xml2]5- Scanning Using Nping
Nping is an open-source utility for network packet creation, response analysis, and response time measurement. You can use Nping as a simple ping tool to identify active hosts, and as a raw packet generator for network stack stress testing, ARP poisoning, denial of service attacks, route tracing, and more. It can generate network packets for a wide range of protocols, giving users complete control over protocol headers. To scan ports using Nping, you can use the following command:
nping [options] [targets]Conclusion
Nmap can be used to list open ports on the local machine along with detecting the remote operating system. In this article, we explained 5 ways to find open ports on your Mac with Nmap. I hope this tutorial was useful for you and helps you to find open ports on your Mac with Nmap. If you have any questions or suggestions, you can contact us in the Comments section.
