Tutorial and How to create the CSR in Microsoft IIS
In this article, we will teach you how to create the CSR in Microsoft IIS. SSL is a protocol for securing communication between the user and the webserver. To communicate under SSL, you must have an SSL certificate installed on your website.
Before you can order your SSL certificate, you must first generate a CSR (Certificate Signing Request) on your server. A CSR is encrypted text containing company information and a domain name. This file, titled Your Website Server Profile, is then sent to the SSL Issuing Company to issue an SSL certificate based on these specifications.
Here are the steps to create a CSR in IIS. Stay with us.
How to generate a CSR in Microsoft IIS?
1. Select Administrative Tools by clicking on the Start menu. Then click on Internet Information Services (IIS) Manager to view the IIS management software.
Note: If you also search for IIS in the Start menu, you can see the relevant software.
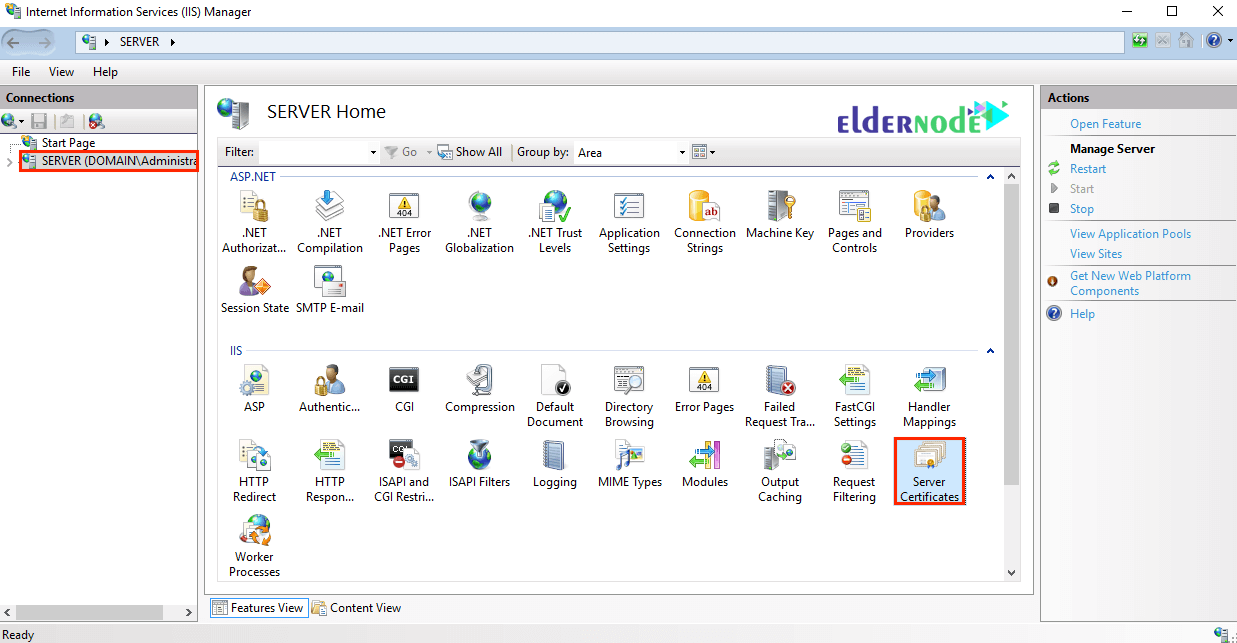
2. Click on the server name.
3. From the options in the middle of the page, in the IIS section, double-click on Server Certificates.
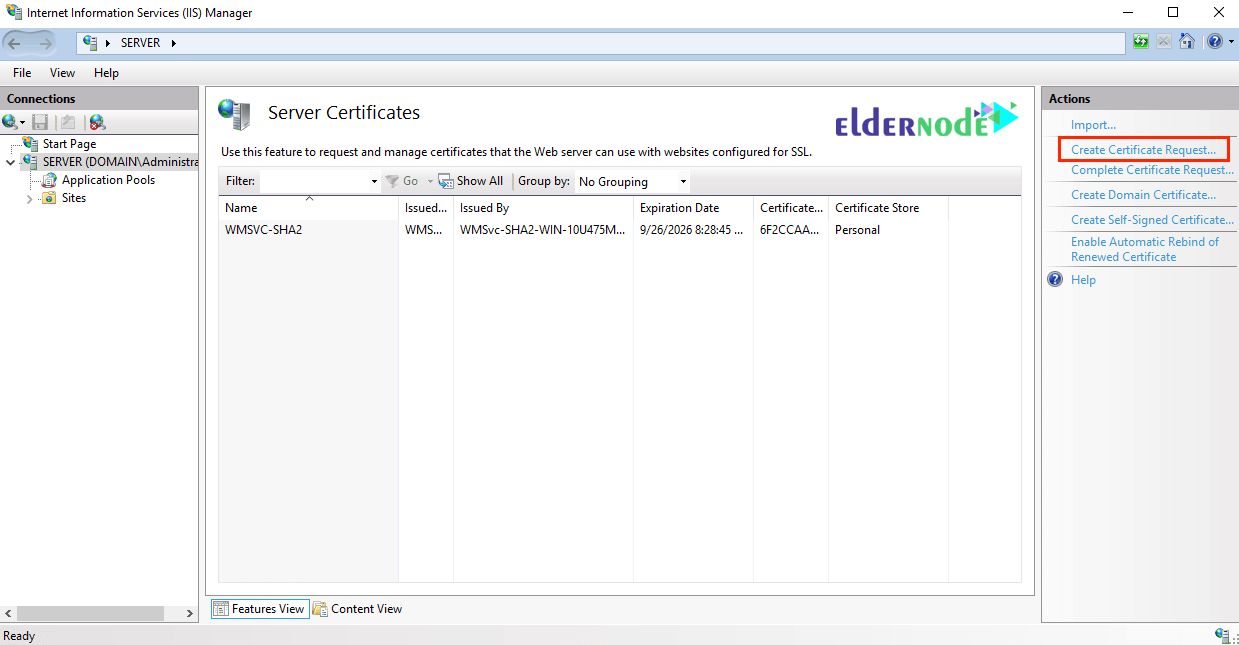
4. Then from the Actions section on the right side of the page, click on Create Certificate Request.
This will open the Request Certificate wizard.
5. In the Distinguished Name Properties window, enter the following information as follows:
— Common Name: The name of the certificate is usually entered as a domain name.
For example, enter www.eldernode.com or mail.eldernode.com.
Note: Common certificates only support one address. The name you enter in this section must be based on the address for which the certificate is to be issued.
Tutorial create the CSR in Microsoft IIS
There is also a type of SSL called WILDCARD, which covers all subdomains of a domain. These types of certificates are more expensive. If you have a WILDCARD certificate, you must enter a domain name with an asterisk “*” when creating a CSR in the Common Name field:
*.YourDomain.com
—Organization: The registered legal name of the organization or company.
—Organizational unit: The name of the relevant department in your organization or company.
— City/locality: The name of the city where your organization or company is located.
— State / Province: The province where your organization or company is located.
— Country / region: is a two-letter country code.
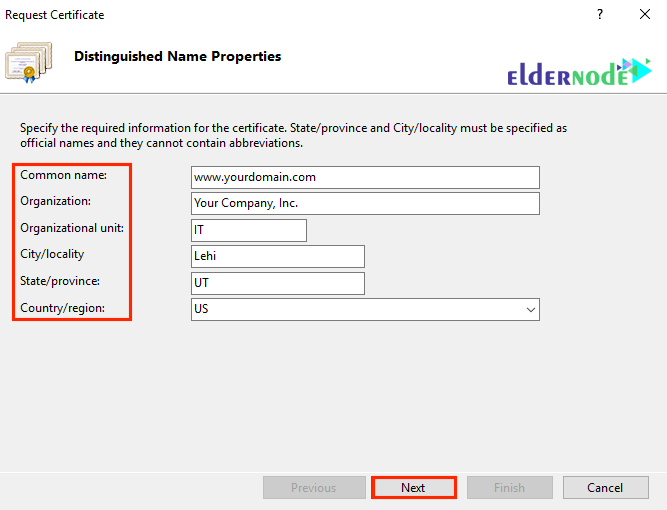
6. Click Next.
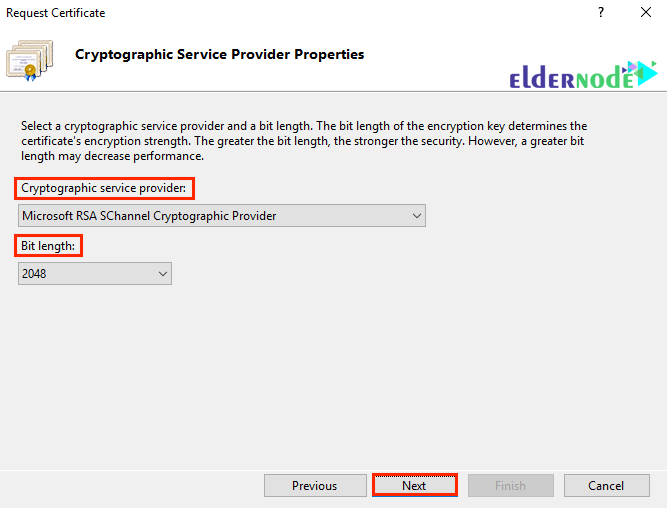
7. In the “Cryptographic Service Provider Properties” window, set the options to “Microsoft RSA SChannel” and “2048“, respectively. Then click Next.
8. Specify a name for the CSR file.
Tip: Remember the file name and the location where you save it.

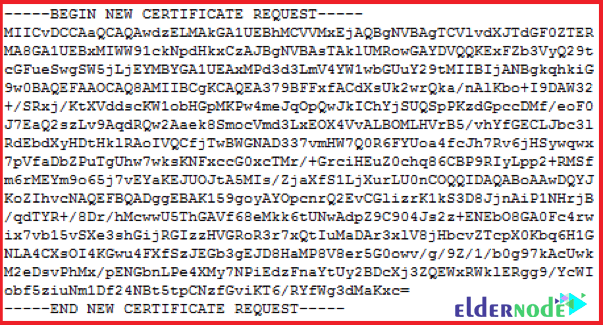
When needed, you should open the CSR file as a text file and copy all its contents and paste it in the online ordering process of the certificate.
Dear user, we hope you would enjoy How to create the CSR in Microsoft IIS, you can ask questions about this training in the comments section, or to solve other problems in the field of Eldernode training, refer to the Ask page section and raise your problem in it as soon as possible. Make time for other users and experts to answer your questions.
Goodluck.
