Learn How to change the MAC address in Windows. There are many reasons for changing a MAC address on an operating system, and you may need this trick for a variety of reasons. In the meantime, there are reasons such as being blocked by a firewall, network disruption, installing software licenses that work with MAC address, etc., that you may need to change your MAC address. You can buy Cheap Windows VPS Server Online from Eldernode. Follow us to learn how to change the MAC address in Windows.
Learn how to change the MAC address in Windows
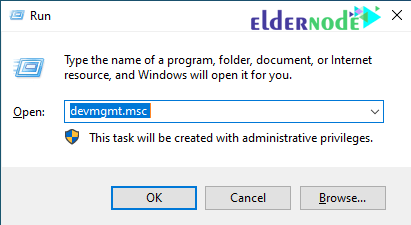
1. First, press Winkey+R to open the Run window.
2. Enter the phrase devmgmt.msc and click ok.
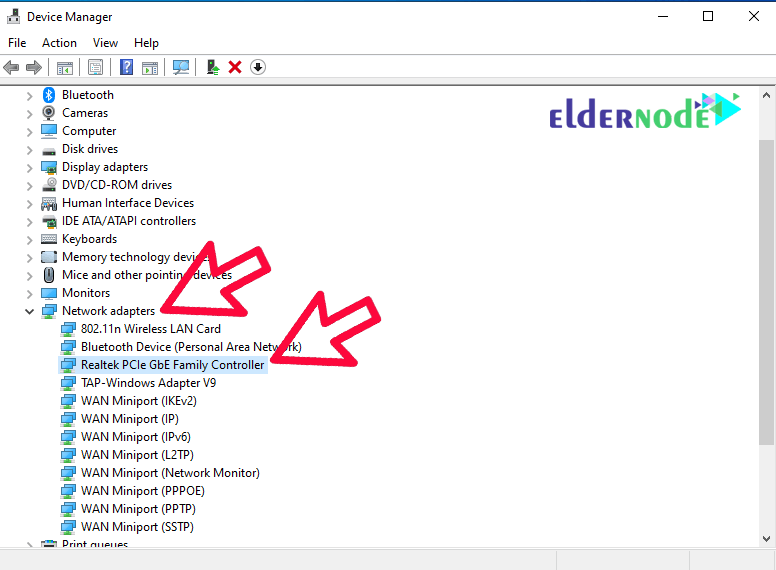
3. In the Device Manager window, click Network Adapters to display your network adapters.
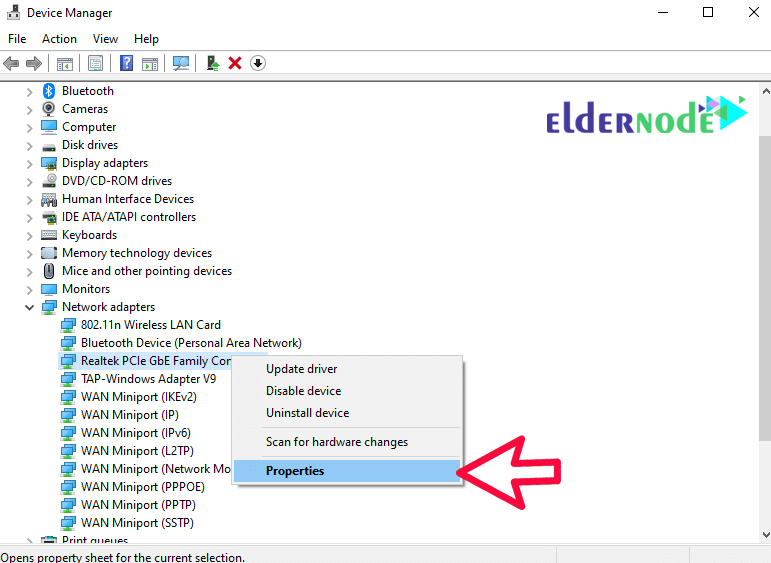
4. Then right-click on the adapter you want to change its MAC address and select Properties.
5. In this section, go to the Advanced tab and select Network address in the left menu. Then enter your desired Mac address in the left field.
6. After entering the desired MAC address, click on Apply and then Ok to apply the settings.
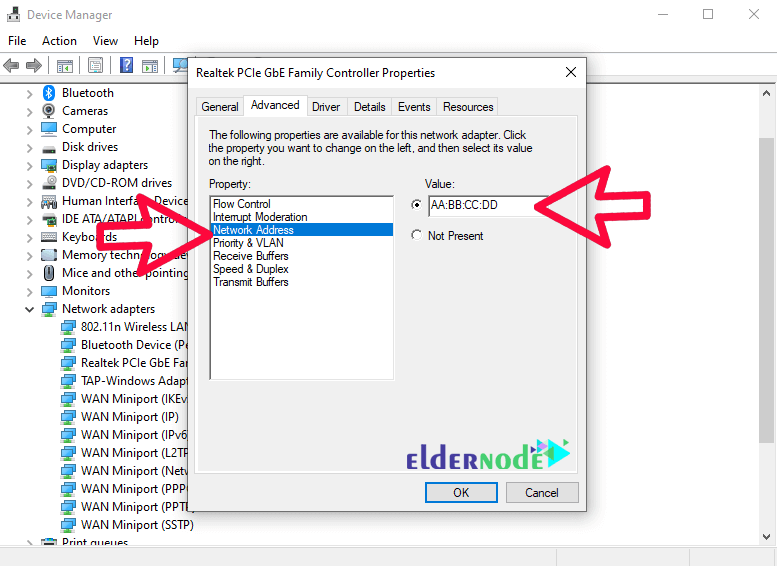
7. Then reboot your system once or Disable and re-enable your network card once.
8. Now you can enter the ipconfig /all command in CMD to see the address of your Mac adapter and make sure it changes.
Note: If your network card does not take into account the changes you have made, there is no problem with the operation process and your network card will not allow the change. But the virtual cards installed in Windows 10 will have all the ability to change the MAC address.
Conclusion
You can not ignore the fact that the network settings on the computer are not so simple and attractive, and there is always the possibility that with a small mistake, your access to the Internet will be cut off. However, if you are faced with the situation that you need to change your MAC address, it should be said that fortunately the process will be very simple and short as long as you know what you are doing. In this article, we tried to teach you How to change the MAC address in Windows.
![Tutorial Install And Run Bluelog On Kali Linux [Security]](https://blog.eldernode.com/wp-content/uploads/2020/12/Tutorial-Install-And-Run-Bluelog-On-Kali-Linux-Security-300x164.png)


