Maybe some of you want to add a cPanel IP address but you don’t know how to do this. Join us to learn how to add an additional IP address in WHM. In this article, we will teach you How to Add an Additional IP on WHM Cpanel. If you want to purchase a VPS server, you can check out the packages offered on the Eldernode website.
Table of Contents
How to Set Up an IP Address in WHM Cpanel
What is WHM & Cpanel?
Cpanel has two interfaces includes Cpanel which is a user interface and WHM which is a server management interface. WHM and Cpanel are popular dashboards used to control servers and hosting accounts. WHM stands for WebHost Manager and is and an administrative control tool that allows you to manage individual accounts and set server-side limits. But Cpanel is a web hosting control panel software that simplifies website and server management.
To connect the IP to Cpanel, you should have root access to this control panel, or in other words, your access should be full access, or in other words, you should be a server administrator. In the continuation of this article from the Cpanel training series, we intend to teach you step by step How to Add an Additional IP on WHM Cpanel.
Prerequisites to Add an Additional IP on WHM Cpanel
– Administrator-level credentials to the WHM
– A server with Cpanel installed
– An additional IP address to assign
Adding an Additional IP on WHM Cpanel
First, open WHM from your desired web browser.
Next, you should choose Account Functions from the WHM home screen:
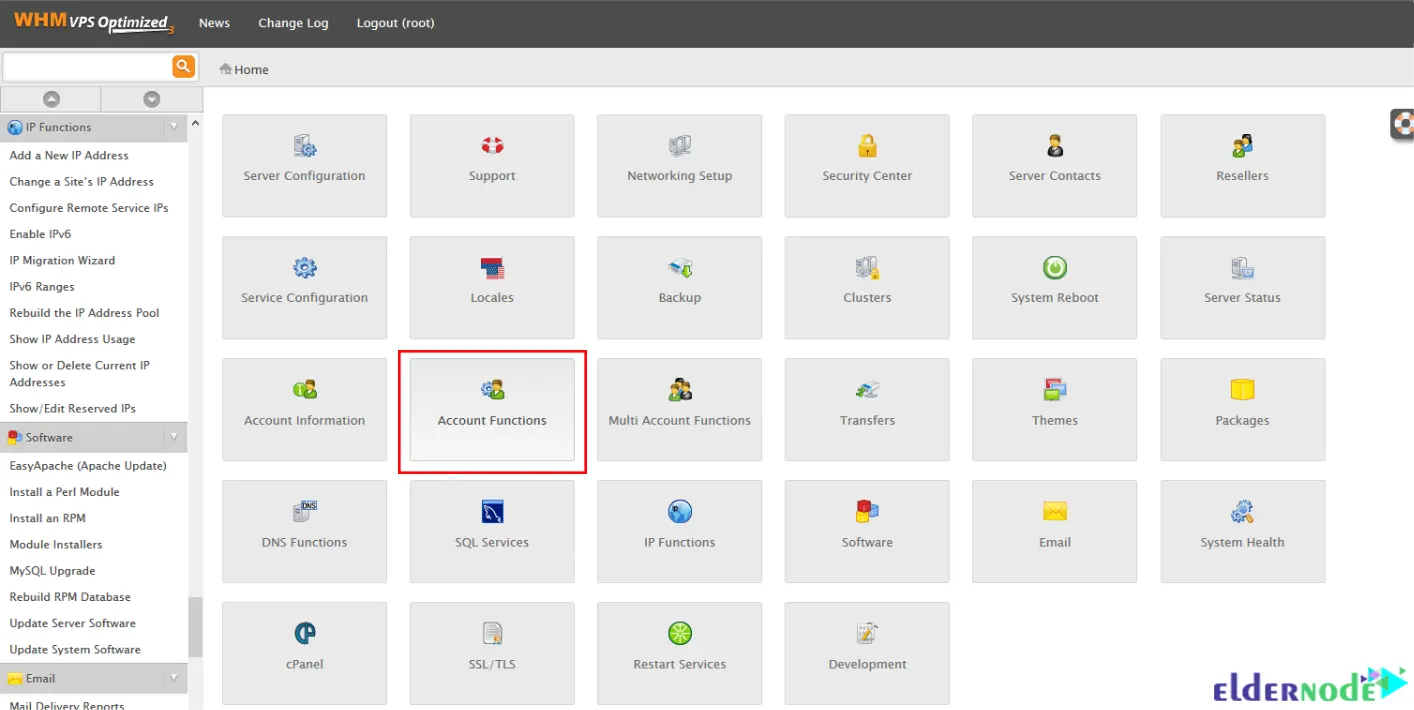
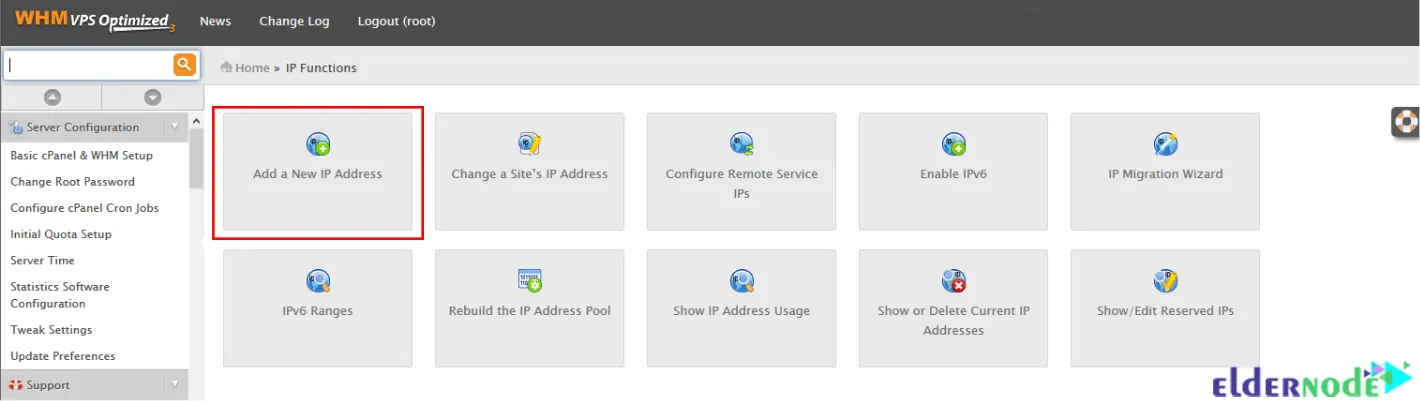
Then you should select Add a New IP Address:
Now you can add an IP or a range of IPs. To add an IP, you should enter it in the New IP or IP range to add: box and then choose the subnet mask for this IP:
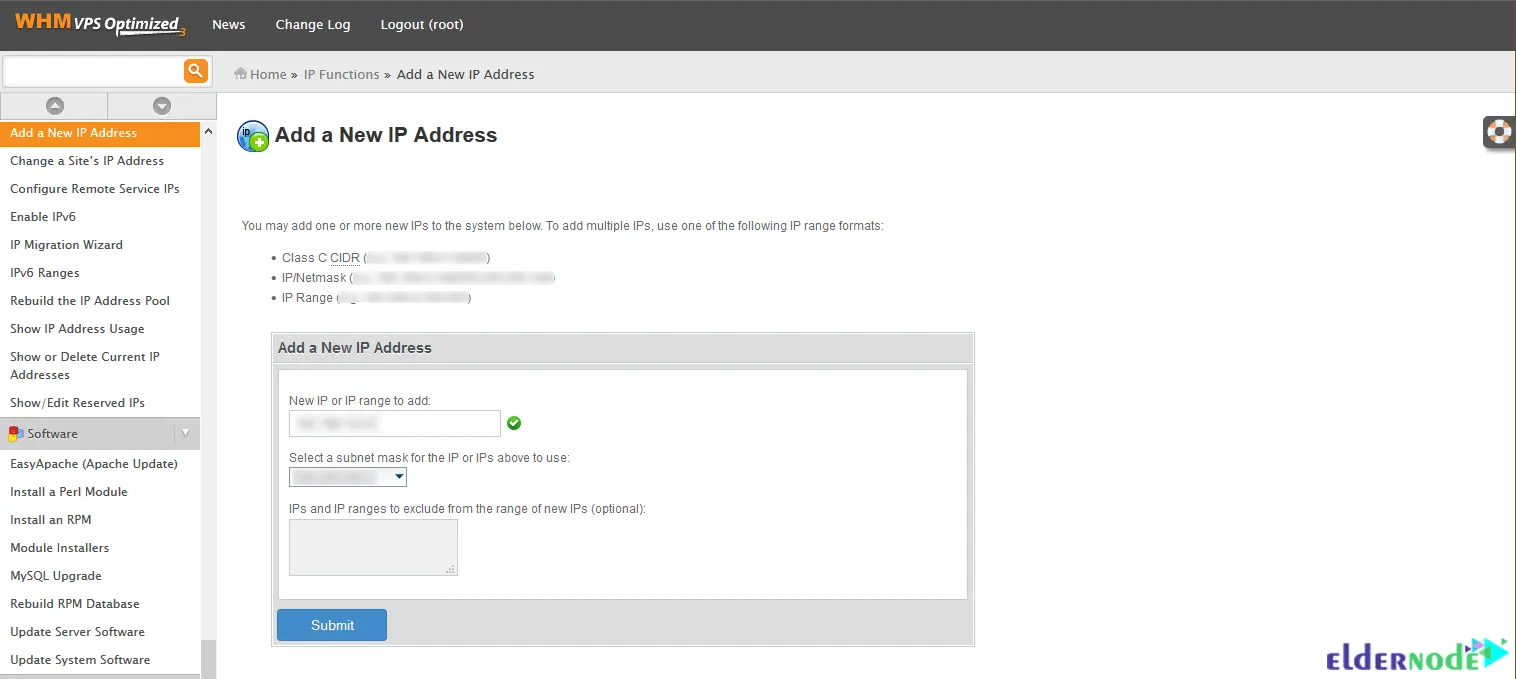
To add a range of IPs, you can use CIDR notation or hyphenate the range.
After you enter the IP, click Submit. Now you should get a green Success box floating up from the bottom right of the screen. If you select the Show or Delete Current IP Addresses menu option on the left side of the screen, you can see what is currently assigned and also confirm that you have successfully entered the correct IP:
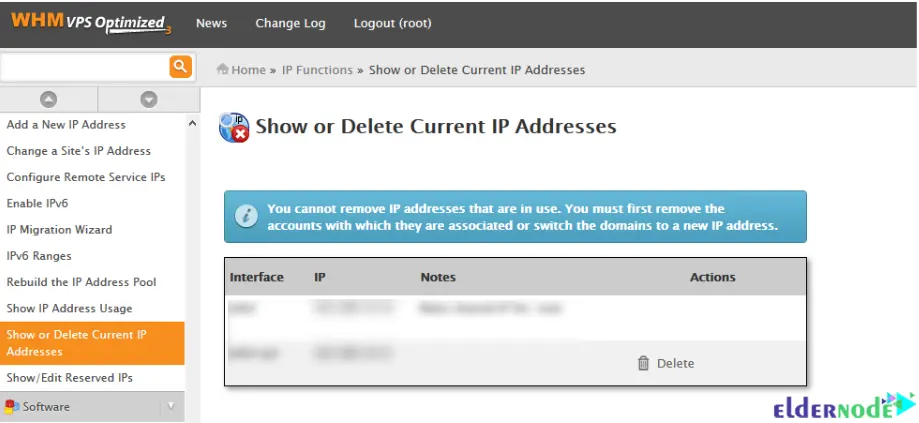
The new IP address is now ready to use. Installation of additional IP in WHM Cpanel completed successfully.
Conclusion
WHM Cpanel servers allow system administrators or webmasters to add multiple IP addresses. This article taught you how to add an additional IP on WHM Cpanel. I hope this article was useful for you and you enjoy it. If you encounter any problems, you can contact us through Comments.