How to Configure FTP Server on windows server 2019. In previous articles, we taught you how to install FTP Server on Windows Server 2019. In this article, we will teach you how to configure FTP server on Windows Server 2019.
You can Choose your perfect Windows VPS Server Packages from eldernode.
Tutorial Configure FTP Server on windows server 2019
Before starting the configuration, it is necessary to install FTP Server on Windows Server 2019.
We will configure FTP server in Passive mode. Follow the steps below to configure FTP.
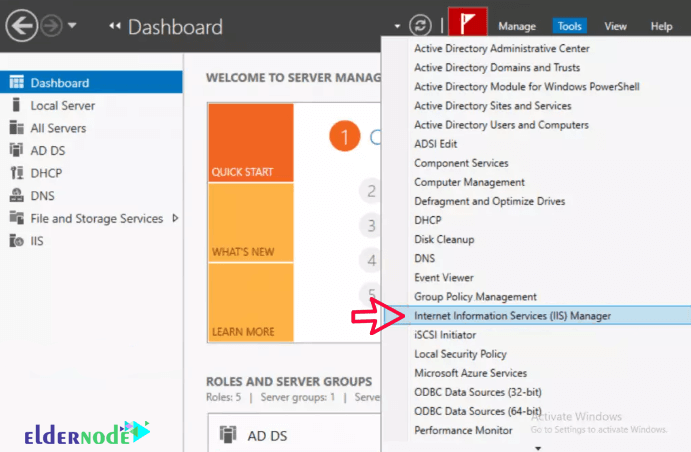
1. Open Server Manager.
2. Select Internet Information Services (IIS) Manager from the Tools tab as shown below.
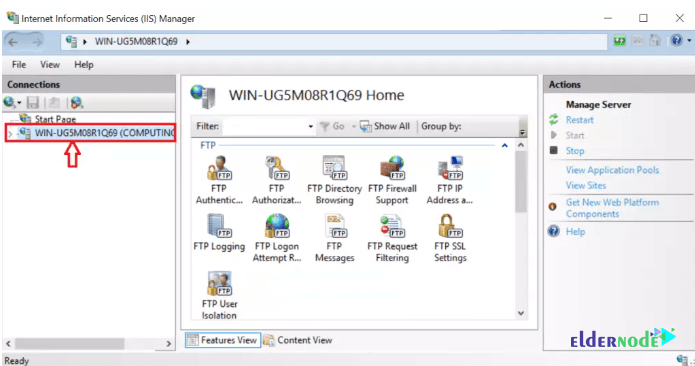
3. Click on your server from the left column.
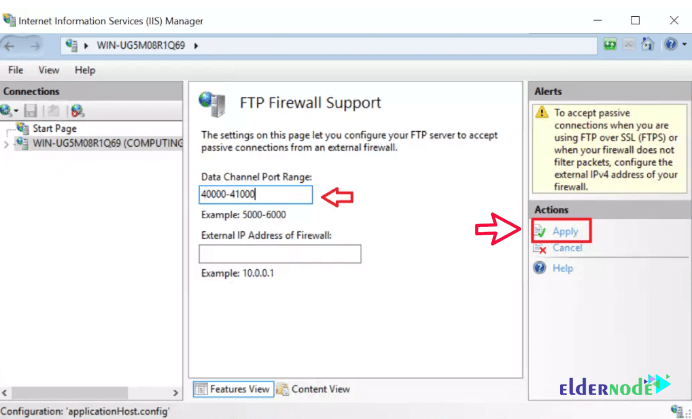
4. Click the FTP Firewall Support option and click Open Feature in the right column.
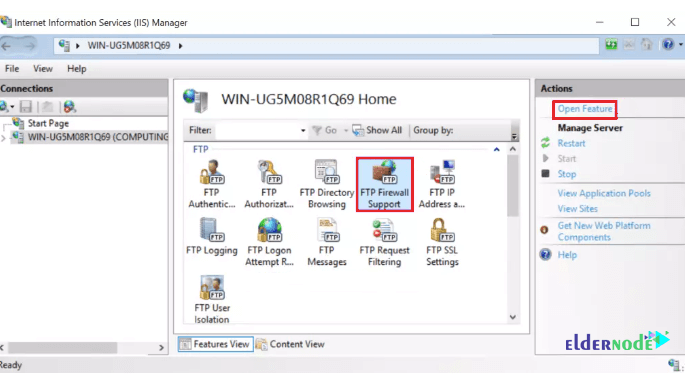
5. In the right column of the Actions section, click Apply.
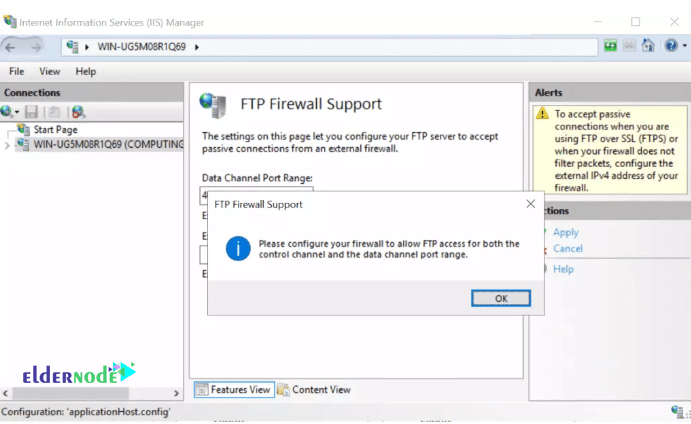
6. The small window below will appear making you aware that you need to allow the port range we configured in the firewall.
Click OK. Then restart FTP Server to make the changes applied.
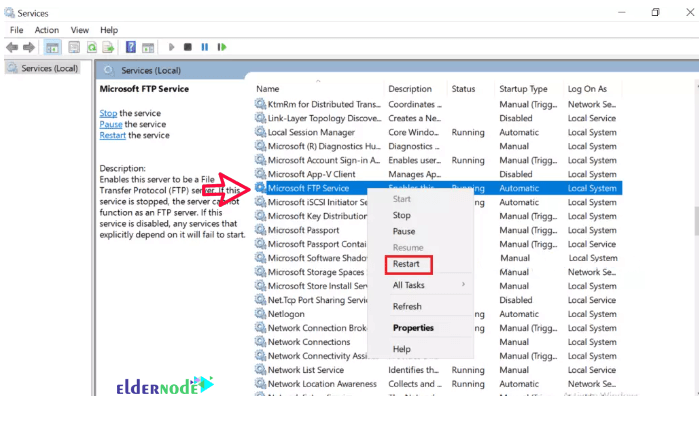
7. Search for Services in the Windows search box.
Right-click on Microsoft FTP Server after opening the Services application. Select restart.
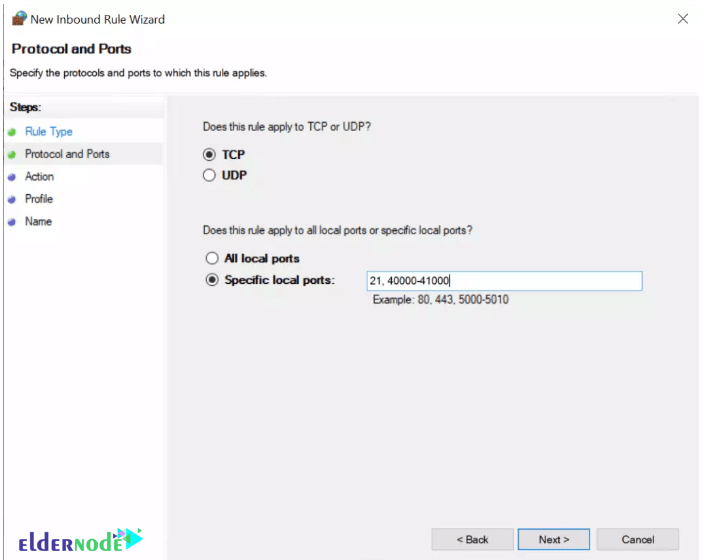
8. Use How To open a port on Windows Server Firewall to add the ports in your Firewall. Also, include port 21.
It should look like below:
Dear user, we hope you would enjoy this tutorial, you can ask questions about this training in the comments section, or to solve other problems in the field of Eldernode training, refer to the Ask page section and raise your problem in it as soon as possible. Make time for other users and experts to answer your questions.
Goodluck.


![How To Install And Use ZSH On Debian 10 [Z shell]](https://blog.eldernode.com/wp-content/uploads/2020/10/photo_2020-10-31_16-15-25-300x164.jpg)
