In this article from the Windows Server 2016 tutorial series, we will set up static IP in Windows Server 2016. These settings are part of the basic settings of a system that network administrators will perform at the beginning of the installation. You can Choose your perfect Windows VPS Server Packages from eldernode.
Static IP Setup Tutorial on Windows Server 2016
1. Log in to your Windows server environment.
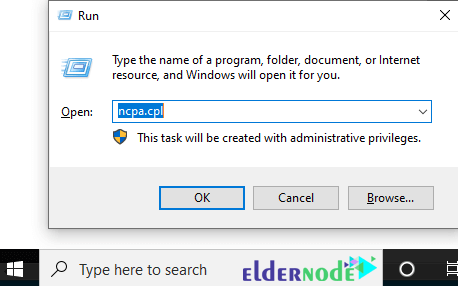
2. Open the Run window by pressing Winkey + R on the keyboard.
3. Type ncpa.cpl and click OK.
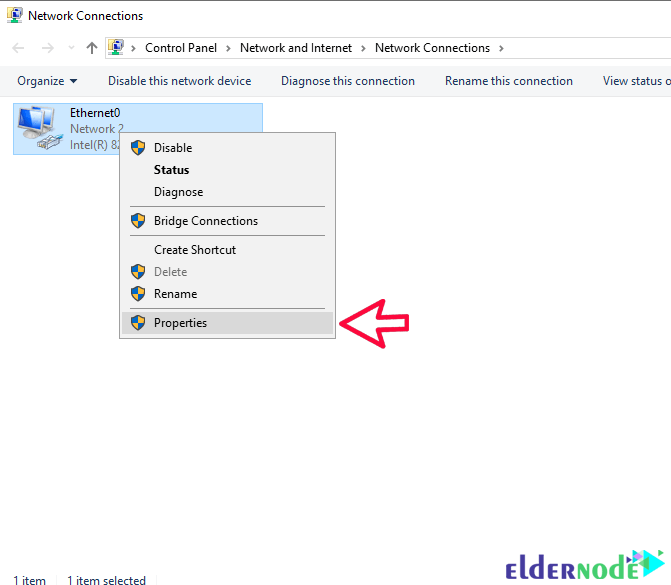
4. After opening the Network Connection window, right-click on the desired interface and select Properties.
Note: When right-clicking, you can access options such as Disable to disable the interface, Status to view network status, and more.
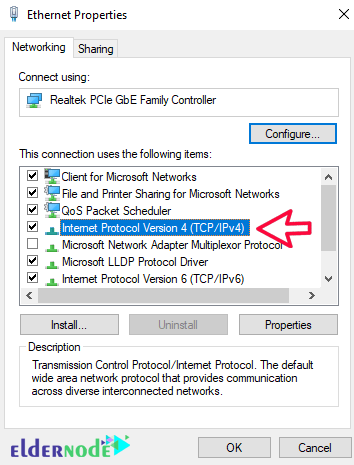
5. After the settings window opens, double-click Internet Protocol Version 4.
6. Set the settings to Use the following address mode and enter the IP address and other settings you want.
You will also be able to configure your DNS server from this section.
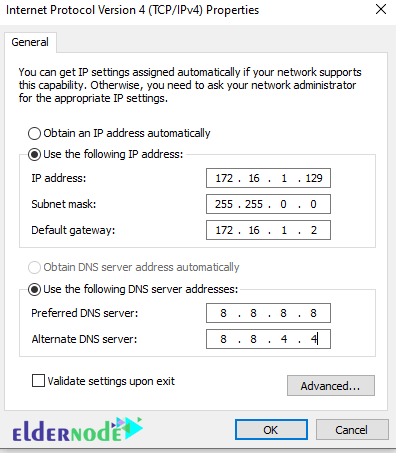
7. After entering the desired IP address, click OK until all windows are closed.
Note: After closing the last window, your network card will be deactivated and reactivated for a moment.
From now on, you can also use the desired IP address.
Dear user, we hope you would enjoy this tutorial, you can ask questions about this training in the comments section, or to solve other problems in the field of Eldernode training, refer to the Ask page section and raise your problem in it as soon as possible. Make time for other users and experts to answer your questions.
Goodluck.


