Applications that run on the server side have more contacts. The mechanism of these programs should be such that they can respond to the high volume of requests on the server side in the shortest possible time. So, the best solution is to use NoSQL databases. One of the most popular and efficient database servers is Redis. This article will teach you 3 Ways To Install Redis On MacOS. If you intend to buy your own VPS server, you can check out the packages offered on the Eldernode website.
Redis stands for Remote Dictionary Server and is an open-source, in-memory, key-value data store. It is placed in RAM and information is temporarily stored in it. Developers use Redis as a database, cache, streaming engine, and message broker. This data store offers sub-millisecond response times and enables millions of requests per second for real-time applications in industries such as gaming, ad tech, financial services, healthcare, and IoT.
You can install Redis on MacOS using two methods which are: Installing Redis using Homebrew and Installing Redis without Homebrew.
Table of Contents
Installing Redis Using Homebrew on MacOS
If you haven’t installed Homebrew yet, follow the steps below.
Open your terminal and install Xcode using the command below:
xcode-select --installEnter the following command to download the Homebrew installation script:
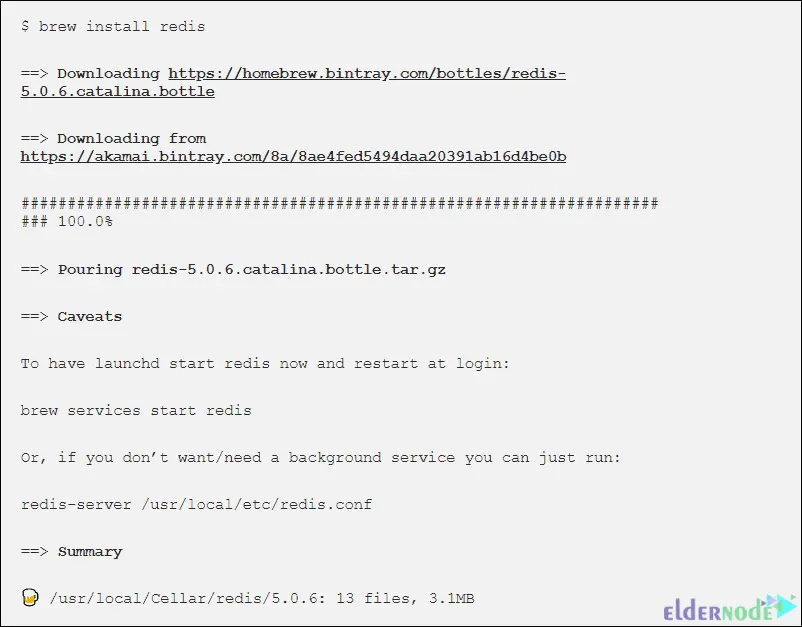
/bin/bash -c "$(curl -fsSL https://raw.githubusercontent.com/Homebrew/install/master/install.sh)"Once your installation is completed, you can install Redis using Homebrew. To do this, run the following command:
brew install redis
Installing Redis without Homebrew on MacOS
You can install Redis on your mac without using Homebrew. To do this first, create a folder and move to the newly created folder using the following command:
mkdir rediscd redisNow download the Redis installation script by running the command below:
curl -O http://download.redis.io/redis-stable.tar.gzUnzip the downloaded file as shown below:
tar xzvf redis-stable.tar.gzTo go to the unzipped folder, enter the command below:
cd redis-stableLastly, run the following commands to complete the installation process:
make make test sudo make installHow to Start Redis on MacOS
There are two ways to start Redis on your mac operating system due to the installation method.
Starting Redis with Homebrew
If you install Redis on MmacOS with Homebrew, you can start it and using the command below:
brew services start redisThe above command will launch Redis and restarts it when you log in.
To check the Redis status, enter the command below:
brew services info redisYou should see the following output:
redis (homebrew.mxcl.redis) Running: ✔ Loaded: ✔ User: Marilyn PID: 67975Starting Redis without Homebrew
But if you choose the second method to install Redis, run the following command to start it:
redis-serverThe following output should appear:

If you want to launch Redis on system boot, the following command can help you:
ln -sfv /usr/local/opt/redis/*.plist ~/Library/LaunchAgents3- Connecting to Redis on MacOS
In this step, first, start your Redis server. You can do this using the launchctl and using the Redis configuration file.
To start the Redis server with the launchctl, run the command below:
launchctl load ~/Library/LaunchAgents/homebrew.mxcl.redis.plistAnd to start Redis with the configuration file, just enter the following command:
redis-server /usr/local/etc/redis.confNote: By default, the Redis configuration file location is at /usr/local/etc/redis.conf.
Test Redis after it is running using the command below:
redis-cliThe Redis REPL will open.
That’s it!
Conclusion
Redis is a type of data structure that is placed in RAM and information is temporarily stored in it. In this article, we taught you how to install Redis on MacOS in 3 ways. I hope this tutorial was useful for you and helps you to install Redis on macOS. If you face any problems or questions, you can contact us in the Comments section.
