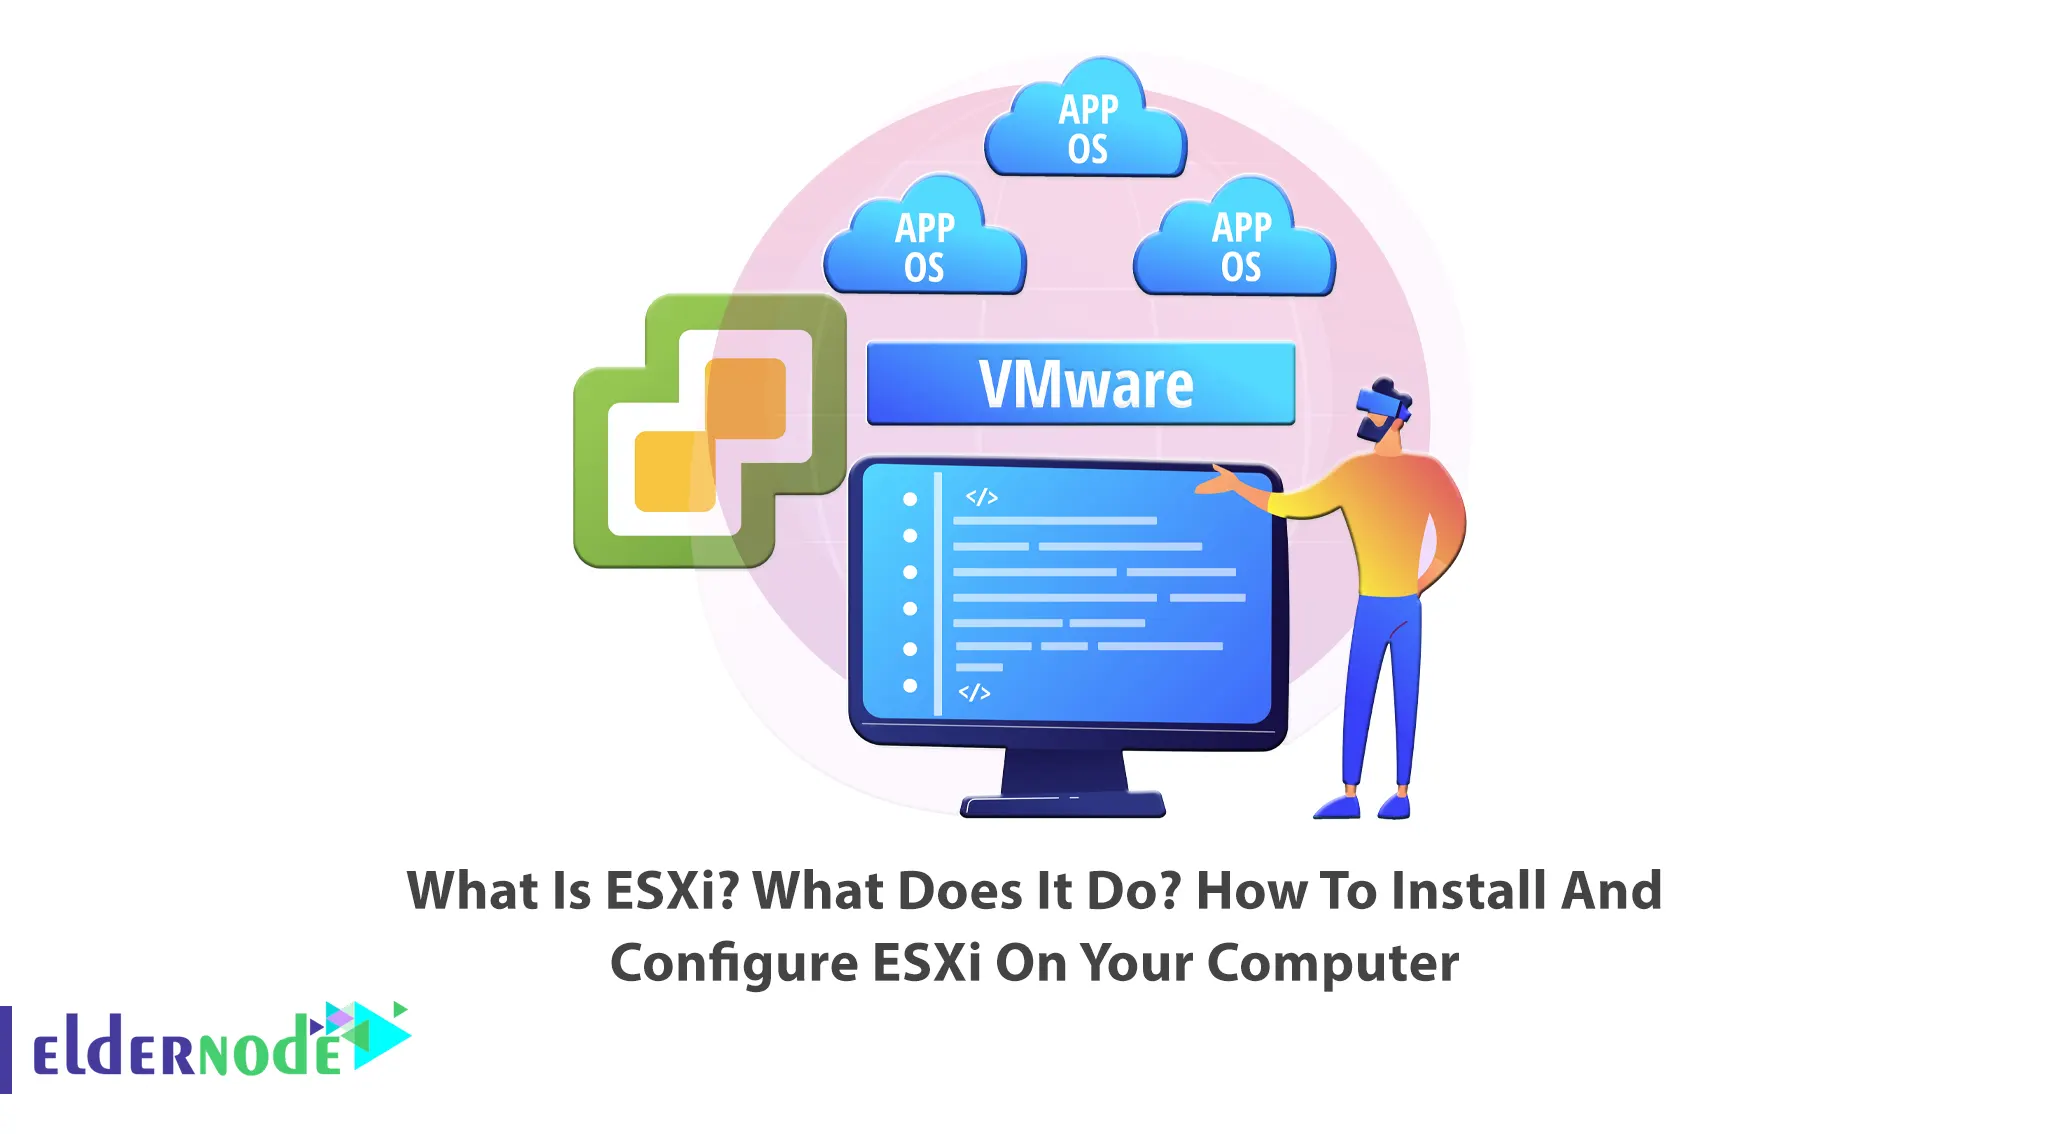
In server virtualization technology, several operating systems can be implemented on a single hardware and all of them can be used simultaneously. If you need to prepare a separate hardware system for each service you need, the right solution is to use virtualization technology. One of the types of operating systems that you can install on a computer or server to perform server virtualization is ESXi. This article will explain to you What is ESX, What Does It Do, and How to Install And Configure ESXi On Your Computer. If you want to purchase a Windows VPS, you can check out the packages offered on the Eldernode website.
Table of Contents
Tutorial Install and Configure ESXi
What is ESXi? What Does It Do?
VMware ESXi is the commercial virtualize of the VMware Hypervisor software series. This virtualize is a bare metal hypervisor, which means that it is installed directly on the hardware, and does not need to be installed on the operating system like other programs. ESXi is a type 1 hypervisor or metal hypervisor and one of the core components in VMware’s infrastructure software suite. Hypervisors help to efficiently run multiple virtual machines on a single physical server.
When a VMkernel receives a resource request, the kernel forwards the request to the Host’s physical hardware. ESXi is installed directly on a local disk on the host machine.
How To Download ESXi server On Your Computer
First, choose the various download option of the ESXi server and download the ESXi server from the VMware ESXi download page:
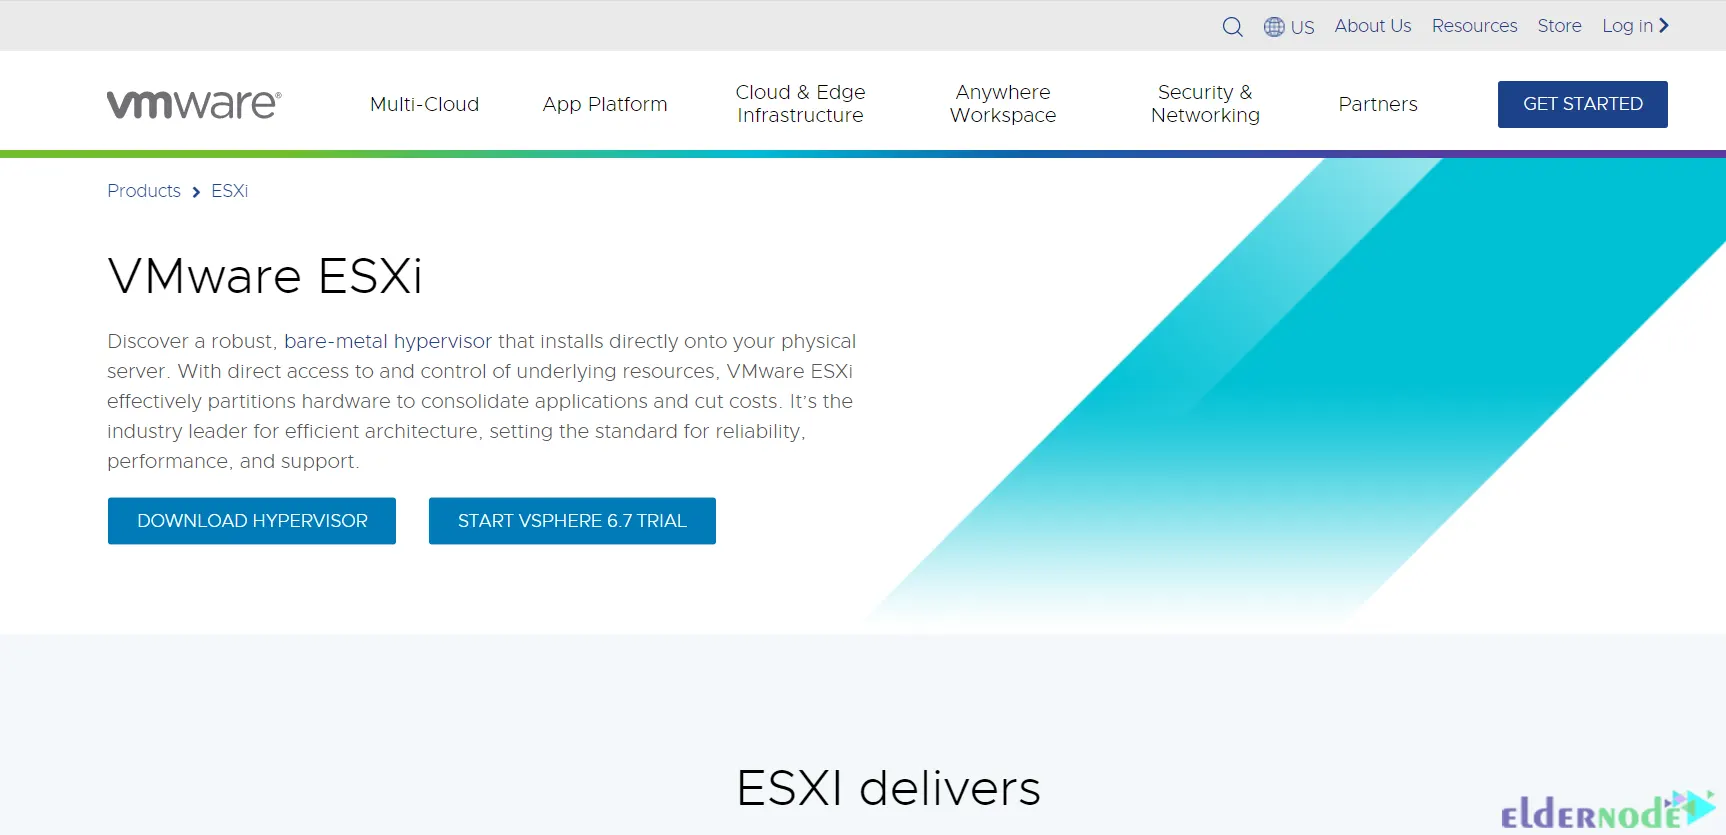
Once the download is complete, go to the installation process.
How to Install ESXi On Your Computer
In this section, you will learn how to install the ESXi server on your computer. To do this first, insert the ESXi CD and reboot your server.
You will be presented with a boot menu with options to launch the ESXi Installer and Boot from local disk. Choose ESXi Installer:

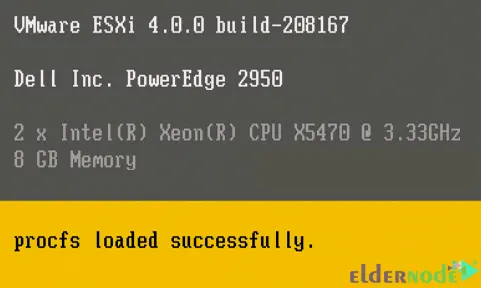
You will view the server configuration information when the installer is loading all the necessary modules:
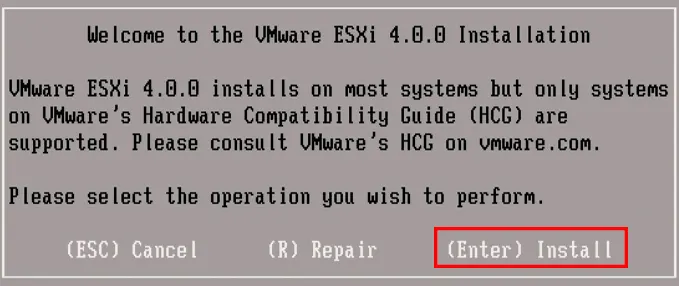
In the following screen, choose Install:
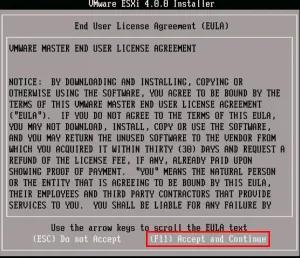
Now press F11 to accept the EULA:
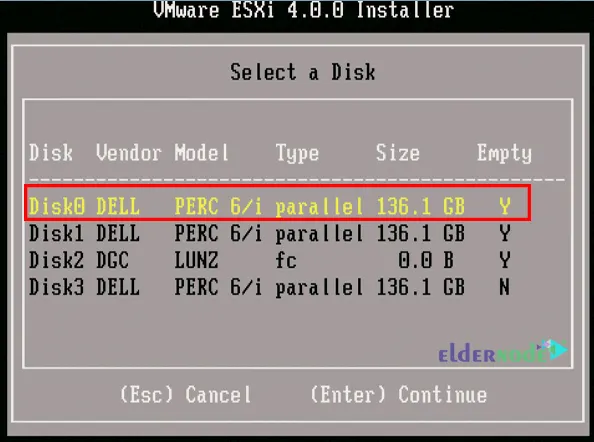
You will see all available disk groups that are displayed by VMware ESXi 4.0.0 Installer. You should select the Disk that you want to install the ESXi. We will choose the Disk0:
In this step, confirm ESXi installation by pressing F11:

Wait a few minutes for the installation process to finish:

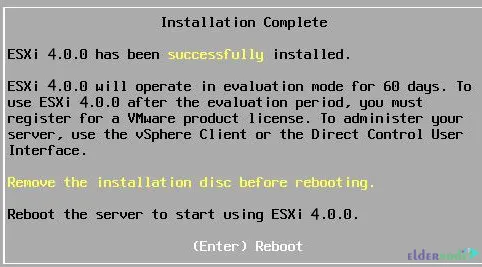
After the installation is completed, you will see the following screen:
How to Configure ESXi On Your Computer
After the installation, reboot the server. Then you will see the following screen:
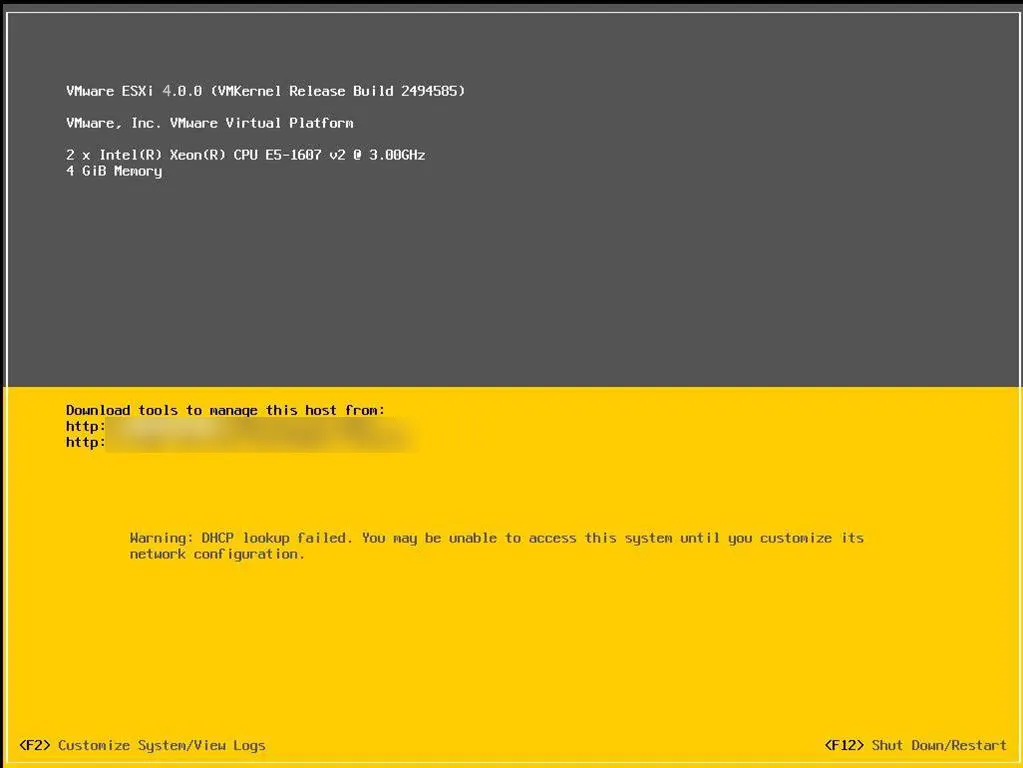
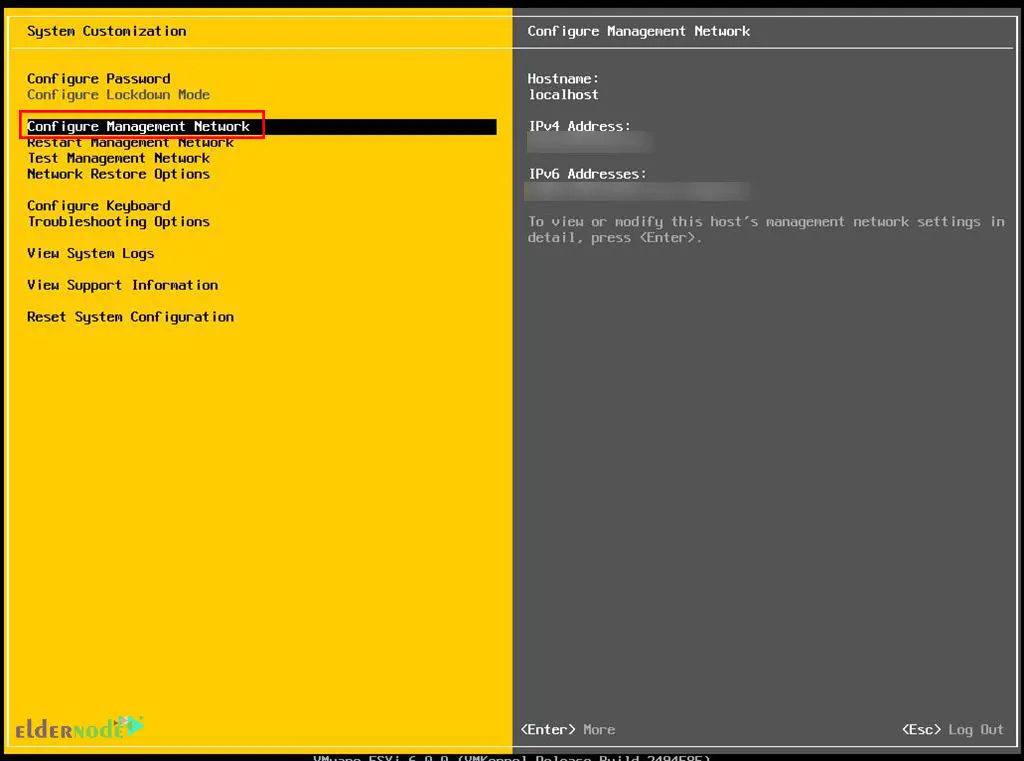
Press F2 to assign the IP address to the server and enter username, password, and root credentials. Then choose Configure Management Network and press Enter:
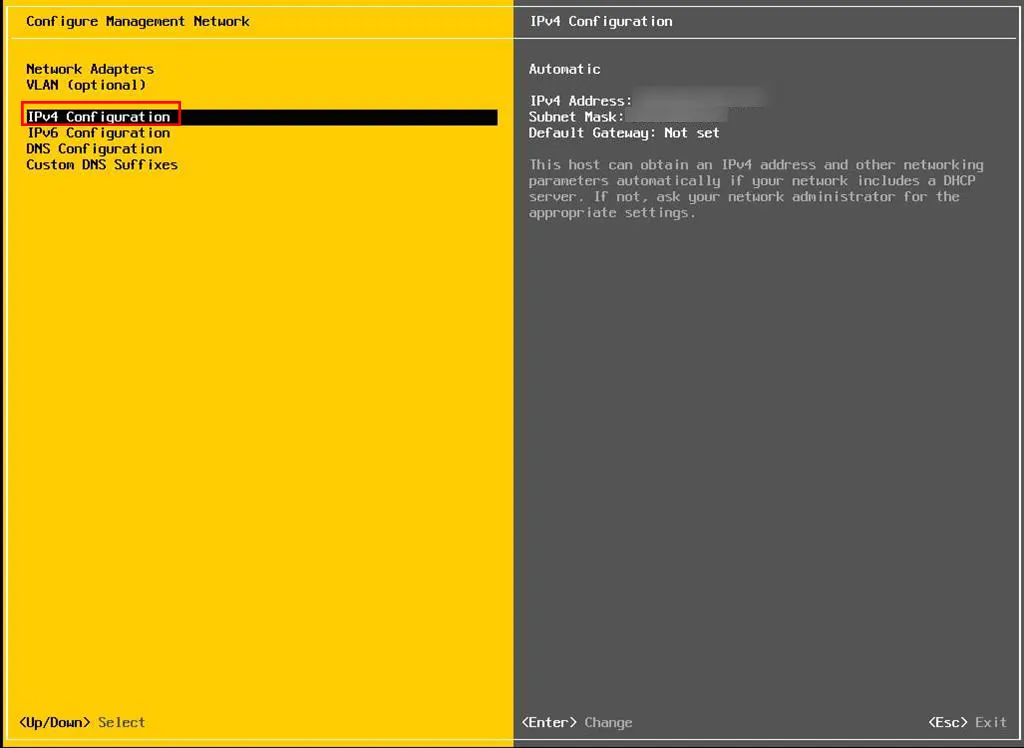
Now choose IPv4 Configuration and press Enter again:
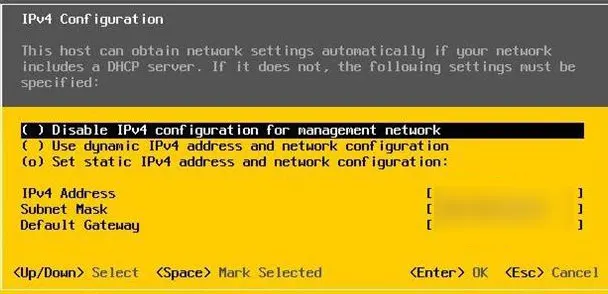
You can set the IP address as DHCP and also Static IP Address. We will choose a Static IP address and provide your IP. Then you will be asked to restart the management network, click Yes:
Lastly, choose DNS configuration and enter the hostname that you want to set to the server. You can come out of the configuration page by pressing the ESC key:

That’s it!
Conclusion
ESXi is the core of the vSphere Hypervisor product suite. In this article, we explained What Is ESXi, What Does It Do, and How To Install And Configure ESXi On Your Computer. I hope you enjoyed this article and helps you to install ESXi on your computer. If you have any questions and suggestions, contact us in the Comments section.


