Tutorial Wireshark installation on Windows. Wireshark is a point-to-point network analytics software that helps network administrators fully analyze all incoming and outgoing packets.
Wirehark software is available for free and is very popular.
Installing wirehark software on Windows is as simple as on any other Windows software, but there are steps involved in installing it that are different from other software and require further explanation.
Choose your perfect Windows VPS Server Packages
Wireshark installation guide in Windows
* First, download the wireshark software from the following link. (Download wireshark)
* After downloading, click Next to get to the component page.
* On this page, you can select Wirehark Components.
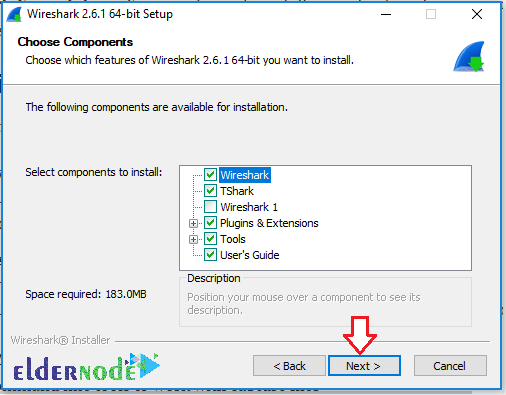
To fully run this software, install all the components.
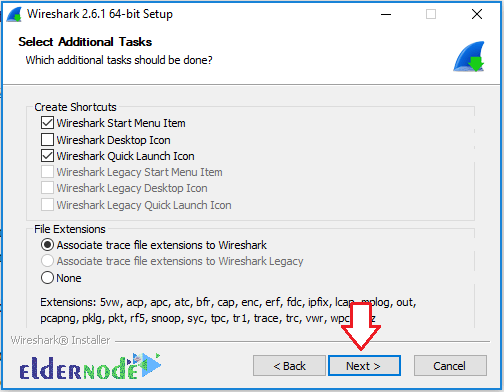
* In this window, select the location of the shortcut and the input /output extensions of the program.
Input/Output extensions are for when you want to save wirehark software analysis results.
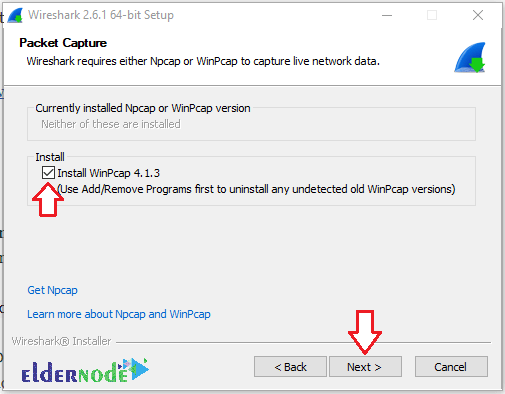
*Following the installation steps, you will be taken to the WinPcap tool installation page.
WinPcap is a standard auxiliary tool that works in the network link layer. This tool allows access to other software to visit and analyze packets.
* At this point you can install the USBPcap tool if needed.
USBPcap is a lightweight and very simple tool for analyzing packets from USB ports. Like WinPcap for network ports, this tool allows access to USB ports to wirehark.
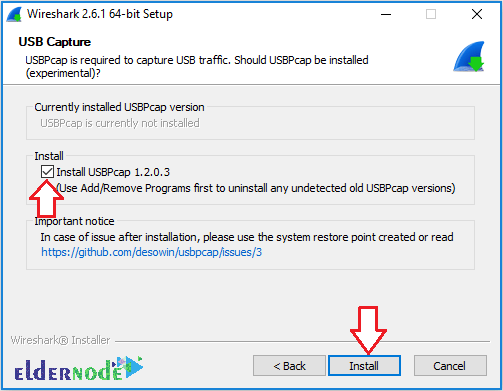
In the following steps of installing wireshark, you will see a window for installing WinPcap and USBPcap.
Finally, restart your system to enable all wireshark capabilities.
Dear user, we hope you would enjoy this tutorial, you can ask questions about this training in the comments section, or to solve other problems in the field of Eldernode training, refer to the Ask page section and raise your problem in it as soon as possible. Make time for other users and experts to answer your questions.
Goodluck.


