Tutorial How to set Windows 10 Update through the Registry. In this article, we will discuss how to set the Windows 10 update through the registry, so that you can use this method to change and adjust the update status. To view other articles about Windows 10 update, refer to the How to Disable Auto-Update in Windows 10 and How to Revert a Windows Update. You can choose your perfect Windows VPS Server Packages in Eldernode.
Tutorial Set up Windows 10 Update via Registry
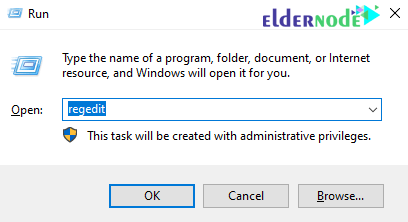
1. Use the Winkey+R key combination to open the Run window.
2. Then type Regedit and click OK.
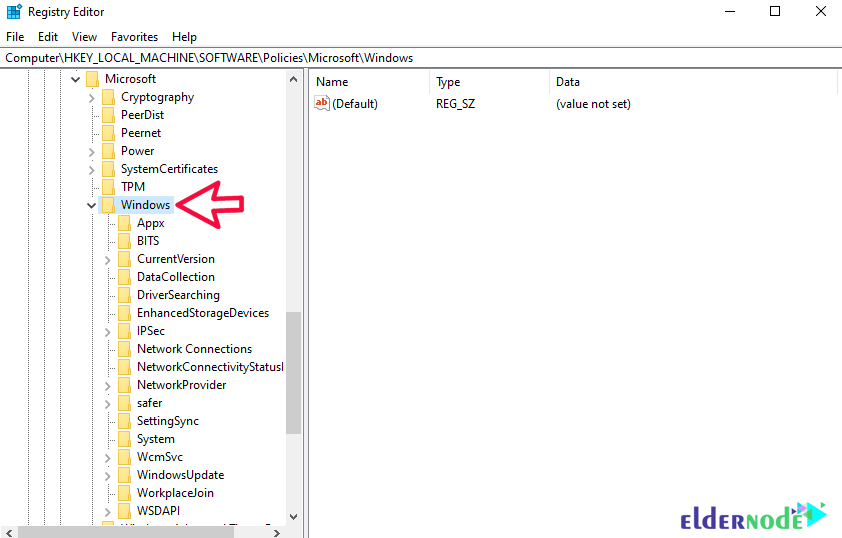
3. In the Registry window, go to the address written in the following line:
HKEY_LOCAL_MACHINE\SOFTWARE\Policies\Microsoft\Windows
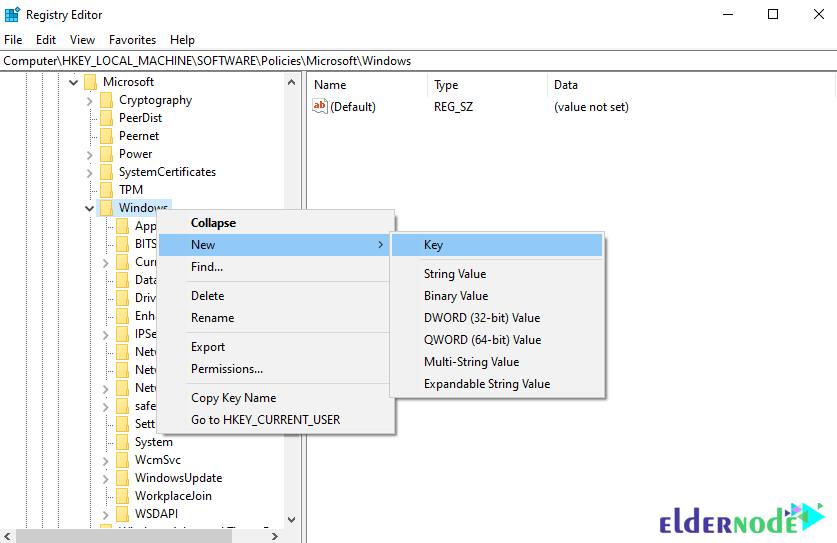
4. Right-click on the Windows directory as shown below and select Key from the New menu.
5. Then enter the name WindowsUpdate and press Enter.
6. Now right-click on the WindowsUpdate directory you created in the previous step and select the Key option again from the New menu.
Note: In this step, enter its name AU.
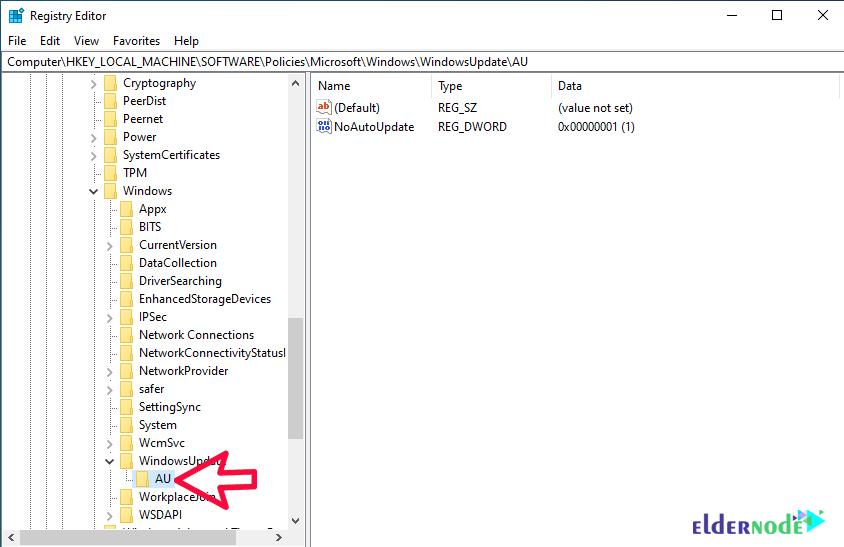
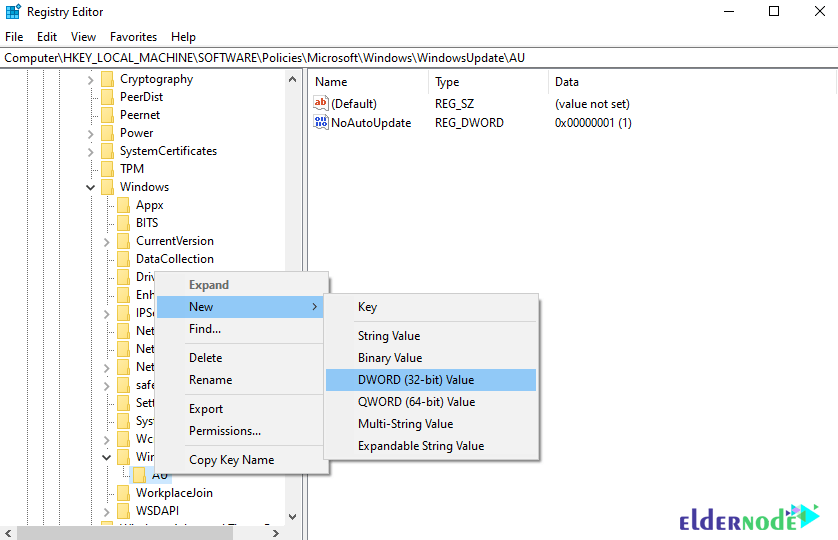
7. Right-click on the AU directory and select the DWORD option.
8. Enter the name of the DWORD key in AUOptions and press Enter.
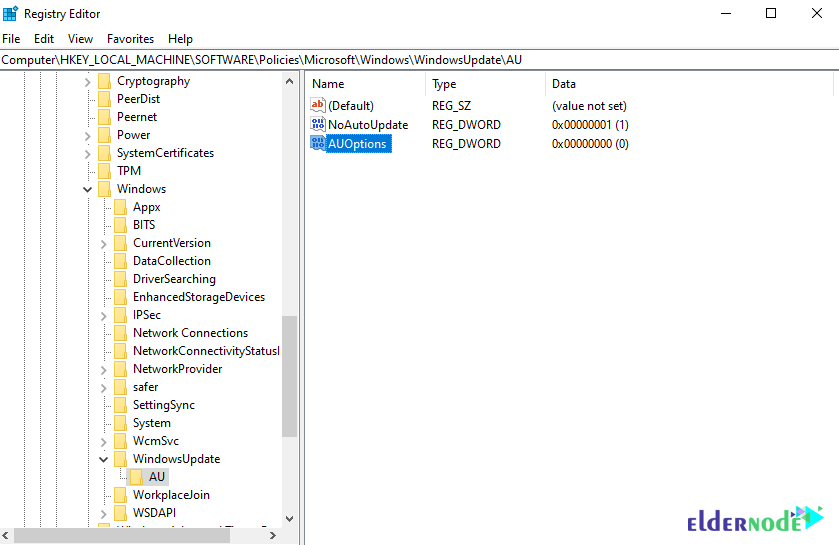
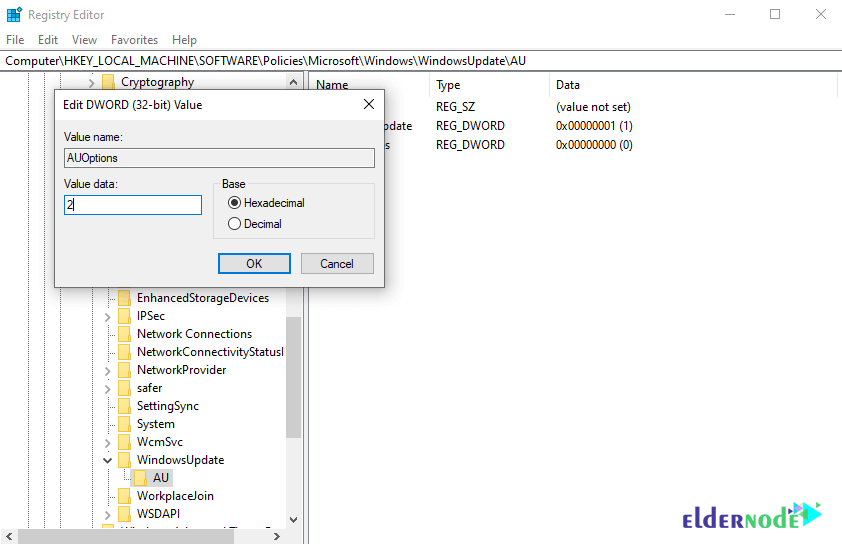
9. Now double click on the AUOptions button to open it.
10. In this section, you must enter a number between 2 and 5, which we have given the meaning of each of them in the following:
2: It will give you a message before downloading and installing each update.
3: Updates will be downloaded automatically and will notify you before installation.
4: Downloads automatically and sets the time to install it automatically.
5: Allow and access the local admin system to select the update status.
It is recommended to enter the best case, ie the number 2. Entering the number 2 causes the user to be notified before any action and to update if desired.
Note: This method is applicable and tested in Windows Server 2016 and other windows in the Windows 10 family.
Conclusion
Step-by-step tutorial on How to set Windows 10 Update through the Registry is fully covered in this article.


