[Updated on Date: 2021-01-30] A static IP is an IP address that is fixed and does not change. You can set it for your devices that use an IP address to be configured for having a static IP address. Since the network configuration is controlled and managed by netplan in Ubuntu 20.04, join us to review how to set IP static on ubuntu 20.04 LTS Server with netplan. Netplan enables configuring networking on a system via YAML files easily. And processes the YAML and generates the required configurations for either Network Manager or systemd-network the system’s renderer. To buy your own Linux VPS visit Eldernode and find the best suitable package due to your needs.
To let this tutorial work better, please consider the below Prerequisites:
A non-root user with sudo privileges.
To set up, follow our Initial server setup on Ubuntu 20.04.
Table of Contents
Tutorial Set IP static on Ubuntu 20.04 LTS Server with netplan
Using netplan utility as a new command-line network configuration helps you to manage and configure network settings easily in Ubuntu systems.
How to check Interface name
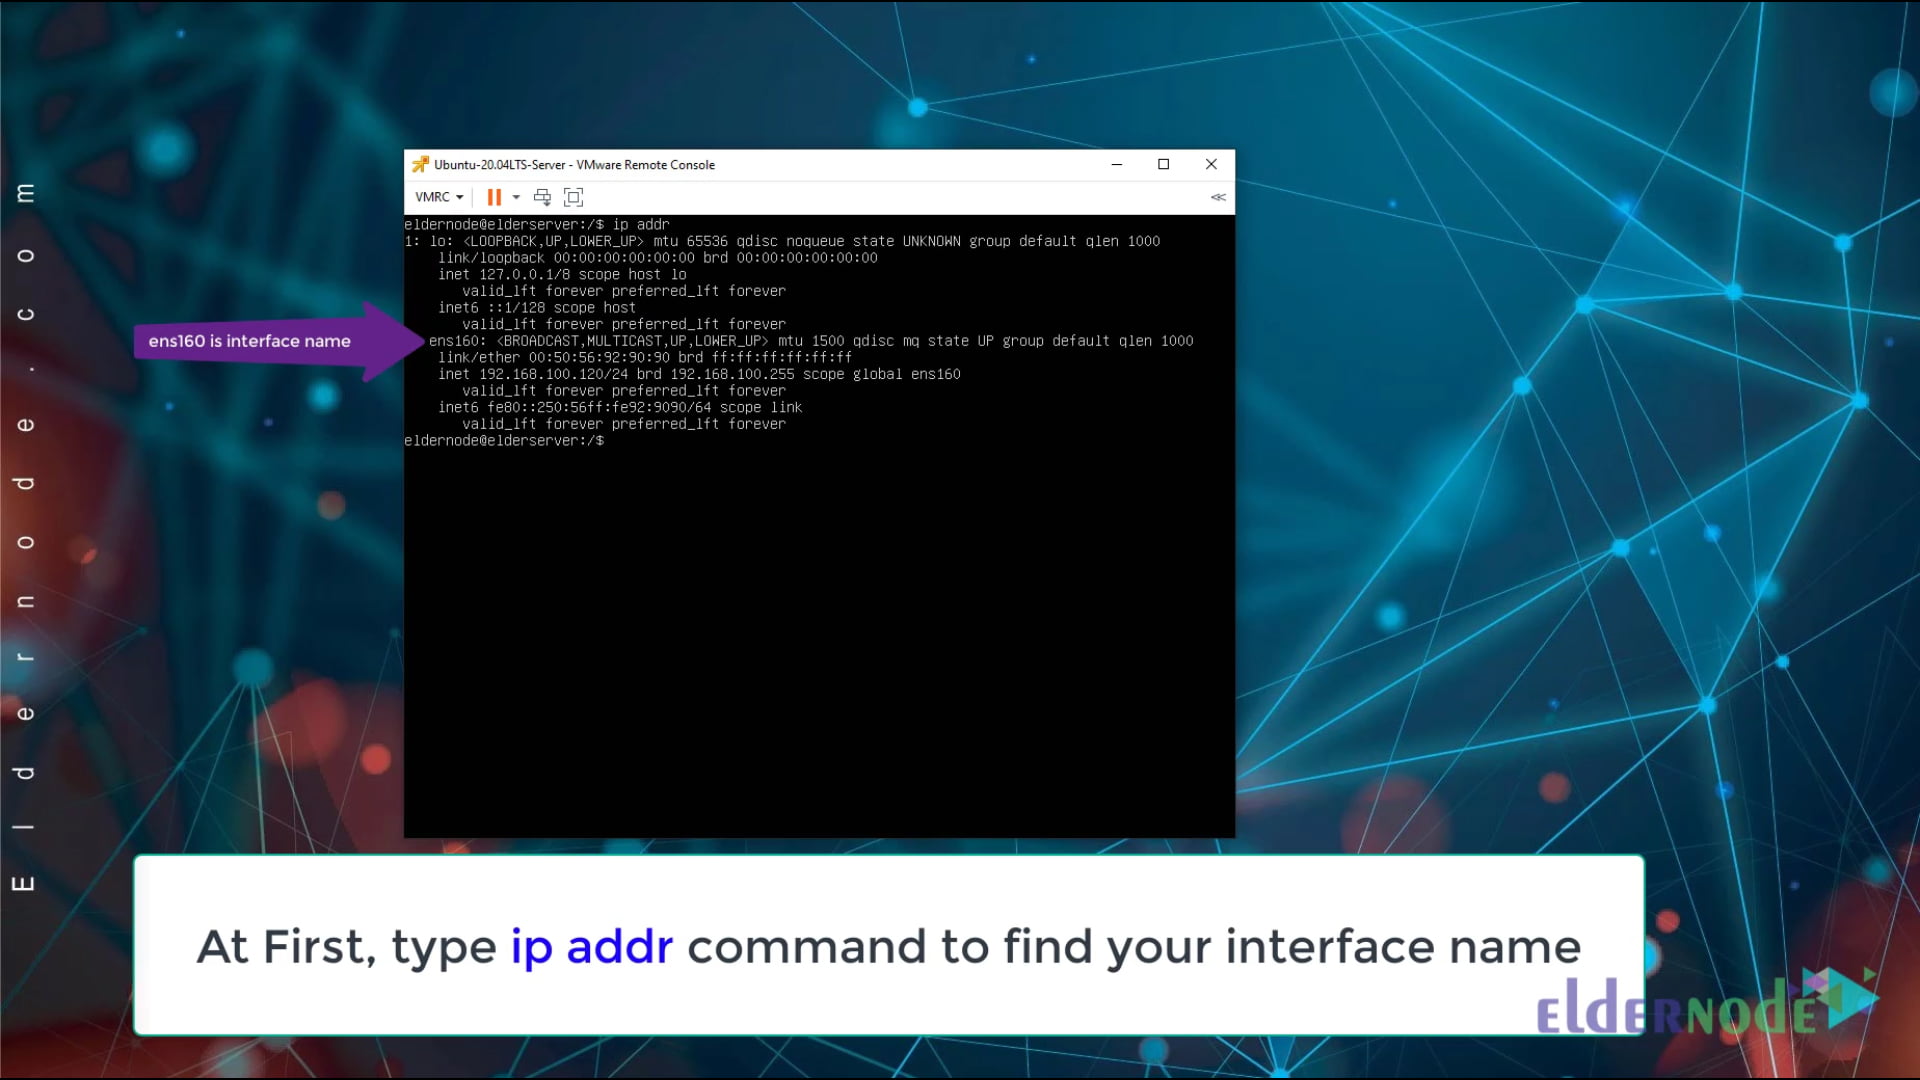
In the first step, you need to check all interfaces on the Ubuntu 20.04 LTS server. Enter the below command for getting the Network Interface Controller name.
ip addrWhen you enter the command, you can see your interface name. You need the name for network configuration later.

How to Set the IP address on Ubuntu 20.04 server
Go to /etc/netplan directory and check the name of the YAML file.
cd /etc/netplanAfter that, you can use the ls command to see the YAML file.
lsIt is time to set IP static on Ubuntu 20.04 LTS Server.
Sudo nano 00-installer-config.yamlRemember: Do not forget to edit your yaml file.
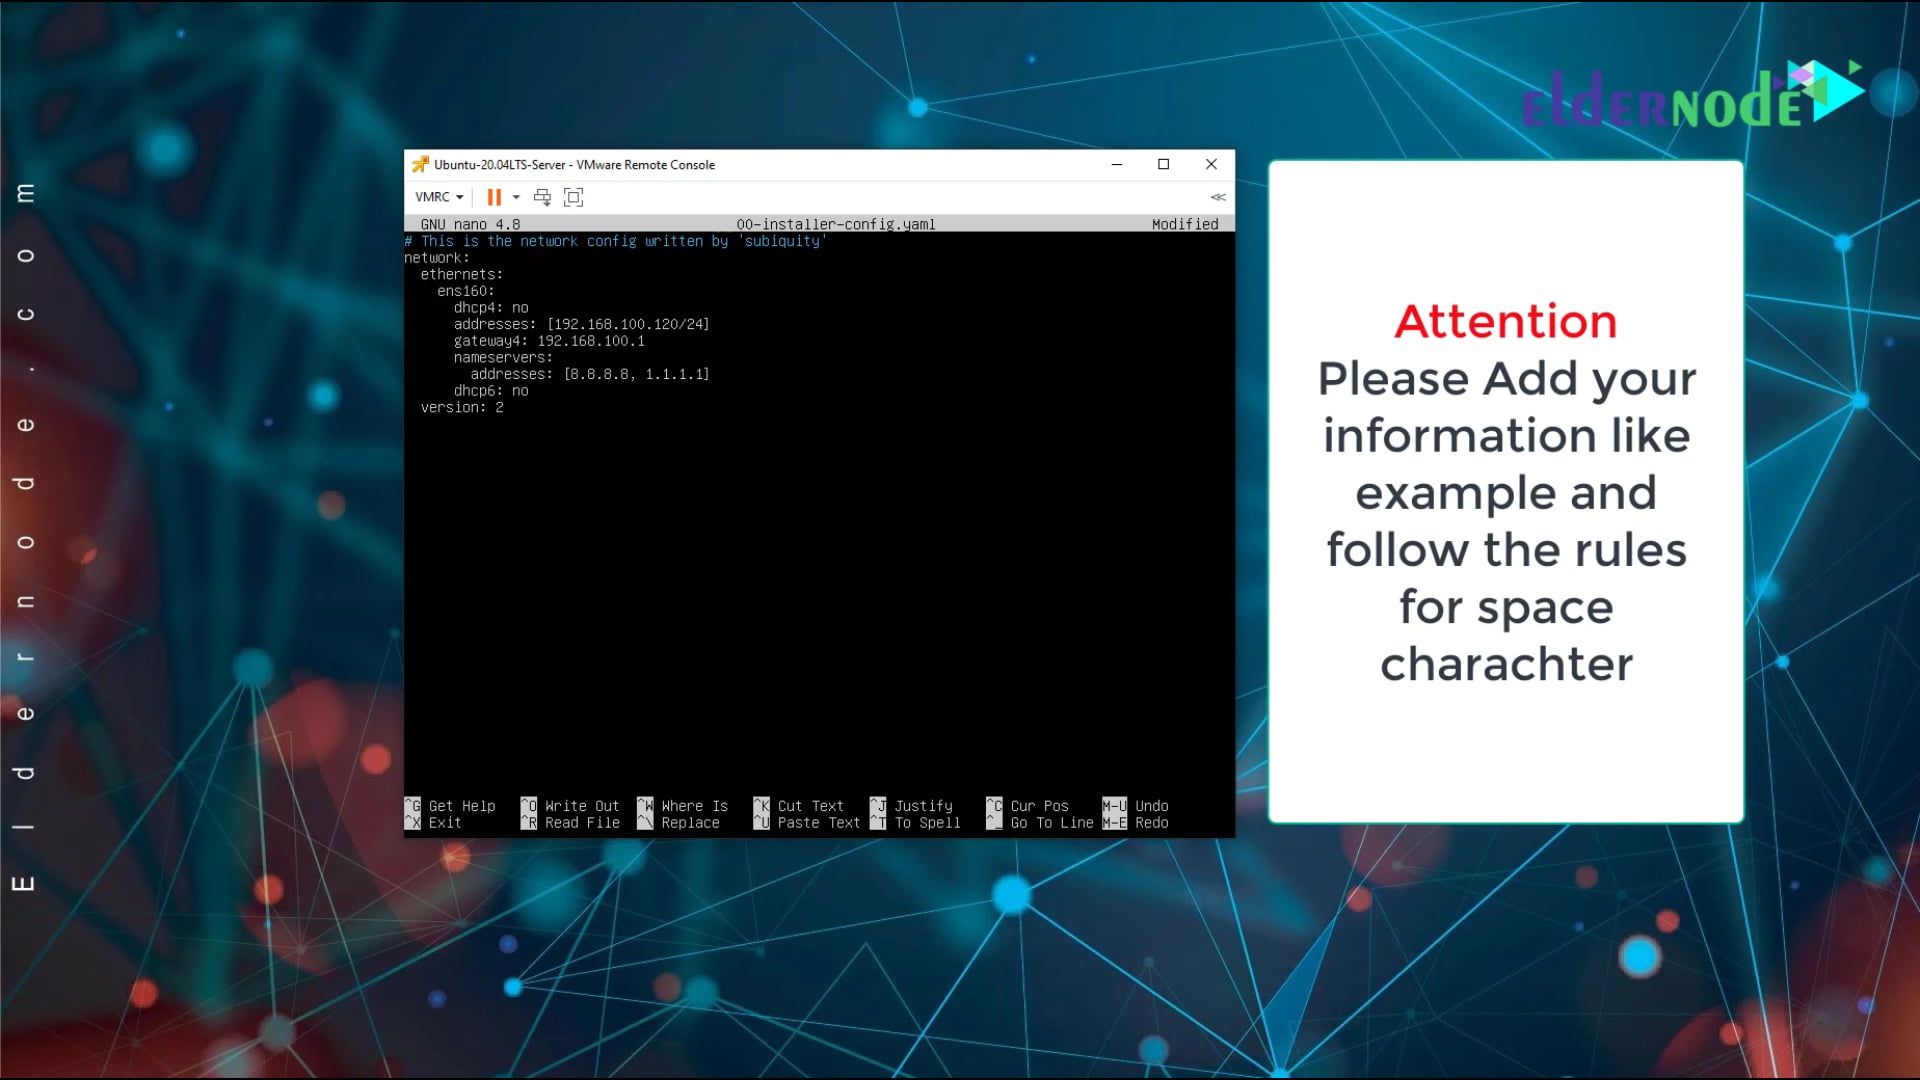
Type your Static IP and other information like this
network ethernets: ens160: dhcp4: no addresses: [192.168.100.120/24] gateway4: 192.168.100.1 nameservers: addresses: [8.8.8.8, 1.1.1.1] dhcp6: no version: 2Please attention below picture, you will see some space and some rules. If you do not consider rules, netplan can not detect your configuration.
After adding IP static and other information on the file, save, and exit.
Point: you can save and exit with Ctrl + x key and press Enter key twice.

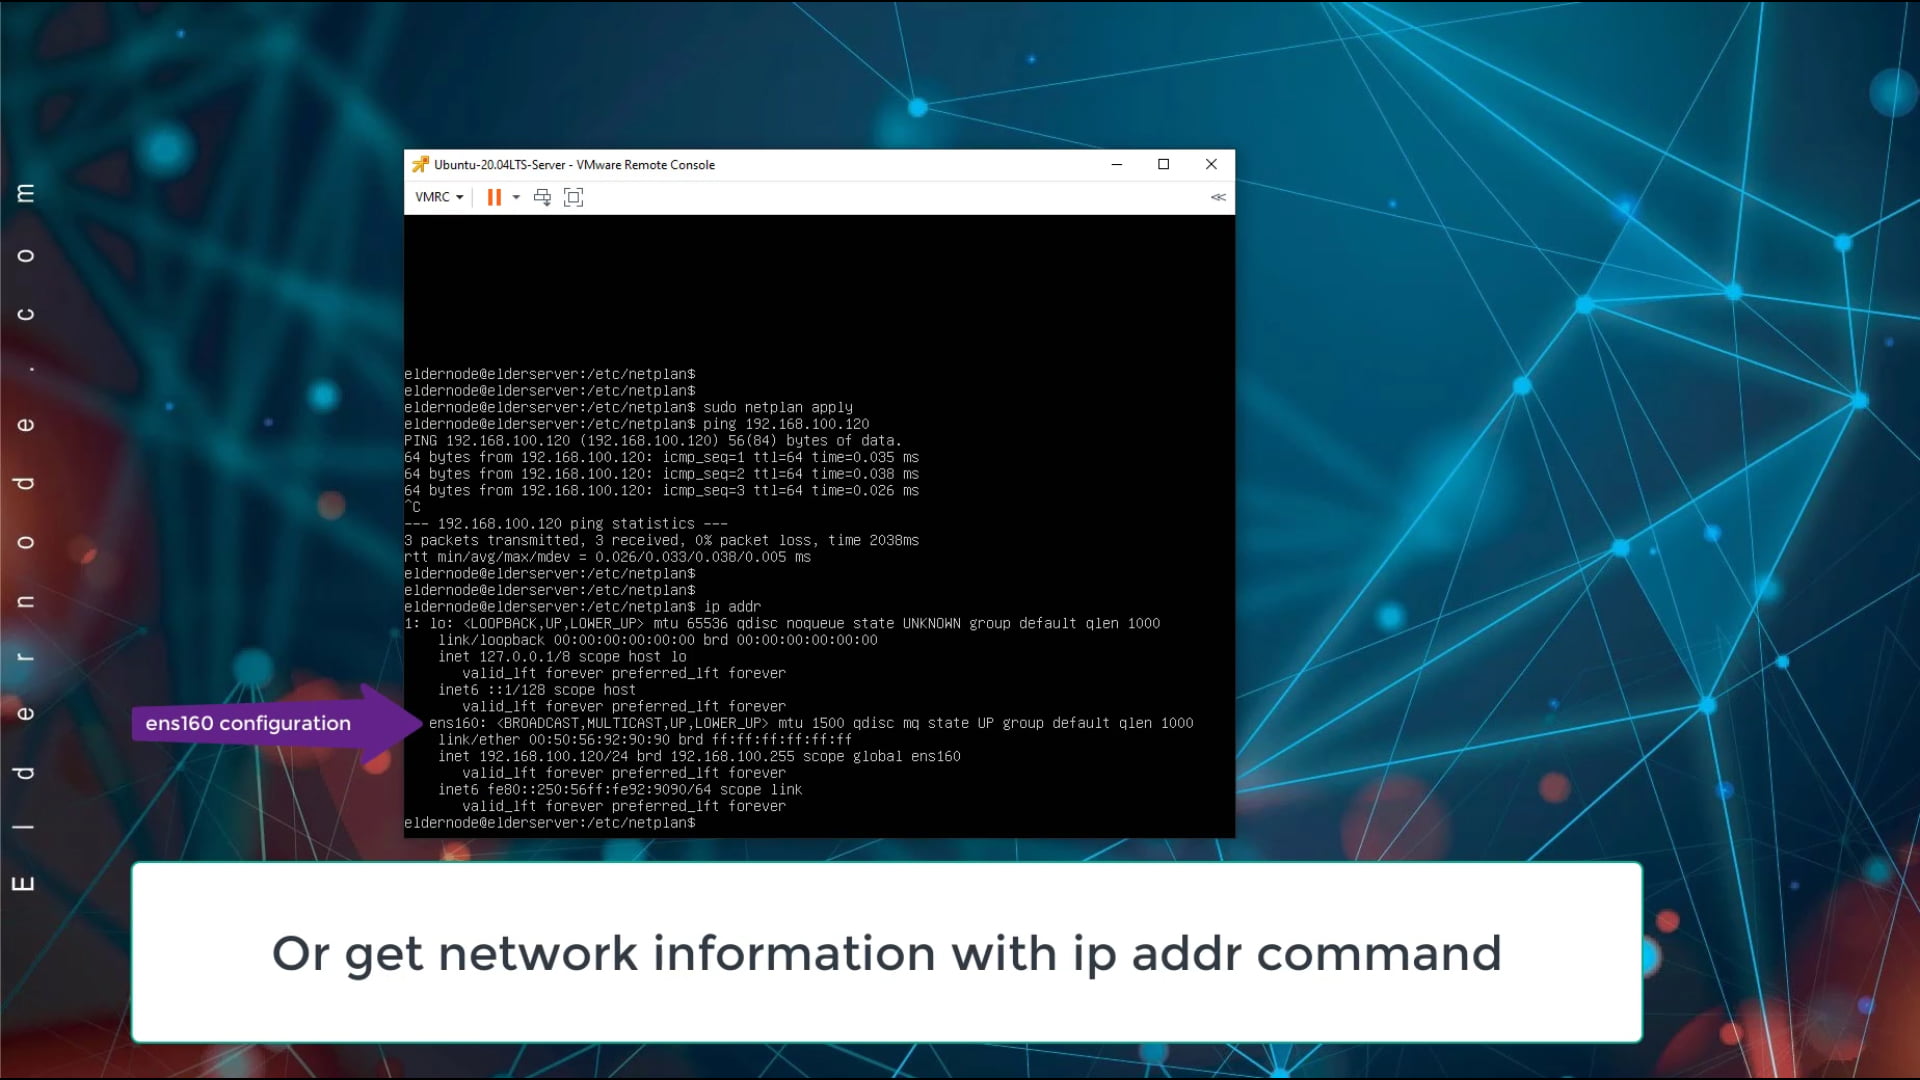
Apply configuration with the following command.
sudo netplan applyNow you can check Network configuration by ping your IP or ip addr command.

Also, you could see the video on the Eldernode Youtube channel.
Conclusion
In this article, you learned how to Set IP static on Ubuntu 20.04 LTS Server with netplan. From now on you can look at the bigger infrastructure by using the static IP to avoid network problems. In case you are interested in learning more, find our related article on How to find server public IP Address in Linux terminal.


Is setting a static IP addresses in windows same as this?
You can have a look at our article on (https://blog.eldernode.com/set-static-ip-in-windows-server-2016/)
But if i want to explain you, please trace below steps: Click Start Menu > Control Panel > Network and Sharing Center or Network and Internet > Network and Sharing Center. Then, click change adapter settings. After detecting your area connection, click properties and Select Internet Protocol Version Again Click Properties and select use the following IP address.
Should I connect a router overlay to configure a network?
Yes you need. Because the router is the gateway between the Internet and your home network. Also you should Access the router’s interface and lock it down.
Dear admin, could you please explain me what is the steps of setting IP static briefly?
Dear user, let’s see this overview together. After selecting the settings of the network interface you wish to configure to use a static IP address, you need to click the settings icon to start configuration. And when you select IPv4 tab, then you will select manual and enter your desired static IP address, netmask, gateway and DNS settings.
Is setting a static IP addresses in windows same as this ?
You can have a look at our article on (https://blog.eldernode.com/set-static-ip-in-windows-server-2016/)
But if i want to explain you, please trace below steps: Click Start Menu > Control Panel > Network and Sharing Center or Network and Internet > Network and Sharing Center. Then, click change adapter settings. After detecting your area connection, click properties and Select Internet Protocol Version Again Click Properties and select use the following IP address.
How can I display all available network interfaces names under Linux operating systems?
You can use the following commands to see all network interfaces under Linux operating systems:
ip command – It is used to show or manipulate routing, devices, policy routing and tunnels.
netstat command – It is used to display network connections, routing tables, interface statistics, masquerade connections, and multicast memberships.
ifconfig command – It is used to display or configure a network interface
How Netplan processes the YAML and generates the required configurations?
Since, Ubuntu has switched to Netplan for configuring network interfaces; Netplan is based on YAML based configuration system that makes configuration process very simple. Netplan has replaced the old configuration file /etc/network/interfaces which was used for configuring network interfaces in Ubuntu.
why we use netplan to Set IP static on Ubuntu?
Netplan is a new command-line network configuration utility introduced in Ubuntu 17.10 to manage and configure network settings easily in Ubuntu systems. It allows you to configure a network interface using YAML abstraction.
What if we do not prefer to use the netplan?
In this case you should be aware that on a running system, netplan can be removed by installing ifupdown, configuring /etc/network/interfaces manually as users have done before and finally removing the netplan.io package altogether.
Ifupdown? What is this? How could I install it?
To explain fast, please consider the 3 below steps to go for that:
Run update command to update package repositories and get latest package information.
Run the install command with -y flag to quickly install the packages and dependencies. sudo apt-get install -y ifupdown.
Check the system logs to confirm that there are no related errors.
You mentioned how to check Network configuration by ping your IP or ip addr command. Please explain how to assign a static IP address to my phone?
Yes, sure. First tap on the settings icon beside the Wi-Fi network name. Once the pop-up opens, you will see IP settings at the bottom of the menu. The default option is “DHCP”. Tap on it to change the IP configuration.
Hi, very good. How can i be aware about new articles once publishing?
It would be nice that manuals for native ipv6 are written. Basically they are the same, however if you add a static IP(v6) in netplan or dhcpcd ther is always a hardware address added. That address is the default source address for outgoing connections.
So far only native networking with interfaces is working correct.
Thanks for your comment, we will inform you that in future posts, how to Set IPv6 on Ubuntu 20.04 LTS Server with netplan will be written. Please follow our articles.