Maybe it has happened to you that different packets come to your MikroTik, or packets are sent from inside your network to the Internet or vice versa. You may want to follow them to learn more about it. Torch allows you to fully track packets and find out their type. This article will teach you How To Install Torches On MikroTik Routers. You can check out the packages offered on the Eldernode website if you intend to buy a MikroTik VPS.
Table of Contents
Tutorial Install Torches On MikroTik Routers
Torches is a real-time traffic monitoring tool in MikroTik that you can use to monitor the traffic flow through an interface. It allows you to monitor traffic classified by protocol, mac-protocol, port, source address, a destination address, mac address, VLAN ID, and DSCP. Based on the protocols you have selected, this tool will display the data sending and receiving rates for each.
In this tutorial from the MikroTik training series, you will learn how to install Torches on MikroTik Routers.
Installing Torches on MikroTik Routers
First, we will teach the installation process of Torches on MikroTik Routers. To do this, follow the steps below.
If you are the admin and you want to identify the user that is congestion the network, all you have to do is to identify and torch the LAN interface on the MikroTik Routers. You can run the Torch tool on MikroTik Routers as shown below:
/tool torch interface=ether1 port=anyNote: Remember to replace your interface instead of ether1.
Using Torches on MikroTik Routers
In this step, we will explain how to use Torches on MikroTik Routers.
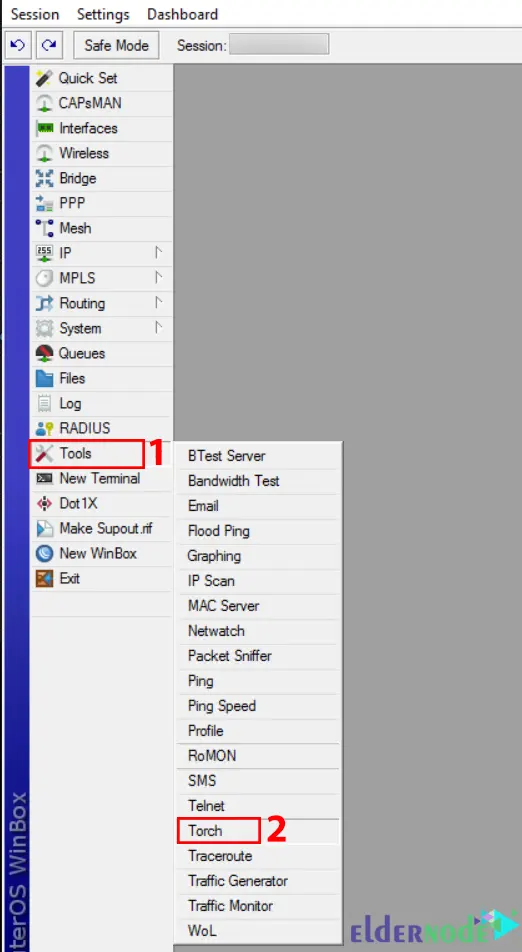
First, open your Winbox and log in as root. Once you have connected to the MikroTik server, navigate to Tools >> Torch path:
Now you will see the following window. All you have to do is to choose an interface that you want to monitor and check what information to collect.
The Filters section allows you to choose a Source address and Destination address to filter the traffic only with such an address, any source, and destination address.
If you leave the Source address and Destination address as the default, it will capture all the traffic that is flowing through the interface. Then, choose MAC Protocol, Protocol, and Port, and click on Start:
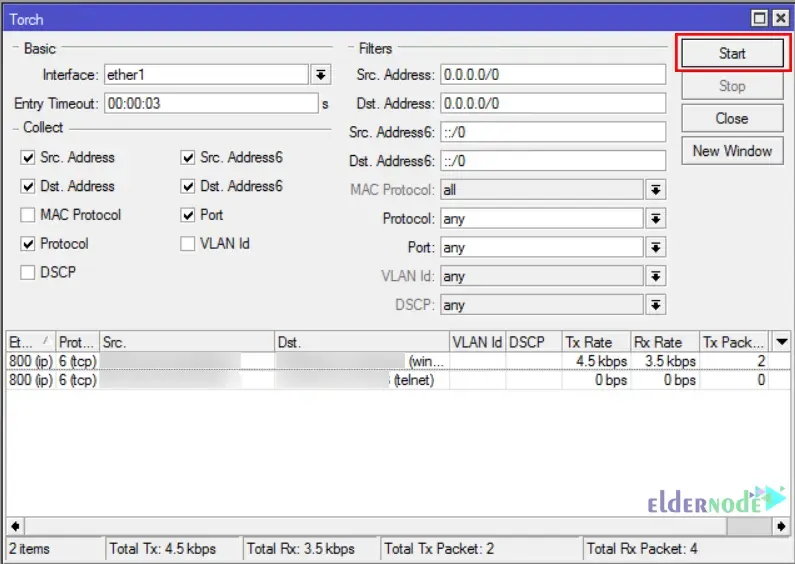
Lastly, you will see the connections and traffic that are flowing through the Routers.
If you put the Protocol into ICMP in the Filters section, it can help you to troubleshoot your router in terms of traffic.
Conclusion
Torch is a very useful tool for monitoring your traffic that is going through an interface. In this article, we taught you how to install Torches on MikroTik Routers. I hope this tutorial was useful for you and helps you to install Torches on Mikrotik Routers. If you have any questions or suggestions, you can contact us in the Comments section.