Tutorial Install SSL Certificate on IIS Web Server. The SSL security certificate stands for Secure Sockets Layer. The use of SSL is to provide security between the user and the website, and creates an encrypted port to reassure the user.
To ensure user confidence, use a secure connection via SSL or security certificate, browsers in the URL use https and a lock icon and green bar instead of http. SSL technology ensures that all data remains encrypted in the browser.
In previous articles, we taught you how to install SSL in cpanel. In this article, we are going to teach you how to install SSL in IIS Web Server.
You can Choose your perfect Windows VPS Server Packages from eldernode.
Table of Contents
A) Add the Certificate to MMC
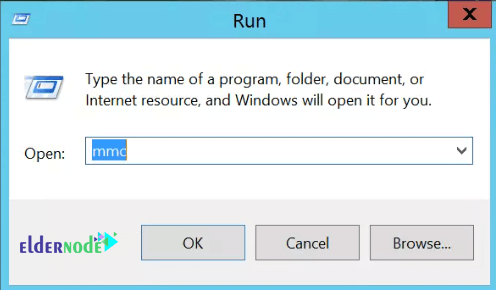
Use the Win+R key combination to open the Run program.
1. Type MMC and click OK.
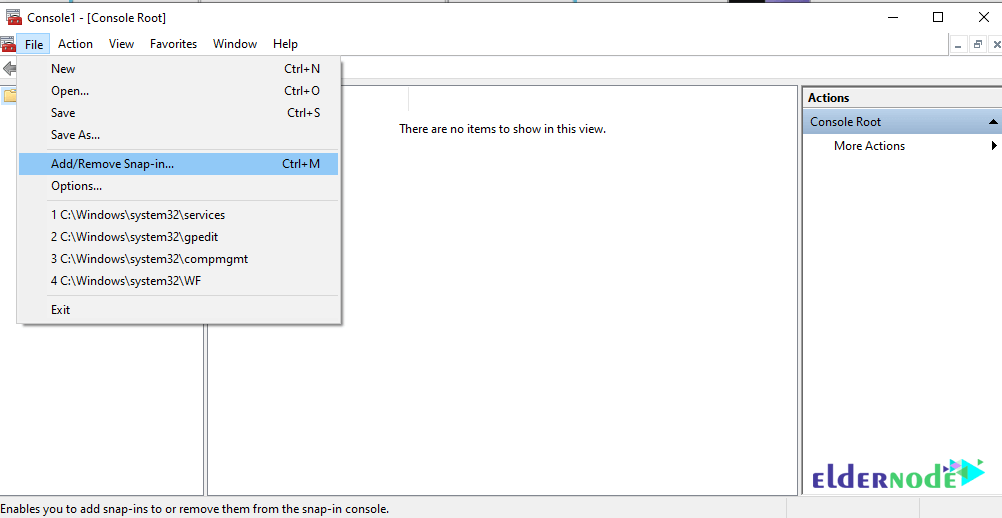
2. On the new MMC Console window Click on File then Add/Remove Snap-In.
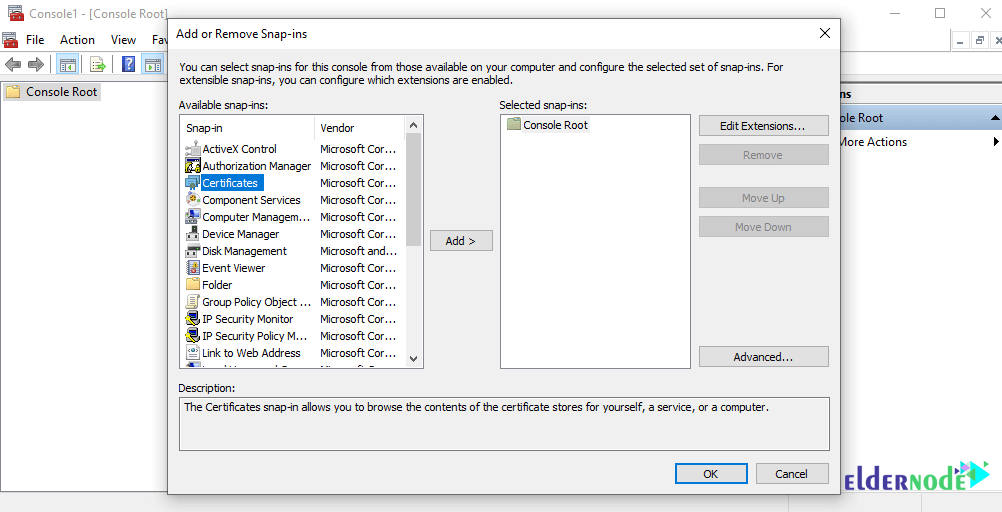
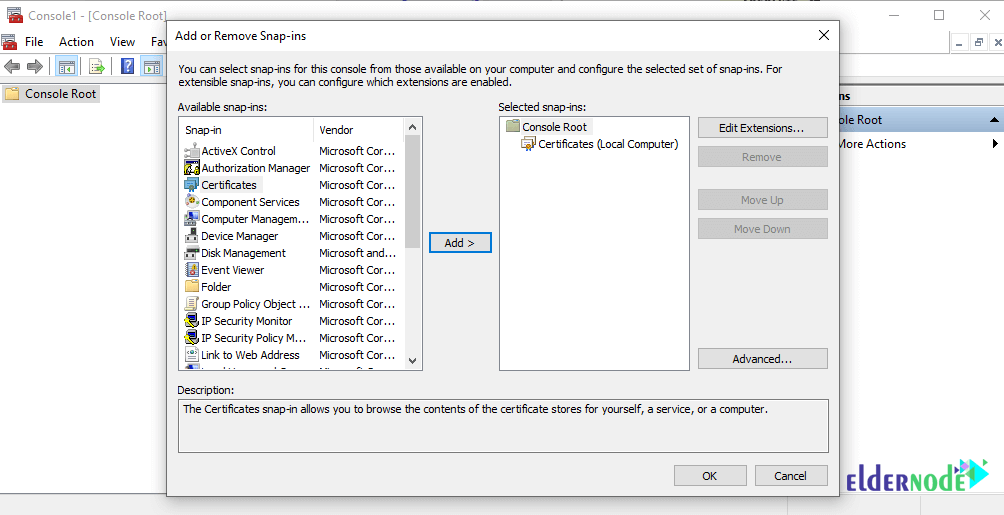
3. In the Add / Remove Snap-ins window, first click Certificates and then Add.
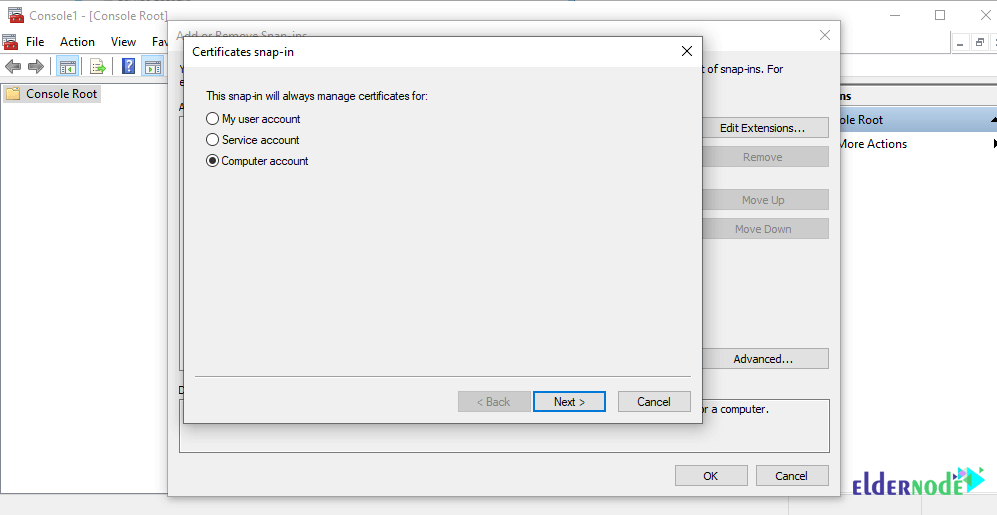
A new window like the one below will open called Certificates Snap-In .
4. Click on the Computer Account button and click on Next.
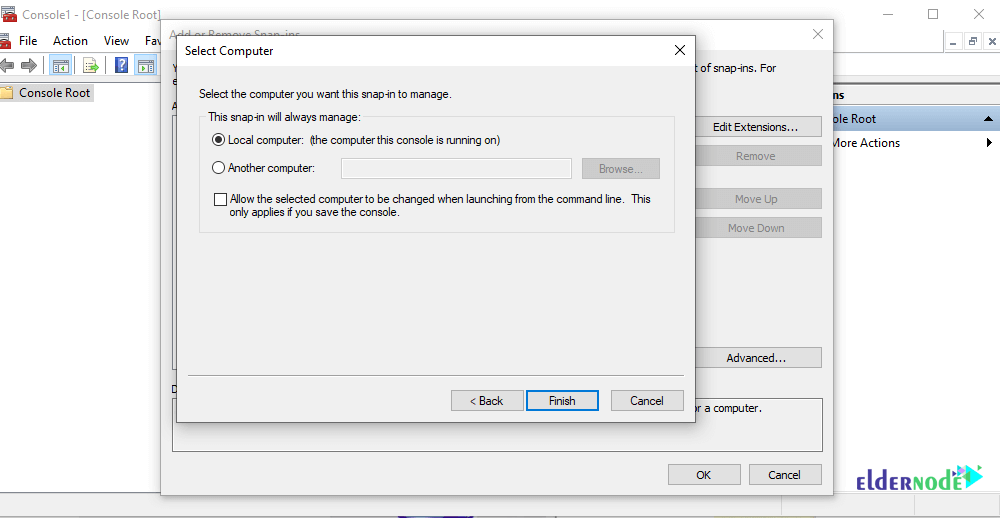
5. choose Local Computer and hit Finish.
6. Click on OK to close the Add or Remove Snap-Ins Window.
B) Import the Certificates
7. Click on the certificates drop-down.
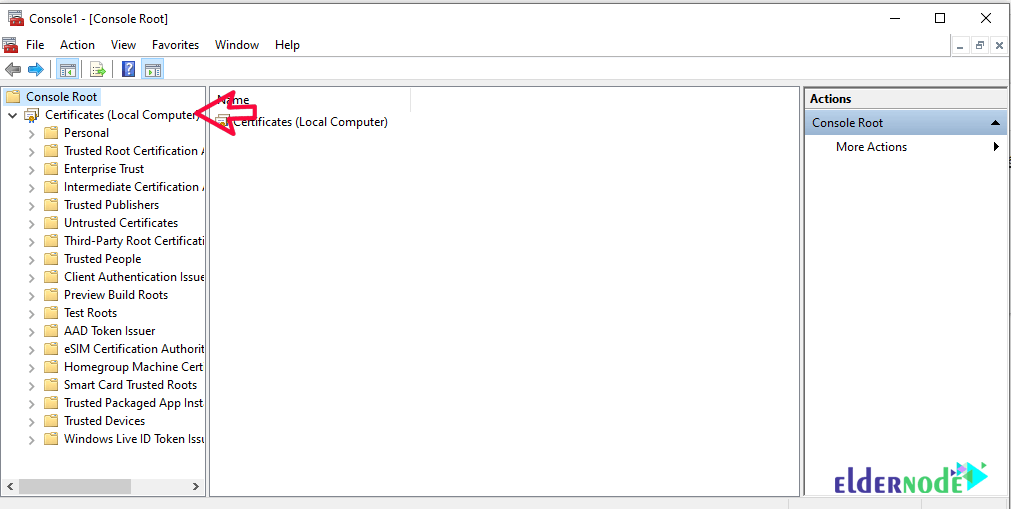
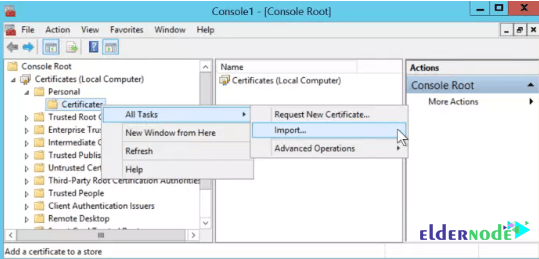
8. Click on the Personal drop-down and then Right-click on Certificates > All Tasks > Import.
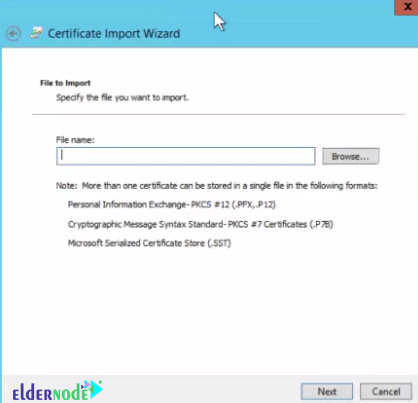
9. In the image below, click Browse and browse your SSL files.
*
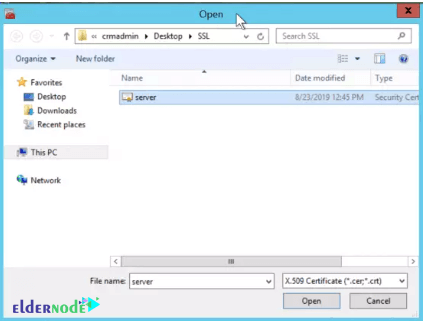
After finding the file you want, open it to see the SSL certificate as shown below.

C) Add Certificate to IIS
It is time to install your Certificateson on your IIS Windows Web server.
10. Search for IIS Manager using the Windows key.
11. After opening IIS Manager, select Default Website and select Bindings from the right side of the page.
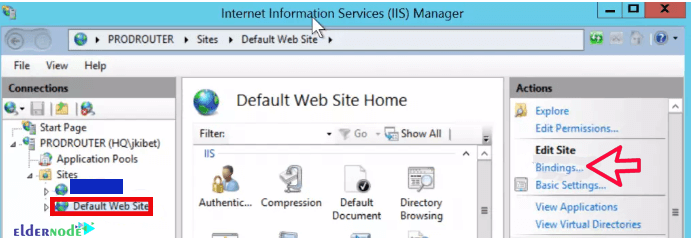
12. In the Site Bindings window, click Edit.
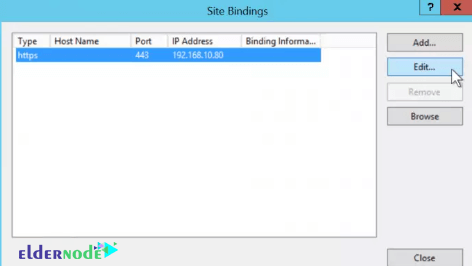
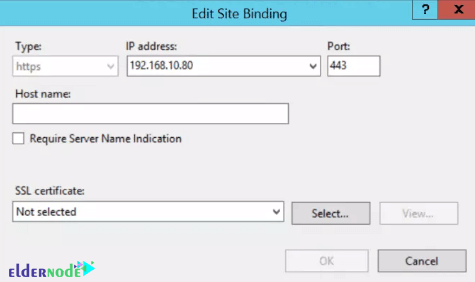
Make sure your IP and Port are correct. You can as well place a Hostname.
On the SSL Certificate area, click on the drop-down arrow and check whether the friendly name of your SSL Certificate you noted is available. After selecting it, click OK.
D) Restart IIS Server
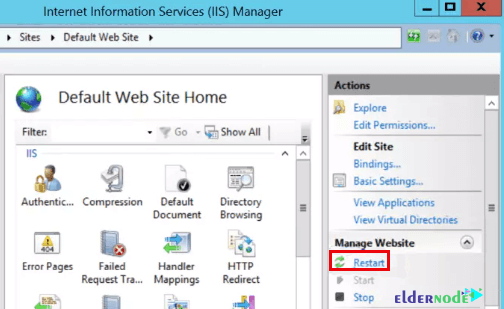
In the final step, you need to restart your IIS Site. To do this, head over to your IIS Manager Window and Click on Restart.
Dear user, we hope you would enjoy this tutorial, you can ask questions about this training in the comments section, or to solve other problems in the field of Eldernode training, refer to the Ask page section and raise your problem in it as soon as possible. Make time for other users and experts to answer your questions.
Goodluck.
