How to install Root Certificate in Google Chrome. Sometimes some web-based software as well as some personal websites have Self-sign SSLs. This means that even though they have SSL, they will be displayed to you in red.
Generally, some management tools are served on the web, and the installation of client software on systems is no longer used. For added security, these services come with a Self-Sign security certificate that is not recognizable to browsers, which will slow down your access to the site.
To solve this problem, you must download the Root Certificate of that set and service. Then install it in your Google Chrome using the method that we will explain in the following.
Note: Avoid installing certificates from sites and software that you are not sure about.
Follow us to learn how to install Root Certificate in Google Chrome.
Tutorial install Root Certificate in Google Chrome
1. Open your Google Chrome first.
2. Then click on the Setting option from the main menu.

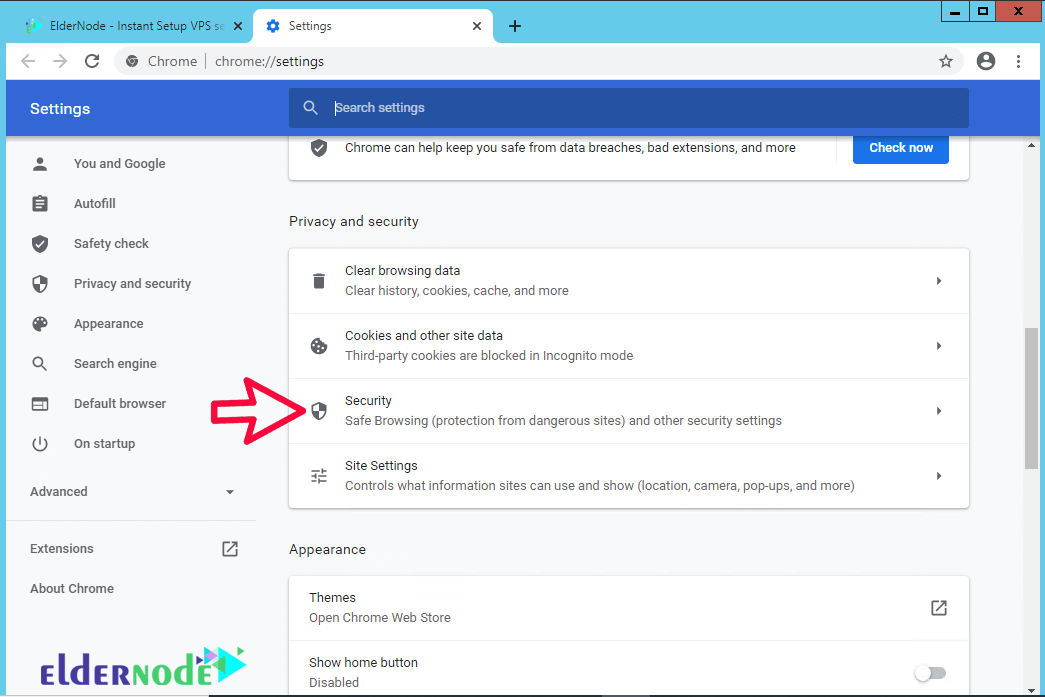
3. In the Privacy and security section, click on Security.
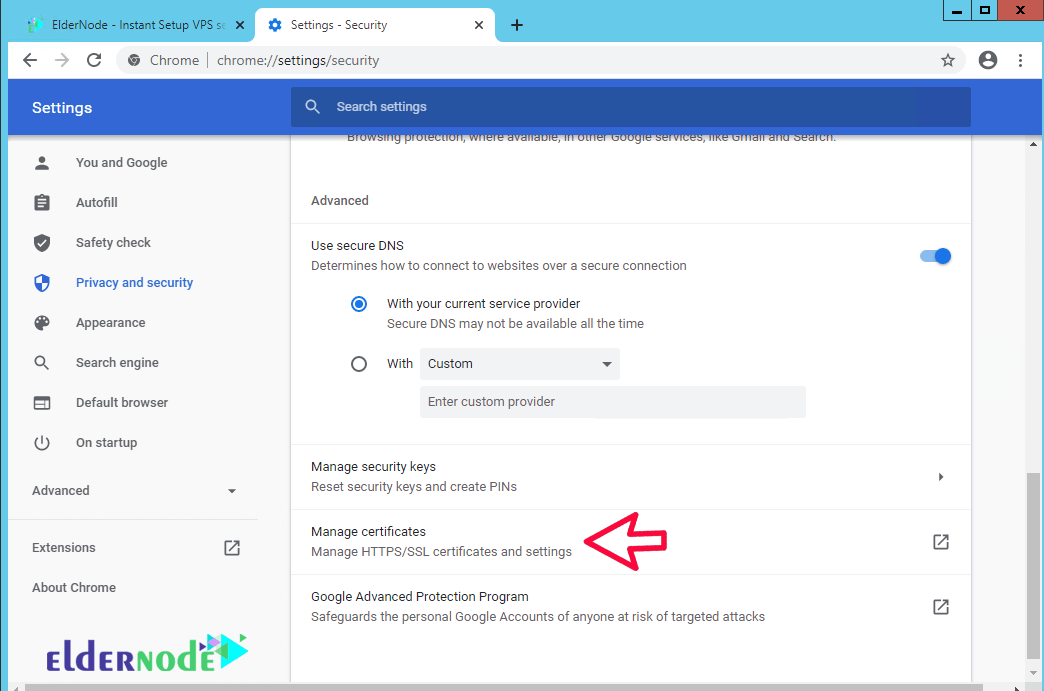
4. Find the Manage Certificates option in the middle of the page and click on it.
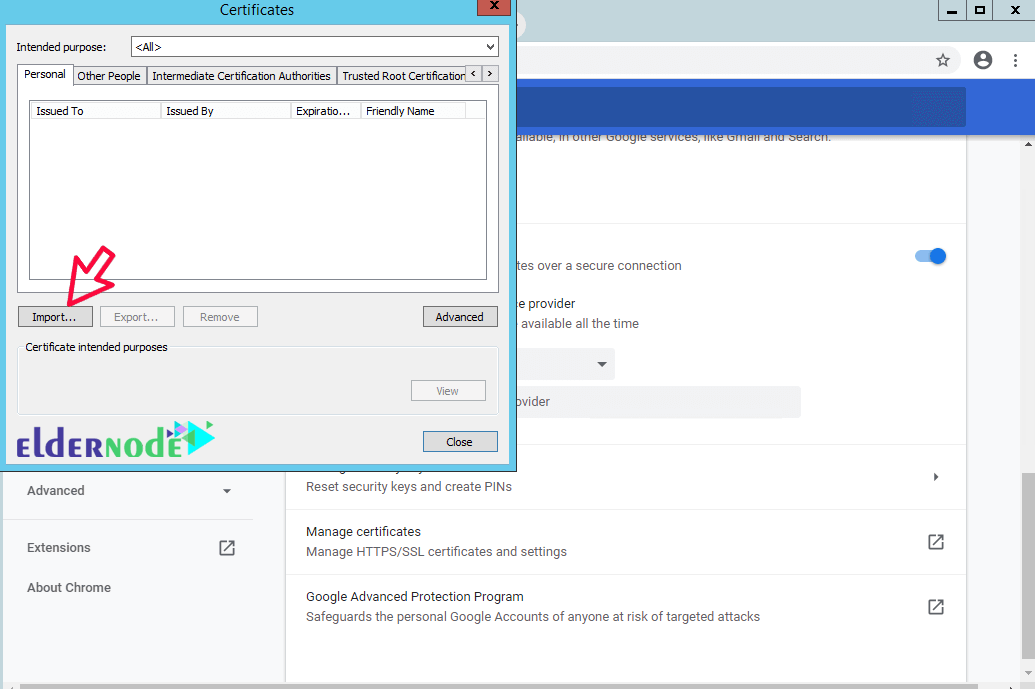
5. Now click on the Import option and click Next in the first step.
6. In the second step, click on Browse and select the downloaded certificate.
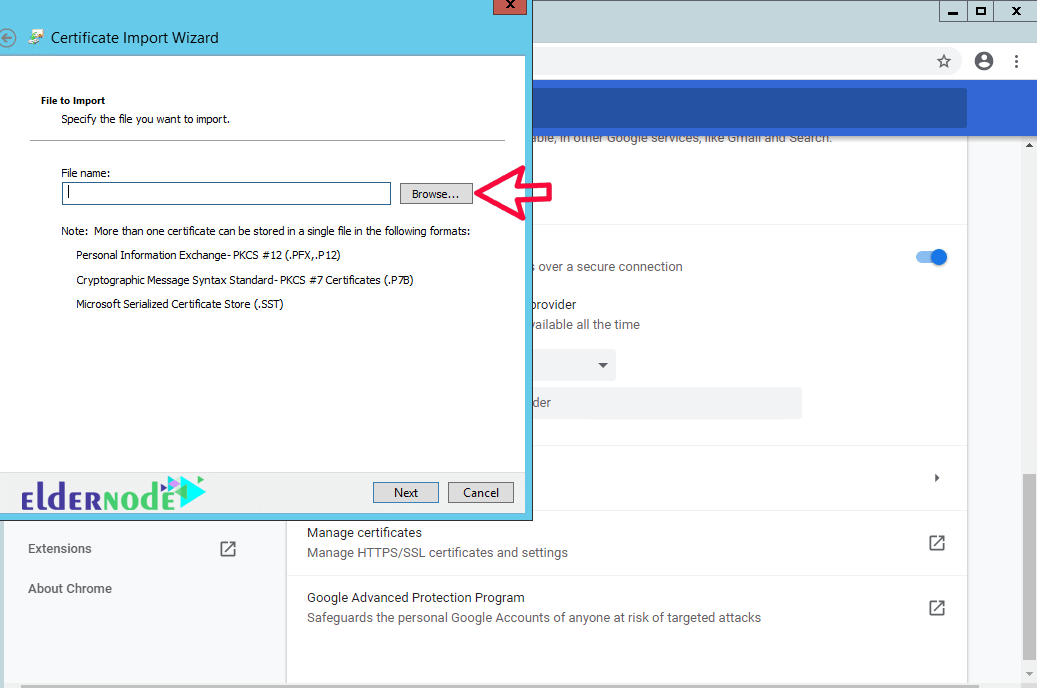
7. In the same way, click Next to install the Root Certificate until the end of the steps without change.
Note: Google Chrome uses the Windows Personal Security Certificate repository, so you can install the Certificate through Windows.
If you need to install the Certificate in Firefox, refer to the tutorial on installing the Root Certificate in Firefox.
Goodluck.


