Python is a powerful programming language that has high code readability. It comes with different packages for programming, data science, and many other things. Since Python doesn’t have packages and libraries for developers, you should install them separately. You can do this with Pip3. This article will teach you How to Install Pip3 On Windows With A Few Easy Steps.
Table of Contents
Tutorial Install Pip3 On Windows Server
PIP stands for Pip Installs Package or Preferred Installer Program and is a command line to manage PyPI package installations from the command line. In fact, it is a package management system that is used to manage third-party packages written in Python. Pip3 is an updated version of PIP. This utility is used to combine two or more commands. Nevertheless, the output of one command acts as the input of another command. So that the output of the command may also serve as the input of the next command.
Download get-pip.py
First of all, search for cmd in the Windows search bar and open it. Also, If you want, you can get Windows VPS and then run these commands on it.
Now download the get-pip.py using the command below:
curl https://bootstrap.pypa.io/get-pip.py -o get-pip.pyInstalling Pip3 on the Windows
All you have to do to install Pip3 on Windows is run the following command:
python get-pip.pyIf you can’t find the file, you should check the folder path of the saved file. The following command shows the contents of the current directory:
dirCheck the installation of Pip3 on the Windows
You can check if the Pip3 is installed successfully or not using the command below:
pip helpOnce you have installed Pip3 on your Windows successfully, you will see the location of the software package and a list of commands you can use with Pip3.
Adding Pip3 to Windows Environment Variables
Afterward, follow the steps below to add Pip3 to Windows Environment variables:
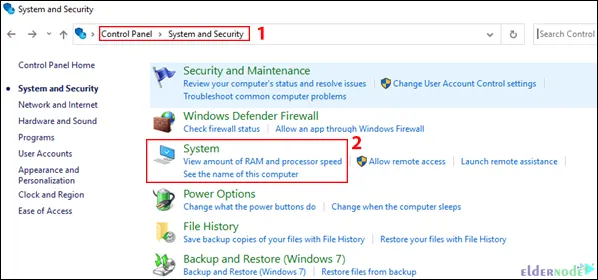
Open the Control Panel and Navigate to the System and Security > System path:
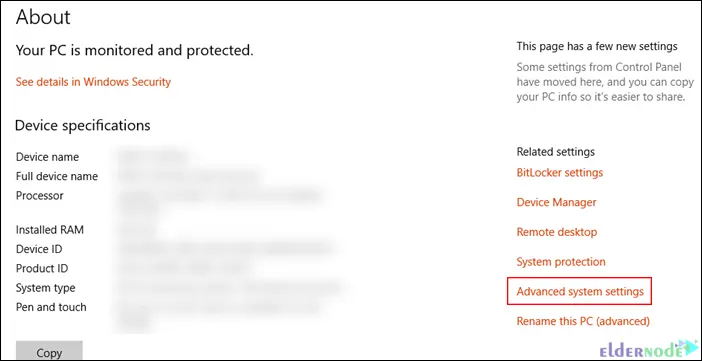
Choose Advanced system settings:
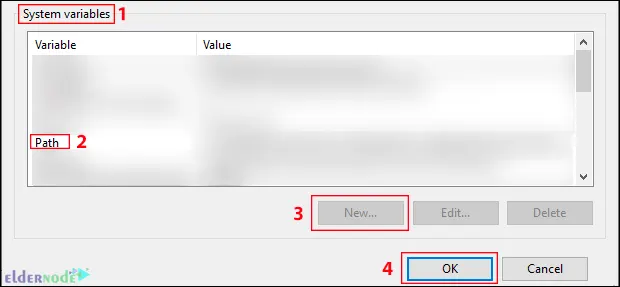
Open the Environment Variables and choose the Path in the System Variables section.
Click New and choose the directory where you installed Pip3 to add it to Windows Environment Variables.
Lastly save changes by clicking OK.
Conclusion
Python programming language comes with different packages. You can use Pip3 to manage software packages written in Python. In this article, we introduced you to Pip3 and taught you how to install it on Windows with a few easy steps. If you face any problems or have any questions, you can contact us in the Comments section. I hope this tutorial helps you in installing Pip3 on Windows and you found it useful.