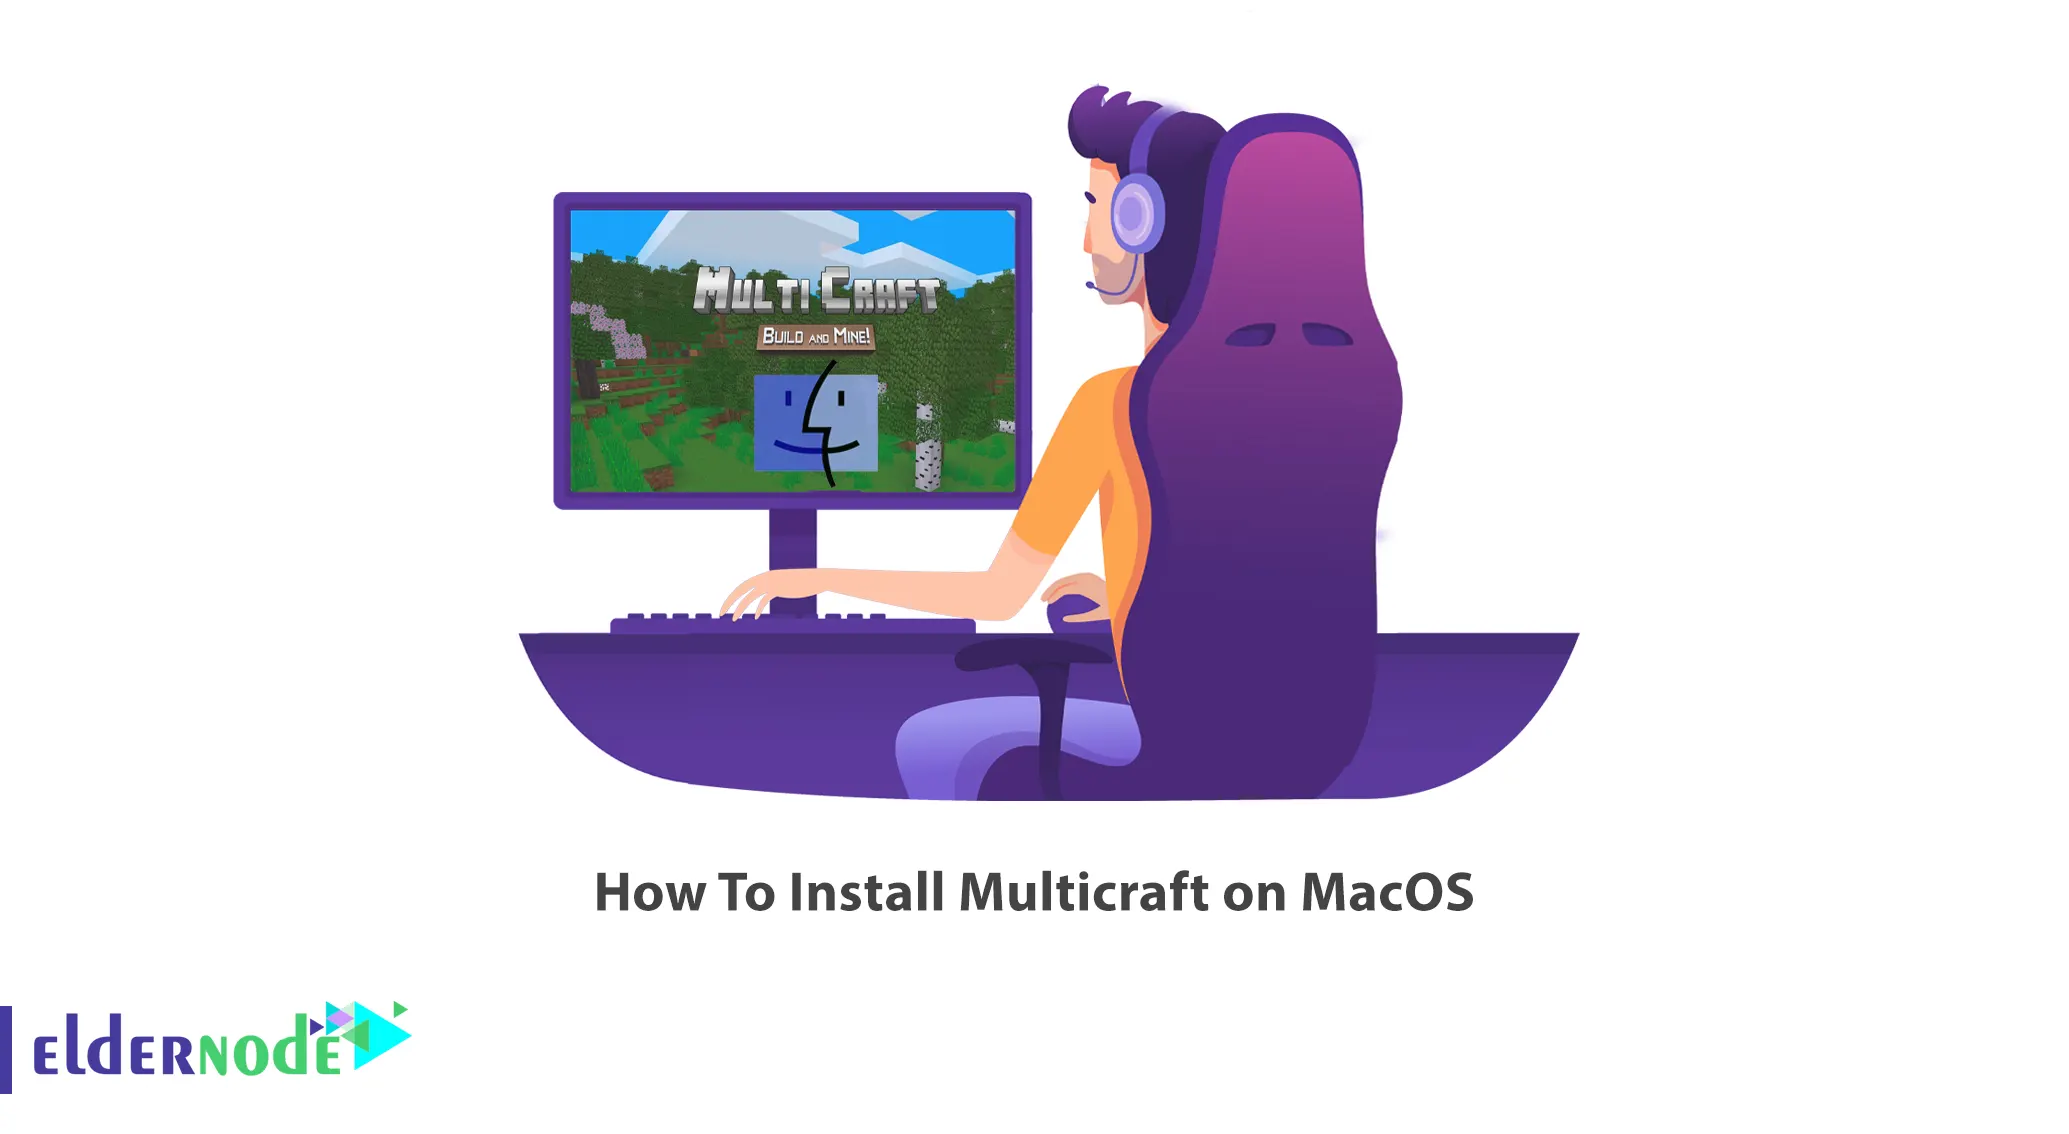
If you are one of those people for whom gaming is an inseparable part of your life, you surely know Minecraft and Multicraft. Minecraft online servers can give their players a unique charm during the game. Multicraft is a powerful control panel for hosting multiple Minecraft servers on one server. This article will teach you How To Install Multicraft on MacOS. If you intend to buy your own VPS server, you can check out the packages offered on the Eldernode website.
Table of Contents
Tutorial Setup Multicraft on MacOS
What is Multicraft?
Multicraft is a Minecraft server control panel with which you can manage multiple servers using a web-based user interface. Depending on the version the servers have, they can be on multiple physical or virtual machines. It has the ability to control thousands of Minecraft servers through a single installation panel. Minecraft changes are independent of Multicraft. This control panel lets servers run as their own system user so the server processes can’t interfere with each other.
In this tutorial from the macOS training series, you will learn how to install Multicraft on MacOS.
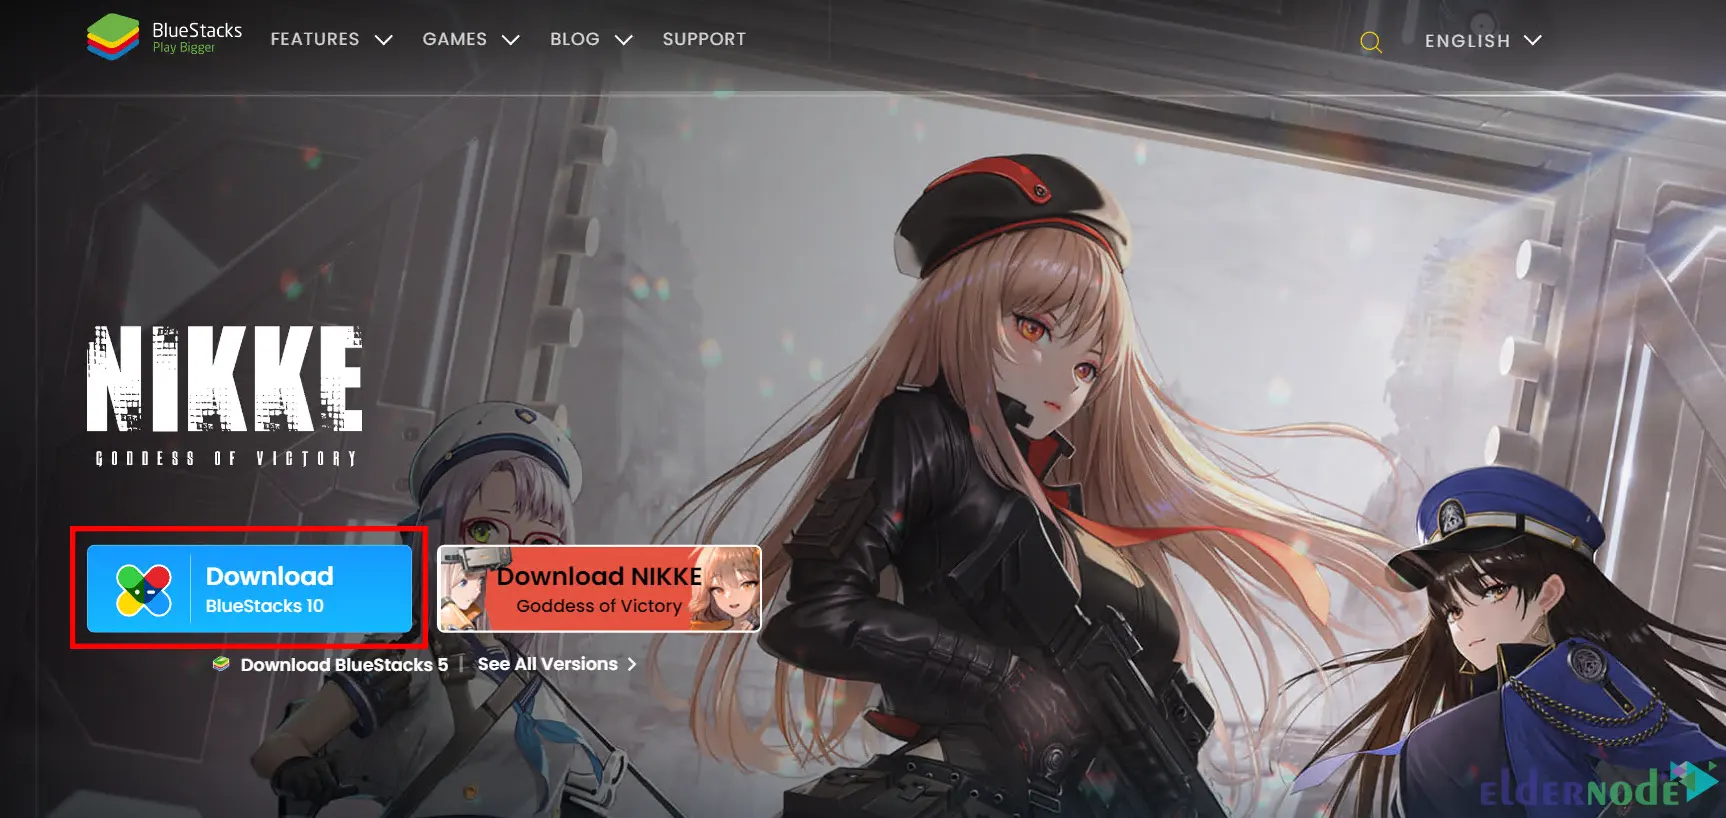
Download and Install Bluestacks on MacOS
First, go to the Bluestacks official website and press the Download button:
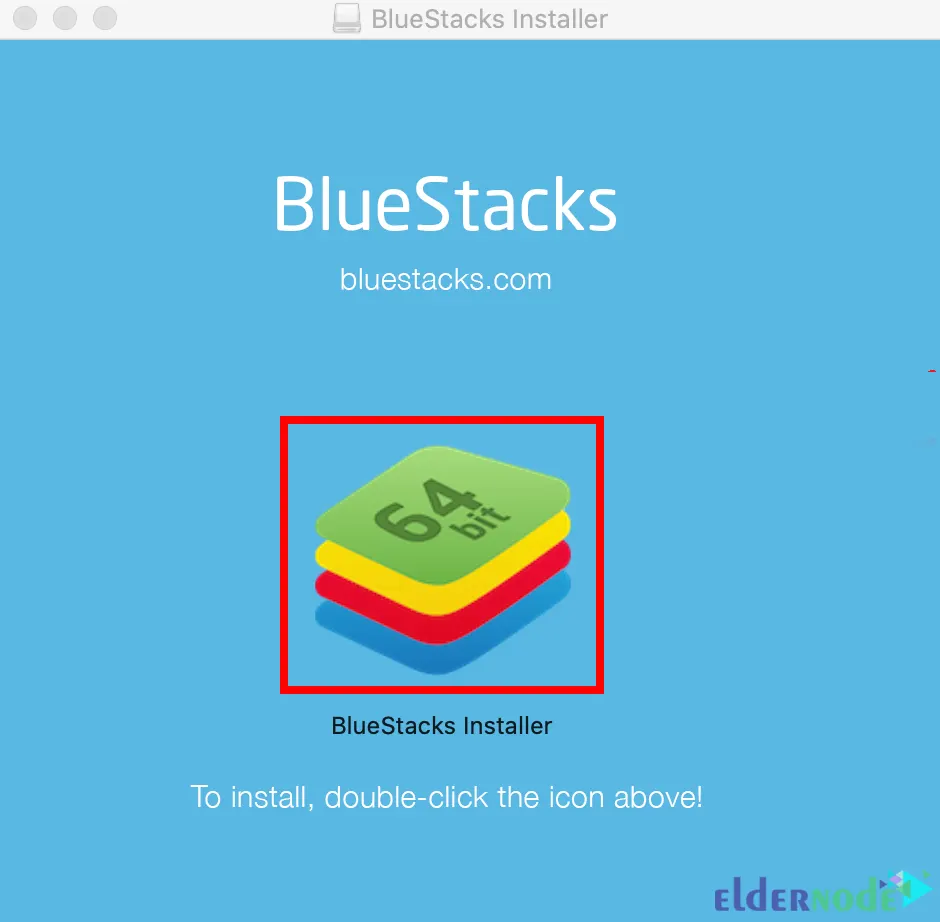
Now navigate to the Downloads folder and double-click on it to open.
You should see the Bluestacks installer. Click on the Bluestacks icon as shown below to start the installation process:
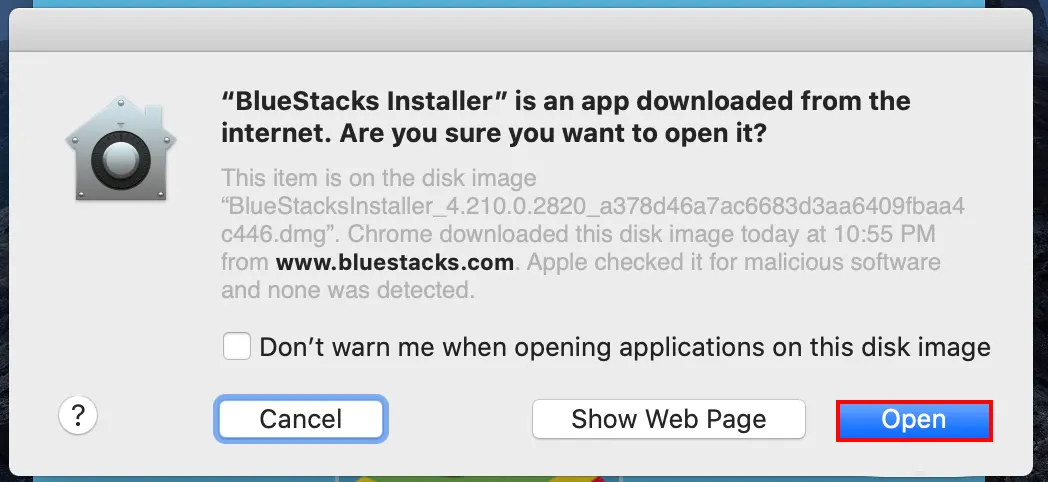
Click Open to proceed to use the Bulestacks installer:
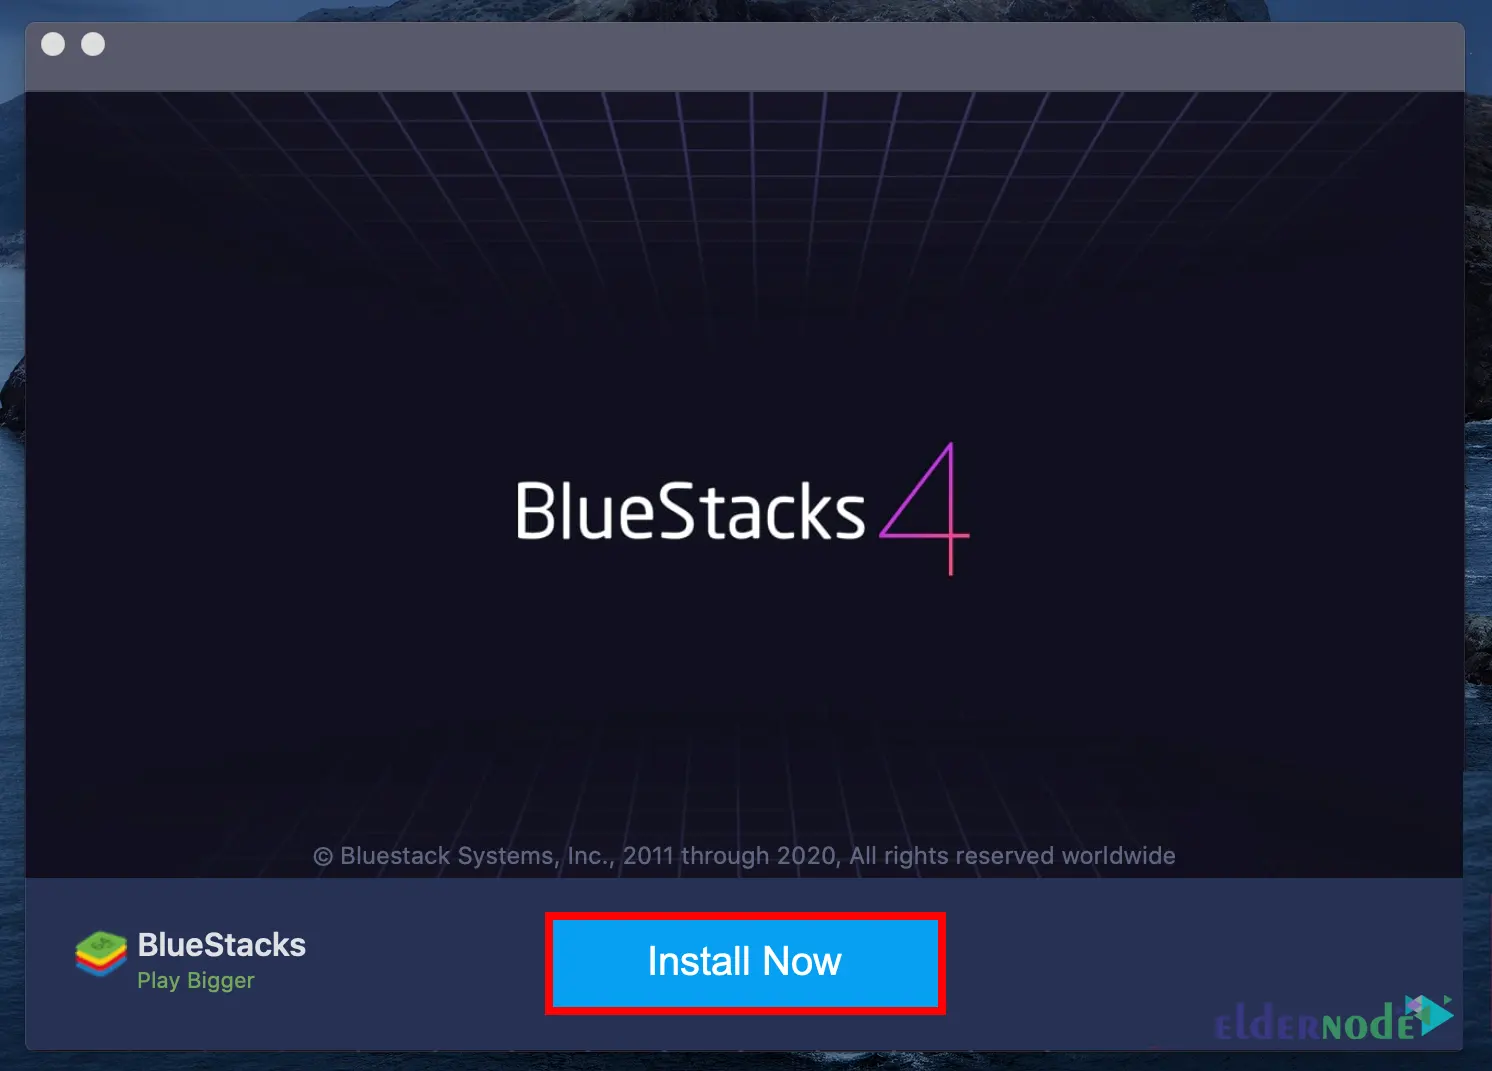
Now press the Install Now button:
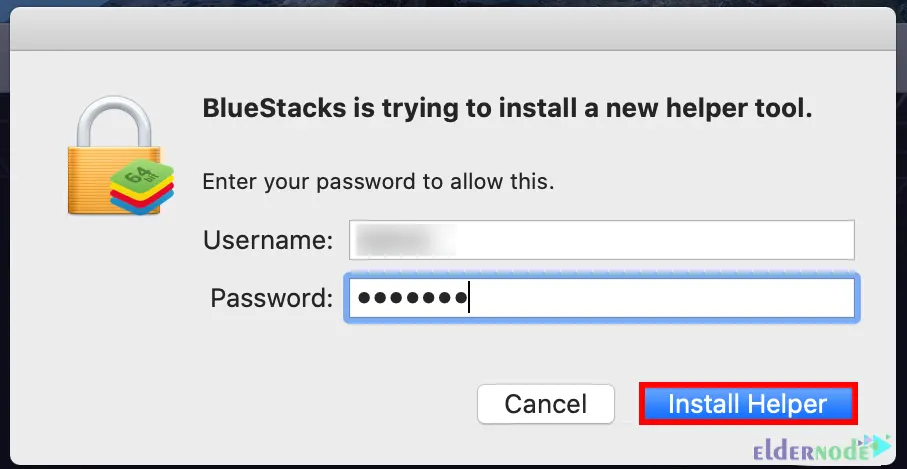
In this step, fill in the relevant information to confirm your username and password and click Install Helper:
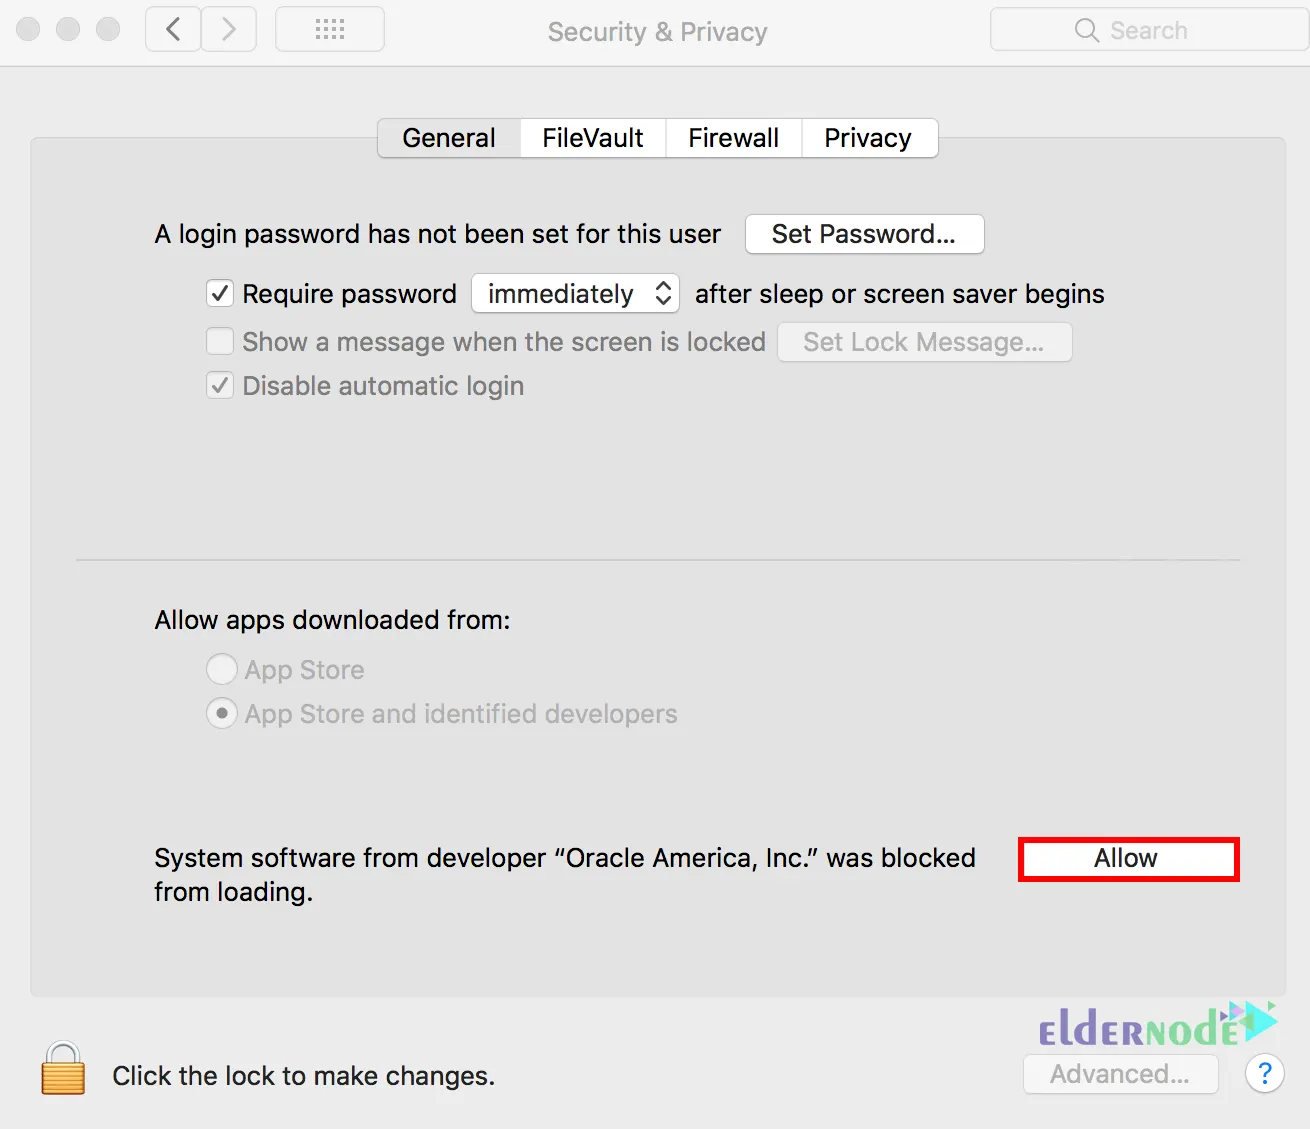
You will see System Extension Blocked popup, so click on Open Security & Privacy:
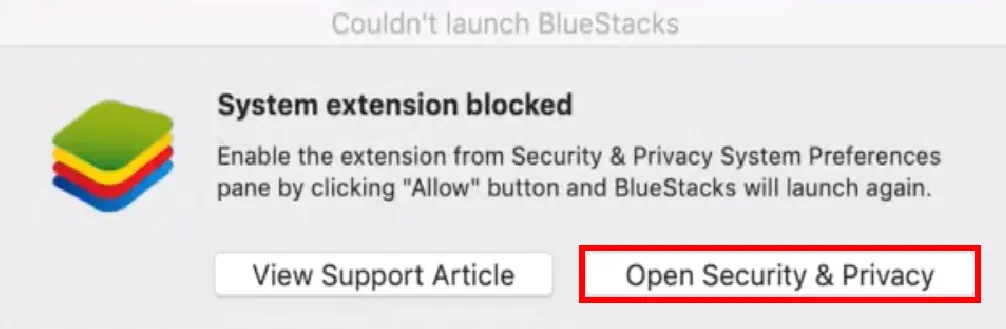
The Security & Privacy settings window will appear, press Allow in the General tab:
Note: If you are using macOS 11 Big Sur, you should restart your system after the above step. But if you are using macOS 10.15 Catalina or below, you don’t need to restart.
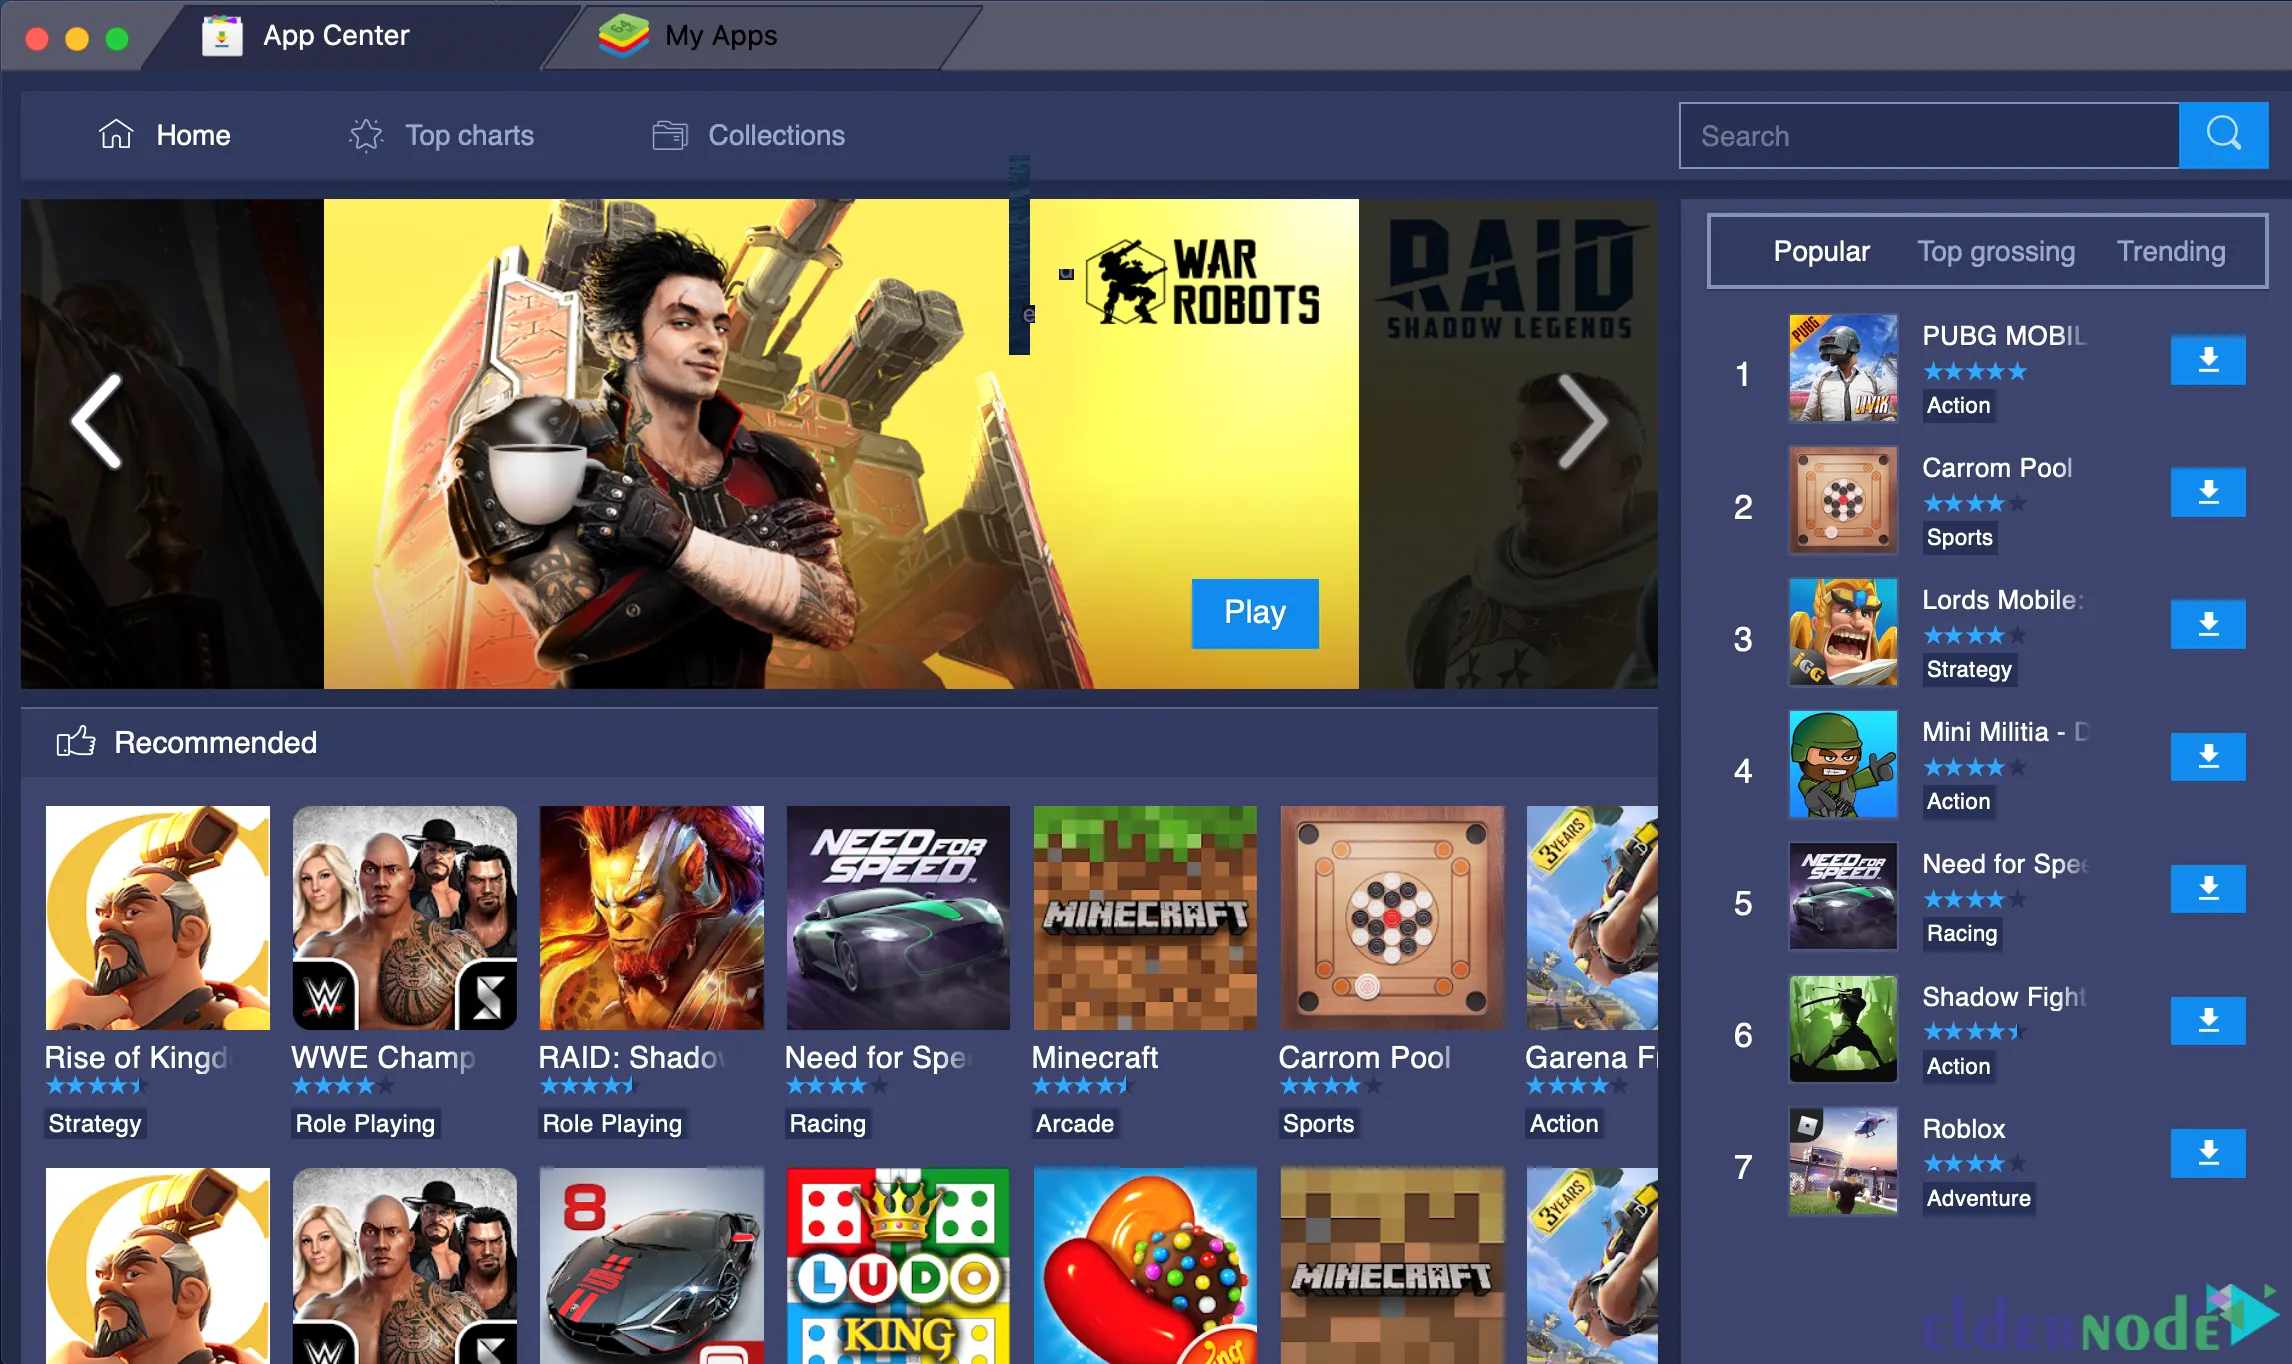
Lastly, just launch Bluestacks to download Multicraft on macOS:
Note: If needed, you can also use the BlueStacks VPS For run apps.
How to Download and Install Multicraft on MacOS
It’s time to install Multicraft on your Mac operating system. To do this, first, go to the Bluestacks Google Play store and double-click on the Playstore icon.
Now type Multicraft Build in the Google Play store search bar.
Then click on Install:
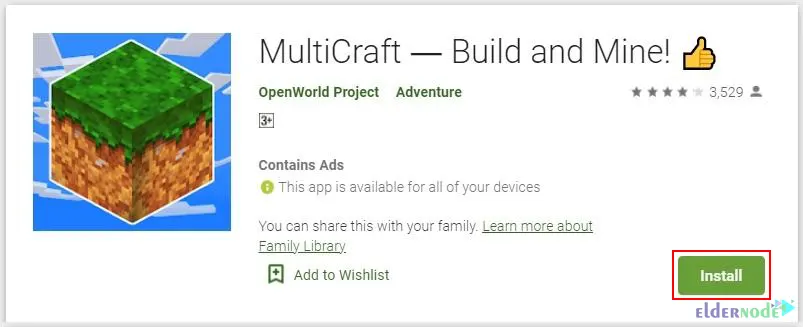
Wait a while for the installation to finish.
After the installation is finished, you can find the Multicraft Build app under the Bluestacks Apps menu.
That’s it!
Conclusion
Multicraft is a powerful control panel for hosting multiple Minecraft servers on one server. In this article, we taught you how to install Multicraft on MacOS. I hope this tutorial was useful for you and helps you to install Multicraft on MacOS. If you have any questions or problems, you can contact us in the Comments section.