CyberPanel is an open-source and free web hosting control panel powered by OpenLiteSpeed. It lets CyberPanel use the advantages of OpenLiteSpeed, not just a conventional web server since it helps reduce resource usage as a performance benefit. This is why CyberPanel is different from other control panels. Cyberpanel is available both in free and enterprise versions. OpenLiteSpeed is using by the free version and the enterprise version uses LSWS. This article will present Introducing And Install CyberPanel On CentOS 7. Also, to finish this guide, purchase your own CentOS VPS and get support, high quality, and the best price at the same time.
To let this tutorial work better, please consider the below Prerequisites:
_ CentOS 7 (64-bit) server with at least 2 GB RAM.
_ A non-root user with Sudo privileges.
_ Access to a command line.
_ The yum package manager, included by default.
Table of Contents
Introducing CyberPanel
The CyberPanel is a next-generation hosting control panel. The free version of CyberPanel which comes with OpenLite Speed is free for an unlimited number of domains and worker processes. But the CyberPanel enterprise comes with LiteSpeed web server enterprise is just free for one domain. To install OpenLiteSpeed, LSCache, WordPress, Prestashop, Joomla, and git automatically, CyberPanel provides a One-click installer. Also, CyberPanel comes with a rich set of features including, Docker support, AutoSSL, Backup and Restore, CSF Firewall, Git, Multiple PHP, and many more. Using CyberPanel provides you to reduce the time it takes to get set up for hosting since it can automate the initial setup for components like Mail service and DNS. In the next section, we will introduce the important features of CyberPanel. Please join us.
CyberPanel Features
CyberPanel allows you to choose the PHP version according to your site needs. Anytime you wish to move an old site to the new hosting environment, do not forget to use CyberPanel. However, both editions have some features. Here is a list of them.
1- Auto-installers for WordPress, Joomla, and Prestashop
2- Git repo attachment and deployment via Git webhooks
3- Let’s Encrypt SSL installer to easily get SSL certificates for your domains
4- Built-in DNS and email server functionalities to host your own DNS zones. Email accounts and a lightweight DNS server
5- FirewallD and SpamAssassin management to help secure your server
6- A command-line interface to interact with CyberPanel if you only have shell access
7- Optimizing the budget of web hosting entrepreneurs
8- Different Level Of users
9- FTP Server
10- PHPMyAdmin
11- FileManager
12- One-click Backup and Restore
13- LSCache caching system
14- Compatible with Apache rewrite-rules
15- Unlimited worker processes
16- Multiple PHP
17- Brotli compression
18- Already supports TLS v1.3
19- Anti DDOS
20- Mod_security
21- ReCaptcha protection
22- High Availability
23- Easy GUI panel display
In the next section, join us to teach you how to Install CyberPanel On CentOS 7.
How To Setup CyberPanel On CentOS 7 | CentOS 8
CyberPanel was completely introduced to you and its notable features were mentioned. Now let’s go through the steps of this guide and review the CyberPanel installation on CentOs 7.
Step 1:
First, update the packages installed on your system. So, run:
yum update -yStep 2:
Since CyberPanel is free, you do not have to prepare any kind of license and you can install it using the following command:
sh <(curl https://cyberpanel.net/install.sh || wget -O - https://cyberpanel.net/install.sh)Once you see the following output, enter 1 and press Enter:
———————————————
CyberPanel Installer v2.0
1. Install CyberPanel.
2. Install Addons.
3. Exit.
Please enter the number[1-3]:
———————————————
Then, you will see as follows:
———————————————
CyberPanel Installer v2.0
RAM check: 71/487MB (14.58%)
Disk check: 1/20GB (7%) (Minimal 10GB free space)
1. Install CyberPanel with OpenLiteSpeed.
2. Install Cyberpanel with LiteSpeed Enterprise.
3. Exit.
Please enter the number[1-3]:
———————————————
Enter 1 and press ENTER once again.
Step 3:
In this step, the installer prompts you to choose a version of MariaDB to install. Select MariaDB 1.0 as it is the only officially supported version with the panel.
For the next six prompts, select y.
In this way, CyberPanel is being installed along with its extensions. The installer will output your administrator details:
CyberPanel Successfully InstalledCurrent Disk usage : 3/20GB (16%)Current RAM usage : 233/487MB (47.84%)Installation time : 0 hrs 3 min 24 secVisit: https://(YOUR_SERVER_IP):8090Panel username: adminPanel password: 1234567Mysql username: rootMysql password: iPe2cEiSh7wEn7Please change your default admin password If you change mysql password, please modify file in /etc/cyberpanel/mysqlPassword with new password as wellWebsite : https://www.cyberpanel.netForums : https://forums.cyberpanel.netWikipage: https://docs.cyberpanel.net Enjoy your accelerated Internet by CyberPanel & OpenLiteSpeedHow to access CyberPanel on CentOS 7
To see an admin login, visit your IP address of the server at the CyberPanel port, (Your_Server_IP):8090. Enter admin for the username and 1234567 for the password. Then Click on the user-menu arrow, next to the name “Cyber Pan”. Choose “Edit Profile“. Select “admin” in the dropdown menu on the “Modify User” page.
Now, you are recommended to change the first name, last name, email address, and password accordingly.
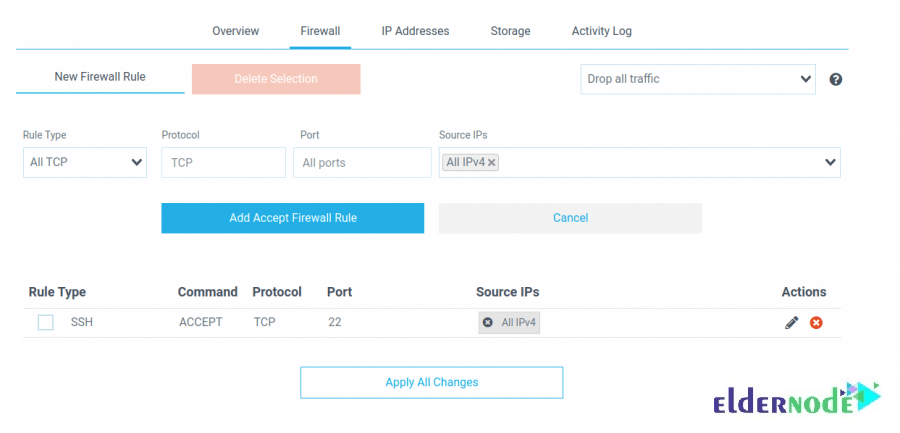
How to configure Firewall on CyberPanel
Firewall rules define what type of Internet traffic is allowed or blocked. You can verify the OS firewall and the Vultr firewall are both open for inbound and outbound on the following ports:
1_ TCP: 8090 for CyberPanel
2_ TCP: 80, TCP: 443, and UDP: 443 for the webserver
3_ TCP: 21 and TCP: 40110-40210 for FTP
4_ TCP: 25, TCP: 587, TCP: 465, TCP: 110, TCP: 143, and TCP: 993 for mail service
5_ TCP: 53 and UDP: 53 for DNS service
How to use CyberPanel on CentOS
When the installation process is finished, you are ready to start using this hosting control panel with all its brilliant features. First, open your web browser and type the URL https://your-ip-address:8090. You will be redirected to the following page to log in to CyberPanel:
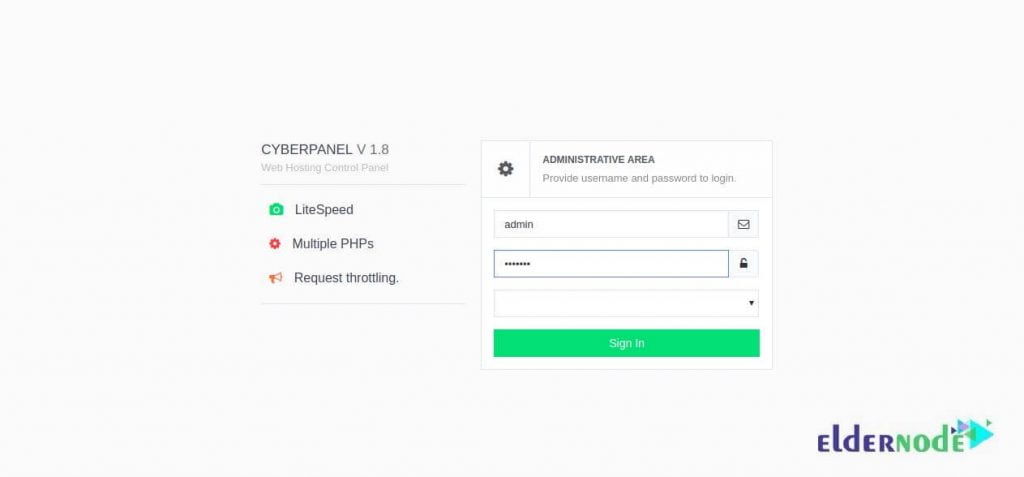
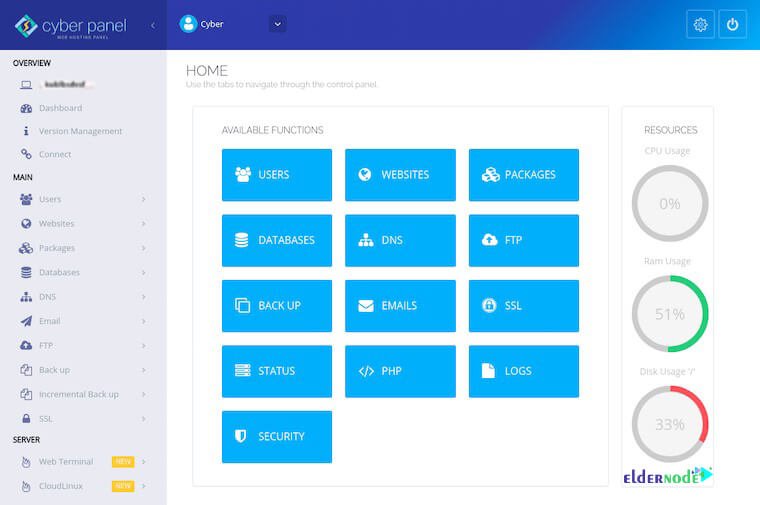
Now, you must provide your default admin username and password and click on the Sign-in button. Then, you should see the CyberPanel dashboard on the following screen:
To create your first website, click on the WEBSITE button. So, you will see a screen as below:
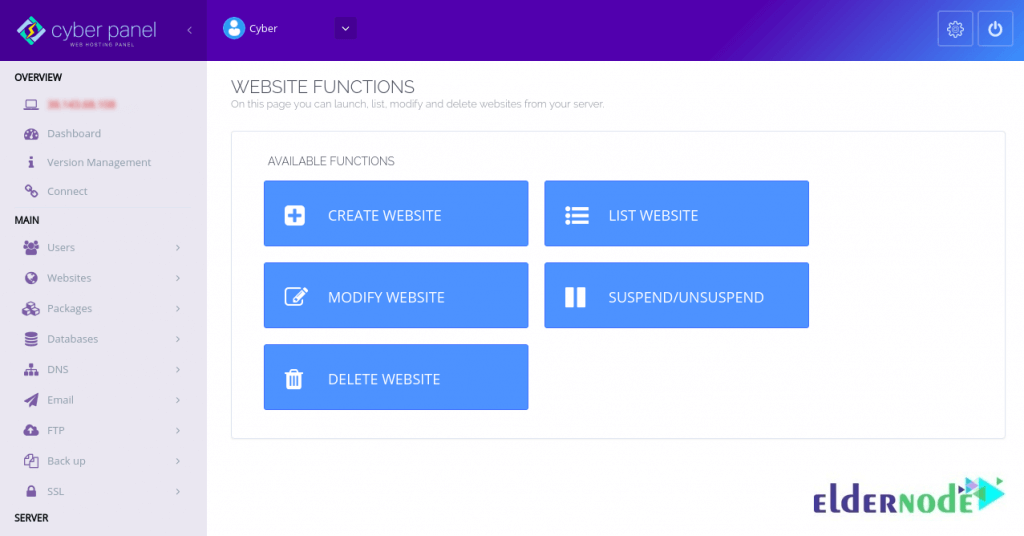
Now, you can create a new website by clicking on the CREATE WEBSITE button. So, you will see the following screen:
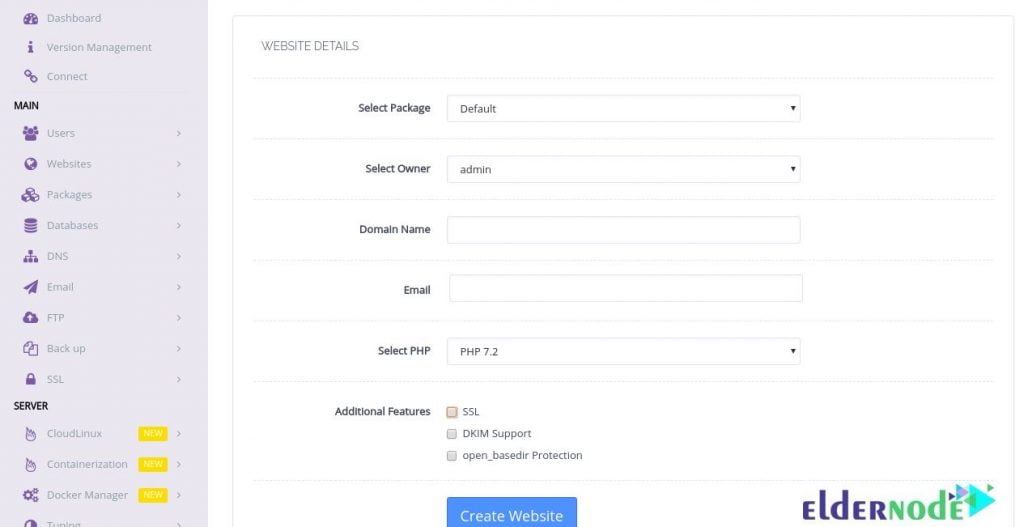
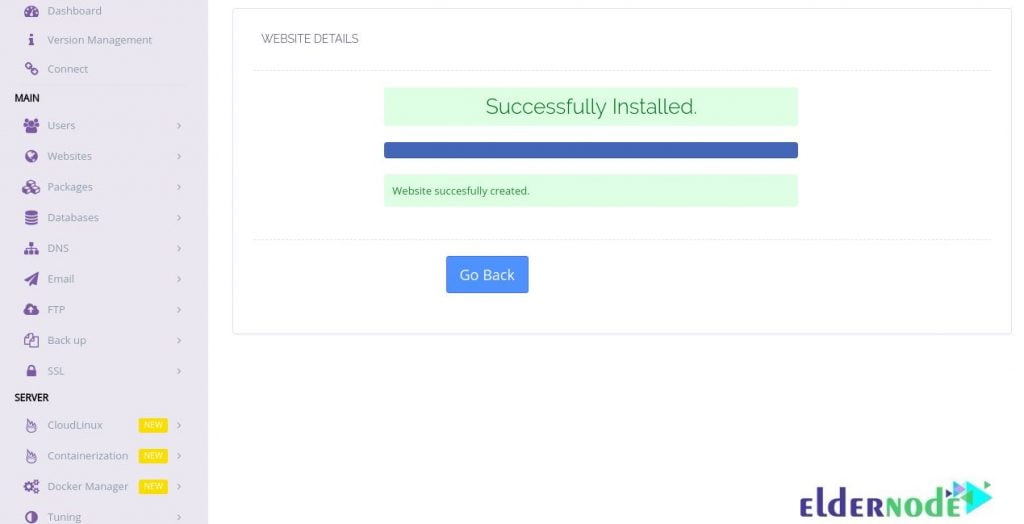
In this step, you can provide all the required information like Owner, website name, email, PHP version, and click on the CREATE WEBSITE button. Next, you can see the screen below if the website is created successfully.
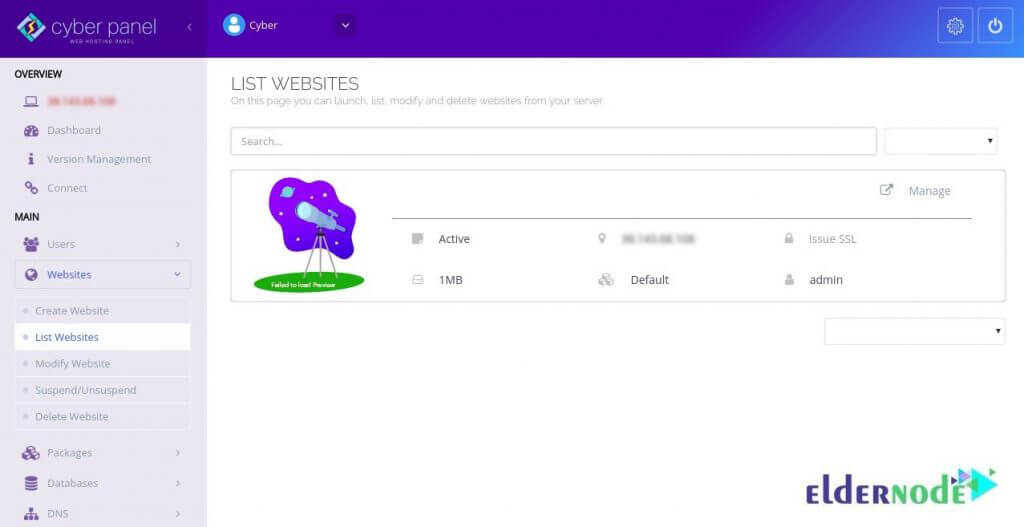
Finally, to see your website as shown below, click on the List Websites in the left pane.
Next, open your web browser and type the URL http://test.Eldernode.com. You should see your newly created website on the following screen:
That’s that! If you have passed all the above steps carefully, CyberPanel should be installed on your CentOS 7 VPS. So, do not wait and host an unlimited number of websites using CyberPanel.
Conclusion
In this article, CyberPanel was introduced to you and you learned How to install CyberPanel on CentOs 7. Since web hosting control panels are one of the main parts of this business, you are ready to setup sites on your Eldernode droplets easily and automatically back them up to Eldernode Spaces.
![How To Install And Use ZSH On Debian 10 [Z shell]](https://blog.eldernode.com/wp-content/uploads/2020/10/photo_2020-10-31_16-15-25-300x164.jpg)