Nowadays, information retention is one of the most important organs for the survival of a system. That’s why Microsoft SQL Server is one of the most popular and powerful database building and management software. In this article, we are going to teach you step by step How to Install and Use SQL Server on AlmaLinux. You can visit the packages available in Eldernode if you wish to purchase a Linux VPS server.
Table of Contents
How to Install and Use SQL Server on AlmaLinux
Introduction to SQL and its Features
SQL Server is a relational database management system (DBMS). This system was developed by Microsoft and supports the ANSI SQL language. There are several types of database management software, one of which is the relational model. In the relational model, instead of simply putting the data into a file, it is organized into a series of tables and then stored. Each table contains a number of rows and columns called Tuples and Attributes.
Microsoft’s SQL Server also has some competitors, such as MySQL and Oracle. Now we want to examine the advantages of SQL Server and see what makes it ahead of the competition in some cases:
1. It is easy to install, configure and set up.
2. It has a good user interface that makes it easier to work with data.
3. It has high security.
4. You can recover lost data if needed.
5. Supports cloud and on-premises databases.
6. It has different versions that are optimized for different tasks.
7. Many pieces of training and documents have been prepared for it.
8. It can also be used on Linux operating system.
In the next section, we will teach you how to Install SQL Server on AlmaLinux. Please join us.
Install SQL Server on AlmaLinux
In this section, we are going to show you how to Install SQL Server on AlmaLinux. To do this, you must follow the steps below in order. You must first add the repositories using the following commands:
sudo curl https://packages.microsoft.com/config/rhel/8/mssql-server-2019.repo -o /etc/yum.repos.d/mssql-server-2019.reposudo curl https://packages.microsoft.com/config/rhel/8/prod.repo -o /etc/yum.repos.d/msprod.repoNow, you can easily install SQL Server by running the following command:
sudo dnf install mssql-serverYou can also install the Microsoft SQL server command-line tool using the following command:
sudo dnf install mssql-tools unixODBC-develWhen you see the message “Do you accept the license terms?“, type “yes” and then press “Enter“.
After the installation is complete, verify that Microsoft SQL Server is installed using the following command:
rpm -qi mssql-serverHow to Configure SQL Server on AlmaLinux
In this section, we will configure Microsoft SQL Server and launch the database engine. To do this you can run the following command:
sudo /opt/mssql/bin/mssql-conf setupAs you can see in the image below, you will be asked to select a version of SQL Server. Select the second option [2]:
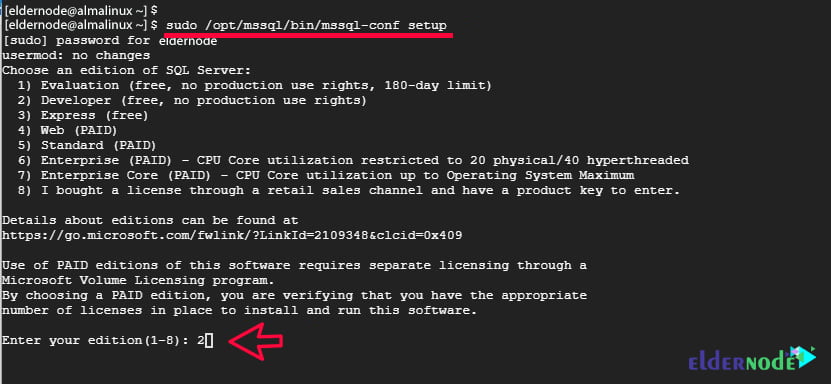
When you see the message “Do you accept the license terms?“, type “yes” and then press “Enter“. Then specify the administrator password:

To verify the running status of the SQL server, use the following command:
sudo systemctl status mssql-server.serviceUse the following command and enable it to start the boot:
sudo systemctl enable mssql-server.serviceThen in the next step, export the path /opt/mssql/bin/ using the following command:
echo 'export PATH=$PATH:/opt/mssql/bin:/opt/mssql-tools/bin' | sudo tee /etc/profile.d/mssql.shNow you need to enable the /etc/profile.d/mssql.sh file using the following command:
source /etc/profile.d/mssql.shOne thing to keep in mind is that MS SQL listens on port 1433 by default. Therefore, it is necessary to open this port in the firewall using the following commands so that external users can access the server:
sudo firewall-cmd --add-port=1433/tcp --permanentsudo firewall-cmd --reloadHow to Use SQL Server on AlmaLinux
After you have seen how to install and configure SQL Server on AlmaLinux in the previous sections, we now want to teach you how to use SQL Server and test it.
The first step is to use the following command to make sure the MS SQL version is installed and check the version:
sqlcmd -S localhost -U SA -Q 'select @@VERSION'To view the version, press Enter after typing the above command. You can also use the following command to exit:
exitNow to test SQL Server, you must log in again by executing the following command:
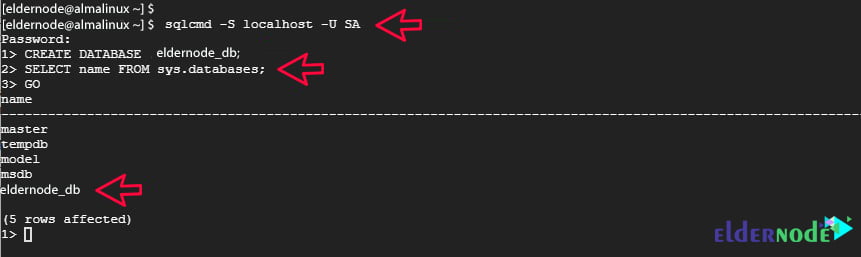
sqlcmd -S localhost -U SANote: Now you need to authenticate with your password and then press ENTER. It should be noted that you can list user names by running the following command:
SELECT name FROM sys.sysusers;GOYou can easily create a database using the following command:
CREATE DATABASE eldernode_db;You can also view the list of all databases using the following command:
SELECT name FROM sys.databases;GO
Finally, you can delete the database using the following command:
DROP DATABASE eldernode_db;GOConclusion
One of the most prominent features of SQL Server is that it can work with large databases up to terabytes. Another thing is that thousands of users can access this database at the same time. In this article, we tried to teach you how to Install and Use SQL Server on AlmaLinux.


I wasn’t certain I could write this kind of article at the beginning. Your writing style impressed me. Again, your content was exceptional. Great Article Neil. While I read the article a few days back, I didn’t make a comment. But, I thought that it was worthy of a”thank you. I’ll use some of these suggestions on my own sites in the near future.