ImunifyAV is an intelligent antivirus and security monitoring tool for websites that keeps them free of malware. You will experience additional security since ImunifyAV scans for malware on your server. Once ImunifyAV recognizes dangerous behaviors, it will clean up them immediately. It seems to be an ideal solution to help you reduce support calls from customers blaming you that the website got hacked. In this article, you will learn How To Install And Use ImunifyAV On Plesk. Find your considered VPS Hosting plan on Eldernode and purchase with the best price and support.
Table of Contents
Tutorial Install And Use ImunifyAV On Plesk
Previously, ImunifyAV was introduced to you. It is a highly advanced antivirus and security monitoring tool. To scan files and monitor blacklist status you can use the free version with no trial period and no scan limitation. In premium and Shared Hosting editions, you will have an unlimited number of domains. Using ImunifyAV allows you to give your customers complete, automated security to combat viruses, adware, spyware, trojans, and worms. ImunifyAV will install on your operating system even if you have not installed a special control panel. If you do not have installed any control panel such as DirectAdmin and Cpanel, sections will be added to your Admin Panel for ImunifyAV through which you can manage this tool graphically.
ImunifyAV Features:
ImunifyAV is available as a Free and a Premium (ImunifyAV+) version. Here are the main features of this security monitoring tool:
1- Detects any types of malicious files including backdoors, web-shells, viruses, hacker’s tools, ‘blackhat SEO’ scripts, phishing pages, and others.
2- Monitors reputation and blacklist status of domains against dozen of security vendors including Google SB, Yandex SB, McAfee, ESET, Kaspersky.
3- Supports WordPress, Joomla!, Magento, Drupal, MODx, Bitrix, and other PHP-based CMSs and static HTML websites.
4- One-click automatic malware cleanup, scheduled & on-demand website scanning, and detailed reports.
5- UI flow optimized for security monitoring of hundreds of users and thousands of domains per server.
6- Configurable access permissions to the Antivirus for different Subscriptions.
Prerequisites to Install ImunifyAV on Plesk
To let this tutorial work better, please consider the below Prerequisites:
_ Log in to WebHost Manager as a non-root user with Sudo privileges, or as a reseller account with root-level privileges.
_ RAM: 1GB
_ HDD: 20GB available disk space
How to Install ImunifyAV on Plesk [Complete]
ImunifyAV is a malware scanner for Linux servers. Similar to the ClamAV cPanel plugin, ImunifyAV allows WebHost Manager and cPanel users to scan files and manage found malware. So, In order to scan your websites for malware using the ImunifyAV you need to install it. Note that Imunify 360 is supported on Plesk 17.0 and up, so, Plesk 12.5 is not supported. Let’s go through the steps of this guide to review the process of Imunify installation on Plesk.
Installation Note: Since Plesk does not support such configuration, you are recommending to not use firewalld and Plesk Firewall simultaneously. Run the following command on the server to disable firewalld:
systemctl disable firewalldPlesk supports only one ruleset at once. So, Imunify 360 will not install its own ruleset if any mod_security ruleset was installed during Imunify360 installation. Use the command below to check, if the Imunify360 ruleset is installed or not:
plesk sbin modsecurity_ctl -L --enabledIf the output is ”custom” Imunify360 ruleset is installed, if ”tortix” is displayed, it means not installed.
In this way, you can run the following commands to remove the existing ruleset and install the Imunify360 one:
plesk sbin modsecurity_ctl --disable-all-rules --ruleset tortixplesk sbin modsecurity_ctl --uninstall --ruleset tortixplesk sbin modsecurity_ctl -L --enabledimunify360-agent install-vendorsNote: Also, you need to check if the update rule sets option is disabled in your Plesk Web Application Firewall interface on the Settings tab.
To Install ImunifyAV free on your control panel run:
wget https://repo.imunify360.cloudlinux.com/defence360/imav-deploy.shThen, use the following command to run the installation shell script:
bash imav-deploy.shAlso, you can use the command below to update ImunifyAV:
yum update imunify-antivirusImunifyAV Hoster Interface
Once you click ImunifyAV in the main menu, you will see the following tabs:
– Users
– Files
– Scan
– History
– Ignore List
– Features Management
– Settings
– Upgrade
How to Use ImunifyAV on Plesk
To learn how to get started with ImunifyAV on Plesk, follow the below path. Once the extension is installed, open the Domains tab and click the Scan All on the right:
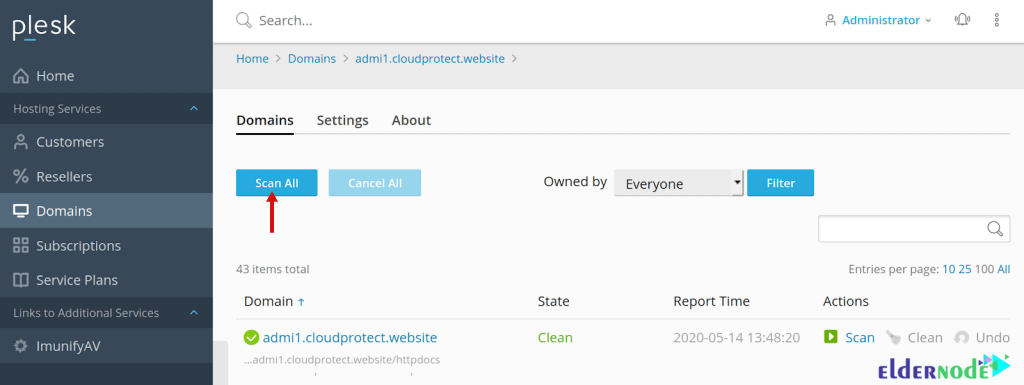
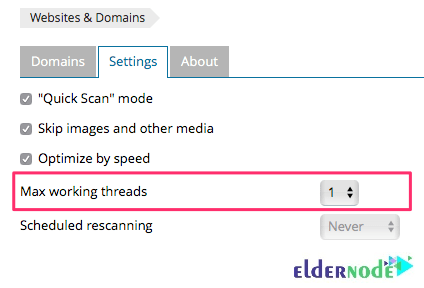
When you click the Setting tab, a complete list of websites for viruses, backdoors, web-shells, hacker’s scripts, phishing pages, and other malware will be scanned. The process of website scanning depending on the specified number of concurrent scanning threads (1, 2, or 4).
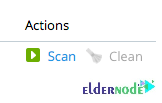
Also, to check the single website for malware and blacklist status you can click the Scan button next to the particular website.
The antivirus extension queues the scanning tasks and runs them with respect to the configured resource limitations. In this way, it can prevent server resource overload during scanning the set of websites.

Since that default settings may not be optional in terms of scanning speed, you need to check the Settings tab before the start and adjust the following parameters manually to set optimal values for better performance:
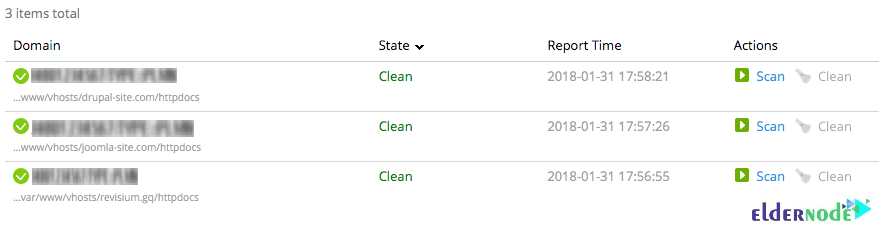
Once the scan process is finished, you can check the infection statuses of your websites. If everything in the report is green, it means your websites are neither compromised nor infected and blacklisted:
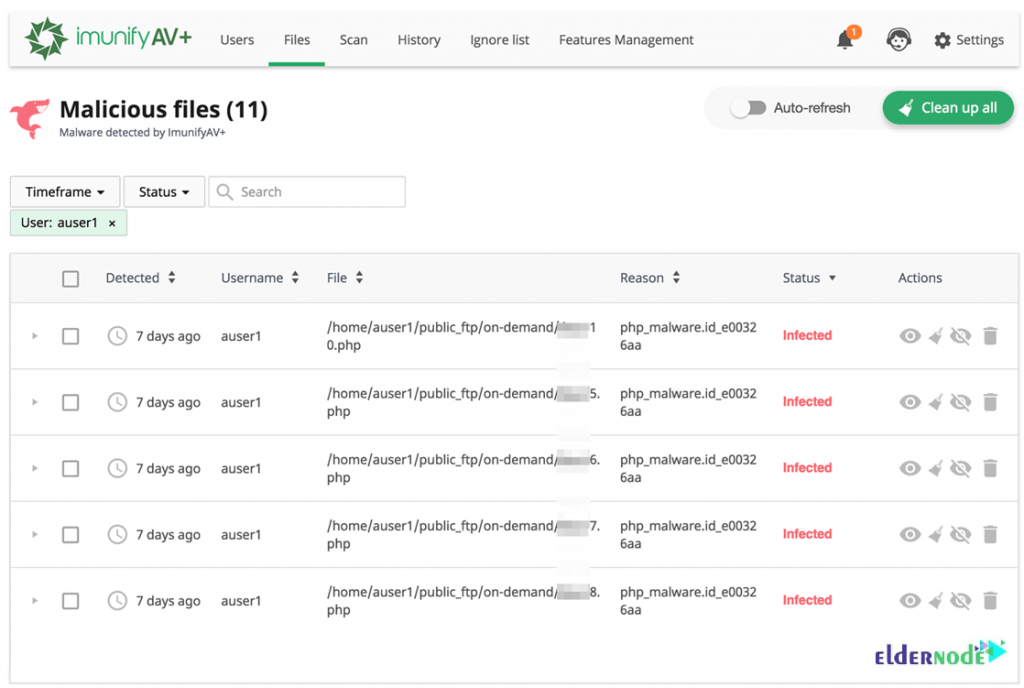
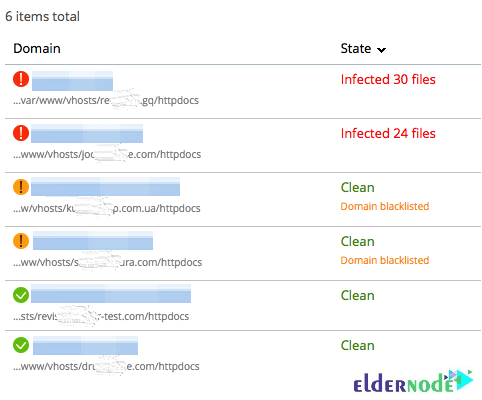
But if ”red alerts” are displayed next to the domain, it means the particular website is compromised and infected. Click the View Report button and see the details.
You may also see some “orange alerts” next to the domain and Domain blacklisted notice. It means the domain is on the blacklist in either search engines or antivirus services. Again to see blacklist status details, you need to click the View Report button.
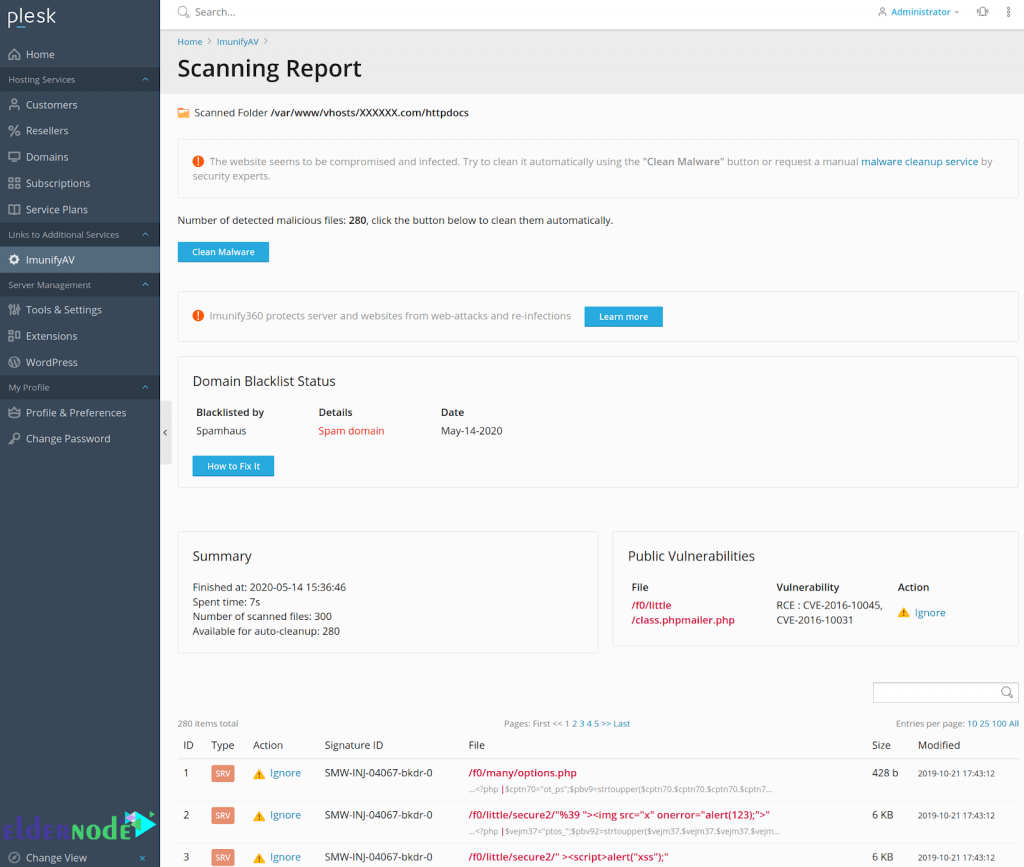
However, in any situation when you click the View Report, it shows you the list of detected malware and domain blacklist status.
How to uninstall ImunifyAV on Plesk
If you wish to stop and uninstall ImunifyAV, you just need to run the following command:
systemctl stop imunify-antivirusOR
service imunify-antivirus stopBut if you have removed the imav-deploy.sh installation script, you need to download it again to uninstall the program:
wget https://repo.imunify360.cloudlinux.com/defence360/imav-deploy.shAnd then, you can uninstall ImunifyAV by running the command below:
bash imav-deploy.sh --uninstallConclusion
ImunifyAV monitors server logs to provide excellent visibility of server security. In this way, Brute-force attacks at both network and HTTP levels, Port scanning, and many others attacks will be stopped. In the Premium version of the Antivirus, you need to activate a license key. Then, you can clean the malware automatically using the Clean Malware button. In this article, we tried to teach you to step by step How To Install And Use ImunifyAV On Plesk.