Open Vulnerability Assessment System is a free vulnerability scanner software. most components of OpenVAS are licensed under the GNU General Public License (GPL). After the release of the OpenVAS 9 framework, it got renamed to Greenbone Vulnerability Management and released as Greenbone Source Edition. OpenVAS is designed to run in a Linux environment and also can be installed either as a self-contained virtual machine. In this article, you will learn How to Install and Configure OpenVAS on Ubuntu 20.04. To purchase your own Ubuntu VPS, visit available packages on Eldernode that have been customized according to your needs.
To let this tutorial work better, please consider the below Prerequisites:
– A non-root user with Sudo privileges.
– To set up, follow our Initial server setup on Ubuntu 20.04.
– At least 4 GB RAM.
– At least 4 vCPUs.
– More than 8 GB disk space.
Table of Contents
Tutorial Install And Configure OpenVAS On Ubuntu 20.04
GVM previously known as OpenVAS is an open-source solution for vulnerability scanning and vulnerability management. Security experts and common users use this all one suite of tools. OpenVAS is widely used to run tests against client computers using its own database of known weaknesses and exploits. Make sure that your servers are protected against attacks and join us to review the OpenVAS installation on Ubuntu 20.04.
How To Install GVM On Ubuntu 20.04 | Ubuntu 18.04
Let’s go through the steps of this guide and be an expert in OpenVAS installation. As always, start with updating your system packages. Use the command below to update your system packages to the latest version:
apt-get update -yHow to install Prerequisites
First of all, you need to install the following dependencies packages.
sudo su -apt update &&\apt -y dist-upgrade &&\apt -y autoremove &&\apt install -y software-properties-common &&\apt install -y build-essential cmake pkg-config libglib2.0-dev libgpgme-dev libgnutls28-dev uuid-dev libssh-gcrypt-dev libldap2-dev doxygen graphviz libradcli-dev libhiredis-dev libpcap-dev bison libksba-dev libsnmp-dev gcc-mingw-w64 heimdal-dev libpopt-dev xmltoman redis-server xsltproc libical-dev postgresql postgresql-contrib postgresql-server-dev-all gnutls-bin nmap rpm nsis curl wget fakeroot gnupg sshpass socat snmp smbclient libmicrohttpd-dev libxml2-dev python3-polib gettext rsync xml-twig-tools python3-paramiko python3-lxml python3-defusedxml python3-pip python3-psutil python3-impacket virtualenv vim git &&\apt install -y texlive-latex-extra --no-install-recommends &&\apt install -y texlive-fonts-recommended &&\curl -sS https://dl.yarnpkg.com/debian/pubkey.gpg | apt-key add - &&\echo "deb https://dl.yarnpkg.com/debian/ stable main" | tee /etc/apt/sources.list.d/yarn.list &&\apt update &&\apt -y install yarn &&\yarn install &&\yarn upgradeHow to create the GVM user
Now, you must create the GVM user. Open the terminal and paste the commands below to create the GVM user. Then, it will be used in the installation and compilation process.
echo 'export PATH="$PATH:/opt/gvm/bin:/opt/gvm/sbin:/opt/gvm/.local/bin"' | tee -a /etc/profile.d/gvm.sh &&\chmod 0755 /etc/profile.d/gvm.sh &&\source /etc/profile.d/gvm.sh &&\bash -c 'cat < /etc/ld.so.conf.d/gvm.conf# gmv libs location/opt/gvm/libEOF'mkdir /opt/gvm &&\adduser gvm --disabled-password --home /opt/gvm/ --no-create-home --gecos '' &&\usermod -aG redis gvm &&\chown gvm:gvm /opt/gvm/Now, you can log in to GVM user:
sudo su - gvmHow to download and install GVM
In this step, you will download and install software by creating the src folder and git clone the GVM source code. So, navigate to the temporary directory created above and run the subsequent commands.
mkdir src &&\ cd src &&\export PKG_CONFIG_PATH=/opt/gvm/lib/pkgconfig:$PKG_CONFIG_PATHgit clone -b gvm-libs-20.08 --single-branch https://github.com/greenbone/gvm-libs.git &&\git clone -b openvas-20.08 --single-branch https://github.com/greenbone/openvas.git &&\git clone -b gvmd-20.08 --single-branch https://github.com/greenbone/gvmd.git &&\git clone -b master --single-branch https://github.com/greenbone/openvas-smb.git &&\git clone -b gsa-20.08 --single-branch https://github.com/greenbone/gsa.git &&\git clone -b ospd-openvas-20.08 --single-branch https://github.com/greenbone/ospd-openvas.git &&\git clone -b ospd-20.08 --single-branch https://github.com/greenbone/ospd.gitHow to install gvm-libs
It is time to install and compile the gvm-libs from GitHub. Use the commands below to change the directory to gvm-libs, export the config path and create a build directory.
cd gvm-libs &&\export PKG_CONFIG_PATH=/opt/gvm/lib/pkgconfig:$PKG_CONFIG_PATH &&\mkdir build &&\cd build &&\cmake -DCMAKE_INSTALL_PREFIX=/opt/gvm .. &&\make &&\make doc &&\make install &&\cd /opt/gvm/srcHow to install openvas-smb
Use the commands below to enter the Openvas-smb directory and compile the source code.
cd openvas-smb &&\export PKG_CONFIG_PATH=/opt/gvm/lib/pkgconfig:$PKG_CONFIG_PATH &&\mkdir build &&\cd build/ &&\cmake -DCMAKE_INSTALL_PREFIX=/opt/gvm .. &&\make &&\make install &&\cd /opt/gvm/srcHow to install OpenVAS Scanner
again, you need to build and install the OpenVas scanner.
cd openvas &&\export PKG_CONFIG_PATH=/opt/gvm/lib/pkgconfig:$PKG_CONFIG_PATH &&\mkdir build &&\cd build/ &&\cmake -DCMAKE_INSTALL_PREFIX=/opt/gvm .. &&\make &&\make doc &&\make install &&\cd /opt/gvm/srcHow to fix Redis for OpenVAS install
To log out of the current session to get back to the privileged user, you should type ‘exit’ in the terminal. Then, paste the following code.
export LC_ALL="C" &&\ldconfig &&\cp /etc/redis/redis.conf /etc/redis/redis.orig &&\cp /opt/gvm/src/openvas/config/redis-openvas.conf /etc/redis/ &&\chown redis:redis /etc/redis/redis-openvas.conf &&\echo "db_address = /run/redis-openvas/redis.sock" > /opt/gvm/etc/openvas/openvas.conf &&\systemctl enable [email protected] &&\systemctl start [email protected]sysctl -w net.core.somaxconn=1024 &&\sysctl vm.overcommit_memory=1 &&\echo "net.core.somaxconn=1024" >> /etc/sysctl.conf &&\echo "vm.overcommit_memory=1" >> /etc/sysctl.confsystemctl daemon-reload &&\systemctl start disable-thp &&\systemctl enable disable-thp &&\systemctl restart redis-serverAt this point, you should add /opt/gvm/sbin path to the secure_path variable:
sed 's/Defaults\s.*secure_path=\"\/usr\/local\/sbin:\/usr\/local\/bin:\/usr\/sbin:\/usr\/bin:\/sbin:\/bin:\/snap\/bin\"/Defaults secure_path=\"\/usr\/local\/sbin:\/usr\/local\/bin:\/usr\/sbin:\/usr\/bin:\/sbin:\/bin:\/snap\/bin:\/opt\/gvm\/sbin\"/g' /etc/sudoers | EDITOR='tee' visudoNow, use the following commands to allow the user running ospd-openvas to launch with root permissions.
echo "gvm ALL = NOPASSWD: /opt/gvm/sbin/openvas" > /etc/sudoers.d/gvmecho "gvm ALL = NOPASSWD: /opt/gvm/sbin/gsad" >> /etc/sudoers.d/gvmHow to update NVT
In this section, you will update vulnerability file definitions. To do this the greenbone-nvt should be run. But first, switch back to the GVM user session.
sudo su – gvmAnd then, type:
greenbone-nvt-syncYou may face timeout errors because of a firewall. Open TCP port 873 and if you get connection refused errors, go for a coffee and back again. It will take a very long time.
Upload plugins in Redis with GVM
Uploading plugins in Redis with OpenVAS will be time-consuming depending on your hardware. Also, you will receive no feedback when you run the command.
sudo openvas -uRun the following if you get missing library errors.
exitecho "/opt/gvm/lib > /etc/ld.so.conf.d/gvm.confldconfigsudo su - gvmInstall GreenboneManager
To build and install Greenbone Manager, enter the gvmd directory:
cd /opt/gvm/src/gvmd &&\export PKG_CONFIG_PATH=/opt/gvm/lib/pkgconfig:$PKG_CONFIG_PATH &&\mkdir build &&\cd build/ &&\cmake -DCMAKE_INSTALL_PREFIX=/opt/gvm .. &&\make &&\make doc &&\make install &&\cd /opt/gvm/srcHow to configure PostgreSQL
To configure PostgreSQL, switch to a user in sudoers. The user session will be switched with the “sudo -u postgres bash” command below.
Note: Do not use root or gvm and execute one line at a time.
exitcd /sudo -u postgres basexport LC_ALL="C"createuser -DRS gvmcreatedb -O gvm gvmdpsql gvmdcreate role dba with superuser noinherit;grant dba to gvm;create extension "uuid-ossp";create extension "pgcrypto";exitexitHow to fix Certificates
To fix GVM certificates, type one line at the time:
sudo su - gvmgvm-manage-certs -aHow to create an Admin user
Run the below command to create an initial username and password but do not forget to change it.
gvmd --create-user=admin --password=adminHow to configure and update feeds
Set ”Feed Import Owner” to the admin’s UUID. It lets the feeds be updated completely. To find the UUID of the new admin user, type:
gvmd --get-users --verboseThere, you will get something as below:
admin fb019c52-75ec-4cb6-b176-5a55a9b360bfAnd then, run:
gvmd --modify-setting 78eceaec-3385-11ea-b237-28d24461215b --value (output string from the above command fb019c52-75ec-4cb6-b176-5a55a9b360bf)So the example command would be:$ gvmd --get-users --verboseadmin fb019c52-75ec-4cb6-b176-5a55a9b360bf
$ gvmd --modify-setting 78eceaec-3385-11ea-b237-28d24461215b --value fb019c52-75ec-4cb6-b176-5a55a9b360bfNext, run the following commands one line at a time. You may get connection refused errors but run again till it succeeds. Consider that these commands may take some time.
greenbone-feed-sync --type GVMD_DATAgreenbone-feed-sync --type SCAPgreenbone-feed-sync --type CERTHow to install GSA
To install GSA (GVM), enter the GSA folder and compile the GSA source code.
cd /opt/gvm/src/gsa &&\export PKG_CONFIG_PATH=/opt/gvm/lib/pkgconfig:$PKG_CONFIG_PATH &&\mkdir build &&\cd build/ &&\cmake -DCMAKE_INSTALL_PREFIX=/opt/gvm .. &&\make &&\make doc &&\make install &&\touch /opt/gvm/var/log/gvm/gsad.log &&\cd /opt/gvm/srcSet up OSPD-OpenVAS and Install the virtualenv
cd /opt/gvm/src &&\export PKG_CONFIG_PATH=/opt/gvm/lib/pkgconfig:$PKG_CONFIG_PATH &&\virtualenv --python python3.8 /opt/gvm/bin/ospd-scanner/ &&\source /opt/gvm/bin/ospd-scanner/bin/activateNote: To match your installed python version, you may have to change _python python3.8
How to Install ospd
Use pip installer to install ospd as follows:
mkdir /opt/gvm/var/run/ospd/ &&\cd ospd &&\pip3 install . &&\cd /opt/gvm/srcInstall ospd-openvas
Again, use pip installer to install ospd-openvas.
cd ospd-openvas &&\pip3 install . &&\cd /opt/gvm/srcHow to create startup scripts
To create startup scripts (root) paste the command below. Before that, you should type exit to log out to the root session.
cat << EOF > /etc/systemd/system/gvmd.service[Unit]Description=Open Vulnerability Assessment System Manager DaemonDocumentation=man:gvmd(8) https://www.greenbone.netWants=postgresql.service ospd-openvas.serviceAfter=postgresql.service ospd-openvas.service[Service]Type=forkingUser=gvmGroup=gvmPIDFile=/opt/gvm/var/run/gvmd.pidWorkingDirectory=/opt/gvmExecStart=/opt/gvm/sbin/gvmd --osp-vt-update=/opt/gvm/var/run/ospd.sockExecReload=/bin/kill -HUP $MAINPIDKillMode=mixedRestart=on-failureRestartSec=2minKillMode=processKillSignal=SIGINTGuessMainPID=noPrivateTmp=true[Install]WantedBy=multi-user.targetEOFcat << EOF > /etc/systemd/system/gsad.service[Unit]Description=Greenbone Security Assistant (gsad)Documentation=man:gsad(8) https://www.greenbone.netAfter=network.targetWants=gvmd.service[Service]Type=forkingPIDFile=/opt/gvm/var/run/gsad.pidWorkingDirectory=/opt/gvmExecStart=/opt/gvm/sbin/gsad --drop-privileges=gvmRestart=on-failureRestartSec=2minKillMode=processKillSignal=SIGINTGuessMainPID=noPrivateTmp=true[Install]WantedBy=multi-user.targetEOFHow to enable and start the services
As root user, enable and start the GVM services:
systemctl daemon-reload &&\systemctl enable gvmd &&\systemctl enable gsad &&\systemctl enable ospd-openvas &&\systemctl start gvmd &&\systemctl start gsad &&\systemctl start ospd-openvasHow to check the services
Run the following command one in line at a time and make sure all three services are running.
systemctl status gvmdsystemctl status gsadsystemctl status ospd-openvasHow to modify default scanner
To modify the default scanner (GVM), switch back to your GVM session.
sudo su - gvmTo get the UUID of the scanner that has the socket (ospd.sock), run:
gvmd --get-scannersNext, use the command below to modify the scanner.
gvmd --modify-scanner=(INSERT SCANNER UUID HERE) --scanner-host=/opt/gvm/var/run/ospd.sockHow to access the GVM web interface
You can access the GVM web interface using the URL https://your-server-ip since it is installed and listening on ports 80 and 443. So, you will be redirected to the GVM login page as you see below:
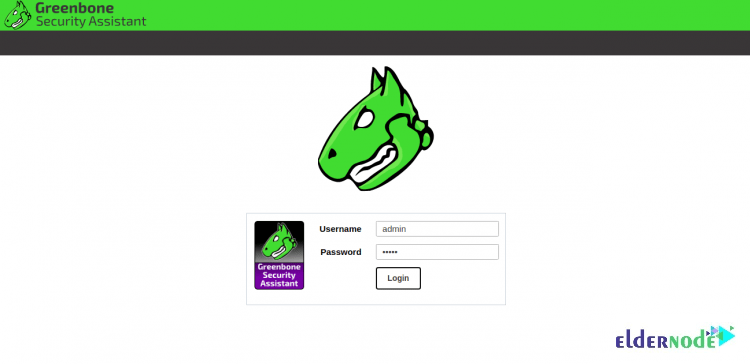
To log in to GVM, provide your admin username, password and click on the Login button. Then, you will see the GVM dashboard as follows:

The default login is admin/admin as set above. The web interface of OpenVAS offers many operations in its Configuration tab. Explore the options, make necessary modifications, and run an advanced scan using different targets, scan configs, and credentials.
How to use the advanced scan options
If you wish to have a greater level of control over your scans, the Advanced Task Wizard has been designed for you. You can access it by browsing the path below:
Scans >> Tasks and clicking the purple button
The advanced wizard will offer you some scanning options such as: Setting a name for the task, choosing a scan config, setting the target IP address, scheduling future scans, and using a credentialed scan.
Several default scan configs are provided by OpenVAS that allow you to create custom configs. Browse to Configuration >> Scan Configs to see the descriptions of scan configs and create new ones. You can also see the details of each scan config if you click on them. Click on the blue star button in the top left corner, create the config, and then click in to edit it to be able to create a new scan.
Conclusion
In this article, you learned How To Install And Configure OpenVAS On Ubuntu 20.04. You should have successfully installed and setup GVM. Log in using your IP address and start scanning your system for vulnerability and send your feedback to your friends on Community Eldernde. In case you are interested in learning more, refer to Install OpenVAS on CentOS 7 Linux.


When I tried to use these commands (and followed your installation steps before) I get this error:
systemctl daemon-reload &&\
systemctl enable gvmd &&\
systemctl enable gsad &&\
systemctl enable ospd-openvas &&\
systemctl start gvmd &&\
systemctl start gsad &&\
systemctl start ospd-openvas
Error:
Failed to enable unit: Unit file ospd-openvas.service does not exist.
and indeed, the ospd-openvas.service is missing in /etc/systemd/system/
Also, I am missing the creation steps in your above setup. Do I missed something?
Please reinstall openvas.
Be sure to update Ubuntu before installation.
Some notes:
some commands are missing second ” or ‘
also the .service file for ospd-openvas.service is missing:
cat < /etc/systemd/system/ospd-openvas.service
[Unit]
Description=Job that runs the ospd-openvas daemon
Documentation=man:gvm
After=network.target [email protected]
[email protected]
[Service]
Environment=PATH=/opt/gvm/bin/ospd-scanner/bin:/opt/gvm/bin:/opt/gvm/sbin:/opt/gvm/.local/bin:/usr/local/sbin:/usr/local/bin:/usr/sbin:/usr/bin:/sbin:/bin
Type=forking
User=gvm
Group=gvm
WorkingDirectory=/opt/gvm
PIDFile=/opt/gvm/var/run/ospd-openvas.pid
ExecStart=/opt/gvm/bin/ospd-scanner/bin/python /opt/gvm/bin/ospd-scanner/bin/ospd-openvas –pid-file /opt/gvm/var/run/ospd-openvas.pid –unix-socket=/opt/gvm/var/run/ospd.sock –log-file /opt/gvm/var/log/gvm/ospd-scanner.log –lock-file-dir /opt/gvm/var/run/ospd/
Restart=on-failure
RestartSec=2min
KillMode=process
KillSignal=SIGINT
GuessMainPID=no
PrivateTmp=true
[Install]
WantedBy=multi-user.target
EOF
Do you have this problem only in Ubuntu 20 or do you see this error in all versions?
I also found that the ospd-openvas.service wasn’t created. Here’s my version, which worked with the rest of the setup above:
[Unit]
Description=Job that runs the ospd-openvas daemon
Documentation=man:gvm
After=postgresql.service
[Service]
Environment=PATH=/opt/gvm/bin/ospd-scanner/bin:/opt/gvm/bin:/opt/gvm/sbin:/opt/gvm/.local/bin:/usr/local/sbin:/usr/local/bin:/usr/sbin:/usr/bin:/sbin:/bin
Type=simple
User=gvm
Group=gvm
WorkingDirectory=/opt/gvm
PIDFile=/opt/gvm/var/run/ospd-openvas.pid
ExecStart=/usr/bin/python3 /opt/gvm/bin/ospd-openvas –pid-file /opt/gvm/var/run/ospd-openvas.pid –unix-socket /opt/gvm/var/run/ospd.sock –log-file /opt/gvm/var/log/gvm/ospd-openvas.log –lock-file-dir /opt/gvm/var/run
Environment=PYTHONPATH=/opt/gvm/bin/ospd-scanner/lib/python3.8/site-packages
Restart=on-failure
RestartSec=2min
KillMode=process
KillSignal=SIGINT
GuessMainPID=no
PrivateTmp=true
[Install]
WantedBy=multi-user.target
Thank you for reading this article and sending this message.
One of the instructions is missing a ” – Upload plugins in Redis with GVM
Is:
echo “/opt/gvm/lib > /etc/ld.so.conf.d/gvm.conf
ldconfig
Should be:
echo “/opt/gvm/lib” > /etc/ld.so.conf.d/gvm.conf
ldconfig
When I try to create the user, I’m getting the following error:
root@ubuntu:/home/administrador# echo ‘export PATH=”$PATH:/opt/gvm/bin:/opt/gvm/sbin:/opt/gvm/.local/bin”‘ | tee -a /etc/profile.d/gvm.sh &&\
> chmod 0755 /etc/profile.d/gvm.sh &&\
> source /etc/profile.d/gvm.sh &&\
> bash -c ‘cat # gmv libs location
> /opt/gvm/lib
> EOF’
export PATH=”$PATH:/opt/gvm/bin:/opt/gvm/sbin:/opt/gvm/.local/bin”
bash: /etc/ld.so.conf.d/gvm.conf: No such file or directory
bash: line 2: /opt/gvm/lib: No such file or directory
bash: line 3: EOF: command not found
Am I missing any step?
Run the below command to create an initial username and password but do not forget to change it.
gvmd --create-user=admin --password=adminI still get the error another user posted:
When I try to create the user, I’m getting the following error:
root@ubuntu:/home/administrador# echo ‘export PATH=”$PATH:/opt/gvm/bin:/opt/gvm/sbin:/opt/gvm/.local/bin”‘ | tee -a /etc/profile.d/gvm.sh &&\
> chmod 0755 /etc/profile.d/gvm.sh &&\
> source /etc/profile.d/gvm.sh &&\
> bash -c ‘cat # gmv libs location
> /opt/gvm/lib
> EOF’
export PATH=”$PATH:/opt/gvm/bin:/opt/gvm/sbin:/opt/gvm/.local/bin”
bash: /etc/ld.so.conf.d/gvm.conf: No such file or directory
bash: line 2: /opt/gvm/lib: No such file or directory
bash: line 3: EOF: command not found
It appears /etc/ld.so.conf.d/gvm.conf does not exist because gvm is not installed yet?
According to the tutorial, please follow the installation steps again carefully to ensure the correct installation of the program.
Hello,
I am attempting to install on Ubuntu 20.04.5 but when I get to installing gvm-libs but am getting an error during make as follows:
> cmake -DCMAKE_INSTALL_PREFIX=/opt/gvm ..
— Configuring the Greenbone Vulnerability Management Libraries…
— Looking for clang-format…
— clang-format not found…
— Using redis socket /run/redis/redis.sock
— Install prefix: /opt/gvm
— Looking for libnet…
— Looking for net… NET-NOTFOUND
CMake Error at boreas/CMakeLists.txt:31 (message):
The net library is required.
— Looking for libnet-config…
— libnet-config not found, using defaults…
— Looking for pcap…
— Looking for pcap… /usr/lib/x86_64-linux-gnu/libpcap.so
— Looking for pcap-config…
— Looking for pcap-config… /usr/bin/pcap-config
— Looking for paho-mqtt3c … LIBPAHO-NOTFOUND
CMake Error at util/CMakeLists.txt:57 (message):
libpaho-mqtt3c is required for MQTTv5 support.
— Looking for gpgme…
— Found gpgme: /usr/lib/x86_64-linux-gnu/libgpgme.so, version 1.13.1-unknown
— Looking for libcrypt…
— Looking for libcrypt… /usr/lib/x86_64-linux-gnu/libcrypt.so
— Looking for libgcrypt…
— Looking for libgcrypt… /usr/lib/x86_64-linux-gnu/libgcrypt.so
— Looking for freeradius-client library…
— Looking for radcli library…
— Found /usr/lib/x86_64-linux-gnu/libradcli.so – radius support enabled
— Looking for libldap…
— Found /usr/lib/x86_64-linux-gnu/libldap.so – ldap support enabled
— Configuring incomplete, errors occurred!
See also “/opt/gvm/src/gvm-libs/build/CMakeFiles/CMakeOutput.log”.
See also “/opt/gvm/src/gvm-libs/build/CMakeFiles/CMakeError.log”.
—————————–
I have been trying to figure out why libpaho-mqtt3c is missing and how to install.
Have you seen this error before?
Thanks
Chris
This error may be caused by using unreleased 21.04 or the master. To solve the error, install libnet1-dev with the help of the following command:
sudo apt install libnet1-dev
Thank you for the reply… I have tried that… still no luck.
It seems to be looking for: libpaho-mqtt3c
The function: find_library(LIBPAHO paho-mqtt3c) in the: mqtt section of: util/CMakeLists.txt is failing because it cannot find the library: paho-mqtt3c.
The problem is that I cannot figure out how to install: paho-mqtt3c
Also… the build number that you specified in the instructions no longer seem to been the repos… The instructions above indicated that the ‘gvm-libs-20.08’ branch should be used but only ‘stable’ and ‘main’ branches exist and only the following tags exist:
* v1.0+beta1
* v1.0+beta2
* v11.0.0
* v20.8.0
* v20.8.1
* v22.4.0
checking out v22.4.0, v20.8.1 or v20.8.0 seems to work… checking out ‘stable’ generates the error.
I am going to try to continue with v20.8.0 or v22.4.0… but ‘stable’ does seem to have this issue.
Although there is no error, make still shows:
.
— Looking for paho-mqtt3c … LIBPAHO-NOTFOUND
— libpaho-mqtt3c is required for MQTTv5 support.
.
So I guess there support for MQTT will be disabled until I can figure out how to install that library.
OK…
make fails with:
.
[ 56%] Building C object util/CMakeFiles/gvm_util_shared.dir/mqtt.c.o
In file included from /opt/gvm/src/gvm-libs/util/mqtt.c:41:
/opt/gvm/src/gvm-libs/util/mqtt.h:28:10: fatal error: MQTTClient.h: No such file or directory
28 | #include
| ^~~~~~~~~~~~~~
compilation terminated.
make[2]: *** [util/CMakeFiles/gvm_util_shared.dir/build.make:154: util/CMakeFiles/gvm_util_shared.dir/mqtt.c.o] Error 1
make[1]: *** [CMakeFiles/Makefile2:455: util/CMakeFiles/gvm_util_shared.dir/all] Error 2
.
.
So really need to get that library installed.
warning: Could not find remote branch gvm-libs-20.08 to clone.
fatal: Remote branch gvm-libs-20.08 not found in upstream origin
How do I undo all steps to this point?
You can remove all installation dependencies using the following command:
sudo apt-get remove --auto-remove greenbone-security-assistantIt appears the referenced branches don’t exist at https://github.com/greenbone/.
Is it possible to update the commands?
sudo systemctl stop openvas-scannersudo systemctl stop openvas-manager
sudo greenbone-nvt-sync
sudo greenbone-certdata-sync
sudo greenbone-scapdata-sync
sudo systemctl start openvas-scanner
sudo systemctl start openvas-manager
sudo openvasmd –update –verbose –progress
Thanks but these commands need updating I think. gvm-libs-20.08 branch does not exist so the commands fail.
git clone -b gvm-libs-20.08 –single-branch https://github.com/greenbone/gvm-libs &&\
git clone -b openvas-20.08 –single-branch https://github.com/greenbone/openvas-scanner &&\
git clone -b gvmd-20.08 –single-branch https://github.com/greenbone/gvmd &&\
git clone -b master –single-branch https://github.com/greenbone/openvas-smb &&\
git clone -b gsa-20.08 –single-branch https://github.com/greenbone/gsa &&\
git clone -b ospd-openvas-20.08 –single-branch https://github.com/greenbone/ospd-openvas &&\
git clone -b ospd-20.08 –single-branch https://github.com/greenbone/ospd-openvas
The instructions of this tutorial are correct, be careful to install the necessary prerequisites carefully and correctly. To install gvm-libs, run the following commands:
cd gvm-libs ;\export PKG_CONFIG_PATH=/opt/gvm/lib/pkgconfig:$PKG_CONFIG_PATH ;\mkdir build ;\cd build ;\cmake -DCMAKE_INSTALL_PREFIX=/opt/gvm .. ;\make ;\make doc ;\make install ;\cd /opt/gvm/src