How to Install and Configure OpenSSH Server on Windows Server 2019. Linux and Windows servers both offer a wide range of features. Both Linux and Windows operating systems have their own fans on the virtual server / dedicated server, but one of the main differences between the two is how to access them. SSH is used to connect to Linux servers and RDP is commonly used to connect to Windows servers.
In Windows Server 2019, the OpenSSH feature is available for installation and can be connected to the server via the SSH service. In this article, we teach you the installation and configuration of OpenSSH on the Windows 2019 server.
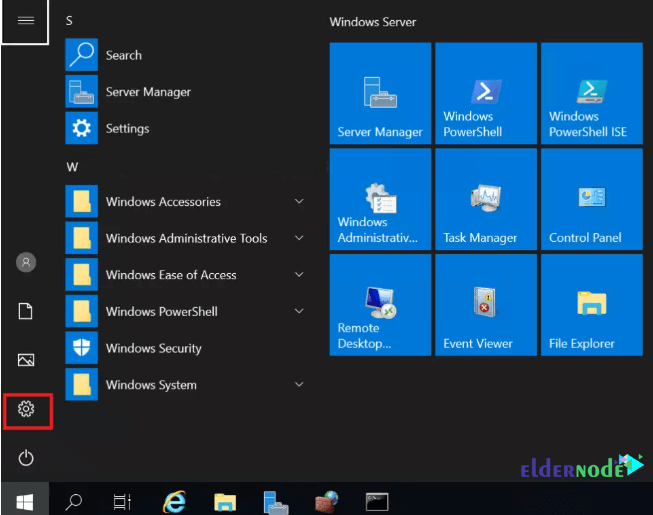
1. Select Settings from the Start menu.
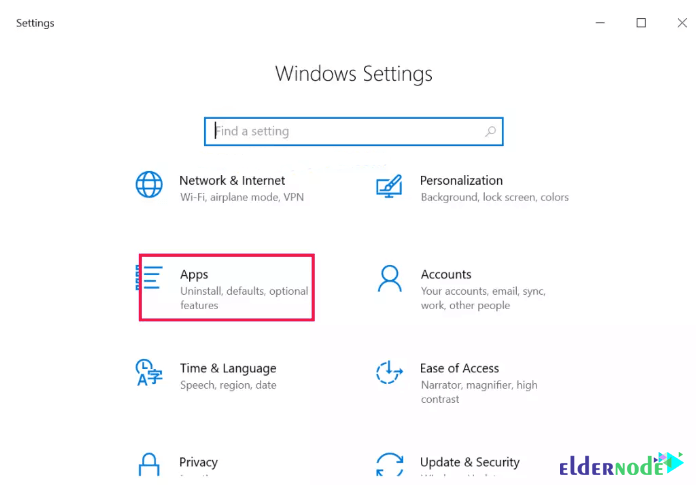
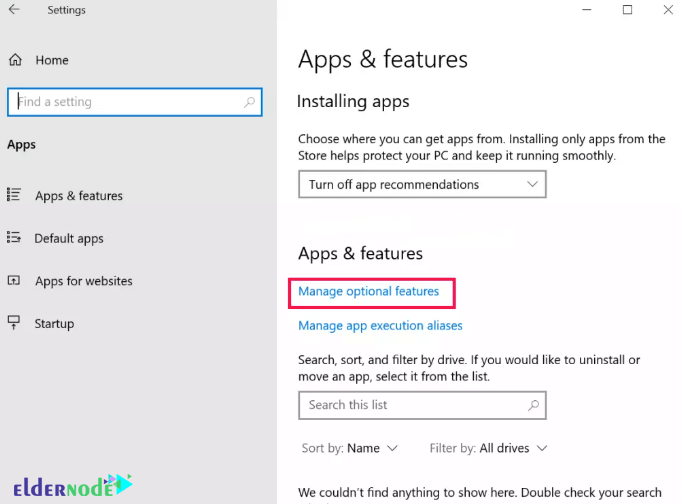
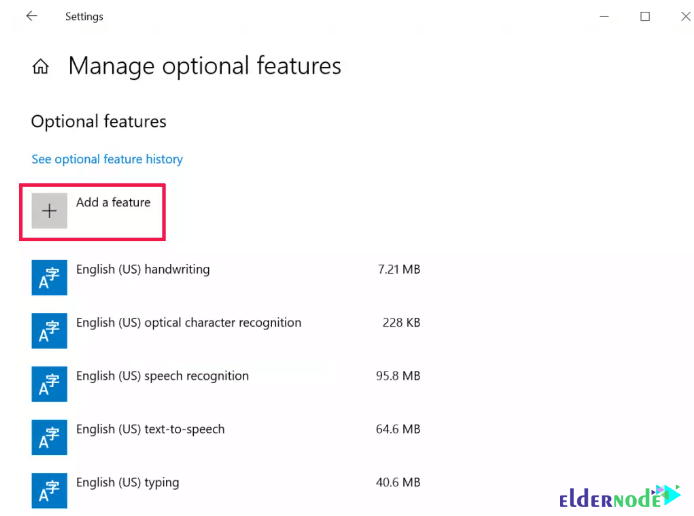
2. After opening the settings, select the App option and then click on Manage optional features.
*
3. Click Add a feature.
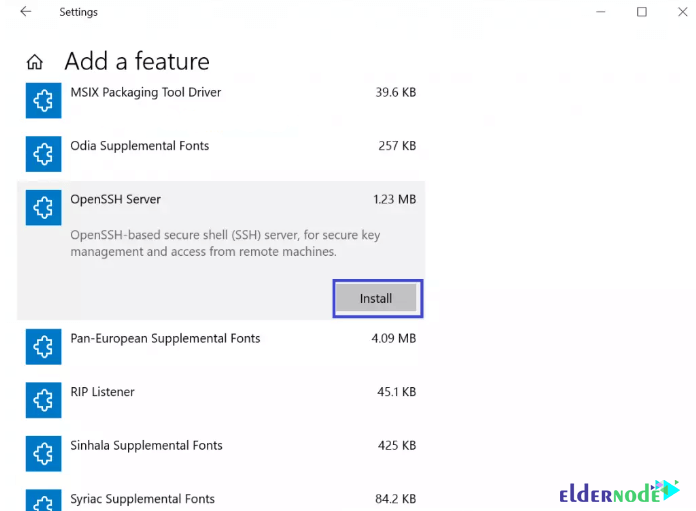
4. In the next window, select OpenSSH Server and click on install.
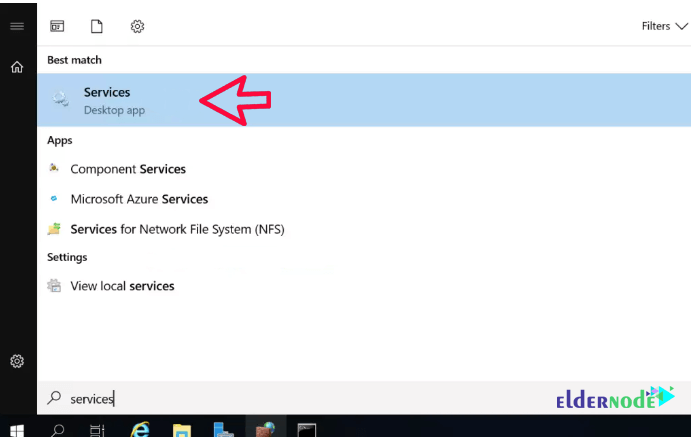
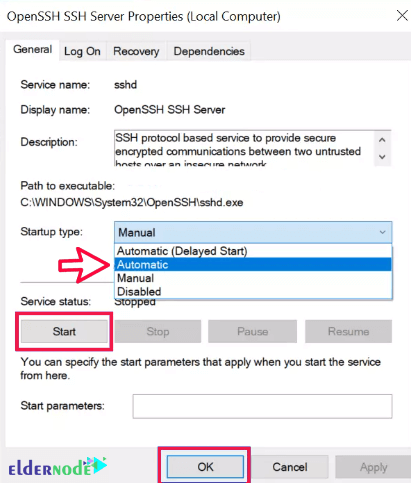
5. Now search for Services from the Start menu. After opening the page, select the OpenSSH Server option and right-click on properties.
**
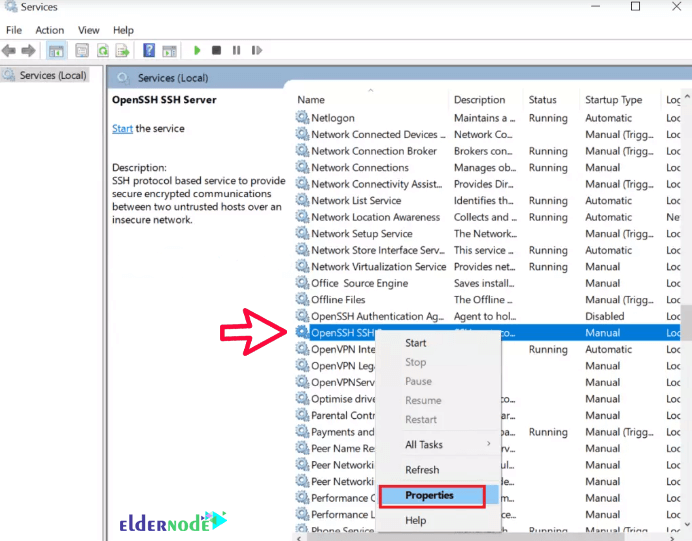
6. Change the Start-upType option to Automatic, click Start, and then click Next.
7. If your firewall is on in your server, allow TCP Port 22 so that clients can be able to connect to the server. You can follow Learn how to open a port on a Windows firewall.
Dear user, we hope you would enjoy this tutorial, you can ask questions about this training in the comments section, or to solve other problems in the field of Eldernode training, refer to the Ask page section and raise your problem in it as soon as possible. Make time for other users and experts to answer your questions.
Goodluck.


