Netcat command is often referred to as the Swiss Army Knife of network tools and can help you monitor, test, and send information over network connections. This article will teach you How to Download and Install Netcat on Windows PCs. If you intend to Windows VPS servers, you can check the packages offered on our website.
Table of Contents
Introduction to Netcat
Netcat is a command-line utility that reads and writes data over network connections using the TCP or UDP protocols. It is built as a secure back-end tool and is available for Linux, macOS, Windows, and BSD. You can use Netcat to debug and monitor network connections, scan open ports, transfer data over the network connections, and security assessments. This utility allows you to send files from a client to a server and back directly with other programs and scripts.
Downloading Netcat on Windows
In this step, you will learn how to download Netcat on your Windows. To do this, follow the steps below.
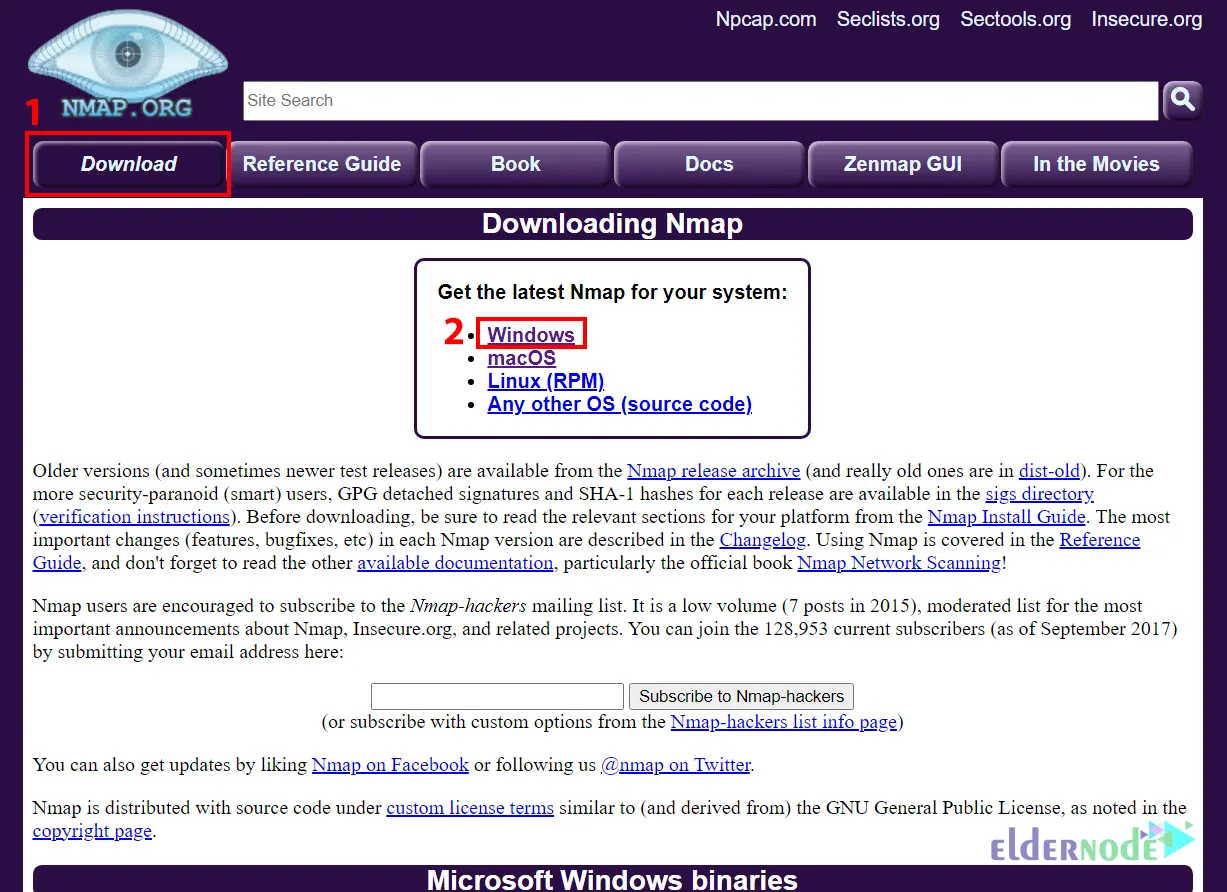
You need to download the Netcat package that comes with Nmap. So first, navigate to the Nmap official website and go to the Downloads >> Windows path:
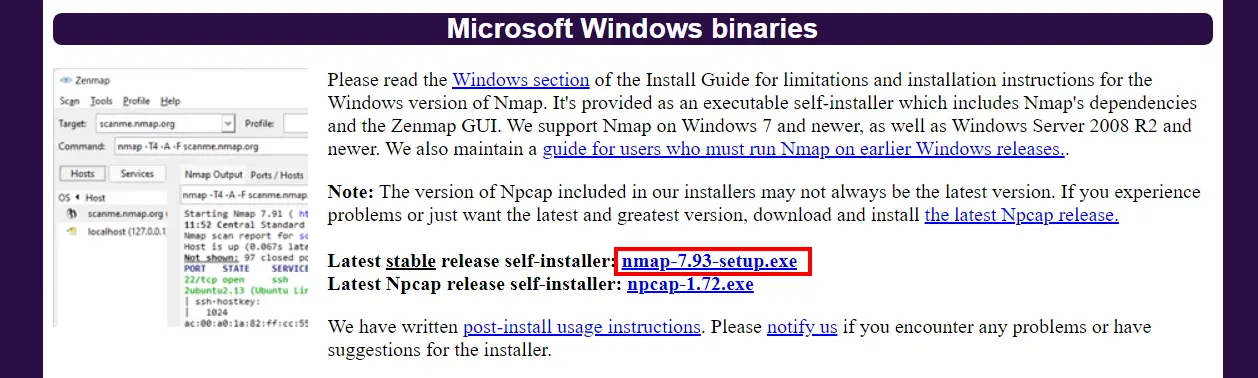
Now choose the latest stable release self-installer and click on nmap-7.93-setup.exe to start the download:
Wait for the download to complete.
How to Install Netcat on Windows PCs
Now go to the Downloads folder and right-click on the downloaded file. Then click on Run as administrator.
The following screen will appear which allows you to choose components to install. You should choose all the components that come with the Nmap installer and especially choose the Ncat and Register Nmap Path. After making your selection, click Next:

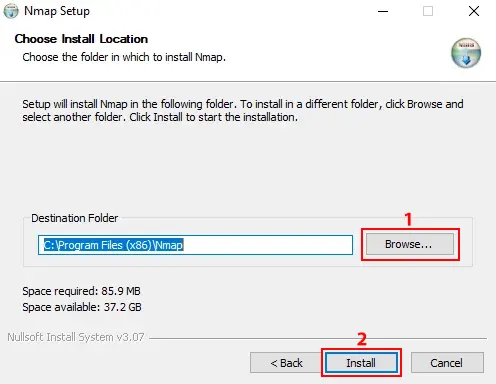
Now click on Browse and choose your install location. Once you make your selection, click on Install:
In this step, open your Windows Terminal or CMD or PowerShell and run the following command to check the installed Netcat version:
ncat -vDisplay the help page using the command below:
ncat -hIf you want to check the Netcat is really working or not, open two terminal windows and run the command below on the first window:
ncat -l <any-port>And run the following command on the second window:
ncat -C localhost <choosen-port>Lastly, you will see you can chat between the windows.
That’s it!
Conclusion
In this article, we introduced you to Netcat and taught you how to download and install it on Windows PCs. I hope this tutorial was useful for you and helps you to install Netcat on Windows PCs. If you encounter any problem while downloading or installing Netcat, you can contact us in the comments section.