Tutorial create forward lookup zone in DNS Manager Server 2019. As you know, Forward Zone is for converting a name to an IP address. In this article, we will perform the setup steps to create this zone as follows. You can Choose your perfect Windows VPS Server Packages from eldernode.
How to create forward lookup zone in DNS Manager Server 2019
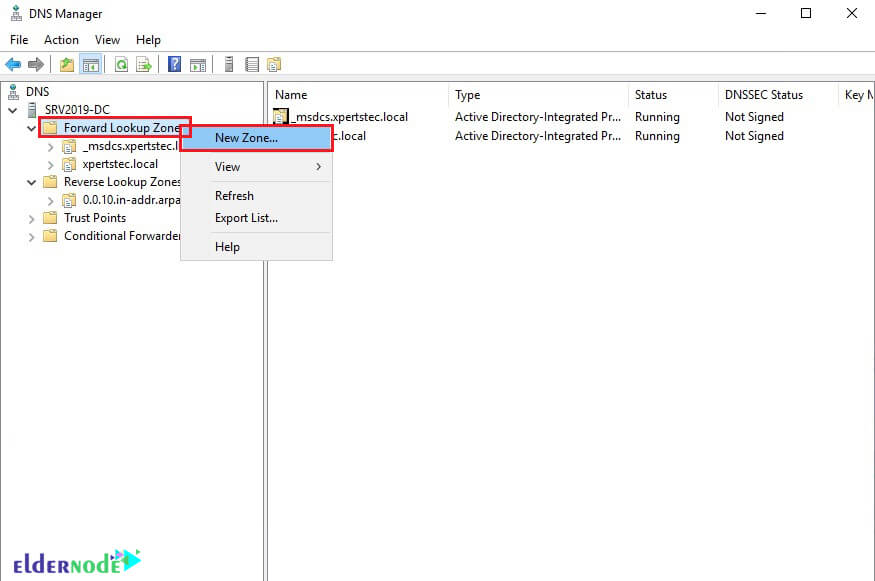
1. Open DNS Manager on your active directory DNS server.
2. Right-click on forward lookup zone and select New Zone.
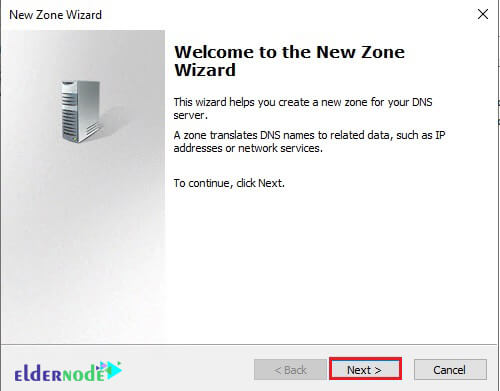
3. In the New Zone Wizard window, click Next and continue.
4. In the next step, select the type of zone you want to create and click Next.
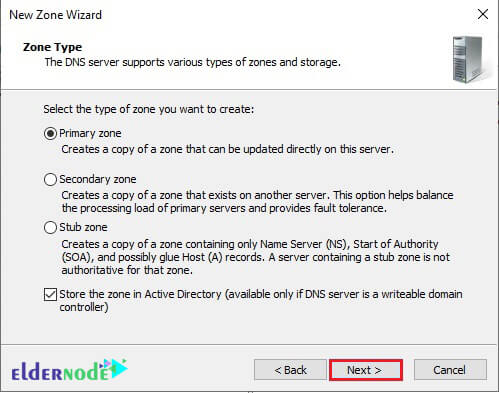
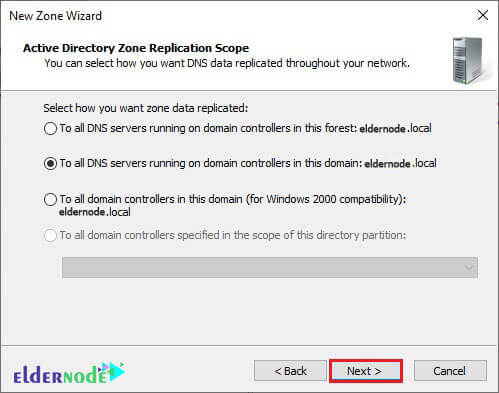
5. Select the default settings and click OK.
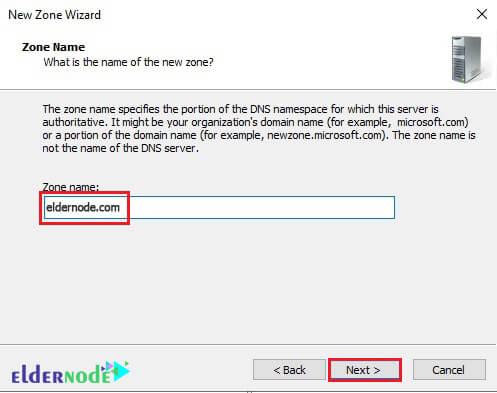
6. In the Zone Name field enter your external domain name.
Note: My external domain is eldernode.com
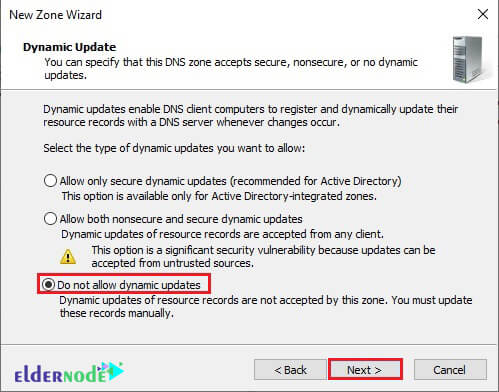
7. Because we create all the files manually, we have to click on “Do not allow dynamic updates” at this stage.
8. Click Next.
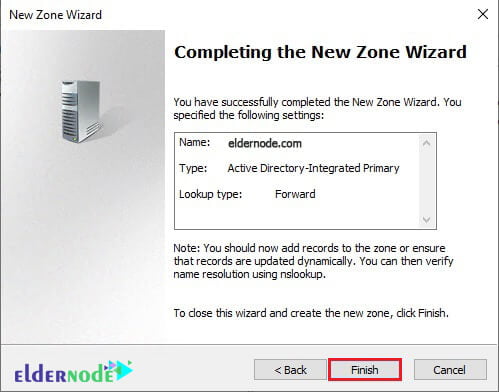
9. In the final step, click Finish to complete the installation process.
Dear user, we hope you would enjoy this tutorial, you can ask questions about this training in the comments section, or to solve other problems in the field of Eldernode training, refer to the Ask page section and raise your problem in it as soon as possible. Make time for other users and experts to answer your questions.
Goodluck.


