Changing the remote desktop port is one of the network security considerations. You may be wondering how we can secure our network from hackers. The most common activity of hackers is to check open network ports and attack them. To be safe from these attacks, it is strongly recommended that the network ports be taken out of default and the default port changed. Remote Desktop Protocol (RDP) is one of the most important services using in most companies and organizations today for telecommuting and remote network management. In this article, we are going to teach you about Tutorial Change RDP Port on Windows. If you want to get a RDP server, you can see the packages available in Eldernode.
Table of Contents
How to Change RDP Port on Windows
In order to increase the security factor in Windows servers, the server administrator changes the remote desktop port from the default mode (port 3389). To change the port, you must first activate the port in the firewall. Note that the selected port must be between 1025 and 65535. In the next section, join us to teach you to step by step how to Change RDP Port on Windows.
Why change RDP Port?
Normally, the RDP service uses the TCP 3389 port. By activating this default mode, hackers can easily infiltrate your network. To change the remote desktop port, you can change this port to the amount you need for security reasons and protect your organization’s network or internal servers against external and internal attacks. By doing this, you can easily prevent hackers from infiltrating.
So the most important reason to change the port to another number is that if your IP is scanned by hackers to check the remote desktop access, port 3389 will be disabled and your server will be hidden from view. In the next section, we will teach you how to Change RDP Port on Windows.
Change RDP Port on Windows 10, 2012, 2016, 2019
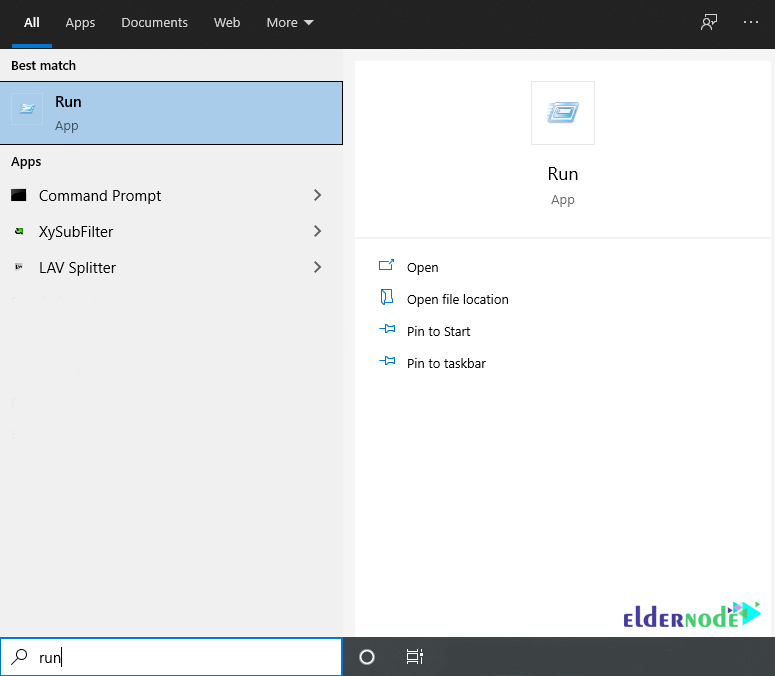
In the first step, select Run from the Start menu.
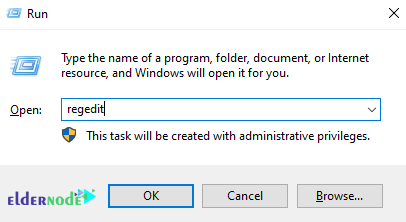
Then in the Run window, type Regedit and then click OK.
Now in the window that opens, go to the following path:
HKEY_LOCAL_MACHINE\System\CurrentControlSet\Control\TerminalServer\WinStations\RDP-Tcp\PortNumber
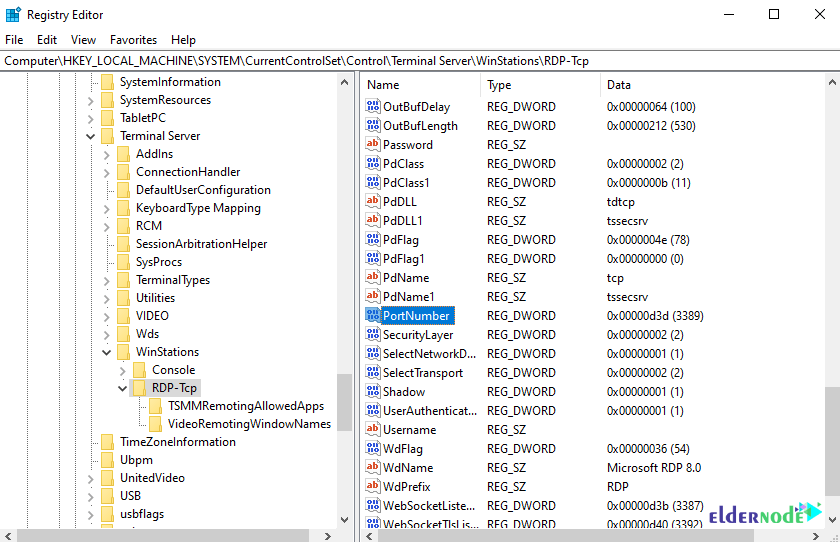
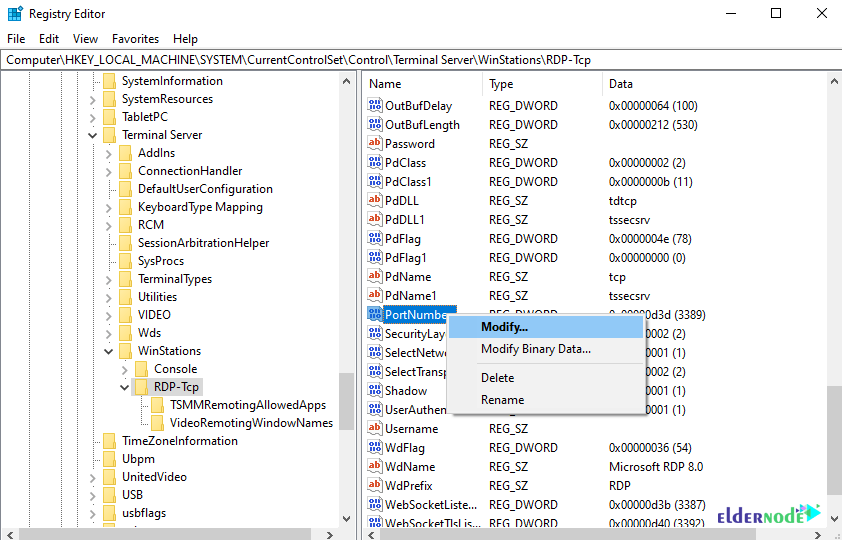
In the next step, right-click on the file and select Modify. Then enter the Decimal option and the new Port number.
*
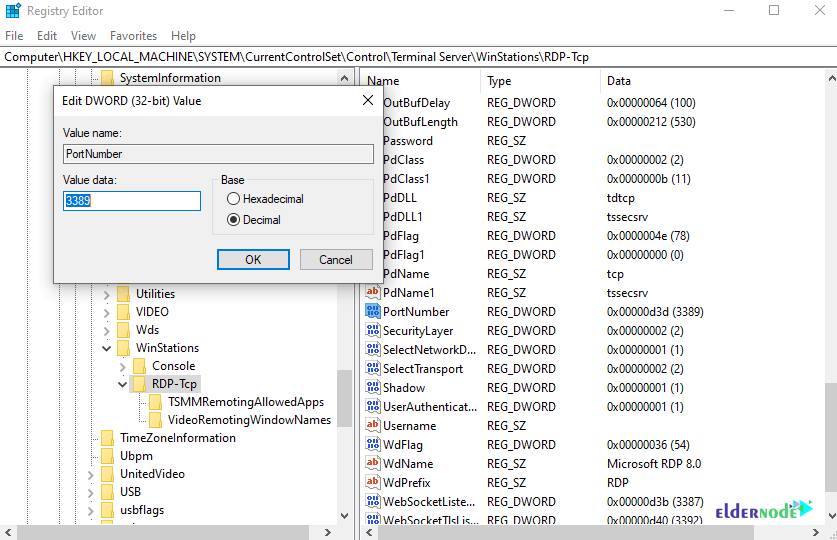
Note: In order to be able to connect successfully, you must enter the desired port as follows:
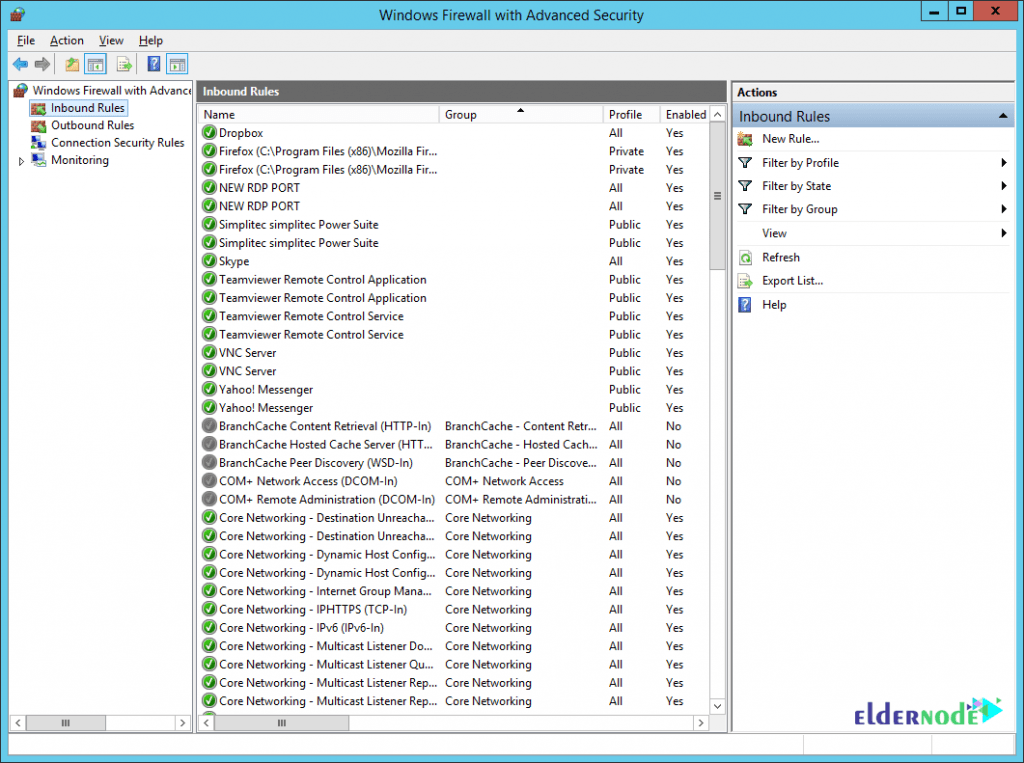
YY.YY.YY.YY:PORTNow we need to go to the firewall settings. Open the Windows Firewall with Advanced Security to open the port in the firewall. To do this, use the Windows search feature or enter from the path below:
Start >> Control Panel >> System and Security >> Windows Firewall
To add a port, click Inbound Rules and click New Rule in the left column.
Follow the steps as shown below:

*

Enter the desired description and click Finish.

Conclusion
Due to the fact that hackers search for default ports when attacking servers or destination systems, measures should be taken to prevent this. One of the most practical and basic methods is to change the default RDP port. In this article, we tried to teach you to step by step how to Change RDP Port on Windows. You can refer to the article How to secure Linux VPS if you wish.
