In this article, you will be taught how to Backup high volume drives in the shared folder on NAS. Thanks to the use of UEFI and GPT technologies, you can store large volumes of data in Windows Server 2012. The main problem with this huge amount of data is backing it up. If you don’t have a financial or budget problem, you can use third-party software and back up multiple servers. But if your organization is weak in terms of IT budget, Windows Server 2012 is the right solution.
Backup high volume drives in the shared folder on NAS
Many IT managers who are financially conscious use the 2012 server to back up USB drives. High-volume USB drives have the problem of limiting 4096 bytes per sector. When you back up USB drives with a size of 3 or 4 terabytes, the backup fails. So how do you back up high-volume drives without spending a fortune?
A good solution is to use NAS and run Incremental backup. There are many different NASs on the market, one of which is the Seagate brand.
How to Backup high volume drives in windows server
To get started, create a shared folder in NAS that is available from Windows Server. Then install the backup feature on Windows Server, select it, and then select Backup schedule.

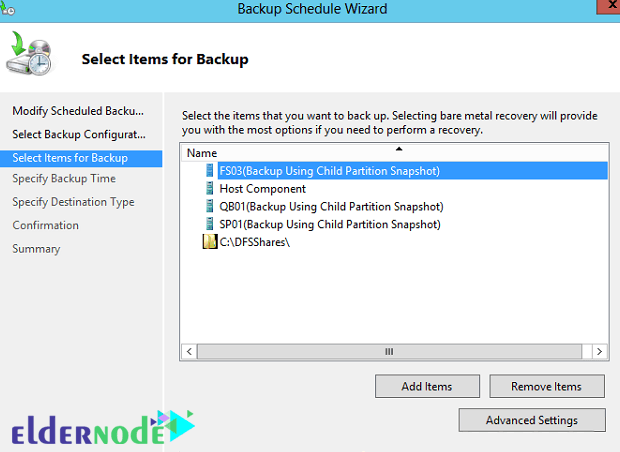
Select the options you want to back up:
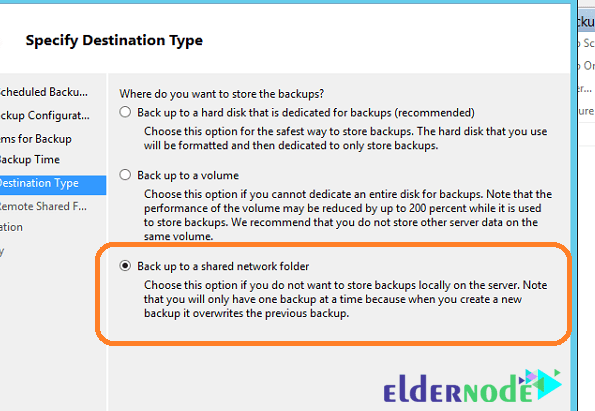
In the Backup destination section, select the backup to a shared network folder option.
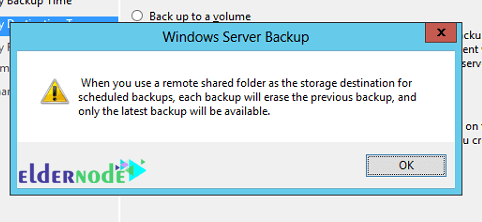
When you receive a full backup message in shared folders, click OK.
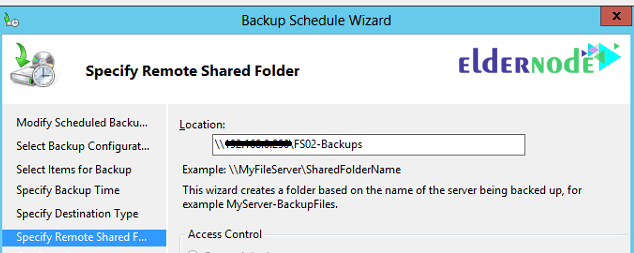
Next, enter the shared folder path in NAS.
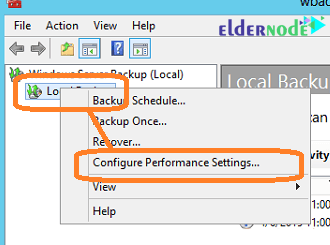
Then right-click the Local Backup icon in MMC and then select configure performance settings in the menu.
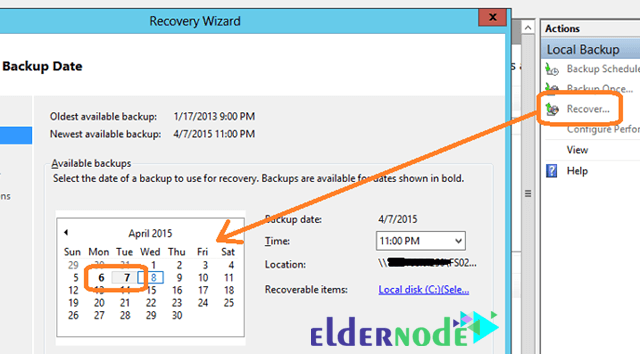
Select the faster performance settings option to run Backup as incremental backup. When your backup is done for a few days, come back and select the recover option. By selecting this option, you should see a few days in bold in the backup calendar, which shows that incremental backup is working properly.
Conclusion
In this article, we tried to fully teach the steps of backing up high-volume drives in the shared folder on NAS.



Hello and thanks for your good training. Please name the best ways to back up your data.
– Manually copy data to an external hard drive, flash drive or second internal hard drive
– Use of cloud technology such as Google Drive or Dropbox
– Backup on the Internet
And of course, if you use network servers, you can back up your data manually or automatically using special software on special storage such as NAS or SAN.
Please explain more about NAS.
This storage is of File Level type and uses CIFS and NFS protocols and is mostly used for file sharing in the network.
What are the most important factors that cause data loss?
Unintentional deletion of information
Deliberate deletion of information
Hard disk failure
Becoming viral
Ransomware
Theft and manipulation of information
Natural disasters (fires and…)
What are the benefits of the NAS storage system?
Reduce restrictions on local disk space
The data storage structure is improved.
Reduces the scatter of files and information on the network by collecting them.
File Server management complexity is greatly reduced.
How does NAS storage work?
In NAS or Network Attached Storage, hard disks are housed on a server called NAS Storage. These drives are then shared on the network for other devices.
In fact, it is connected to the storage via the TCP / IP protocol and is serviced from it.