How to add a Rule in Windows Firewall. In the previous article, you were introduced to the Windows firewall environment. In this article, we are going to teach you how to add a rule in the Windows firewall.
Before starting the tutorial, it is necessary to know how to add rules in inbound and outbound have similar steps to each other.
Windows Virtual Private Server Packages in Eldernode
Learn how to add a Rule in a Windows firewall
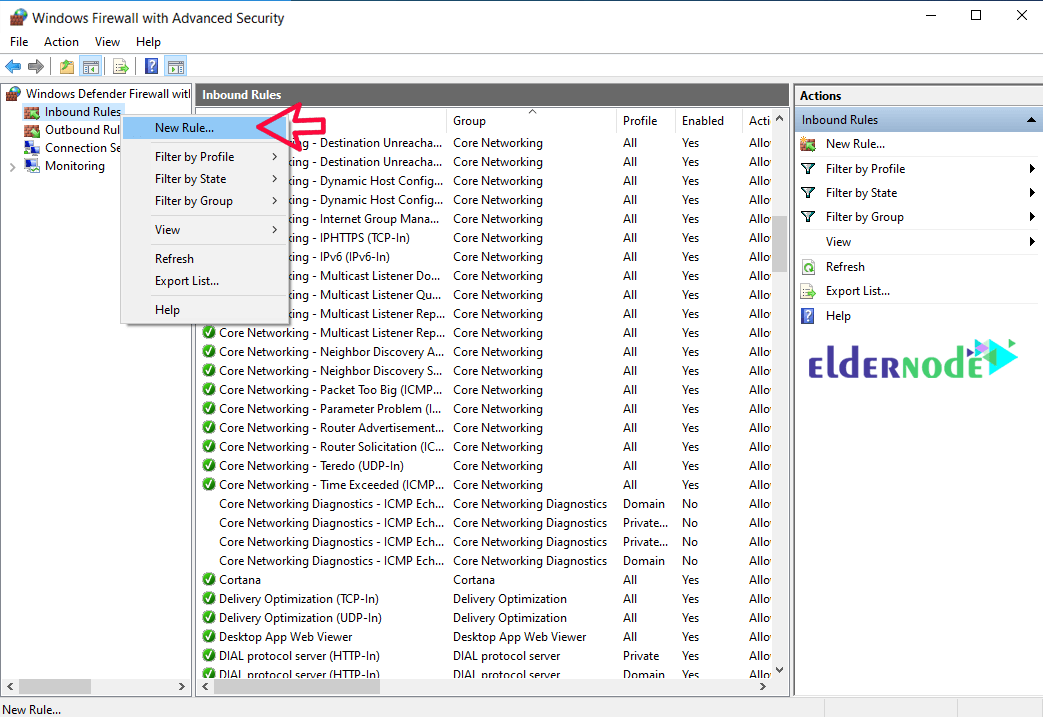
1. Right-click on the inbound Rules option and select New Rule.
2. In the opened page, there are 4 modes to choose from, which are as follows:
– Program: Write a rule for software inside Windows
– Port: Write a rule for one or more specific ports
– Predefined: Write a rule for predefined Windows services such as Remote Desktop
– Custom: Write a rule with open options (a combination of the above 3 options)
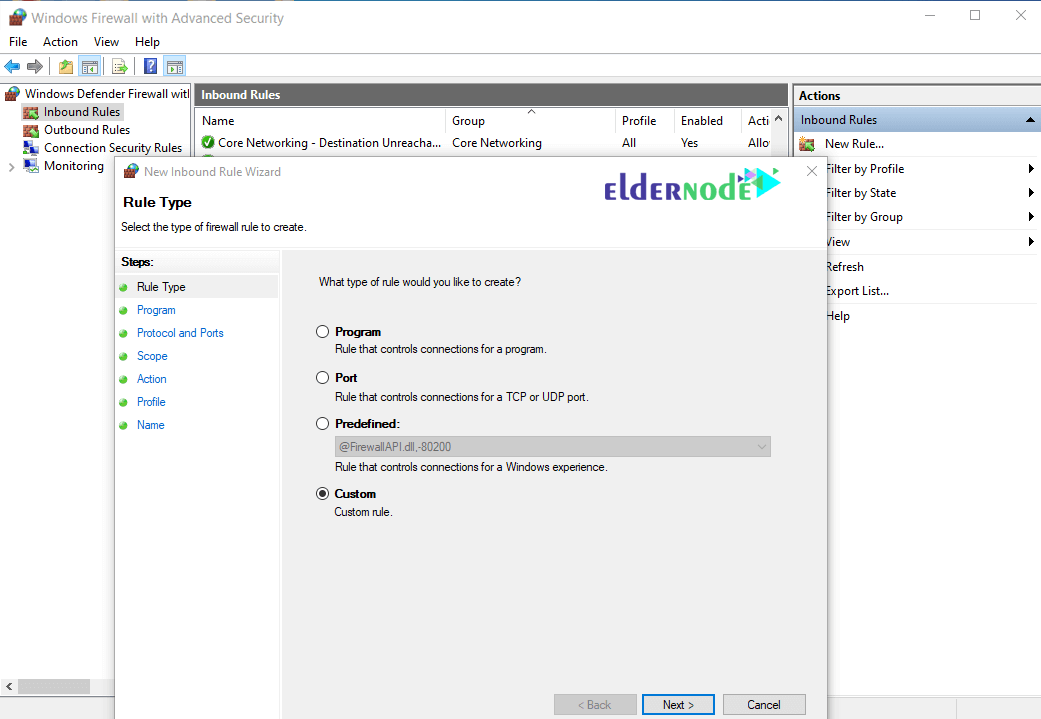
In this article, we use the Custom option to include all scenarios.
3. Select the Custom option and click Next.
On the following page you will see 3 options which are as follows:
– All Program: Apply the rule to all Windows programs
– This Program Path: Apply a rule to a specific program
– Services: Apply a rule to a specific Windows service
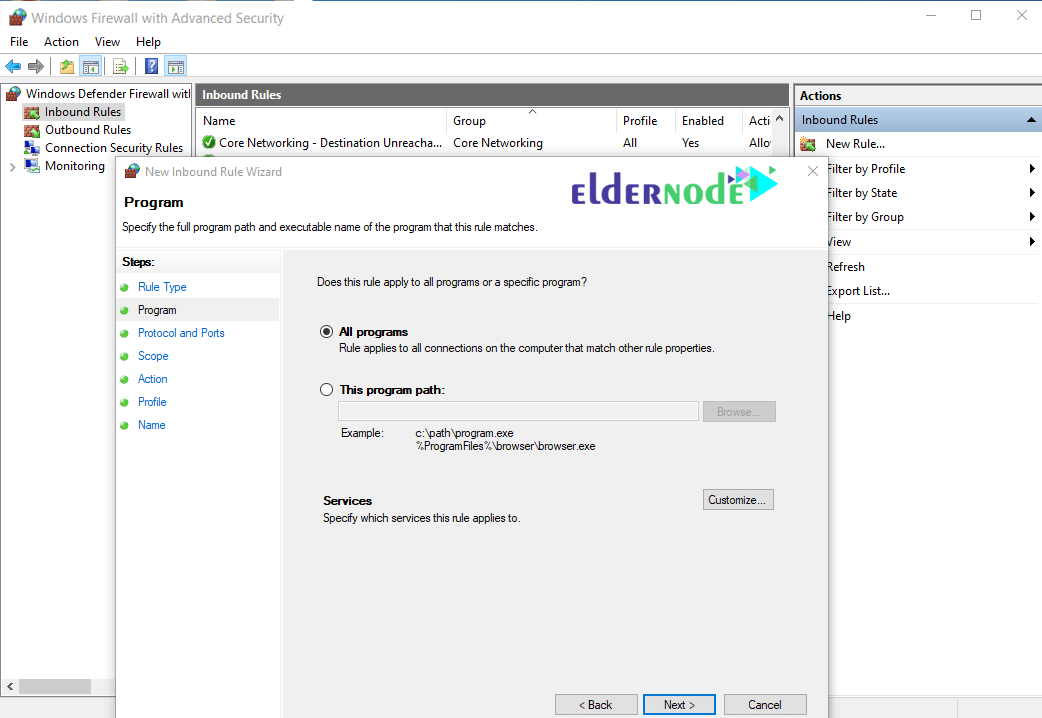
In this section, we select the All Program option.
4. In the next step, you can select the desired port and protocol.
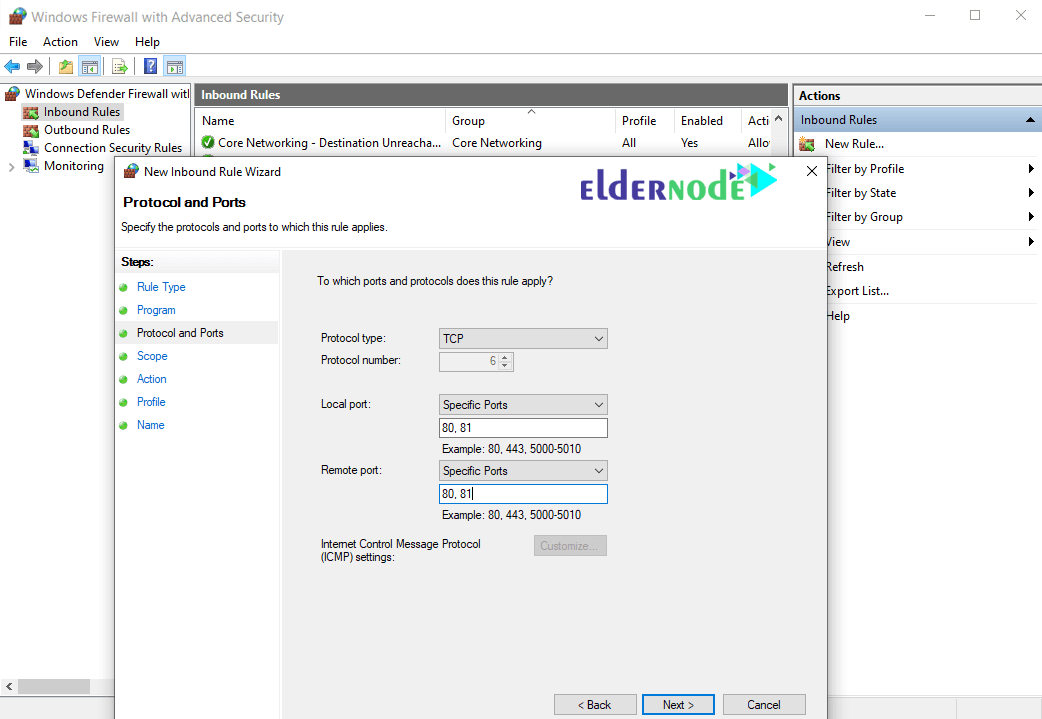
Note that the choice of port and protocol depends on your opinion on whether to open or close that port.
In this section we have selected ports 80 and 81.
5. You can open or close this port for a specific IP.
If you click Next in this section, the settings for all IPs will be considered by default. If you need to define this rule for a specific IP address, use the These IP addresses option.
RDP (Remote Desktop) Server from Eldernode
In this tutorial we are going to define this rule for a specific IP.
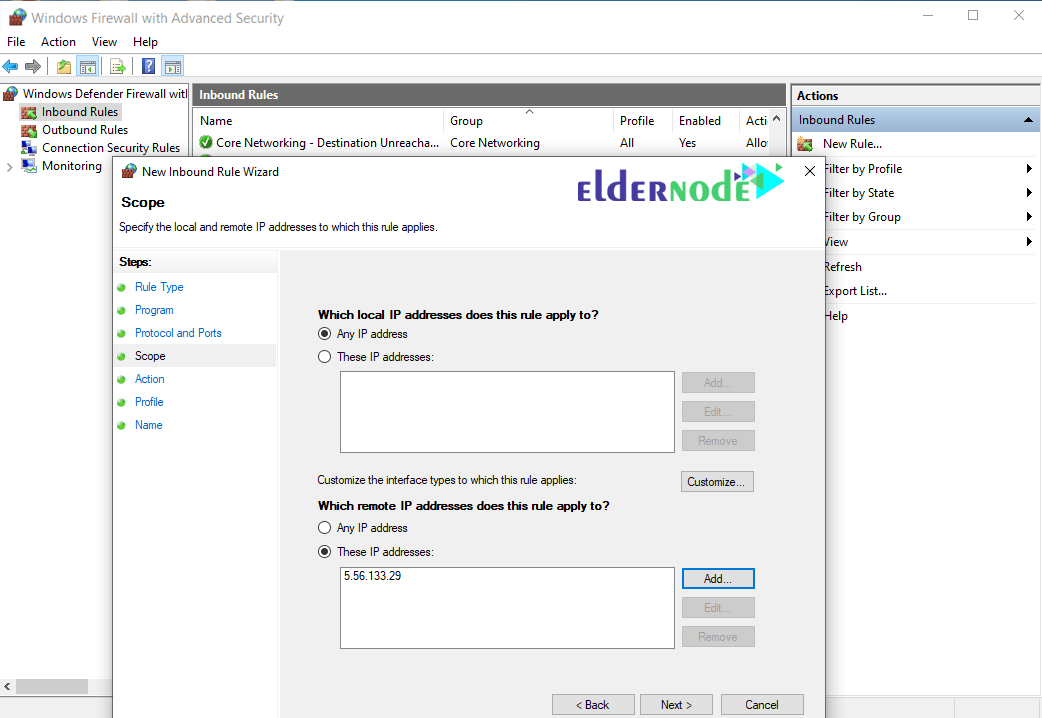
Here we have added the IP of a server with the address 5.56.133.29.
Note that when adding an IP you can also define a specific range.
6. In this step, you can select your rule mode:
a) Allow the Connection
b) Allow the Connection if it secure
c) Block The Connection
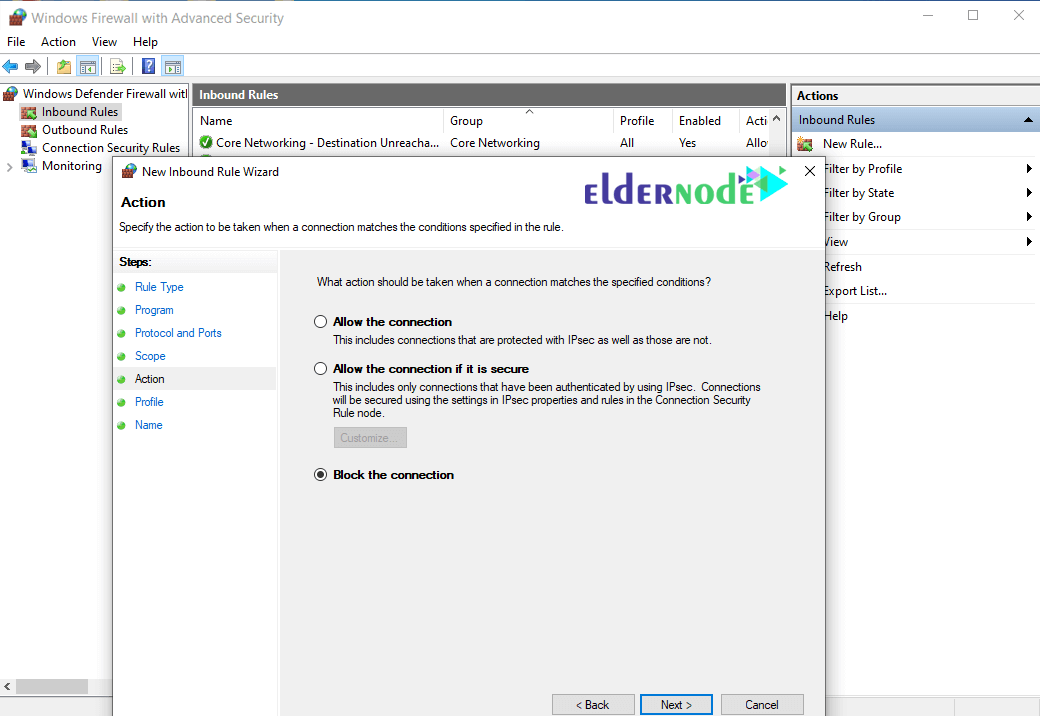
After selecting the desired option, click Next.
7. In this step, you determine the permission to execute the rule to different networks.
Windows Firewall is divided into 3 different parts:
– Domain: If your system is connected to a domain, it follows these rules.
– Public: Follows this rule if your system is connected to a public network, such as the Internet.
– Private: Follows this rule if your system is connected to an internal network.
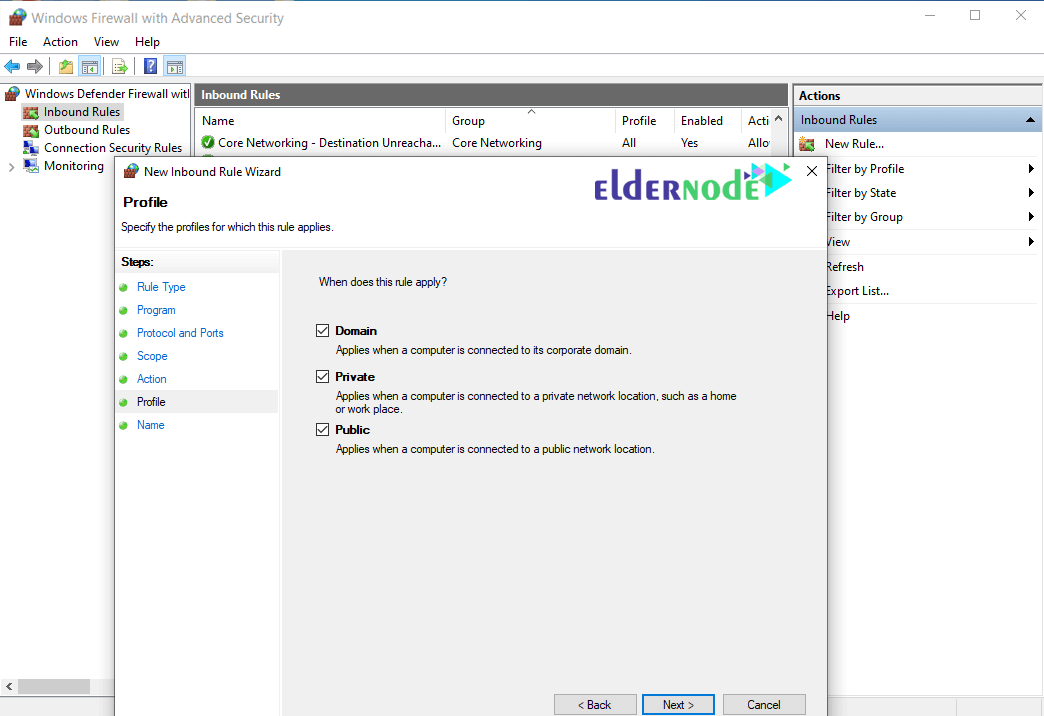
Here we have selected all 3 options which means to execute this rule for all 3 firewall modes.
8. In the last step, define a name for your rule and click on Finish.
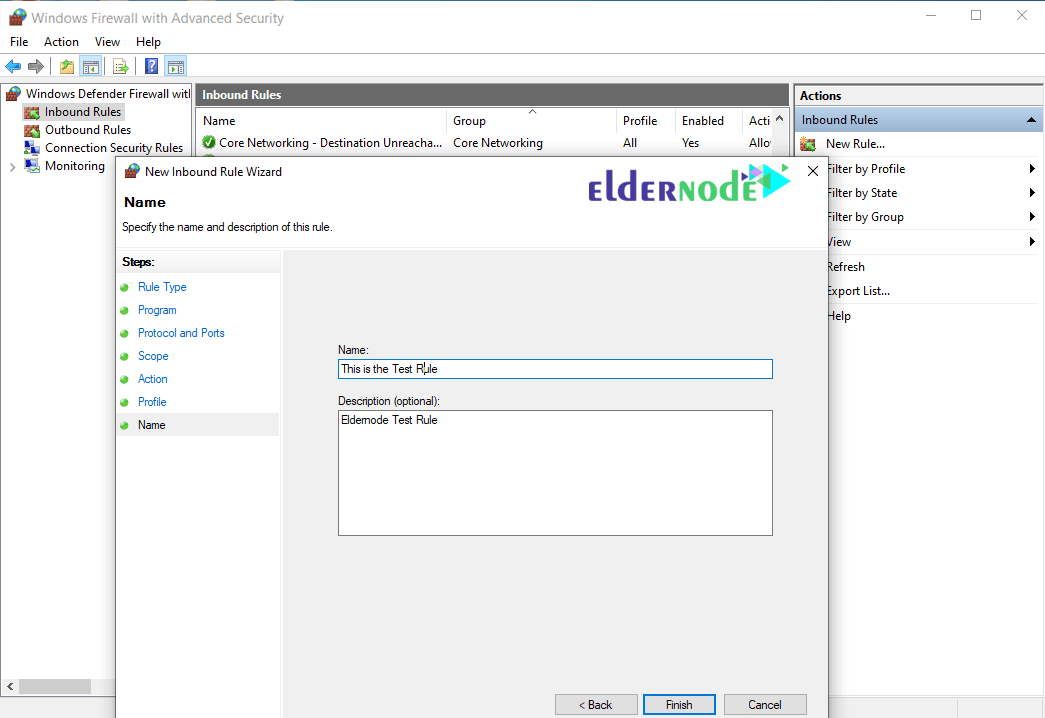
Note: The rule defined in this tutorial blocks access to ports 80 and 81 for all applications on the system at 5.56.133.29.
Dear user, we hope you would enjoy this tutorial, you can ask questions about this training in the comments section, or to solve other problems in the field of Eldernode training, refer to the Ask page section and raise your problem in it as soon as possible. Make time for other users and experts to answer your questions.
Goodluck.


