How to Connect a Domain to DNS in Windows Server 2016. In the previous articles, the DNS service configuration in Windows Server 2016 was taught. In the continuation of the same topics, we are going to teach you how to connect a domain to DNS in Windows Server 2016.
As you know, a domain needs a DNS service to point to different servers or nodes on the network and the Internet. If you use hosting services, you will be able to configure DNS settings through your DNS hosting panel.
To install a dedicated DNS server that you have full control over, you must install DNS on Windows or Linux and finally connect your domain to it.
Follow us to learn how to connect a domain to DNS in Windows Server 2016.
1. You must first have the DNS service installed on your Windows Server 2016.
Note 1: If this service is still not installed on your system, refer to the DNS installation tutorial in Windows Server 2016.
2. After installation, open your DNS management console.
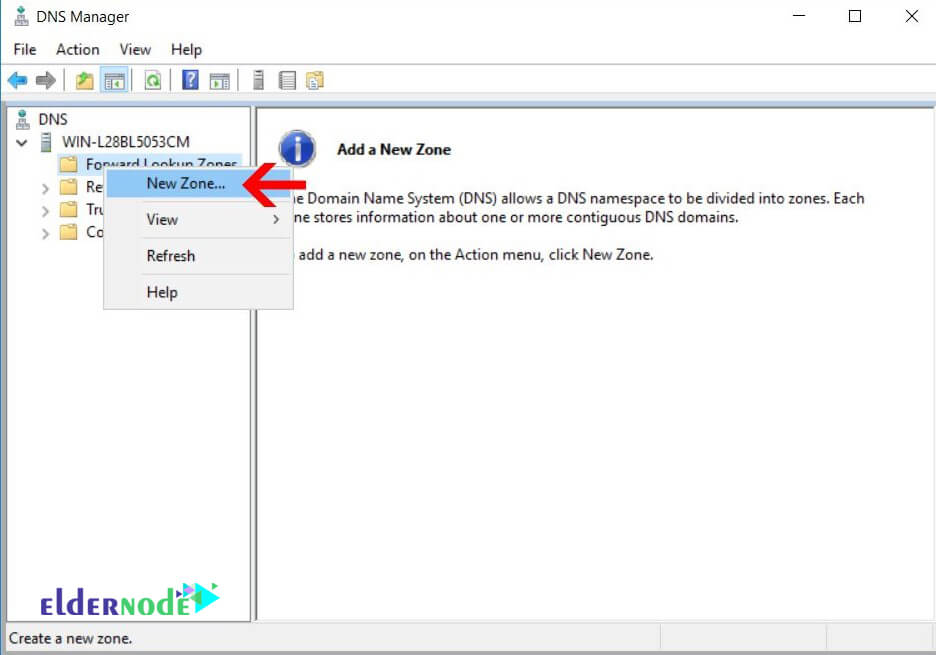
3. In the console, right-click on Forward Zone and select New Zone.
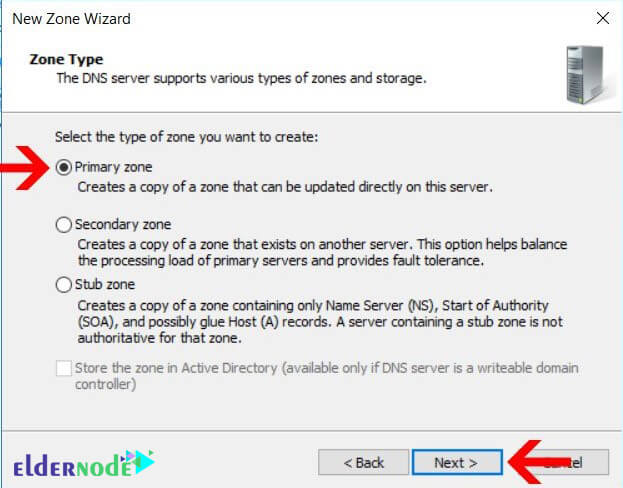
4. On the first page, select Primary Zone and click Next.
Note 2: If this server is installed as the second DNS server, you must use the Secondary Zone and go through different steps.
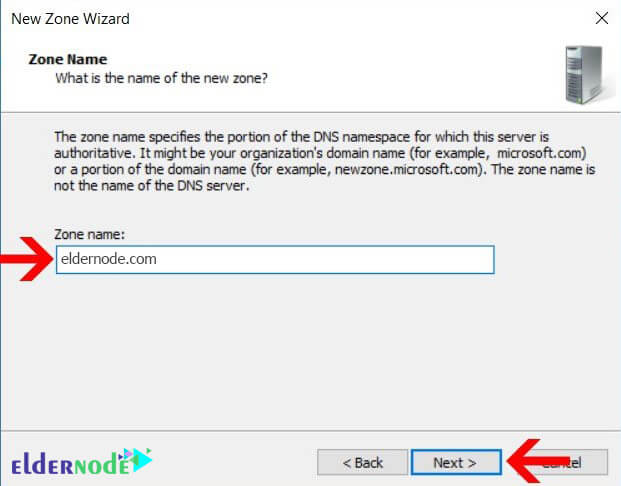
5. In this section, enter your domain name in full.
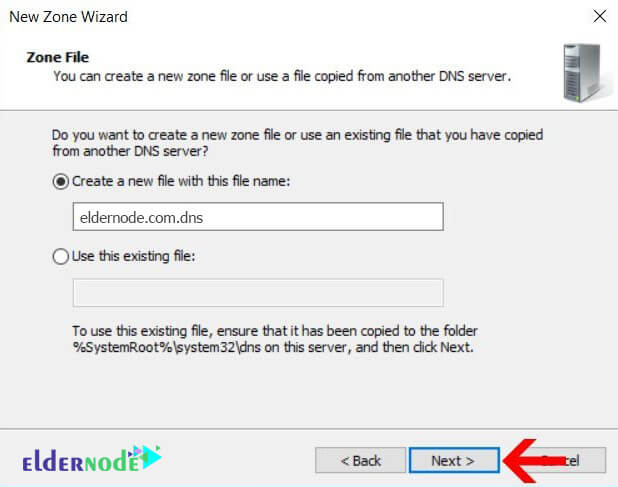
6. Specify the name of your Zone file here and click Next. We suggest you skip this section without change.
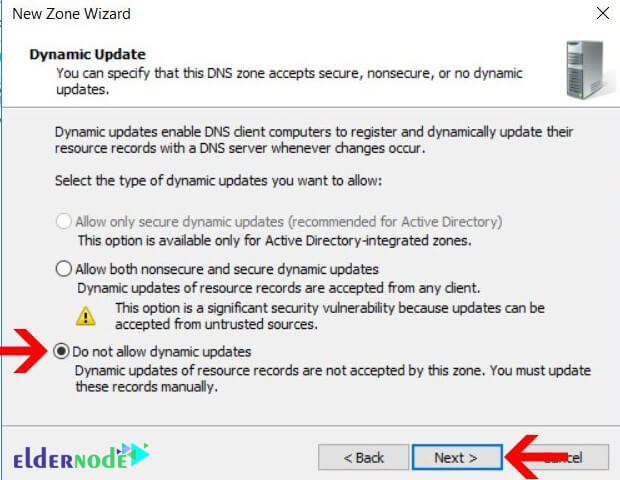
7. Finally, select Do not allow Dynamic updates and click next.
Next we will set up your NS domain or Name Server.
Set up Name Server in DNS in Windows Server 2016
1. First, click on your Zone to open its contents.
2. Now right-click on an empty field and select New Host.
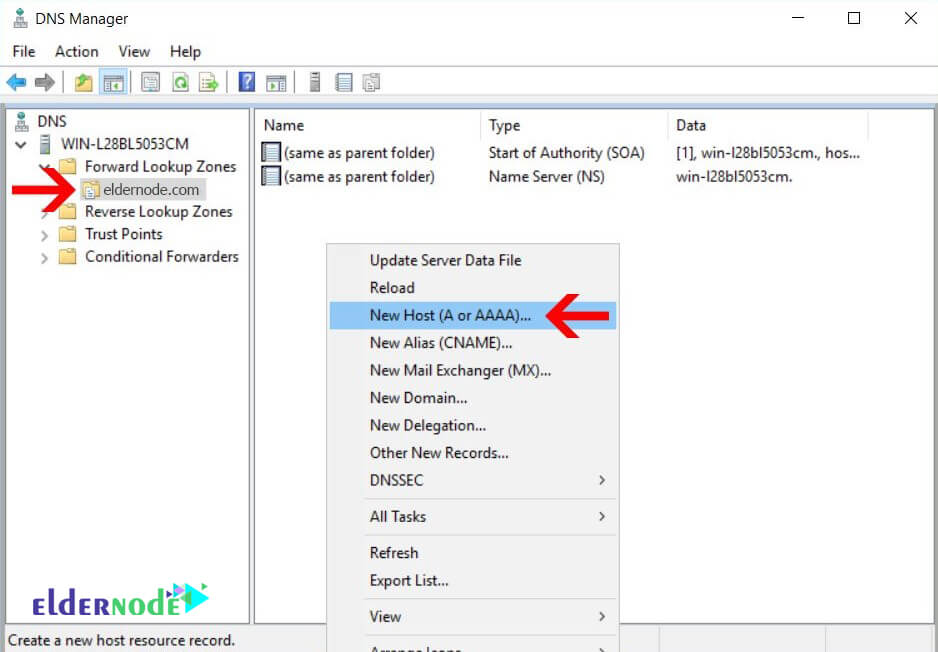
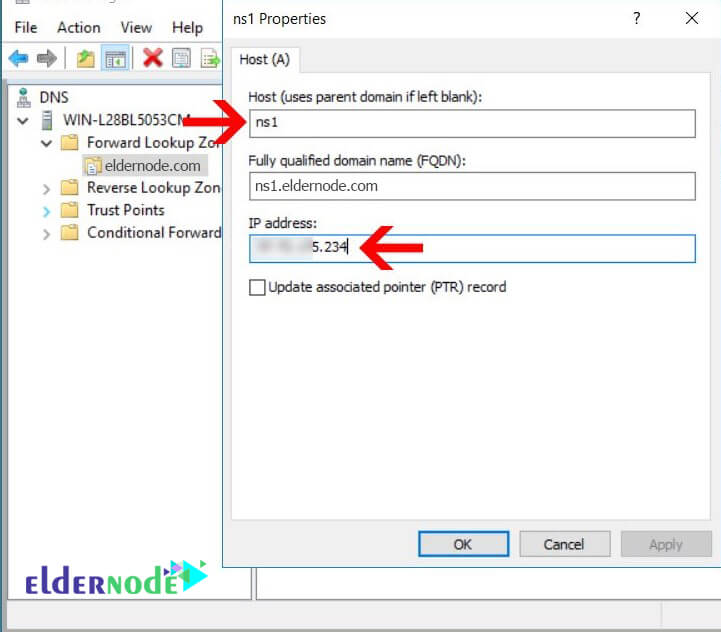
3. In the window that opens, enter the word ns1 as the name and enter the IP address of your server.
Similarly you can add one or more other NS to your server or another server.
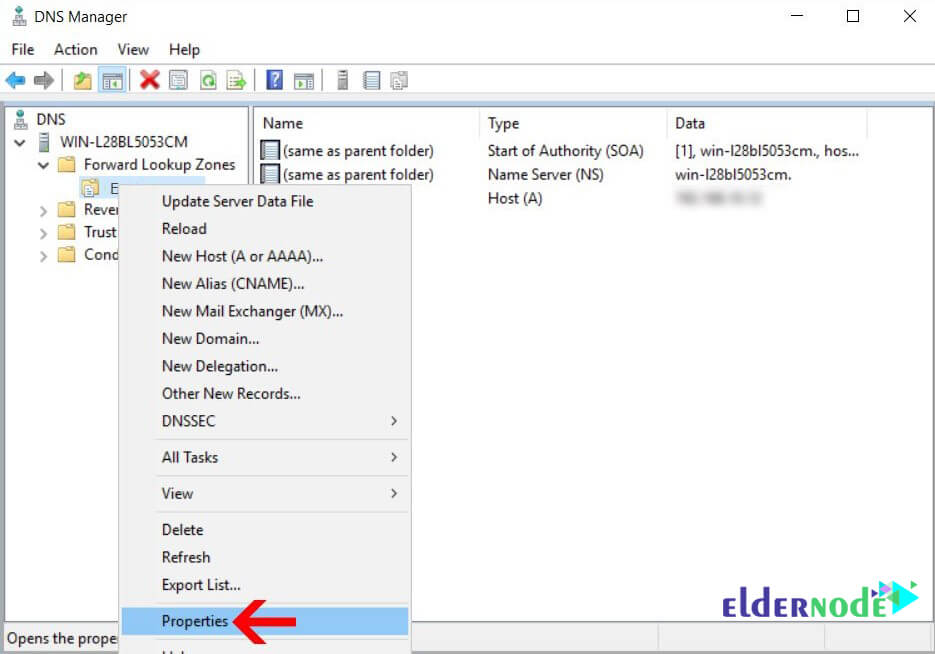
4. Right-click on your Zone and select Properties.
5. Go to the Name Servers tab.
6. Delete all preset NS.
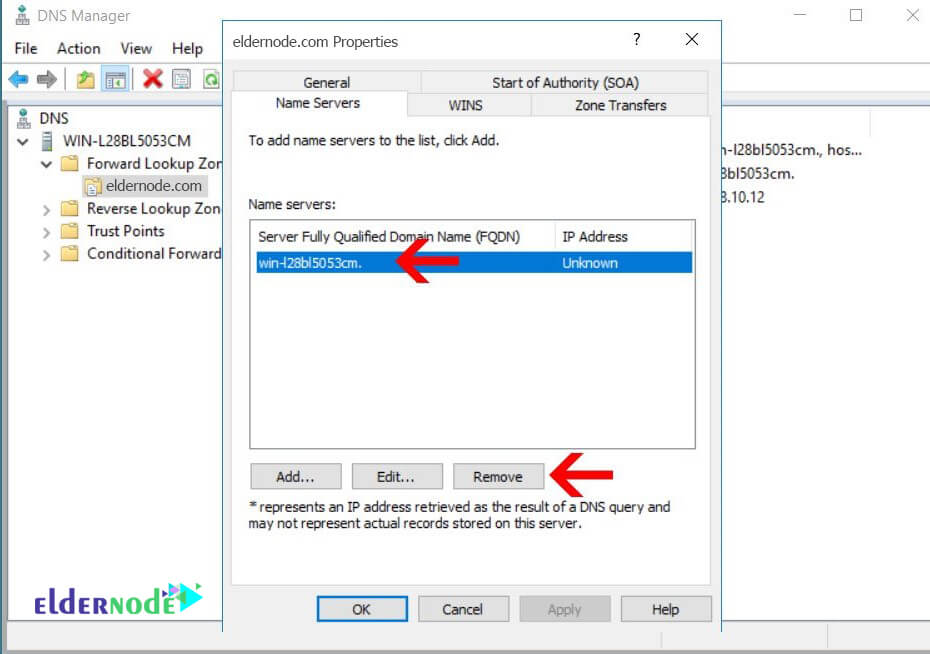
7. Now click on Add and enter your NS name and add its address at the bottom. Then click ok.
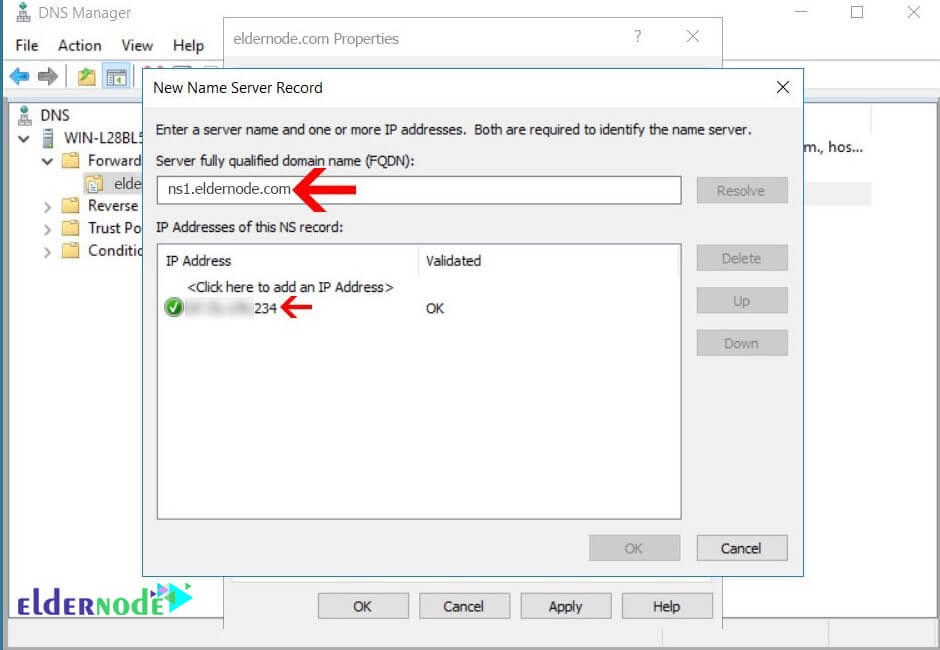
8. Add other NSs in the same way.
In this section, the settings related to connecting the domain to DNS in Windows Server 2016 are completed.
Now you need to configure your Child DNS and Name Servers through your domain panel and wait for the Root DNS to be updated until all the DNS settings for your domain are on Windows Server 2016.
Dear user, we hope you would enjoy this tutorial, you can ask questions about this training in the comments section, or to solve other problems in the field of Eldernode training, refer to the Ask page section and raise your problem in it as soon as possible. Make time for other users and experts to answer your questions.
Goodluck.


