How to transfer file using RDP to Windows Server. It often happens that we need to transfer a file from a computer or laptop to a server or vice versa.
The best way to do this is to transfer the file from the remote desktop. The method of transferring files from the remote desktop is suitable because you can use this method to copy files of any kind (executable file, image file, movie, text file, etc.) with any size. You also do not need intermediary upload sites to transfer and you copy the file directly from the source and place it in the destination. In this article, we will teach you how to transfer a file to a Windows server via Remote Desktop.
How to transfer file using RDP to Windows Server
1. To get started, open Remote Desktop from the Start menu.

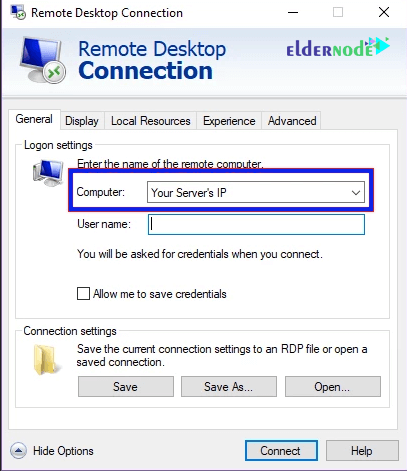
2. Input your server’s IP address in the Computer field.
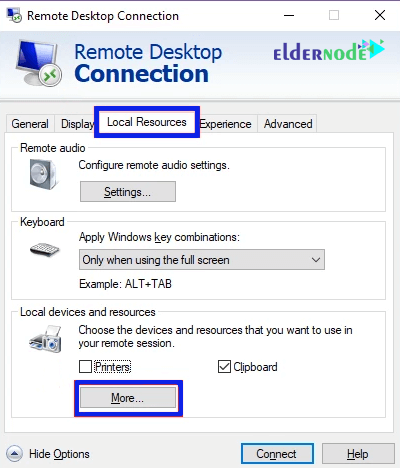
3. In the local resource tab, click on more and select the drive you want.
4. Expand the Drives section and select the Local Disk C: (or any other drives).
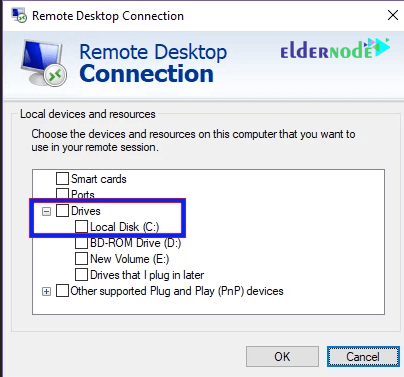
5. select the General tab and then Save to save these settings.
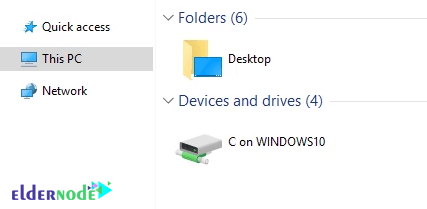
6. Now click connect and enter the server. In My Computer Server, you will see your drive and you can easily move files between the drive server and the selected drive from your computer.
Dear user, we hope you would enjoy this tutorial, you can ask questions about this training in the comments section, or to solve other problems in the field of Eldernode training, refer to the Ask page section and raise your problem in it as soon as possible. Make time for other users and experts to answer your questions.
Goodluck.


