Troubleshoot Cisco VPN in Windows 10. Cisco VPN works relatively well in Windows 10. The biggest problems occurred in the recent Windows update, which led to problems in this application. These problems are not very common, but if they do occur, the Cisco VPN client is completely useless. In this tutorial, we have listed solutions to solve and troubleshoot Cisco VPN in Windows 10. Stay with us.
Table of Contents
How to Troubleshoot Cisco VPN in Windows 10
1) Repairing the installation
2) Allow the VPN to communicate freely through the firewall
3) Apply changes in the registry
4) Re-installation
1- How to Repair the installation to troubleshoot Cisco VPN
The first thing you need to do is repair the installation. Many third-party applications run into problems after major operating system updates. Therefore, it is always recommended that you update them again after updating the operating system.
It is even recommended that you delete various errors after updating. Of course, if you haven’t removed Cisco VPN before updating, you’ll need to repair the software installation.
If you don’t know how to repair Cisco VPN, follow these steps:
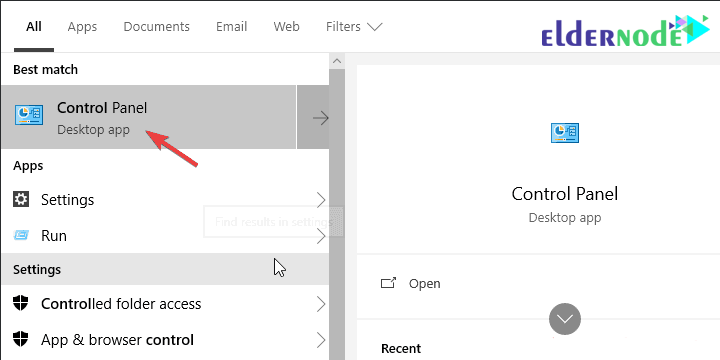
A. In the Windows Search section, type Control Panel and select it.
B. Click Uninstall a program at the bottom left.
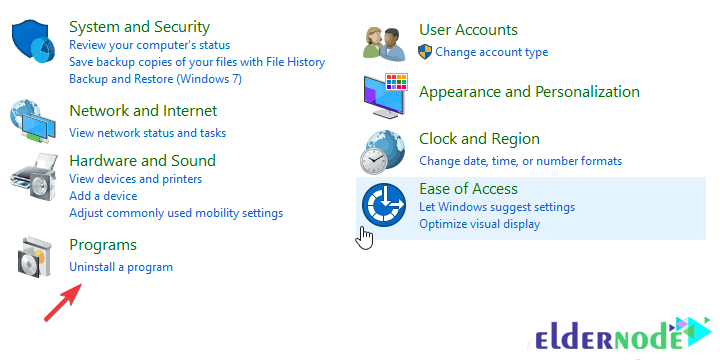
C. Click on the Cisco system VPN client and then click Repair.
D. Follow the steps until the installation is completed.
2- How to Allow the VPN to communicate freely in the firewall
System updates can change the operating system settings to default. This can also affect Windows Defender settings. If this happens, there is a possibility of this problem for all applications that need to send traffic from the firewall. That’s why we recommend that you check the settings and make sure that the application is allowed to pass Internet traffic:
A. In the Windows Search section, type Allow an app to display the Allow an app through Windows Firewall option, and when this option is found, select it.
B. Click Change Settings.
C. Make sure Cisco VPN is on the list and is allowed to pass traffic through the firewall. If Cisco VPN is not available, click Allow another app to add this option to the list of authorized apps.
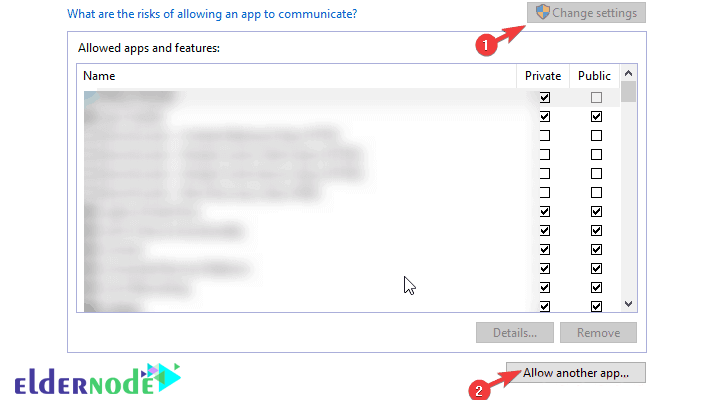
D. Check both Private and Public options.
E. Apply the changes and then open Cisco VPN.
3- Manipulation in the registry
Like all other VPNs available, Cisco VPN requires a Virtual Network Adapter. Failure of this device is another common occurrence that is indicated by error code 442. The first thing you need to do is check the virtual network card driver in Device Manager.
To do this, follow these steps:
A. Click Start and open Device Manager.
B. Open the Network Adapters section.

C. Right-click Virtual Adapter and update it.
D. Reset the computer.
If the problem persists, you must manipulate the registry. This will probably solve the problem completely. You need admin access to make changes to the registry.
Note that if you make changes to the registry, do so carefully, because if you make a mistake in registering the changes in the registry, it can lead to system errors.
How to change the registry and repair Cisco VPN
A. Write regedit and open Registry Editor.
B. Enter the following path in the Address bar section and then press Enter:
HKEY_LOCAL_MACHINESYSTEMCurrentControlSetServicesCVirtA

C. Right-click the DisplayName button and select Modify.
D. In the Value Data section, make sure there is Cisco Systems VPN Adapter text. For 64-bit versions, this text is in the form of Systems VPN Adapter for 64-bit Windows.
E. Save the changes and run Cisco VPN again.
4- How to Reinstall the Cisco VPN Software
Finally, if none of the above methods work, the last resort is to uninstall and reinstall the software. Of course, this installation should be such that you delete all the existing files and do not keep any settings in the operating system, which requires the existence of a third-party software such as Ashampoo uninstaller.
Follow these steps to reinstall Cisco VPN:
A. Enter the Control Panel and open Uninstall a program.
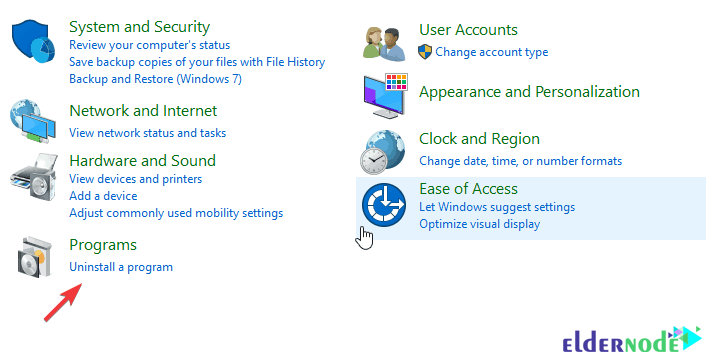
B. Delete Cisco Systems VPN Client.
C. Ashampoo Uninstaller (or run any third-party cleaning software)
D. Remove anything related to Cisco software from the software folder.
E. Download the Cisco VPN client again.
F. Install it and run it again.
Conclusion
It is sometimes observed that after installing Cisco VPN in Windows 10, there are problems with running this program. In this tutorial, we tried to troubleshoot Cisco VPN in Windows 10. We hope you would enjoy this tutorial.




Why does he ask the same password again after entering the password?
“Failed to initialize connection subsystem” error message is displayed when installing. what’s the solution?
Download and install the opposite file and then restart your Windows. http://go.microsoft.com/?linkid=9876036
Why the error message “The VPN client agent was unable to create the interprocess communication depot” is displayed when installing?
Please name the salient features of Cisco AnyConnect.
Cisco AnyConnect Secure Mobility Client is the leading technology in the VPN market, an endpoint multidimensional vpn software product; This means that it not only provides VPN access via SSL and IPsec, IKEv2, but also provides more security through various Built-In modules.
What is Cisco OpenConnect?
OpenConnect is an SSL VPN service for Cisco AnyConnect and ocserv gateways.
What are the key features of the Cisco AnyConnect Secure Mobility Client?
– Integrated Endpoint Adaptability
– Completely secure network access
– Web security
– Network visibility
– DNS-Layer Security
– Clientless access
– Access Virtual Desktop Infrastructure (VDI)
How to disconnect Cisco?
To disconnect, right-click on the application icon in the Taskbar (next to Windows Clock) and select the VPN Disconnect option.
While running the Cisco anyconnect mobility client on laptop which is recently updated from windows 7 to windows 10. Below is the error :
there is a problem with this windows installer package, a program run as part of the setup did not finish as expected. Contact your support personnel or package vendor.
Hi,
I would suggest you to try the steps provided below and check if it helps:
Step 1: Check the Windows Installer service is running or not;
Start the Windows Installer service:
1. Click Start, type services.msc and hit enter.
2. From the list of items, double click Windows Installer service.
3. Change the startup type to Automatic and click Start button to start service.
4. Click Apply and then click ok.
Check if the issue is resolved.
_____________
Step 2: Unregister and re-register the Windows Installer.
1. Click Start Orb, in the start search box, type MSIEXEC /UNREGISTER, and then click OK.
2. Click Start Orb, in the start search box, type MSIEXEC /REGSERVER, and then click OK. After you run this command, the operation is complete.
3. Now, try your installation again.