By purchasing a Germany Virtual Server, you can enjoy distinctive features such as the superior quality of the server hardware and the provision of server management services by the experts of our support team. In this article, we are going to teach you How to Get Germany Virtual Server on Eldernode. Follow us in the continuation of this article.
Table of Contents
Tutorial Get Germany VPS Hosting
Introduction to Virtual Server and its variants on Eldernode
Virtual server or VPS is the best and most cost-effective way to achieve high speed, security, and stability in hosting important corporate, and store sites. Purchasing a VPS is appropriate and important for important and high-traffic sites due to the advantage of providing more resources and security than purchasing shared hosting and being cheaper than purchasing a dedicated server. In addition to better service and speed in a managed virtual server, it also provides more information security and stability.
By purchasing a VPS for one or more important sites, the risk of hacking, attacking the server, and definite or slow problems caused by nearby sites is eliminated.
Eldernode offers a variety of VPS servers for you. These services include:
– SSD VPS
And various other services. Therefore, buying a virtual server is recommended for hosting important commercial and enterprise sites.
Prerequisites to Get a Virtual Server
You do not have to work hard to get a German VPS server. All you have to do is register on the Eldernode website. In the next step, we will teach you how to Get Germany Virtual Server to step by step. Please stay tuned for the rest of this article.
Get Germany Virtual Server on Eldernode
In the first step after registration, you must click on Buy VPS on the main page:
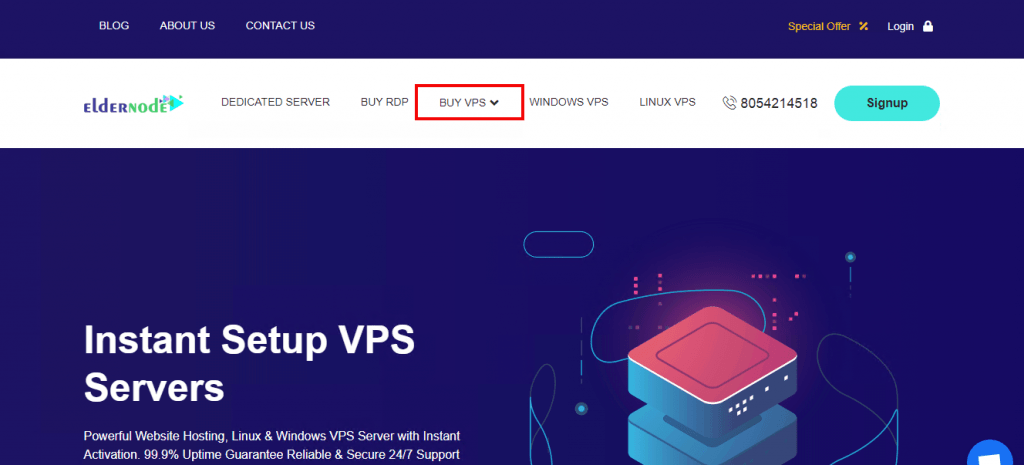
On the page that will open, you must click on one of the services you want. Here we select the Linux VPS. To select the desired service, just click on See All Plans:

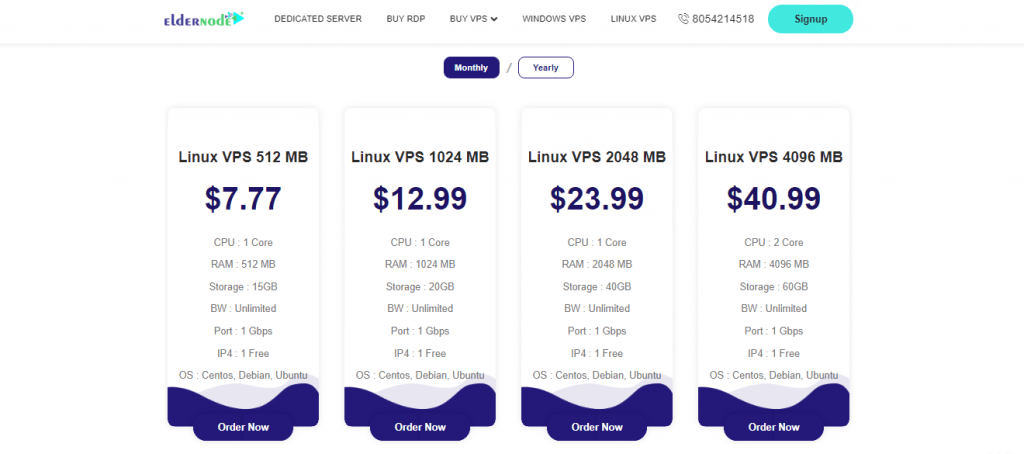
Scroll down the page slightly. After reviewing the plans, click on Order Now to select the plan you want.
Note: Here you can specify the service you want on a Monthly or Yearly basis.
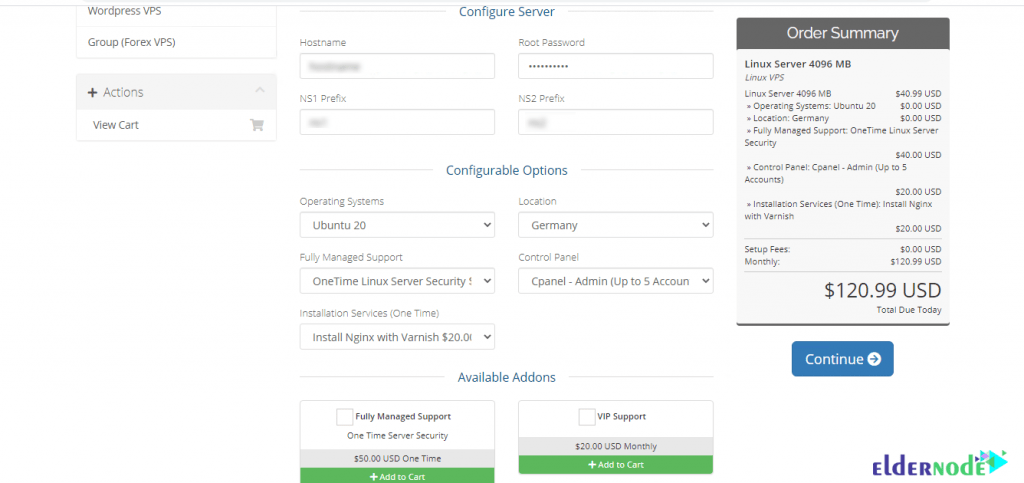
The next page is the Configure page. You can see the information about your plan here. You will also need to fill in the required fields to complete the configuration.
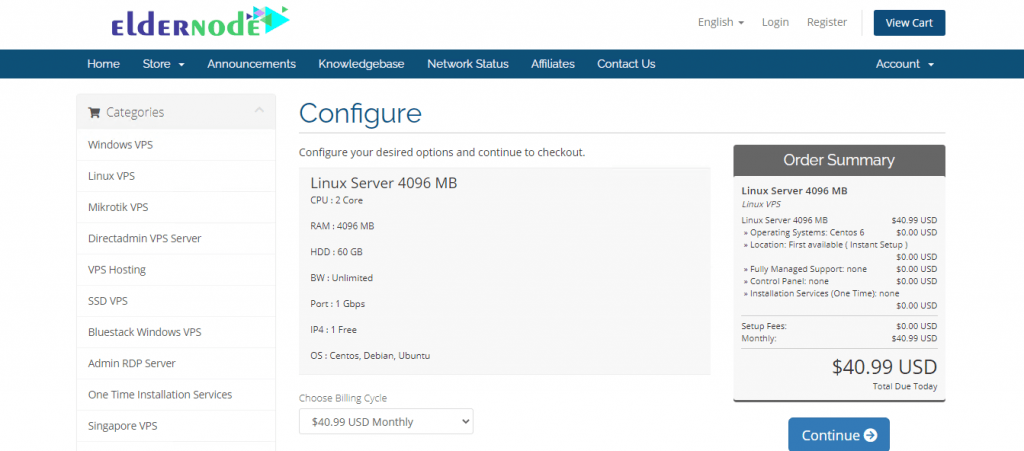
In the Configure Server section, you need to fill in the fields related to the hostname, root password, and name servers.
The most important part is Configurable Options. In this section of the Operating Systems field, you must specify your proposed operating system for the server.
Then select Germany from the Location section.
From the Fully Managed Support field, you can select the support you need.
From the Control Panel, select Cpanel. Finally, select one of the options from the Installation Services (One Time) field. After selecting the above options, click Continue from the right column.
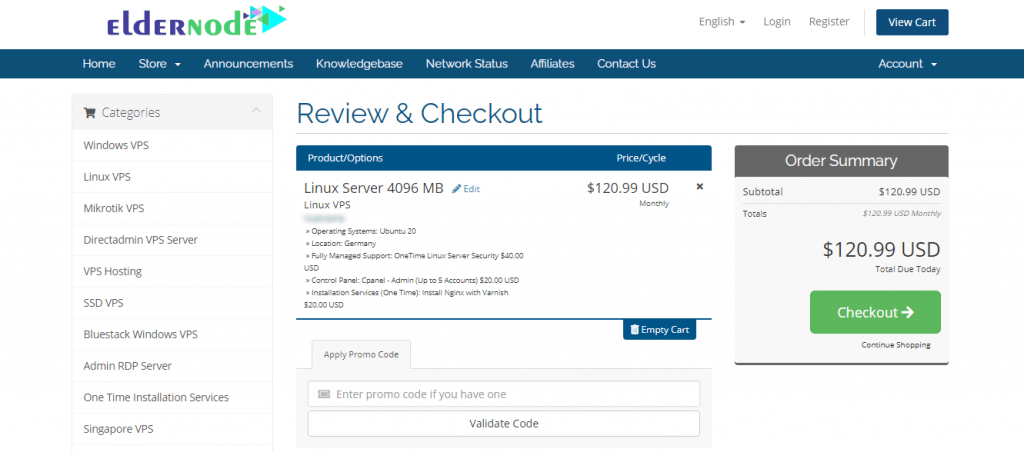
On the next page, which is Review & Checkout, after reviewing the information and confirming it from the right column, click on Checkout.
Note: You can enter your promo code if you have one in Apply Promo Code section and then click on Validate Code.
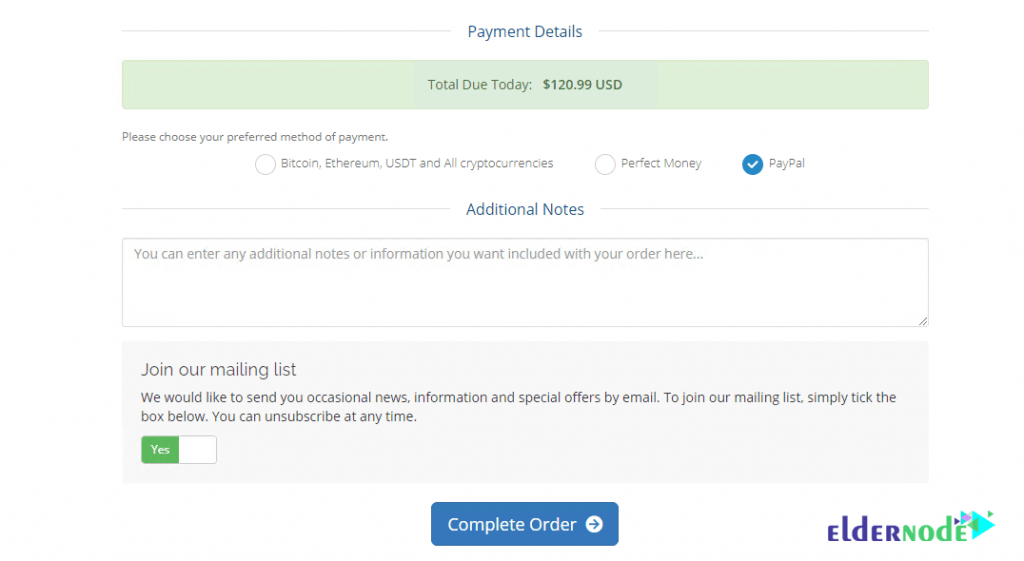
Now you can choose one of the available methods to deposit the service fee. These methods include:
1) Bitcoin, Ethereum, USDT, and All cryptocurrencies
2) Perfect Money
3) PayPal
After selecting the desired payment method, click on Complete Order:
Conclusion
Virtual server has many uses. These applications include hosting high-usage websites, using them for web services such as mail servers and database servers, controlling or improving system performance, and so on. In this article, we tried to teach you How to Get Germany Virtual Server on Eldernode.

![Dedicated Server vs VPS [Performance, Quality and Price]](https://blog.eldernode.com/wp-content/uploads/2022/05/Dedicated-Server-vs-VPS-Performance-Quality-and-Price-300x164.webp)
